


相关知识
为了完成本关任务,你需要掌握:
- 如何在 ubuntu18.04 中安装apache2。
- 如何使用 apache2。
- 对 apache2 配置文件目录结构以及基本配置项有所了解。
apache2 简介

Apache HTTP 服务器项目致力于为现代操作系统(包括 UNIX 和 Windows)开发和维护开源 HTTP 服务器。该项目的目标是提供一个安全、高效且可扩展的服务器,该服务器提供与当前 HTTP 标准同步的 HTTP 服务。
Apache 软件基金会和 Apache HTTP 服务器项目在2021年6月1日宣布发布 Apache HTTP 服务器(“httpd”)2.4.48 版。关于 apache http 服务器有两种叫法,一种叫做 httpd,另一种叫做 apache2,实际上两者是相同软件对于不同操作系统的不同发行版,例如,在 RHEL 6.2 中,它称为 httpd,而在 Ubuntu 中,它称为 apache2。
注意:apache2和httpd配置文件中使用的指令以及目录结构略有不同
ubuntu18.04 下 apache2 安装
ubuntu18.04 下可以通过两种方式进行安装:通过源码安装和通过软件源直接安装,本实验只演示通过软件源安装的方式。
首先更新源
apt update
安装apache2
apt install apache2 -y
apache2 的开启、停止
开启apche2服务
service apache2 start查看 apache2 服务是否在运行
netstat -antp | grep 80
# 或者
netstat -antp | grep apache2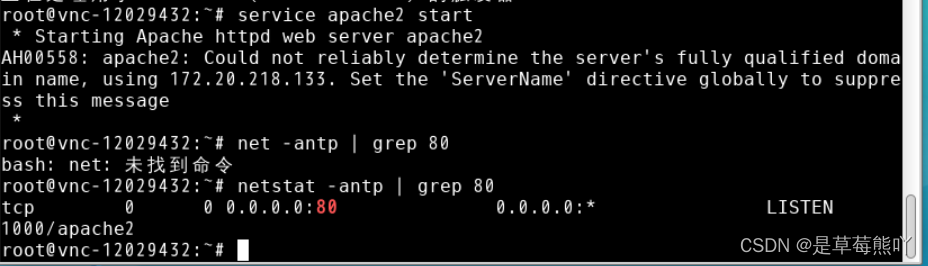
关闭 apache2 服务
service apache2 stop开机自启动 apache2 服务
systemctl enable apache2apache2 配置文件目录解析
apache2 的配置文件在目录 /etc/apache2 下。主要的配置文件为 apache2.conf
cd /etc/apache2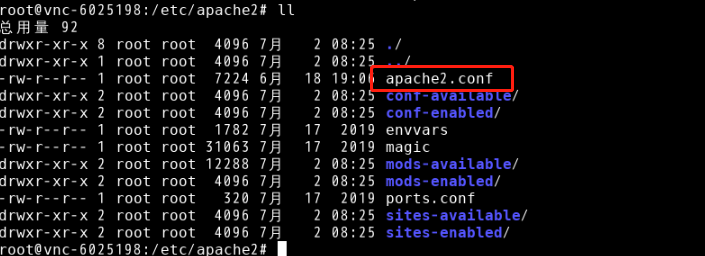
查看该文件,关注如下内容
vi /apache2.conf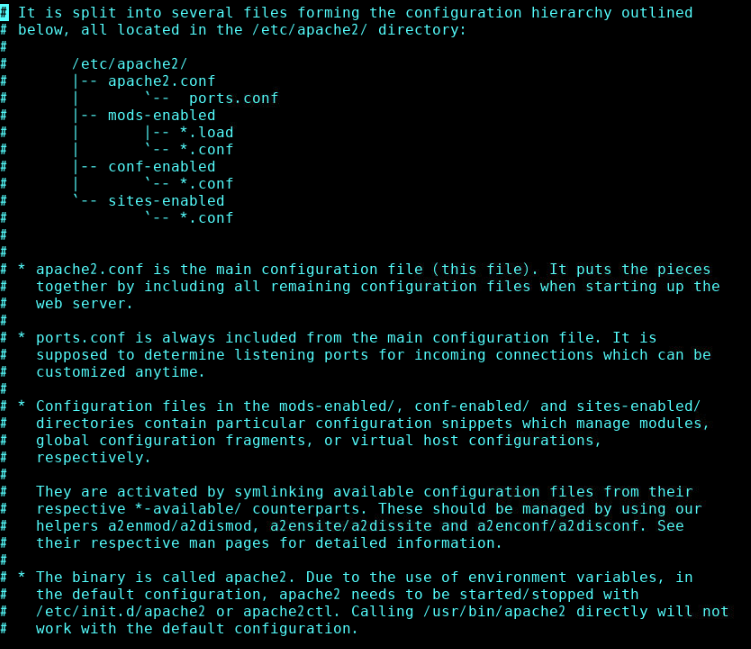
# It is split into several files forming the configuration hierarchy outlined
# below, all located in the /etc/apache2/ directory:(apache2的配置功能分成了多个文件,形成如下的配置层次结构)
#
# /etc/apache2/
# |-- apache2.conf
# | `-- ports.conf
# |-- mods-enabled
# | |-- *.load
# | `-- *.conf
# |-- conf-enabled
# | `-- *.conf
# `-- sites-enabled
# `-- *.conf- apache2.conf 主要配置文件
- port.conf 自定义apache2 监听的端口
- conf-enabled 是apache2 服务器的已经开启的配置文件
- conf-available 是apache2 服务器可以开启的配置文件
- mods-enabled 是apache2 服务器的已经启动的模块配置文件
- mods-available 是apache2 服务器可以使用的模块配置文件
- sites-enabled 是apache2 正在使用的网站配置文件
- sites-available 是apache2 可用的网站配置文件。
具体的配置项内容不是本实训的主要目的,因此不做过多介绍。具体内容可以参考官方文档:Apache HTTP 服务器 2.4 文档
apache2 网站根目录变更
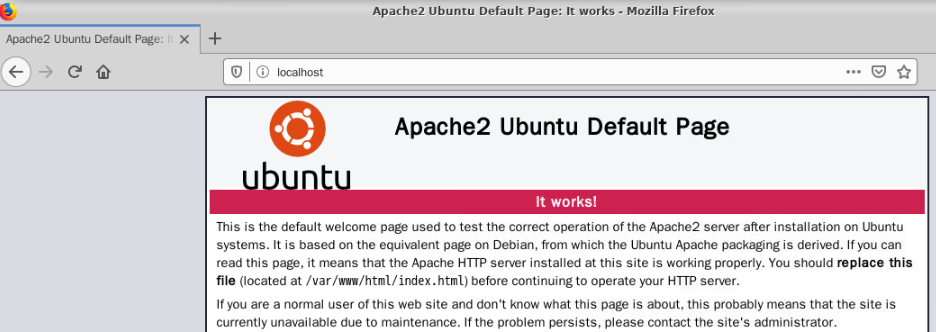
apache2 安装成功后,默认的网站根目录为 /var/www/html/
service apache2 start # 开启apache2服务
cd /var/www/html/ && ls
可以看到默认的 index.html。使用 firefox 浏览器访问http://localhost/ 可以查看到如下页面
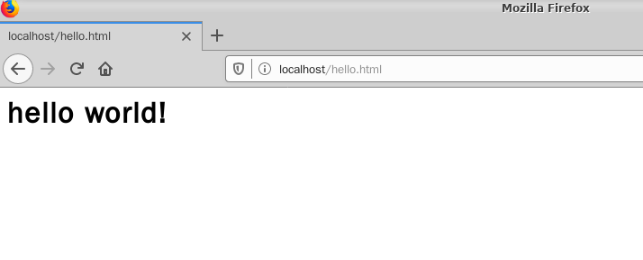
我们在此目录下创建的文件,就可以通过 url 访问到,例如,创建 hello.html
<html>
    <h1>
        hello world!
    </h1>
</html>访问http://localhost/hello.html
**如果我们需要更换网站的根目录应该怎么做呢?网站的根目录可以在配置文件中进行配置。
定位文件 /etc/apache2/sites-enabled/000-default.conf
vi /etc/apache2/sites-enabled/000-default.conf该文件对默认的页面进行了配置,内容如下:
<VirtualHost *:80>
# The ServerName directive sets the request scheme, hostname and port that
# the server uses to identify itself. This is used when creating
# redirection URLs. In the context of virtual hosts, the ServerName
# specifies what hostname must appear in the request's Host: header to
# match this virtual host. For the default virtual host (this file) this
# value is not decisive as it is used as a last resort host regardless.
# However, you must set it for any further virtual host explicitly.
#ServerName www.example.com

ServerAdmin webmaster@localhost
DocumentRoot /var/www/html

# Available loglevels: trace8, ..., trace1, debug, info, notice, warn,
# error, crit, alert, emerg.
# It is also possible to configure the loglevel for particular
# modules, e.g.
#LogLevel info ssl:warn

ErrorLog ${APACHE_LOG_DIR}/error.log
CustomLog ${APACHE_LOG_DIR}/access.log combined

# For most configuration files from conf-available/, which are
# enabled or disabled at a global level, it is possible to
# include a line for only one particular virtual host. For example the
# following line enables the CGI configuration for this host only
# after it has been globally disabled with "a2disconf".
#Include conf-available/serve-cgi-bin.conf
</VirtualHost>
“# ” 后的为注释说明内容。
- <VirtualHost *:80> :VirtualHost 表示一个虚拟主机,80表示监听80端口。
- DocumentRoot /var/www/html:DocumentRoot 规定了该虚拟主机的根目录,目前是/var/www/html
- ErrorLog ${APACHE_LOG_DIR}/error.log 定义了错误日志路径
- CustomLog ${APACHE_LOG_DIR}/access.log 定义了访问日志路径
如果需要修改网站的根目录,例如切换到 /var/www/html/site1/
mkdir /tmp/www
mv /var/www/html/hello.html /tmp/www/
然后修改
DocumentRoot /tmp/www

打开配置文件 /etc/apache2/apache2.conf,定位到如下内容:
/etc/apache2/apache2.conf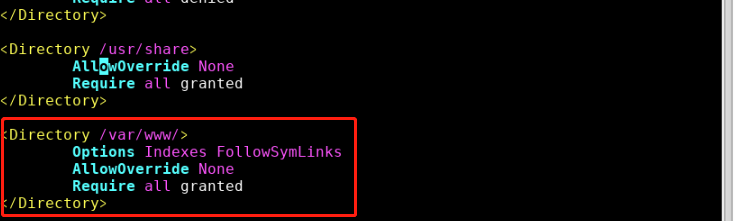
配置文件中关于目录/var/www做了配置,具体内容不理解没关系
- Options Indexes FollowSymLinks:禁止访问目录时显示目录结构
- AllowOverride None:忽略.htacess配置文件
- Require all granted:(这一条就是最关键的配置了)Require 为访问控制指令,all granted 为允许所有访问请求,如果要拒绝所有请求,则可以配置为 Require all denied
所以,对于新创建的 /tmp/www 和 /tmp/www2,我们也需要进行相同的配置,添加如下针对两个目录的内容后,重启 apache2,两个目录下的文件就能够正常访问:

重启 apache2 服务
service apache2 restart
配置完成后再浏览器搜索 http://localhost/hello.html

apache2 更换监听端口
某些场景下,我们需要更换 apache2 的监听端口
此时可以通过修改 /etc/apache2/port.conf 与 /etc/apache2/sites-enabled/000-default.conf 配置文件内容达成。
查看 /etc/apache2/ports.conf 文件内容:
# If you just change the port or add more ports here, you will likely also
# have to change the VirtualHost statement in
# /etc/apache2/sites-enabled/000-default.conf

Listen 80

<IfModule ssl_module>
Listen 443
</IfModule>

<IfModule mod_gnutls.c>
Listen 443
</IfModule>

# vim: syntax=apache ts=4 sw=4 sts=4 sr noet- Listen 80 表明监听 80 端口
修改成 81 端口,

再编辑 /etc/apache2/sites-enabled/000-default.conf,将其中第一行<VirtualHost *:80>改成<VirtualHost *:81>
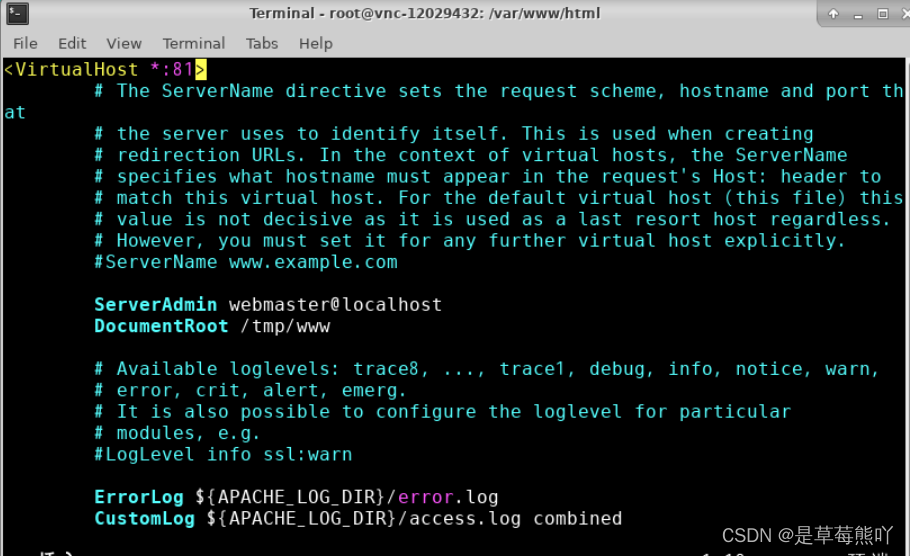
修改后重启 apache2
service apache2 restart查看端口情况:
netstat -antp
可以看到端口已经切换过来了,使用浏览器进行访问时,需要访问 81 端口:
http://localhost:81/hello.html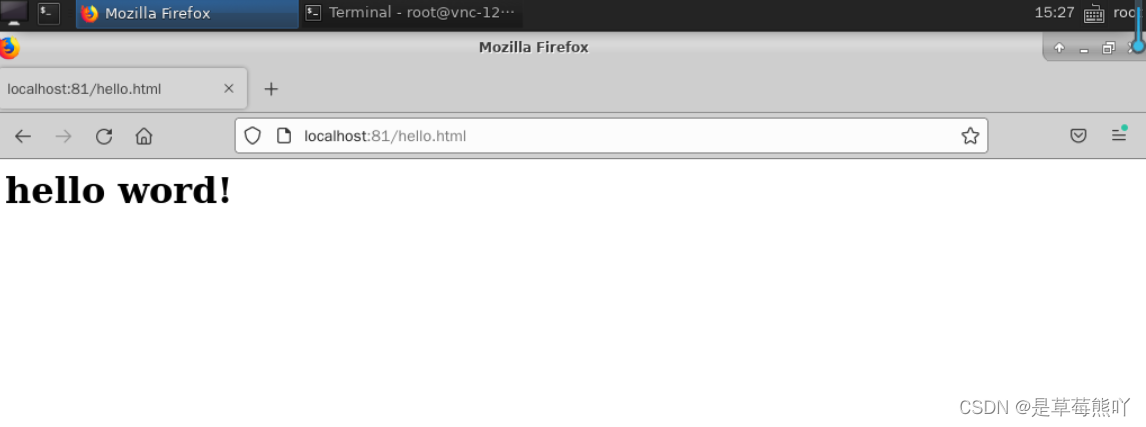
apache2 监听多个端口
某些情况下,我们需要开启多个端口,每个端口相当于一个站点,每个站点有着不同的网站根目录,遇到这种情况时应该怎么使用 apache2 进行配置呢。
首先编辑 /etc/apache2/ports.conf,添加:
listen 8080
如图所示:

此时重启 apache2 服务后,可以看到端口已经在监听。
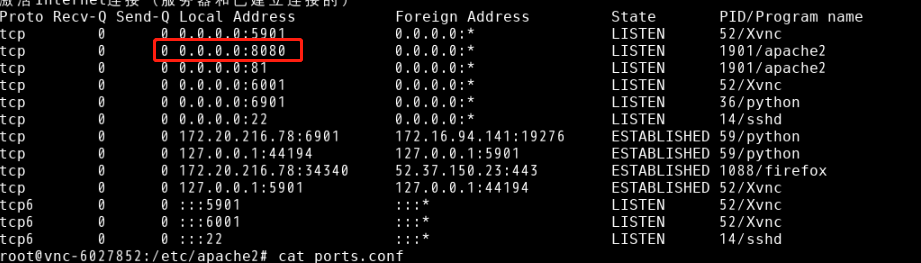
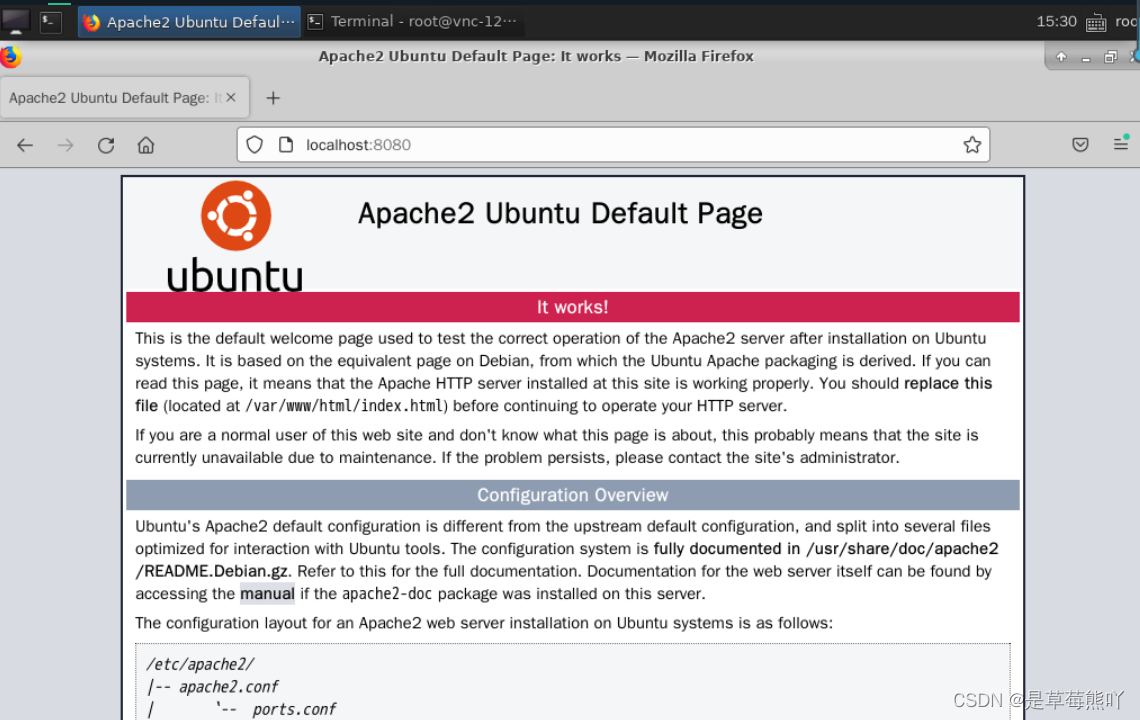
访问 8080 端口相当于访问一个新的站点,但是由于还未设置网站根目录,访问http://localhost:8080/时,会看到 apache2 的默认 index 页面,接下来进行对应目录的设置。
切换到目录 /etc/apache2/sites-enabled/
cd /etc/apache2/sites-enabled/将 000-default.conf复制一份,命名随意,例如:8080.conf
vi /etc/apache2/sites-enabled/000-8080.conf<VirtualHost *:8080>
# The ServerName directive sets the request scheme, hostname and port that
# the server uses to identify itself. This is used when creating
# redirection URLs. In the context of virtual hosts, the ServerName
# specifies what hostname must appear in the request's Host: header to
# match this virtual host. For the default virtual host (this file) this
# value is not decisive as it is used as a last resort host regardless.
# However, you must set it for any further virtual host explicitly.
#ServerName www.example.com
ServerAdmin webmaster@localhost
DocumentRoot /var/www/html/site2
# Available loglevels: trace8, ..., trace1, debug, info, notice, warn,
# error, crit, alert, emerg.
# It is also possible to configure the loglevel for particular
# modules, e.g.
#LogLevel info ssl:warn
ErrorLog ${APACHE_LOG_DIR}/error.log
CustomLog ${APACHE_LOG_DIR}/access.log combined
# For most configuration files from conf-available/, which are
# enabled or disabled at a global level, it is possible to
# include a line for only one particular virtual host. For example the
# following line enables the CGI configuration for this host only
# after it has been globally disabled with "a2disconf".
#Include conf-available/serve-cgi-bin.conf
</VirtualHost>
# vim: syntax=apache ts=4 sw=4 sts=4 sr noet将 DocumentRoot 设置为:/tmp/www2
然后创建/tmp/www2目录,在其中创建 index.html,写入
<html>
    <h1>
        site 2
    </h1>
</html>
重启 apache2 服务,访问http://localhost:8080/index.html

操作要求
根据相关步骤,完成如下任务:
- 安装 apache2
- 开启 apache2 服务
- 变更 apache2 网站根目录到/tmp/www/
- 变更 apache2 默认监听81端口
- 添加监听第二个端口 8080,根目录设置在 /tmp/www2/。


 960
960


 被折叠的 条评论
为什么被折叠?
被折叠的 条评论
为什么被折叠?
 到【灌水乐园】发言


