


一、项目介绍

二、项目设计原则
2.1整体原则

2.2持久层

2.3业务逻辑层

具体分析
 三、实战
三、实战
3.1项目搭建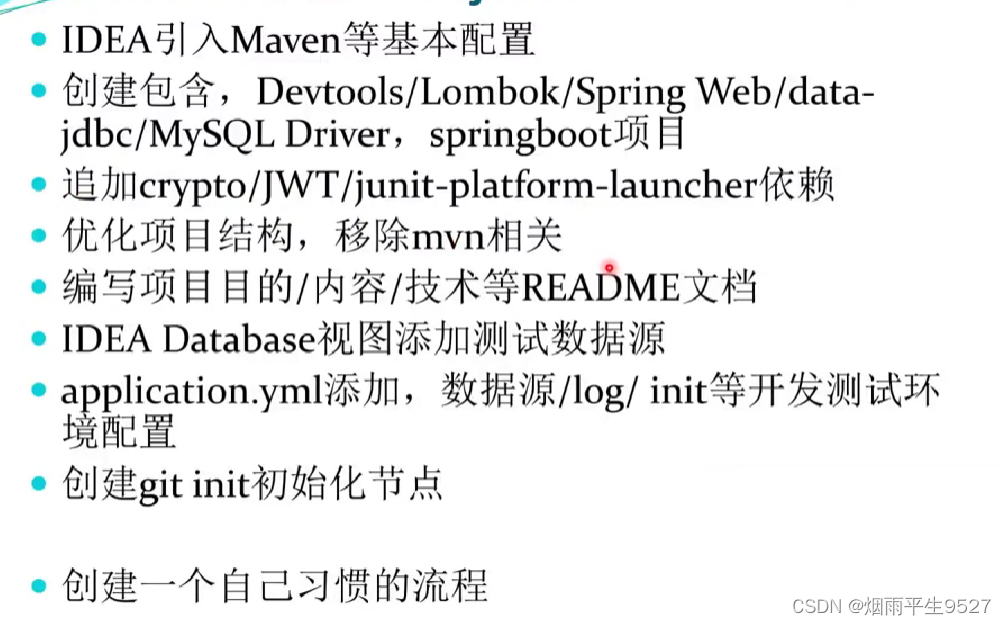

 <dependency>
            <groupId>org.springframework.security</groupId>
            <artifactId>spring-security-crypto</artifactId>
        </dependency>
        <dependency>
            <groupId>com.auth0</groupId>
            <artifactId>java-jwt</artifactId>
            <version>3.19.2</version>
        </dependency>
        <dependency>
            <groupId>org.junit.platform</groupId>
            <artifactId>junit-platform-launcher</artifactId>
            <scope>test</scope>
        </dependency>
3.2yml配置
spring:
  datasource:
    url: 'jdbc:mysql://'
    username: root
    password:
  sql:
    init:
      mode: always
  jackson: #表示在序列化过程中,只有非空的属性才会被包含在JSON输出中。
    default-property-inclusion: non_null
  jpa:
    show-sql: true
    hibernate:
      ddl-auto: update
    properties:
      hibernate:
        dialect: org.hibernate.dialect.MySQL8Dialect


logging:
  level:
    sql: debug
    com:
      example: debug
  pattern:
    console: '%-5level %C.%M[%line] - %msg%n'
server:
  port: 8080

my:
  secretkey: R28K42ZEJ8LWRHU5
  salt: 636eac2534bcfcb0
3.3创建业务码VO
package com.yanyu.vo;

public enum Code {
    LOGIN_ERROR(400, "用户名密码错误"),
    BAD_REQUEST(400, "请求错误"),
    UNAUTHORIZED(401, "未登录"),
    TOKEN_EXPIRED(403, "过期请重新登录"),
    FORBIDDEN(403, "无权限");

    private final int code;
    private final String message;

    Code(int code, String message) {
        this.code = code;
        this.message = message;
    }

    public int getCode() {
        return code;
    }

    public String getMessage() {
        return message;
    }
}
NoArgsConstructor
@Getter
@Setter
@Builder
@AllArgsConstructor
@NoArgsConstructor
public class ResultVO {
    // 定义状态码字段
    private int code;
    // 定义消息字段
    private String message;
    // 定义数据字段,用于存储返回给前端的数据
    private Map<String, Object> data;

    // 用于构建成功的结果对象
    public static ResultVO success(Map<String, Object> data) {
        // 使用Builder模式构建ResultVO对象,并设置状态码为200,以及传入的数据
        return ResultVO.builder().code(200).data(data).build();
    }

    // 用于构建错误的结果对象
    public static ResultVO error(int code, String msg) {
        // 使用Builder模式构建ResultVO对象,并设置状态码和错误信息
        return ResultVO.builder().code(code).message(msg).build();
    }
    // 用于构建错误的结果对象,传入的参数为枚举类型Code
    public static ResultVO error(Code code) {
        // 使用Builder模式构建ResultVO对象,并设置状态码和错误信息,从Code枚举中获取
        return ResultVO.builder().code(code.getCode()).message(code.getMessage()).build();
    }
}
3.4创建自定义异常
package com.yanyu.exception;


import com.yanyu.vo.Code;
import lombok.Builder;
import lombok.Getter;

@Getter
@Builder
public class XException extends RuntimeException{
    private final Code code;

    public XException(Code code) {
        this.code = code;
    }
}
package com.yanyu.exception;
import com.yanyu.vo.ResultVO;
import lombok.extern.slf4j.Slf4j;
import org.springframework.web.bind.annotation.ExceptionHandler;
import org.springframework.web.bind.annotation.RestControllerAdvice;
@Slf4j
@RestControllerAdvice
public class ExceptionController {
@ExceptionHandler(XException.class)
public ResultVO handleValidException(XException exception) {
return ResultVO.error(exception.getCode());
}
@ExceptionHandler(Exception.class)
public ResultVO handleException(Exception exception) {
return ResultVO.error(400, "请求错误: " + exception.getMessage());
}
}
3.5创建基础工具
配置密码编码器
package com.example.backendjdbcexamples.component;

import org.springframework.context.annotation.Bean;
import org.springframework.context.annotation.Configuration;
import org.springframework.security.crypto.bcrypt.BCryptPasswordEncoder;
import org.springframework.security.crypto.password.PasswordEncoder;

// 配置类,用于定义密码编码器的 Bean
@Configuration
public class PasswordEncoderConfig {

    // 声明一个名为 getPasswordEncoder 的 Bean,用于提供密码编码器
    @Bean
    public PasswordEncoder getPasswordEncoder() {
        // 返回一个 BCryptPasswordEncoder 实例作为密码编码器
        return new BCryptPasswordEncoder();
    }
}
JWT编码
@Component // 将该类标记为Spring组件,使其能够被自动扫描并注入到其他类中
public class JWTComponent {
    // 私钥,从配置文件中获取
    @Value("${my.secretkey}")
    private String secretkey;

    // 编码方法,将传入的map转换为JWT字符串
    public String encode(Map<String, Object> map) {
        LocalDateTime time = LocalDateTime.now().plusMonths(1); // 设置过期时间为一个月后
        return JWT.create() // 创建一个新的JWT对象
                .withPayload(map) // 设置载荷(payload)
                .withIssuedAt(new Date()) // 设置签发时间
                .withExpiresAt(Date.from(time.atZone(ZoneId.systemDefault()).toInstant())) // 设置过期时间
                .sign(Algorithm.HMAC256(secretkey)); // 使用HMAC256算法和私钥进行签名
    }

    // 解码方法,验证并解析JWT字符串
    public DecodedJWT decode(String token) {
        try {
            return JWT.require(Algorithm.HMAC256(secretkey)).build().verify(token); // 验证并解析JWT字符串
        } catch (TokenExpiredException | SignatureVerificationException | JWTDecodeException e) {
            Code code = e instanceof TokenExpiredException ? Code.TOKEN_EXPIRED : Code.FORBIDDEN; // 根据异常类型设置错误码
            throw XException.builder().code(code).build(); // 抛出自定义异常
        }
    }
}
JWT(JSON Web Token)是一种基于JSON的开放标准,用于在网络上安全地传输信息。它通常用于身份验证和授权。一个JWT由三部分组成:头部(Header)、载荷(Payload)和签名(Signature)。
- 头部(Header):包含描述JWT的元数据,如加密算法。
- 载荷(Payload):包含所需要传递的数据,如用户ID、过期时间等。
- 签名(Signature):用于验证发送者的身份,防止数据被篡改。
雪花算法
@Configuration // 标记为配置类
@EnableJdbcAuditing // 启用Jdbc审计功能
public class SnowflakeGenerator {
    @Bean // 定义一个Bean,用于生成AuditorAware实例
    AuditorAware<String> auditorAware() {
        Snowflake s = new Snowflake();
        return () -> Optional.of(String.valueOf(s.nextId()));
    }

    private static class Snowflake {
        private static final int UNUSED_BITS = 1; // 未使用的位数,始终设置为0
        private static final int EPOCH_BITS = 41; // 时间戳位数
        private static final int NODE_ID_BITS = 10; // 节点ID位数
        private static final int SEQUENCE_BITS = 12; // 序列号位数

        private static final long maxNodeId = (1L << NODE_ID_BITS) - 1; // 最大节点ID值
        private static final long maxSequence = (1L << SEQUENCE_BITS) - 1; // 最大序列号值

        // 自定义纪元(2015年1月1日午夜UTC)
        private static final long DEFAULT_CUSTOM_EPOCH = 1420070400000L;

        private final long nodeId; // 节点ID
        private final long customEpoch; // 自定义纪元

        private volatile long lastTimestamp = -1L; // 上一次的时间戳
        private volatile long sequence = 0L; // 当前序列号

        // 使用节点ID和自定义纪元创建Snowflake实例
        public Snowflake(long nodeId, long customEpoch) {
            if(nodeId < 0 || nodeId > maxNodeId) {
                throw new IllegalArgumentException(String.format("NodeId must be between %d and %d", 0, maxNodeId));
            }
            this.nodeId = nodeId;
            this.customEpoch = customEpoch;
        }

        // 使用节点ID创建Snowflake实例
        public Snowflake(long nodeId) {
            this(nodeId, DEFAULT_CUSTOM_EPOCH);
        }

        // 让Snowflake生成一个节点ID
        public Snowflake() {
            this.nodeId = createNodeId();
            this.customEpoch = DEFAULT_CUSTOM_EPOCH;
        }

        // 生成下一个ID
        public synchronized long nextId() {
            long currentTimestamp = timestamp();

            if(currentTimestamp < lastTimestamp) {
                throw new IllegalStateException("Invalid System Clock!");
            }

            if (currentTimestamp == lastTimestamp) {
                sequence = (sequence + 1) & maxSequence;
                if(sequence == 0) {
                    // 序列号耗尽,等待到下一个毫秒
                    currentTimestamp = waitNextMillis(currentTimestamp);
                }
            } else {
                // 重置序列号,以便下一个毫秒从零开始
                sequence = 0;
            }

            lastTimestamp = currentTimestamp;

            long id = currentTimestamp << (NODE_ID_BITS + SEQUENCE_BITS)
                    | (nodeId << SEQUENCE_BITS)
                    | sequence;

            return id;
        }

        // 获取当前时间戳(毫秒)并调整为自定义纪元
        private long timestamp() {
            return Instant.now().toEpochMilli() - customEpoch;
        }

        // 阻塞并等待到下一个毫秒
        private long waitNextMillis(long currentTimestamp) {
            while (currentTimestamp == lastTimestamp) {
                currentTimestamp = timestamp();
            }
            return currentTimestamp;
        }

        // 生成节点ID
        private long createNodeId() {
            long nodeId;
            try {
                StringBuilder sb = new StringBuilder();
                Enumeration<NetworkInterface> networkInterfaces = NetworkInterface.getNetworkInterfaces();
                while (networkInterfaces.hasMoreElements()) {
                    NetworkInterface networkInterface = networkInterfaces.nextElement();
                    byte[] mac = networkInterface.getHardwareAddress();
                    if (mac != null) {
                        for(byte macPort: mac) {
                            sb.append(String.format("%02X", macPort));
                        }
                    }
                }
                nodeId = sb.toString().hashCode();
            } catch (Exception ex) {
                nodeId = (new SecureRandom().nextInt());
            }
            nodeId = nodeId & maxNodeId;
            return nodeId;
        }

        // 解析ID,返回包含时间戳、节点ID和序列号的数组
        public long[] parse(long id) {
            long maskNodeId = ((1L << NODE_ID_BITS) - 1) << SEQUENCE_BITS;
            long maskSequence = (1L << SEQUENCE_BITS) - 1;

            long timestamp = (id >> (NODE_ID_BITS + SEQUENCE_BITS)) + customEpoch;
            long nodeId = (id & maskNodeId) >> SEQUENCE_BITS;
            long sequence = id & maskSequence;

            return new long[]{timestamp, nodeId, sequence};
        }

        @Override
        public String toString() {
            return "Snowflake Settings [EPOCH_BITS=" + EPOCH_BITS + ", NODE_ID_BITS=" + NODE_ID_BITS
                    + ", SEQUENCE_BITS=" + SEQUENCE_BITS + ", CUSTOM_EPOCH=" + customEpoch
                    + ", NodeId=" + nodeId + "]";
        }
    }
}
3.6设计数据库表‘
-- 全部角色用户的公共表
-- ID/role需经常使用的信息加密置于token
create table if not exists user
(
    id bigint(19) not null primary key ,
    name varchar(8) not null ,
    number varchar(12) not null ,
    password varchar(65) not null ,
    role int not null default 1,
    create_time datetime not null default current_timestamp,
    update_time datetime not null default current_timestamp on update current_timestamp,
     -- 对number字段添加唯一约束,确保每个用户的number值都是唯一的
    UNIQUE (number),
    -- 对number字段添加索引,提高查询效率
    INDEX (number)
);
-- 与user一对一,因此使用共用主键。非组合关系,利于维护
-- 即,添加一个教师时,先提取出user数据加入user表,并获取返回的id;再将id和其他信息存教师表
create table if not exists teacher
(
    id bigint(19) not null primary key ,
    title varchar(8),
    create_time datetime not null default current_timestamp,
    update_time datetime not null default current_timestamp on update current_timestamp
);
-- 与user为共用主键
create table if not exists student
(
    id bigint(19) not null primary key ,
    clazz varchar(8),
    create_time datetime not null default current_timestamp,
    update_time datetime not null default current_timestamp on update current_timestamp
);
-- 每门可以有1位授课教师,索引非外键
create table if not exists course
(
    id bigint(19) not null primary key ,
    name varchar(45) not null ,
    teacher_id bigint(19) not null ,
    create_time datetime not null default current_timestamp,
    update_time datetime not null default current_timestamp on update current_timestamp,
    index (teacher_id)
);
-- 学生课程双向多对多。中间表
create table if not exists student_course
(
    id bigint(19) not null primary key ,
    student_id bigint(19) not null ,
    course_id bigint(19) not null ,
    create_time datetime not null default current_timestamp,
    update_time datetime not null default current_timestamp on update current_timestamp,
    index (course_id),
    index (student_id)
);
3.7实体类
package com.yanyu.dox;

import com.fasterxml.jackson.annotation.JsonProperty;
import lombok.AllArgsConstructor;
import lombok.Builder;
import lombok.Data;
import lombok.NoArgsConstructor;
import org.springframework.data.annotation.CreatedBy;
import org.springframework.data.annotation.Id;
import org.springframework.data.annotation.ReadOnlyProperty;

import java.time.LocalDateTime;

@Data
@AllArgsConstructor
@NoArgsConstructor
@Builder
public class User {
    public static final int USER = 1;
    public static final int ADMIN = 9;
    @Id
    @CreatedBy
    private String id;
    private String name;
    private String number;
    @JsonProperty(access = JsonProperty.Access.WRITE_ONLY)
    private String password;
    private Integer level;
    @ReadOnlyProperty
    private LocalDateTime createTime;
    @ReadOnlyProperty
    private LocalDateTime updateTime;

}
@JsonProperty是一个 Java 注解,用于指定 JSON 对象属性的名称。它通常与 Jackson 库一起使用,以便在将 Java 对象转换为 JSON 字符串或将 JSON 字符串转换为 Java 对象时,自定义属性名称。该属性将仅在序列化(将 Java 对象转换为 JSON 字符串)过程中使用,而在反序列化(将 JSON 字符串转换为 Java 对象)过程中将被忽略。
@CreatedBy
`@CreatedBy` 注解用于自动设置创建对象的用户名称。当使用此注解时,在将对象保存到数据库时,会自动将当前用户的用户名设置为该对象的 `createdBy` 属性值。这样可以避免手动设置创建者的名称,提高代码的可维护性和可读性。
3.8持久层
@Repository
public interface UserRepository extends CrudRepository<User, String> {

    User findByNumber(String number);

    @Modifying
    @Query("update user u set u.password=:password where u.id=:uid")
    void updatePassword(String uid, String password);
}
测试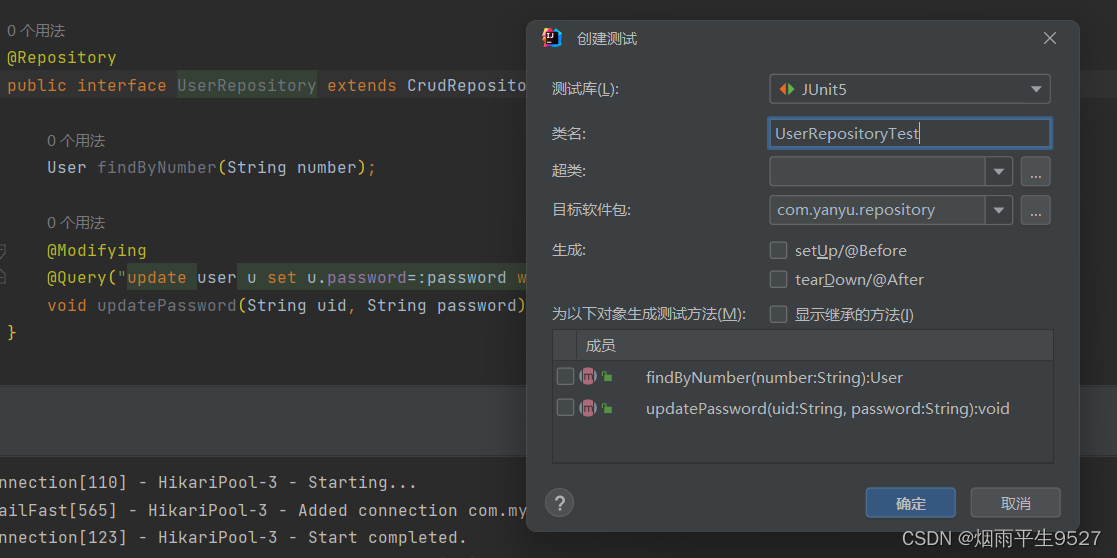
@SpringBootTest
@Slf4j
class UserRepositoryTest {
    @Autowired
    private UserRepository userRepository;

    @Test
    void findByNumber() {
        User u = userRepository.findByNumber("admin");
        log.debug("{}", u.getId());
    }
    @Test
    void updatePassword() {
        userRepository.updatePassword("1120010882327330816", "aaa");
    }
}
3.9业务逻辑层
@Service
@RequiredArgsConstructor
public class UserService {
    private final UserRepository userRepository;
    private final PasswordEncoder passwordEncoder;

    public User getUserByNumber(String number) {
        return userRepository.findByNumber(number);
    }

    public User getUser(String uid) {
        return userRepository.findById(uid).orElse(null);
    }
}
模拟数据@MockBean
@SpringBootTest
@Slf4j
public class UserServiceMockTest {
    @Autowired
    private UserService userService;

    // 会在测试容器注入模拟组件,不能与整合测试用例混用
    @MockBean
    private UserRepository userRepositoryMock;

    @Test
    public void getUserByNumberTest() {

        Mockito.when(userRepositoryMock.findByNumber("admin"))
                .thenReturn(User.builder().number("admin").id("101").name("aaa").build());

        User user = userService.getUserByNumber("admin");
        log.debug("{}", user.getId());
    }

}
@MockBean是 Spring Boot 测试框架中的一个注解,用于在单元测试中创建模拟对象(mock objects)。它通常与@SpringBootTest或@WebMvcTest等注解一起使用,以便在测试环境中自动注入模拟对象。
3.10控制层组件
@RequiredArgsConstructor
@RestController
@RequestMapping("/api/")
@Slf4j
public class LoginController {
    private final UserService userService; // 用户服务
    private final PasswordEncoder passwordEncoder; // 密码编码器
    private final JWTComponent jwtComponent; // JWT组件

    @PostMapping("login")
    public ResultVO postLogin(@RequestBody User user, HttpServletResponse response) {
        User u = userService.getUserByNumber(user.getNumber()); // 根据用户编号获取用户信息
        if (u == null || !passwordEncoder.matches(user.getPassword(), u.getPassword())) { // 验证用户名和密码
            return ResultVO.error(Code.LOGIN_ERROR); // 登录失败,返回错误信息
        }
        String code = switch(u.getLevel()) { // 根据用户等级生成对应的code
            case User.USER -> "Yo87M";
            case User.ADMIN -> "nU0vt";
            default -> "";
        };

        String token = jwtComponent.encode(Map.of("uid", u.getId(), "role", u.getLevel())); // 生成JWT令牌
        response.addHeader("role", code); // 将code添加到响应头中
        response.addHeader("token", token); // 将token添加到响应头中
        return ResultVO.success(Map.of()); // 登录成功,返回成功信息
    }
}
@RequiredArgsConstructor
@RequiredArgsConstructor是 Lombok 库中的一个注解,用于自动生成一个包含所有final和@NonNull字段的构造函数。
3.11拦截器组件
@Component // 将该类标记为Spring组件,使其能够被自动扫描并实例化
@Slf4j // 使用Lombok提供的日志功能,简化日志记录操作
@RequiredArgsConstructor // 使用Lombok提供的构造器生成器,自动生成包含final字段的构造函数
public class LoginInterceptor implements HandlerInterceptor { // 实现Spring MVC中的拦截器接口

    private final JWTComponent jwtComponent; // JWT组件,用于处理JWT令牌的编码和解码
    private final ResponseHelper responseHelper; // 响应助手,用于构建响应结果

    @Override
    public boolean preHandle(HttpServletRequest request, HttpServletResponse response, Object handler) throws Exception {
        // 在请求处理之前执行,返回true则继续处理,返回false则中断请求处理
        String token = request.getHeader("token"); // 从请求头中获取token
        if (token == null) {
            responseHelper.response(response, Code.UNAUTHORIZED); // 如果token为空,返回未授权错误
            return false;
            //throw XException.builder().code(Code.UNAUTHORIZED).build();
        }
        String uid = jwtComponent.decode(token).getClaim("uid").asString(); // 解密token,获取用户ID
        int role = jwtComponent.decode(token).getClaim("role").asInt(); // 解密token,获取用户角色
        // 拦截解密出用户真实数据后,置于request供后续使用
        request.setAttribute("uid", uid);
        request.setAttribute("role", role);
        return true; // 继续处理请求
    }
}
3.12路由
@Configuration // 表示这是一个配置类
@RequiredArgsConstructor // 自动生成包含所有 final 和 @NonNull 字段的构造函数
public class WebMvcConfig implements WebMvcConfigurer { // 实现 WebMvcConfigurer 接口,用于自定义 Spring MVC 的配置

    private final LoginInterceptor loginInterceptor; // 登录拦截器
    private final AdminInterceptor adminInterceptor; // 管理员拦截器

    @Override
    public void addInterceptors(InterceptorRegistry registry) { // 重写 addInterceptors 方法,添加自定义拦截器
        registry.addInterceptor(loginInterceptor) // 添加登录拦截器
                .addPathPatterns("/api/**") // 拦截以 /api/ 开头的所有请求路径
                .excludePathPatterns("/api/login", "/api/welcome"); // 排除登录和欢迎页面的请求路径

        registry.addInterceptor(adminInterceptor) // 添加管理员拦截器
                .addPathPatterns("/api/admin/**"); // 拦截以 /api/admin/ 开头的所有请求路径
    }
}
3.13管理员注入
@Service // 表示这是一个服务类,用于处理业务逻辑
@RequiredArgsConstructor // 自动生成包含所有 final 和 @NonNull 字段的构造函数
public class InitialService {
    private final UserRepository userRepository; // 用户仓库,用于操作数据库中的用户数据
    private final PasswordEncoder passwordEncoder; // 密码编码器,用于对密码进行加密

    @EventListener(classes = ApplicationReadyEvent.class) // 监听应用程序启动完成事件
    @Transactional // 开启事务支持
    public void onApplicationEvent() { // 当应用程序启动完成后执行该方法
        long count = userRepository.count(); // 查询数据库中用户的数量
        if (count == 0) { // 如果用户数量为0,即数据库中没有用户数据
            User user = User.builder() // 使用建造者模式创建用户对象
                    .name("admin") // 设置用户名为 admin
                    .level(9) // 设置用户等级为 9
                    .number("admin") // 设置用户编号为 admin
                    .password(passwordEncoder.encode("admin")) // 对密码进行加密后设置用户密码
                    .build(); // 构建用户对象
            userRepository.save(user); // 将用户对象保存到数据库中
        }
    }
}


 887
887

 被折叠的 条评论
为什么被折叠?
被折叠的 条评论
为什么被折叠?
 到【灌水乐园】发言


