


安装kafka
docker-compose安装kafka,docker-compose.yml文件如下
version: "3"

services:
  zookeeper:
    image: 'bitnami/zookeeper:3.6'
    container_name: zookeeper
    ports:
      - '2181:2181'
    environment:
      # 匿名登录--必须开启
      - ALLOW_ANONYMOUS_LOGIN=yes
    #volumes:
      #- ./zookeeper:/bitnami/zookeeper
    # restart: always

  kafka1:
    image: 'bitnami/kafka:3.0'
    container_name: kafka1
    ports:
      - '9092:9092'
    environment:
      - KAFKA_BROKER_ID=1
      - KAFKA_CFG_LISTENERS=PLAINTEXT://:9092
      - KAFKA_CFG_ADVERTISED_LISTENERS=PLAINTEXT://192.168.208.139:9092
      - KAFKA_CFG_ZOOKEEPER_CONNECT=zookeeper:2181
      - ALLOW_PLAINTEXT_LISTENER=yes
    # restart: always
    depends_on:
      - zookeeper

  kafka2:
    image: 'bitnami/kafka:3.0'
    container_name: kafka2
    ports:
      - '9093:9093'
    environment:
      - KAFKA_BROKER_ID=2
      - KAFKA_CFG_LISTENERS=PLAINTEXT://:9093
      - KAFKA_CFG_ADVERTISED_LISTENERS=PLAINTEXT://192.168.208.139:9093
      - KAFKA_CFG_ZOOKEEPER_CONNECT=zookeeper:2181
      - ALLOW_PLAINTEXT_LISTENER=yes
    # restart: always
    depends_on:
      - zookeeper

  kafka3:
    image: 'bitnami/kafka:3.0'
    container_name: kafka3
    ports:
      - '9094:9094'
    environment:
      - KAFKA_BROKER_ID=3
      - KAFKA_CFG_LISTENERS=PLAINTEXT://:9094
      - KAFKA_CFG_ADVERTISED_LISTENERS=PLAINTEXT://192.168.208.139:9094
      - KAFKA_CFG_ZOOKEEPER_CONNECT=zookeeper:2181
      - ALLOW_PLAINTEXT_LISTENER=yes
    # restart: always
    depends_on:
      - zookeeper

  # Web 管理界面 另外也可以用exporter+prometheus+grafana的方式来监控 https://github.com/danielqsj/kafka_exporter
  kafka_manager:
    image: 'hlebalbau/kafka-manager:latest'
    container_name: kafka-manager
    ports:
      - "9009:9000"
    environment:
      ZK_HOSTS: "zookeeper:2181"
    # restart: always
    depends_on:
      - zookeeper
      - kafka1
      - kafka2
      - kafka3
只需要替换KAFKA_CFG_ADVERTISED_LISTENERS=PLAINTEXT://192.168.208.139:9094的ip为自己的ip即可
启动 docker-compose up -d
启动成功后访问浏览器 http://192.168.208.139:9009/ ip换成自己的,时间可能会有点久
才会出现如下页面
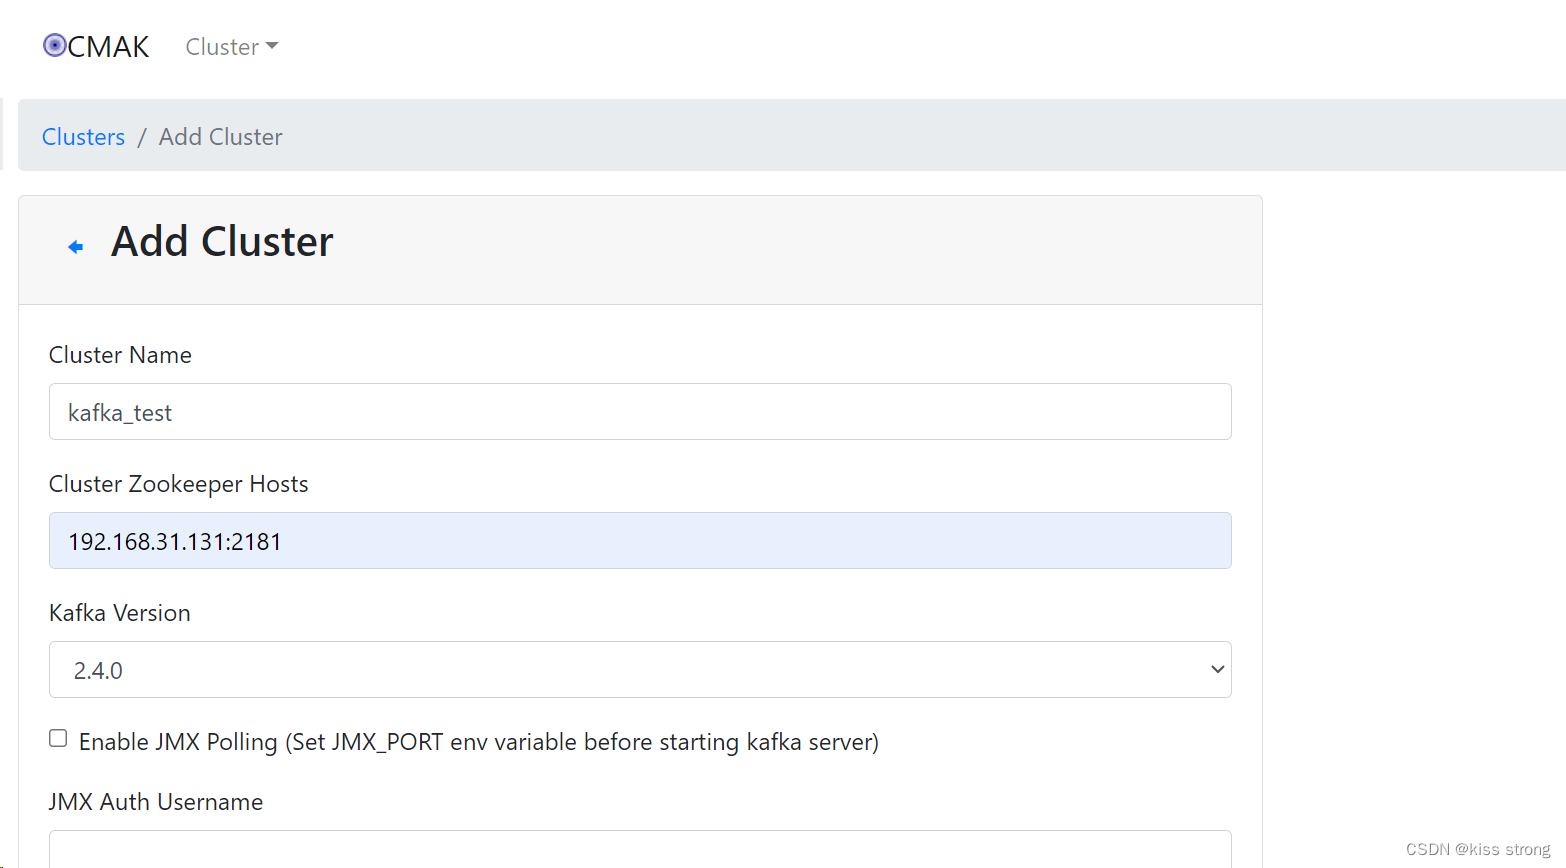
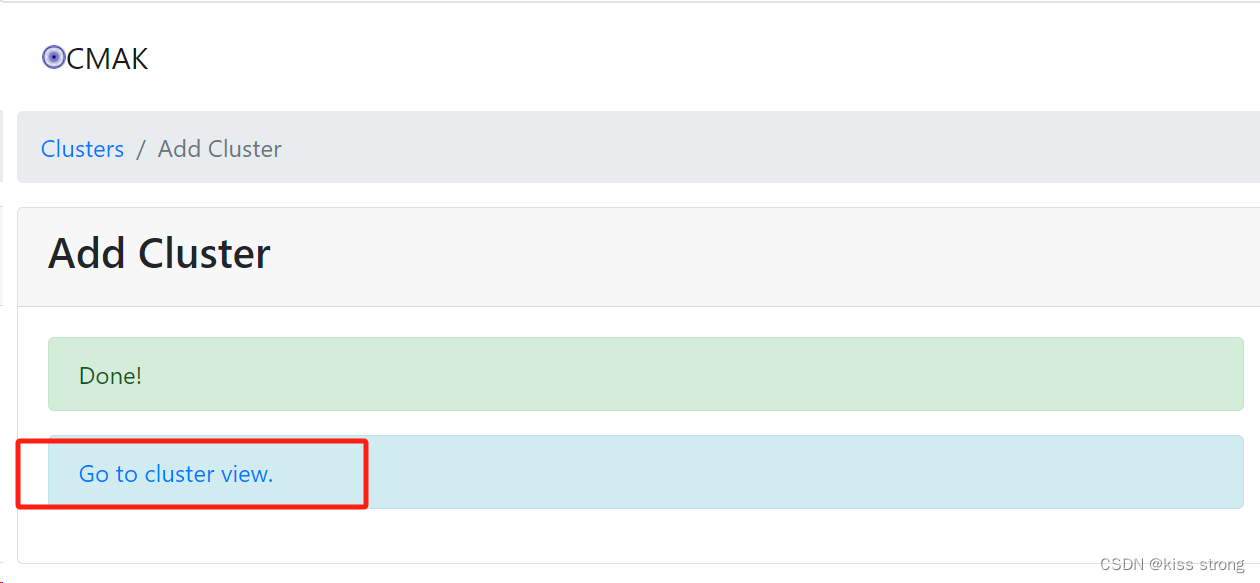
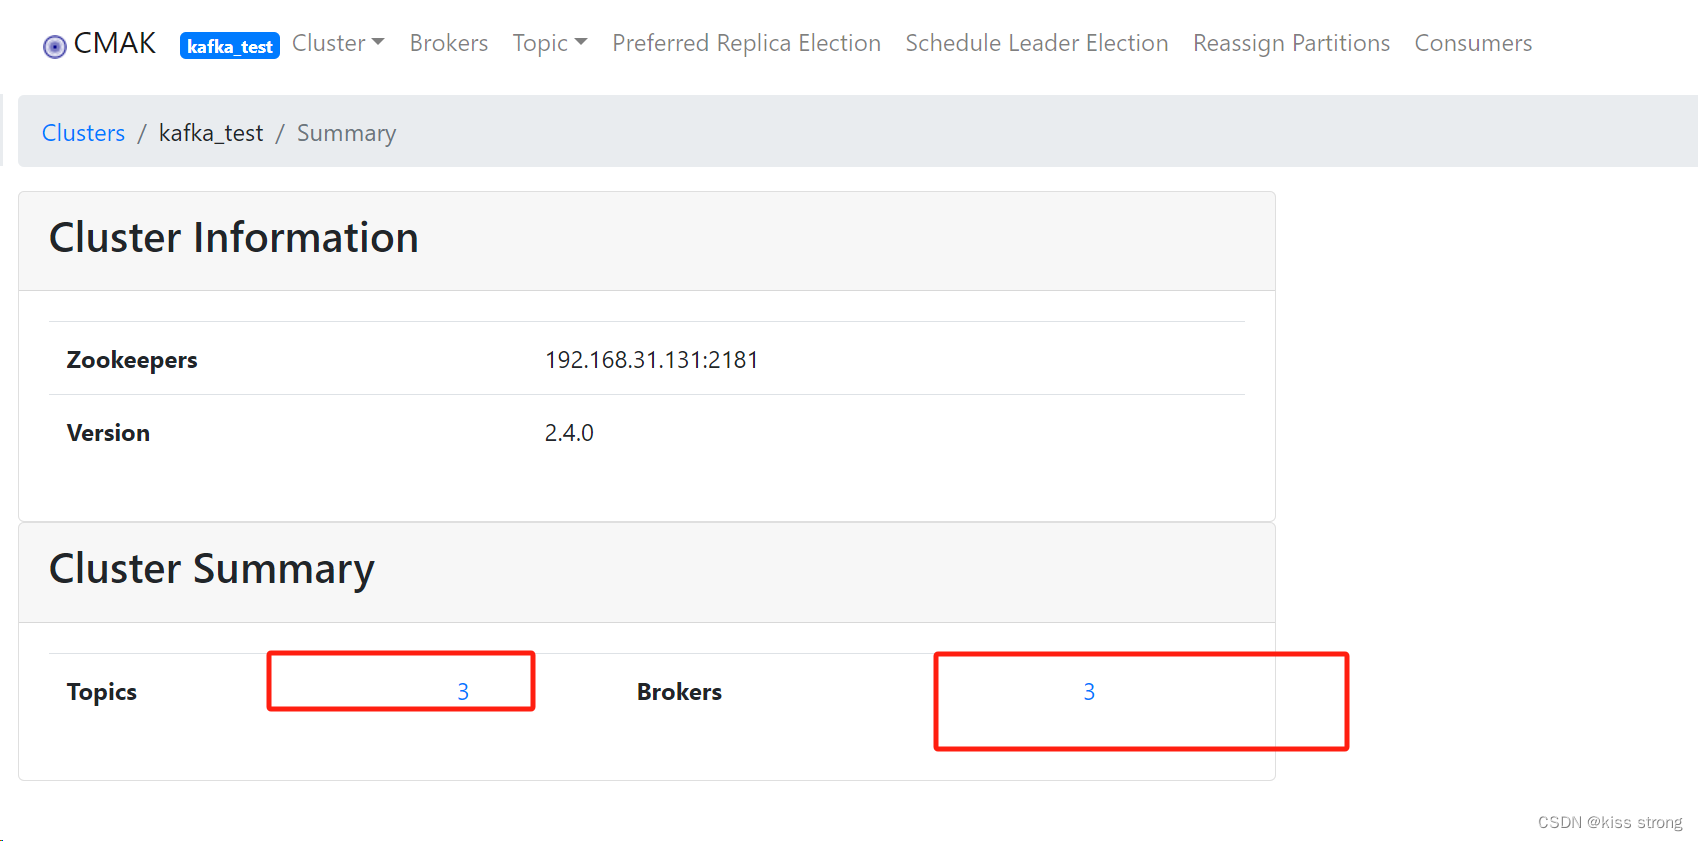
添加集群信息


整合springboot
导入依赖:一定要使用父版本,不然springboot版本和spring版本不一致会报错
<?xml version="1.0" encoding="UTF-8"?>
<project xmlns="http://maven.apache.org/POM/4.0.0"
         xmlns:xsi="http://www.w3.org/2001/XMLSchema-instance"
         xsi:schemaLocation="http://maven.apache.org/POM/4.0.0 http://maven.apache.org/xsd/maven-4.0.0.xsd">
    <modelVersion>4.0.0</modelVersion>

    <groupId>org.example</groupId>
    <artifactId>testkafka</artifactId>
    <version>1.0-SNAPSHOT</version>

    <properties>
        <maven.compiler.source>8</maven.compiler.source>
        <maven.compiler.target>8</maven.compiler.target>
    </properties>
    <parent>
        <groupId>org.springframework.boot</groupId>
        <artifactId>spring-boot-starter-parent</artifactId>
        <version>2.6.10</version> <!-- 更新为最新的稳定版本 -->
        <relativePath/> <!-- lookup parent from repository -->
    </parent>

    <dependencies>
        <dependency>
            <groupId>org.springframework.boot</groupId>
            <artifactId>spring-boot-starter-web</artifactId>
        </dependency>
        <dependency>
            <groupId>org.springframework.kafka</groupId>
            <artifactId>spring-kafka</artifactId>
        </dependency>
    </dependencies>

</project>
配置文件
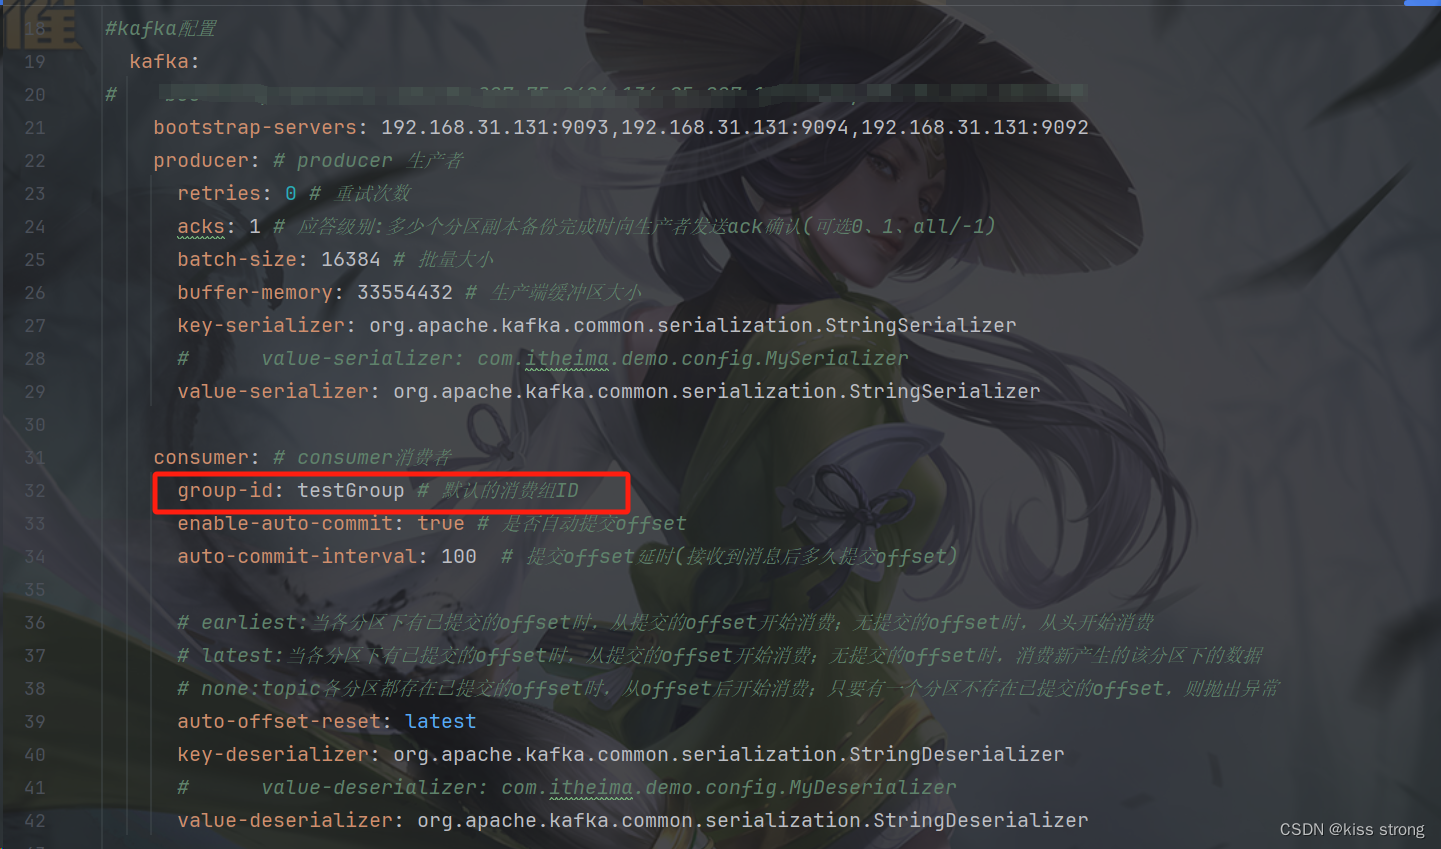
spring:
  kafka:
    bootstrap-servers: 192.168.208.139:9093,192.168.208.139:9094,192.168.208.139:9092
    producer: # producer 生产者
      retries: 0 # 重试次数
      acks: 1 # 应答级别:多少个分区副本备份完成时向生产者发送ack确认(可选0、1、all/-1)
      batch-size: 16384 # 批量大小
      buffer-memory: 33554432 # 生产端缓冲区大小
      key-serializer: org.apache.kafka.common.serialization.StringSerializer
      #      value-serializer: com.itheima.demo.config.MySerializer
      value-serializer: org.apache.kafka.common.serialization.StringSerializer

    consumer: # consumer消费者
      group-id: javagroup # 默认的消费组ID
      enable-auto-commit: true # 是否自动提交offset
      auto-commit-interval: 100  # 提交offset延时(接收到消息后多久提交offset)

      # earliest:当各分区下有已提交的offset时,从提交的offset开始消费;无提交的offset时,从头开始消费
      # latest:当各分区下有已提交的offset时,从提交的offset开始消费;无提交的offset时,消费新产生的该分区下的数据
      # none:topic各分区都存在已提交的offset时,从offset后开始消费;只要有一个分区不存在已提交的offset,则抛出异常
      auto-offset-reset: latest
      key-deserializer: org.apache.kafka.common.serialization.StringDeserializer
      #      value-deserializer: com.itheima.demo.config.MyDeserializer
      value-deserializer: org.apache.kafka.common.serialization.StringDeserializer
发布信息(同步)
package com.cyz.produce;

import org.springframework.kafka.core.KafkaTemplate;
import org.springframework.web.bind.annotation.GetMapping;
import org.springframework.web.bind.annotation.PathVariable;
import org.springframework.web.bind.annotation.RestController;

import javax.annotation.Resource;

/**
 * @author cyz
 * @date 2023/8/9 20:14
 * @mood happy
 */
@RestController
public class KafkaProducer {
    @Resource
    private KafkaTemplate<String, Object> kafkaTemplate;

    @GetMapping("/kafka/test/{msg}")
    public void sendMessage(@PathVariable("msg") String msg) {
        kafkaTemplate.send("test", msg);
        System.out.println(msg);
    }
}
发布消息(异步)
package com.cyz.produce;

import org.springframework.kafka.core.KafkaTemplate;
import org.springframework.kafka.support.SendResult;
import org.springframework.util.concurrent.ListenableFuture;
import org.springframework.web.bind.annotation.GetMapping;
import org.springframework.web.bind.annotation.PathVariable;
import org.springframework.web.bind.annotation.RestController;

import javax.annotation.Resource;
import java.util.concurrent.TimeUnit;

/**
 * @author cyz
 * @date 2023/8/9 20:16
 * @mood happy
 */
//测试同步发送与监听
@RestController
public class AsyncProducer {
    @Resource
    private KafkaTemplate<String, Object> kafkaTemplate;

    //同步发送
    @GetMapping("/kafka/sync/{msg}")
    public void sync(@PathVariable("msg") String msg) throws Exception {
        ListenableFuture<SendResult<String, Object>> future = kafkaTemplate.send("test", msg);
        //注意,可以设置等待时间,超出后,不再等候结果
        SendResult<String, Object> result = future.get(3, TimeUnit.SECONDS);
        System.out.println("异步发送:"+msg);
    }

}
消费者
package com.cyz.produce;

import org.apache.kafka.clients.consumer.ConsumerRecord;
import org.springframework.kafka.annotation.KafkaListener;
import org.springframework.stereotype.Component;

import java.util.Optional;

/**
 * @author cyz
 * @date 2023/8/9 20:18
 * @mood happy
 */
@Component
public class KafkaConsumer {

    //不指定group,默认取yml里配置的
    @KafkaListener(topics = {"test"})
    public void onMessage1(ConsumerRecord<?, ?> consumerRecord) {
        Optional<?> optional = Optional.ofNullable(consumerRecord.value());
        if (optional.isPresent()) {
            Object msg = optional.get();
            System.out.println("消费====>>>>>>"+msg);
        }
    }
}
测试
启动服务访问浏览器http://localhost:8080/kafka/test/测试kafka
http://localhost:8080/kafka/sync/异步发送

向指定消费组中发送信息并接受
消费组:一个消息可以被不同消费组的消费者消费,同一个消费组的消费者消息共享,即一个消费组中的消费者只有一个可以消费某一条消息,不同消费组的消费者可以消费相同的消息
在配置文件中会默认配置一个消费组
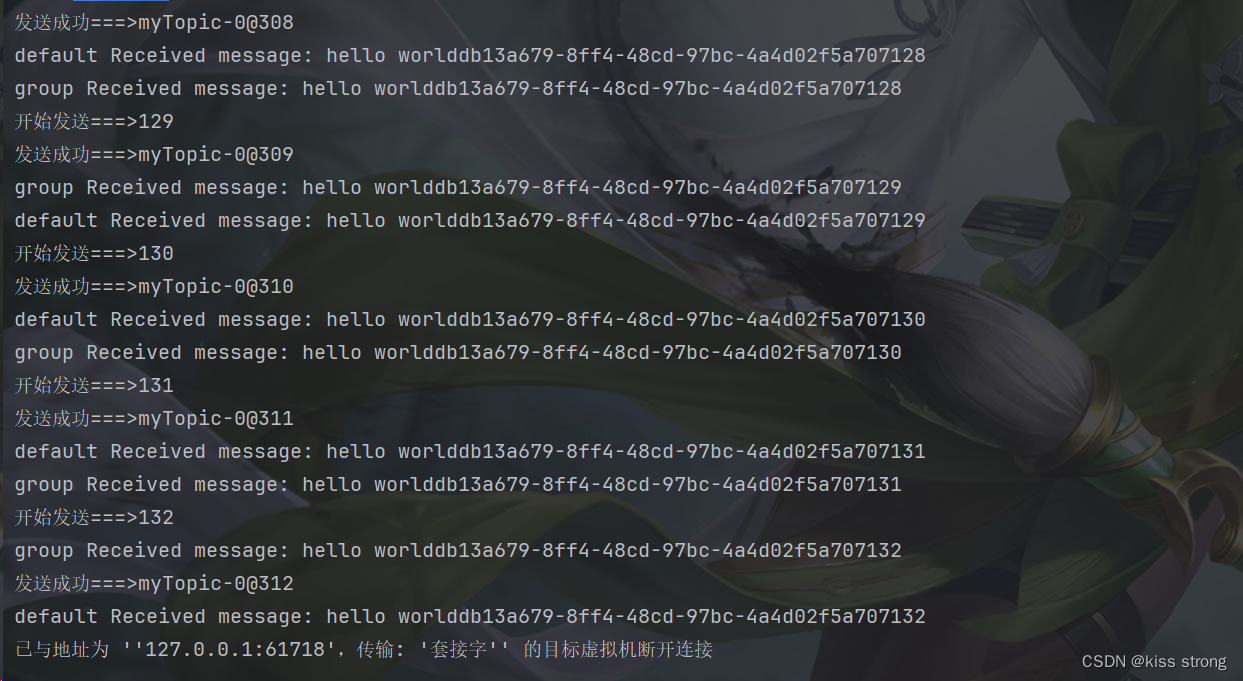
生产消息
@Resource
    private KafkaTemplate<String, Object> kafkaTemplate;
    @PostConstruct
    void send(){
        new Thread(()->{
            int index=0;
            UUID uuid = UUID.randomUUID();
            while (true){
                System.out.println("开始发送===>"+index);
                sendMessage("myTopic", "hello world" + uuid + index++);
                try {
                    TimeUnit.SECONDS.sleep(2);
                } catch (InterruptedException e) {
                    throw new RuntimeException(e);
                }
            }
        }).start();
    }


    public void sendMessage(String topic,String message) {
        ListenableFuture<SendResult<String, Object>> send = kafkaTemplate.send(topic, message);
        send.addCallback(new ListenableFutureCallback<SendResult<String, Object>>() {
            @Override
            public void onFailure(Throwable ex) {
                System.out.println("发送失败===>"+ex.getMessage());
            }
            @Override
            public void onSuccess(SendResult<String, Object> result) {
                System.out.println("发送成功===>"+result.getRecordMetadata());
            }
        });
    }
不指定消费组
监听消息的时候不指定消费组会默认消费配置的消费组信息
    //不指定group,默认取yml里配置的
    @KafkaListener(topics = "myTopic")
    public void listen(ConsumerRecord<String, String> record) {
        System.out.println("default Received message: " + record.value());
    }
指定消费组
发送到指定的消费组中,消费消息的时候只能消费指定消费组的消息
    @KafkaListener(topics = "myTopic",groupId = "group")
    public void listen1(ConsumerRecord<String, String> record) {
        System.out.println("group Received message: " + record.value());
    }
结果


 2298
2298


 被折叠的 条评论
为什么被折叠?
被折叠的 条评论
为什么被折叠?
 到【灌水乐园】发言


