


UE移速设置方案(C++方式)
功能背景
玩家的移速应当根据所持有的武器,移动方式,方向,状态而不同,这样比较符合现实,增加游戏性。
- 当玩家手中持有不同武器时,玩家的移动速度应当是不同的,例如持有步枪,手枪,不持有武器时;
- 当玩家以不同方式移动时,玩家的移动速度应当是不同的,例如步行,奔跑,蹲行;
- 当玩家以不同方向移动时,玩家的移动速度应当是不同的,例如向前,向左,向右,向后;
- 当玩家触发与移速相关的交互时,移速也需要更新。
实现方式
数据表格
为了便于管理设置如此多种状态下的移速,我们可以使用数据表来解决 。
首先定义一个结构体,定义不同方向下的移速,相当于表格中列的定义。
//不同方向移动速度
USTRUCT(BlueprintType)
struct FWalkSpeed : public FTableRowBase
{
	GENERATED_BODY()
public:
	UPROPERTY(EditAnywhere,BlueprintReadWrite,Category="Speed")
	float Forward;
	UPROPERTY(EditAnywhere,BlueprintReadWrite,Category="Speed")
	float RightOrLeft;
	UPROPERTY(EditAnywhere,BlueprintReadWrite,Category="Speed")
	float Back;
};
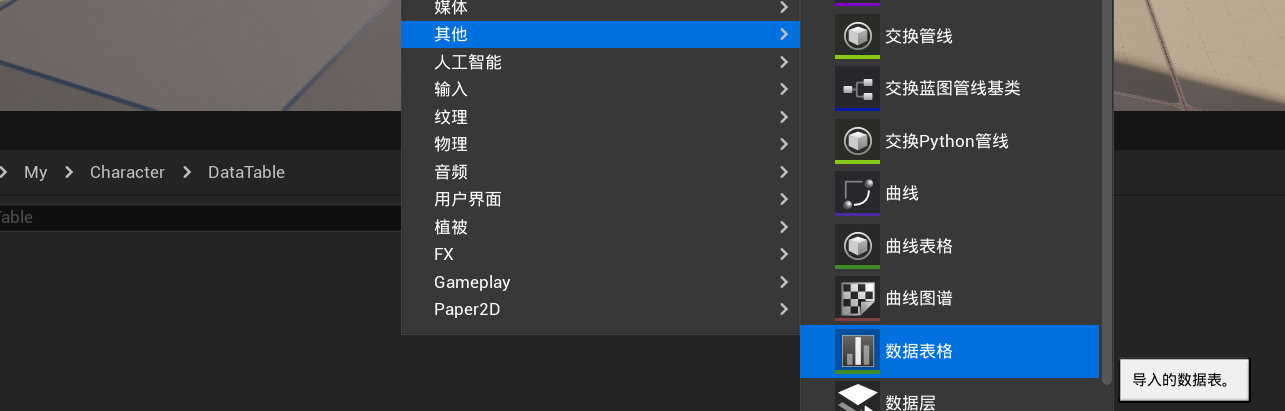
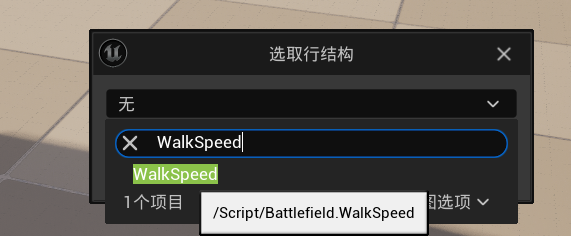
编译后打开UE5引擎,创建数据表格。
行结构使用我们创建的WalkSpeed结构体。
此时我们要考虑到影响移速的几个因素,一个是武器,一个是移动状态,所以数据在命名时可以使用武器_状态这种方式命名。

设置移速
武器类中先设置一些武器的枚举。
//枚举一些武器
UENUM(BlueprintType)
enum class EWeaponName :uint8
{
	Without UMETA(DisplayName = "Without"),
	AssaultRiffle UMETA(DisplayName = "AssaultRiffle"),
	HandGun UMETA(DisplayName = "HandGun"),
};
先声明一个玩家移速的变量,一个更新移速的方法,在移动输入事件中调用更新移速的方法。
在玩家前后左右移动时添加一个移动信号输入检测,用于判断玩家前后左右移动的状态,例如前后移动时,前移值为1,后移值为-1。
这里我还做了一个角色起步的效果,即角色刚开始移动时移速逐渐增大到设定速度。
//人物行走速度
	float WalkSpeed=300;
//更新移速
	void UpdateMoveSpeed();
//检测移动输入信号
	UPROPERTY(EditAnywhere, BlueprintReadOnly, Category = "Move")
	float MoveForwardAxis;
	UPROPERTY(EditAnywhere, BlueprintReadOnly, Category = "Move")
	float MoveRightAxis;

/*以下这些参与的变量大家根据自己需要自己用*/
//当前武器
	UPROPERTY(EditAnywhere,BlueprintReadWrite,Category="Weapon")
	AWeaponBase* CurrentWeapon;
//人物姿势状态
	bool IsRun=false;
	bool IsADS=false;
	bool IsInAir=false;
	bool IsCrouch=false;

//角色移动按键绑定事件

void APlayerCharacter::Action_ForwardMove(const FInputActionValue& Value)
{

	//设置移动输入信号
	MoveForwardAxis=Value.Get<float>();
	UpdateMoveSpeed();
	//通过不断增大当前角色最大行走移速来做出角色平滑移动效果
	float CurrentVelocity =GetCharacterMovement()->Velocity.Length();
	if(CurrentVelocity<WalkSpeed)
	{
		//在每次输入事件触发时让MaxWalkSpeed在当前速度上逐渐加10
		GetCharacterMovement()->MaxWalkSpeed=CurrentVelocity+10;
	}
	else
	{
		//角色到达设置的行走速度后限制MaxWalkSpeed为行走速度
		GetCharacterMovement()->MaxWalkSpeed=WalkSpeed;
	}
	AddMovementInput(GetActorForwardVector(),Value.Get<float>(),false);
}

void APlayerCharacter::Action_RightMove(const FInputActionValue& Value)
{
	//设置移动输入信号
	MoveRightAxis=Value.Get<float>();
	UpdateMoveSpeed();
	//通过不断增大当前角色最大行走移速来做出角色平滑移动效果
	float CurrentVelocity =GetCharacterMovement()->Velocity.Length();
	if(CurrentVelocity<WalkSpeed)
	{
		GetCharacterMovement()->MaxWalkSpeed=CurrentVelocity+10;
	}
	else
	{
		GetCharacterMovement()->MaxWalkSpeed=WalkSpeed;
	}
	AddMovementInput(GetActorRightVector(),Value.Get<float>(),false);
}
接下开就是移速实现方法,思路就是根据当前的一些状态值来查询数据表的的数据,最后赋值给WalkSpeed。
void APlayerCharacter::UpdateMoveSpeed()
{
	FString WeaponName = "Without";
	FString MoveState;
	if(CurrentWeapon)
	{
		WeaponName=UEnum::GetValueAsString(CurrentWeapon->WeaponName);
		WeaponName=WeaponName.Replace(TEXT("EWeaponName::"),TEXT(""));
	}
	if(IsRun)
	{
		MoveState="Run";
	}
	else if(IsCrouch)
	{
		MoveState="Crouch";
	}
	else
	{
		MoveState="Walk";
	}
	FString State=WeaponName.Append("_").Append(MoveState);
	static const FString ContextString(TEXT("没有找到该行移速"));
	FWalkSpeed* ThisRow=WalkSpeedDataTable->FindRow<FWalkSpeed>(FName(State),ContextString,true);
	if(ThisRow)
	{
		//左前,前,右前方向移速
		if(MoveForwardAxis==1)
		{
			WalkSpeed=ThisRow->Forward;
		}
		//左后,后,左后方向移速
		else if(MoveForwardAxis==-1)
		{
			WalkSpeed=ThisRow->Back;
		}
		else if(MoveForwardAxis==0)
		{
			//正左,正右方向移速
			if(MoveRightAxis==1 or MoveRightAxis==-1)
			{
				WalkSpeed=ThisRow->RightOrLeft;
			}
		}
	}

}
这样以来就实现了移速的设置方式,当然这种方法也可以在蓝图中实现出来。如果后续需要拓展出其他功能,例如受击减速,就可以通过直接修改WalkSpeed来实现。
觉得有用,就点赞收藏加关注,后续还会更新更多内容!


 被折叠的 条评论
为什么被折叠?
被折叠的 条评论
为什么被折叠?
 到【灌水乐园】发言


