后端实现视频压缩上传到minio
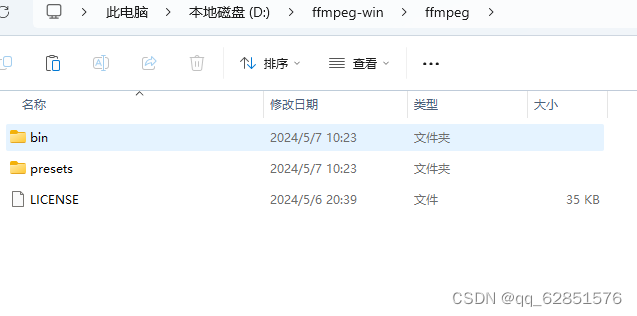
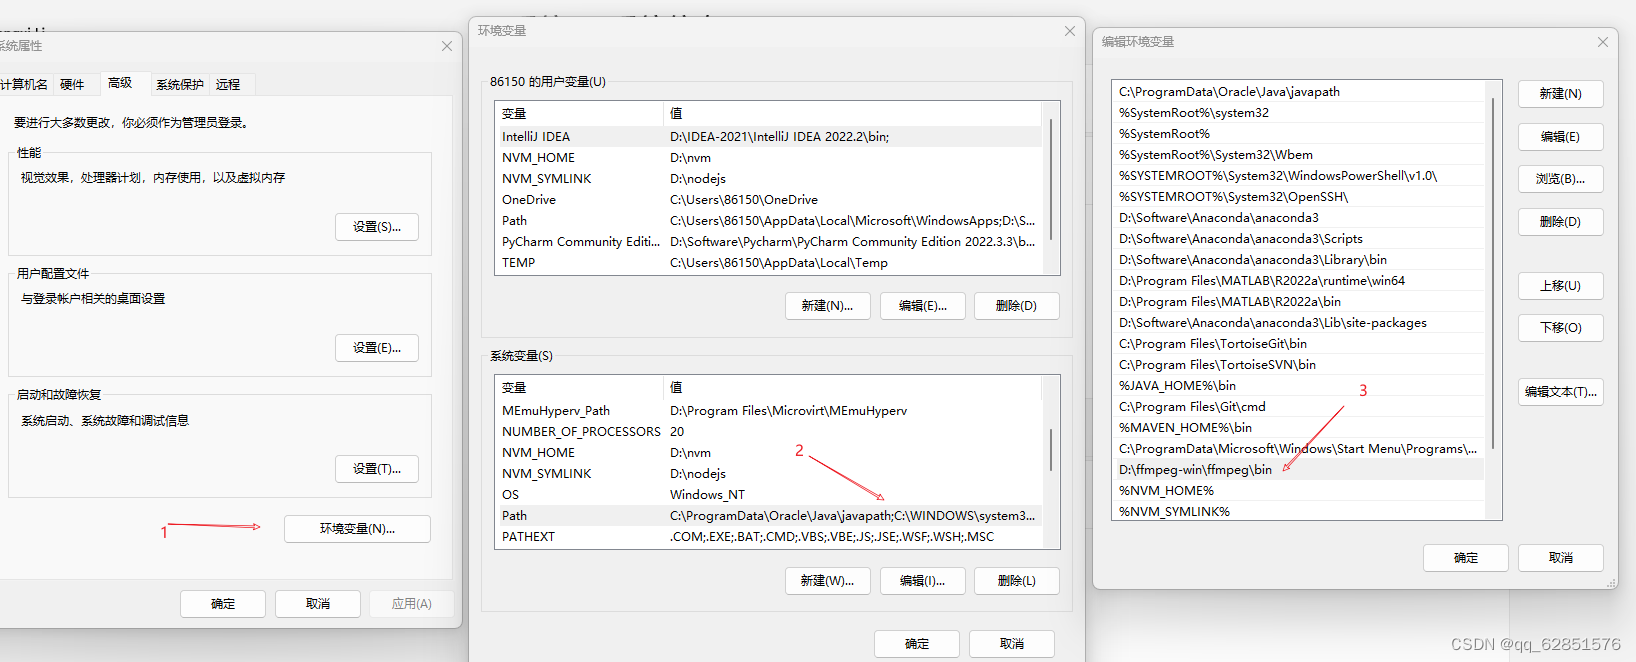
首先你需要在电脑下载ffmpeg包,然后在电脑配置环境变量

复制路径到环境变量

1、controller层
@RequestMapping("/upload")
public class UploadController{
@ApiOperation(value = "视频上传")
@PostMapping("/uploadVideo")
public Result uploadVideo(@RequestPart("file") MultipartFile file) {
        return result = bizUploadService.uploadVideo(file);
      }
}
2、service层
此时minio的上传这里已经做成一个业务层可直接调用,具体实现方式大家可以看之前写的封装成的jar包
@Service
public class upload{
@Autowired
    private MinoService minoService;

/**
     * 上传视频压缩处理
     *
     * @param file
     * @return
     */
    public Result uploadVideo(MultipartFile file) {
        if (file.isEmpty()) {
            return Result.error("上传视频为不存在");
        }
        // 临时保存上传的文件
        File tempFile = null;
        String outputFilePath =null;
        MockMultipartFile multipartFile =null;
        String uploadFilePath =null;
        try {
            tempFile = File.createTempFile("temp-video-", ".mp4");
            file.transferTo(tempFile);
            // FFmpeg压缩命令示例(需要根据实际需求调整参数)
            outputFilePath = tempFile.getAbsolutePath().replace(".mp4", "-compressed.mp4");
            String ffmpegCmd = "ffmpeg -i " + tempFile.getAbsolutePath() + " -c:v libx264 -preset veryfast -crf 23 -c:a copy " + outputFilePath;
            ProcessBuilder pb = new ProcessBuilder(Arrays.asList(ffmpegCmd.split(" ")));
            pb.inheritIO().start().waitFor();

            //根据文件输出路径反编译为MockMultipartFile上传到minio
             multipartFile = convertToFileMockMultipartFile(outputFilePath);
            //上传视频到minio
            uploadFilePath = minoService.uploadFile("effort", file);
        } catch (IOException e) {
        } catch (InterruptedException e) {
            throw new RuntimeException(e);
        }
        return Result.success(uploadFilePath);
    }
    //根绝文件路径编译成MockMultipartFile上传到minio
    private static MockMultipartFile convertToFileMockMultipartFile(String filePath) throws IOException {
        File file = new File(filePath);
        FileInputStream fileInputStream = new FileInputStream(file);
        String fileName = file.getName();
        return new MockMultipartFile("file", fileName, "multipart/form-data", fileInputStream);
    }
}
此时的后端视频压缩上传做的差不多了,但是对于大视频压缩会造成大量的资源占用,影响性能
下面有前端压缩方法
前端视频实现压缩:
这里用的是vue3,配置文件是vite.config.js
<template>
  <div class="video-box">
    <video id="video" controls object-fill="fill"></video><br />
    <input id="upload" type="file" accept="video/mp4" capture="camcorder" @change="upload"><br/>
    <button @click="uploadVideo">上传</button>
  </div>
</template>

<script>
import { createFFmpeg, fetchFile } from '@ffmpeg/ffmpeg'

export default {
  data () {
      return {
          msg: '',
          videoWidth: '',
          videoHeight: '',
          duration: ''
      }
  },

  methods: {
      // 选择文件
      async upload (e) {
          console.log('start', e)
          console.log('start', e.target.files[0])
          var _this = this
          if (e.target.files[0]) {
              var filename = e.target.files[0].name
              var filetype = e.target.files[0].type

              const videoUrl = _this.getObjectURL(e.target.files[0])
              const video = document.getElementById('video')
              video.src = videoUrl

              this.getVideoData().then((videoObj) => {
                  const file = e.target.files[0]
                  console.log('videoObj:', videoObj)
                  const { width, height } = videoObj
                  const result = _this.squeezVideo(file, filename, filetype, width, height, _this.msg)
                  result.then(res => {
                      console.log('resultFile', res)
                  })
              })
          }
      },
      // 压缩视频
      async squeezVideo (file, filename, filetype, width, height) {
          console.log('squeezingVideo file name:  ', file.name)
          console.log('squeezingVideo file type:  ', file.type)
          console.log('squeezingVideo file path:  ', file.path)
          console.log('squeezingVideo file size:  ', file.size)
          console.log('squeezingVideo file lastModified:  ', file.lastModified)
          console.log('squeezingVideo file lastModifiedDate:  ', file.lastModifiedDate)
          const _this = this
          // 分辨率
          const resolution = `${width / 2}x${height / 2}`
          // 实例化ffmpeg
          const ffmpeg = createFFmpeg({
              // ffmpeg路径
              corePath: 'ffmpeg-core.js',
              // 日志
              log: true,
              // 进度
              progress: ({ ratio }) => {
                  _this.msg = `完成率: ${(ratio * 100.0).toFixed(1)}%`
              }
          })
          var { name } = file
          this.msg = '正在加载 ffmpeg-core.js'
          // 开始加载
          await ffmpeg.load()
          this.msg = '开始压缩'
          // 把文件加到ffmpeg   写文件
          ffmpeg.FS('writeFile', name, await fetchFile(file))
          // await ffmpeg.run('-i', name, '-b', '2000000', '-fs', '4194304', '-preset medium', 'superfast', 'put.mp4')
          // 开始压缩视频
          await ffmpeg.run('-i', name, '-b', '2000000', '-crf', '23', '-fs', '4194304', '-s', resolution, 'put.mp4')
          this.msg = '压缩完成'
          // 压缩所完成,   读文件  压缩后的文件名称为 put.mp4
          const data = ffmpeg.FS('readFile', 'put.mp4')
          // 转换压缩后的视频格式  当前为 blob 格式
          var filed = _this.transToFile(data)
          console.log('transToFile: ', filed)
          return new Promise((resolve, reject) => {
              if (filed) {
                  resolve({
                      squzingFile: filed
                  })
              }
          })
      },
      // 获取视频的宽高分辨率
      getVideoData () {
          return new Promise((resolve, reject) => {
              const videoElement = document.getElementById('video')
              videoElement.addEventListener('loadedmetadata', function () {
                  resolve({
                      width: this.videoWidth,
                      height: this.videoHeight,
                      duration: this.duration
                  })
              })
          })
      },
      // 获取上传视频的url
      getObjectURL (file) {
          let url = null
          window.URL = window.URL || window.webkitURL
          if (window.URL) {
              url = window.URL.createObjectURL(file)
          } else {
              url = URL.createObjectURL(file)
          }
          return url
      },
      // 类型转换 blob 转换 file
      transToFile (data) {
          console.log(data)
          const _this = this
          var file = []
          // 转换bolb类型
          const blob = new Blob([data], { type: 'text/plain;charset=utf-8' })
          // 这么写是因为文件转换是异步任务
          const transToFile = async (blob, fileName, fileType) => {
              return new window.File([blob], fileName, { type: fileType })
          }
          const textContain = transToFile(blob, 'put.mp4', 'video/mp4')
          // 转换完成后可以将file对象传给接口
          textContain.then((res) => {
              file.push(res)
              console.log('res', res)
              // _this.confirm(file)
          })
          return file
      }
  }
}
</script>
过程中会出现错误ReferenceError: SharedArrayBuffer is not defined
记得再vite.config.js中配置·
server: {
    headers: {
      'Cross-Origin-Opener-Policy': 'same-origin',
      'Cross-Origin-Embedder-Policy': 'require-corp'
    },
如果用的是vue.config.js配置
  devServer: {
    headers: {
      // 如果需要用到ffmpeg合并视频,需要将COEP和COOP打开,来确保ShareArrayBuffer能够正常使用
      'Cross-Origin-Embedder-Policy': 'require-corp',
      'Cross-Origin-Opener-Policy': 'same-origin',
    }
  }
这样不出问题就可以直接运行


 850
850


 被折叠的 条评论
为什么被折叠?


