


一、功能
开发一个类似微信的主页面框架,UI布局为上中下结构,包含4个tab界面。
二、设计流程
1 、页面设计
微信的界面布局分为上中下三个部分。
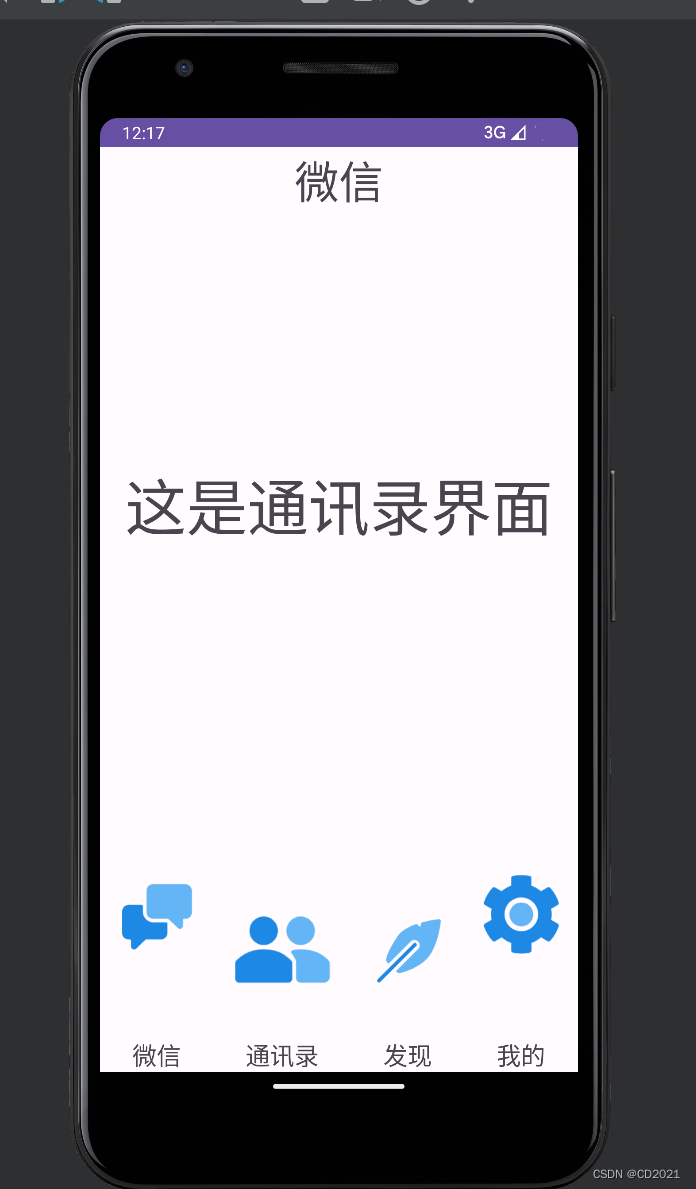
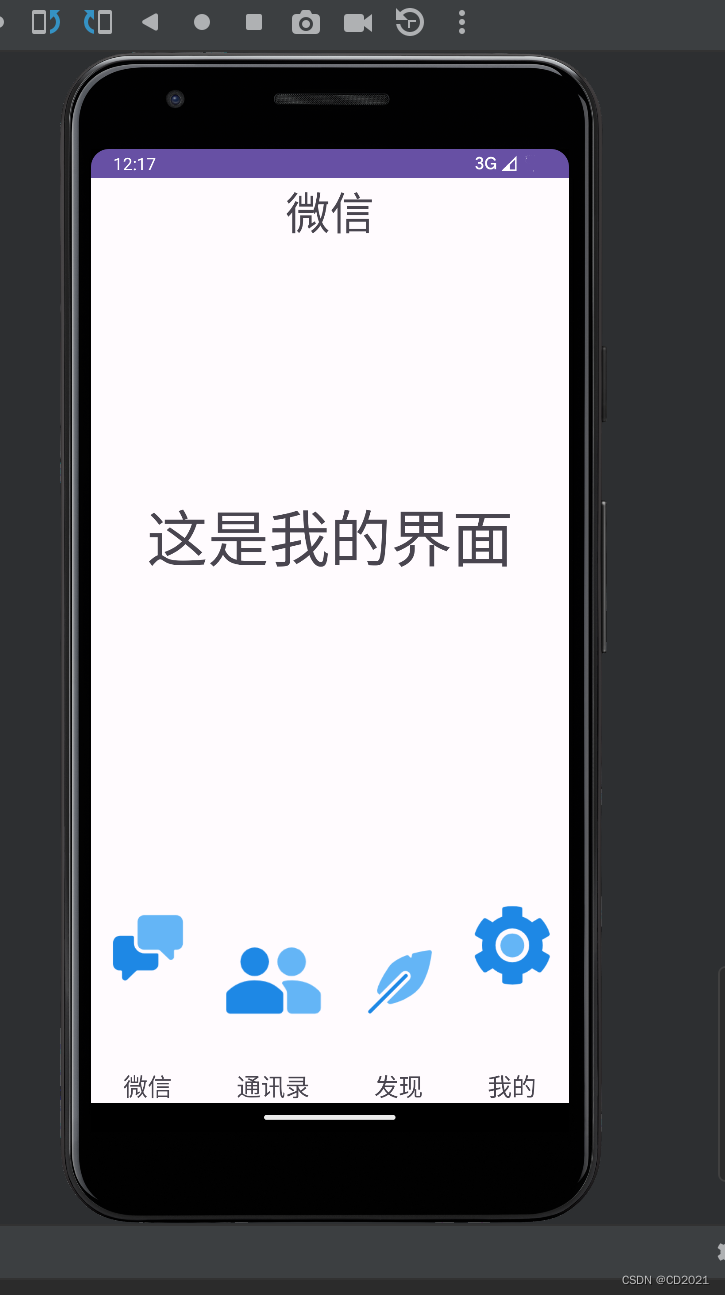
上面主要是显示界面的标题。中间主要是“微信”、“通讯录”、“发现”和“我的”四个板块的具体内容。下面是“微信”、“通讯录”、“发现”和“我的”四个板块的切换控件。
2、 功能设计
实现点击底部控件切换到对应的板块界面。
三、实现步骤和代码
1.UI界面
(1)页面上方建立一个头部标题命名微信,在layout文件夹中新建一个xml命名headlayout

进入代码页面修改xml的代码
<?xml version="1.0" encoding="utf-8"?>
<LinearLayout
xmlns:android="http://schemas.android.com/apk/res/android"
android:layout_width="match_parent"
android:layout_height="match_parent">
<TextView
android:id="@+id/textView"
android:layout_width="wrap_content"
android:layout_height="wrap_content"
android:layout_weight="1"
android:gravity="center"
android:text="微信"
android:textSize="100px" />
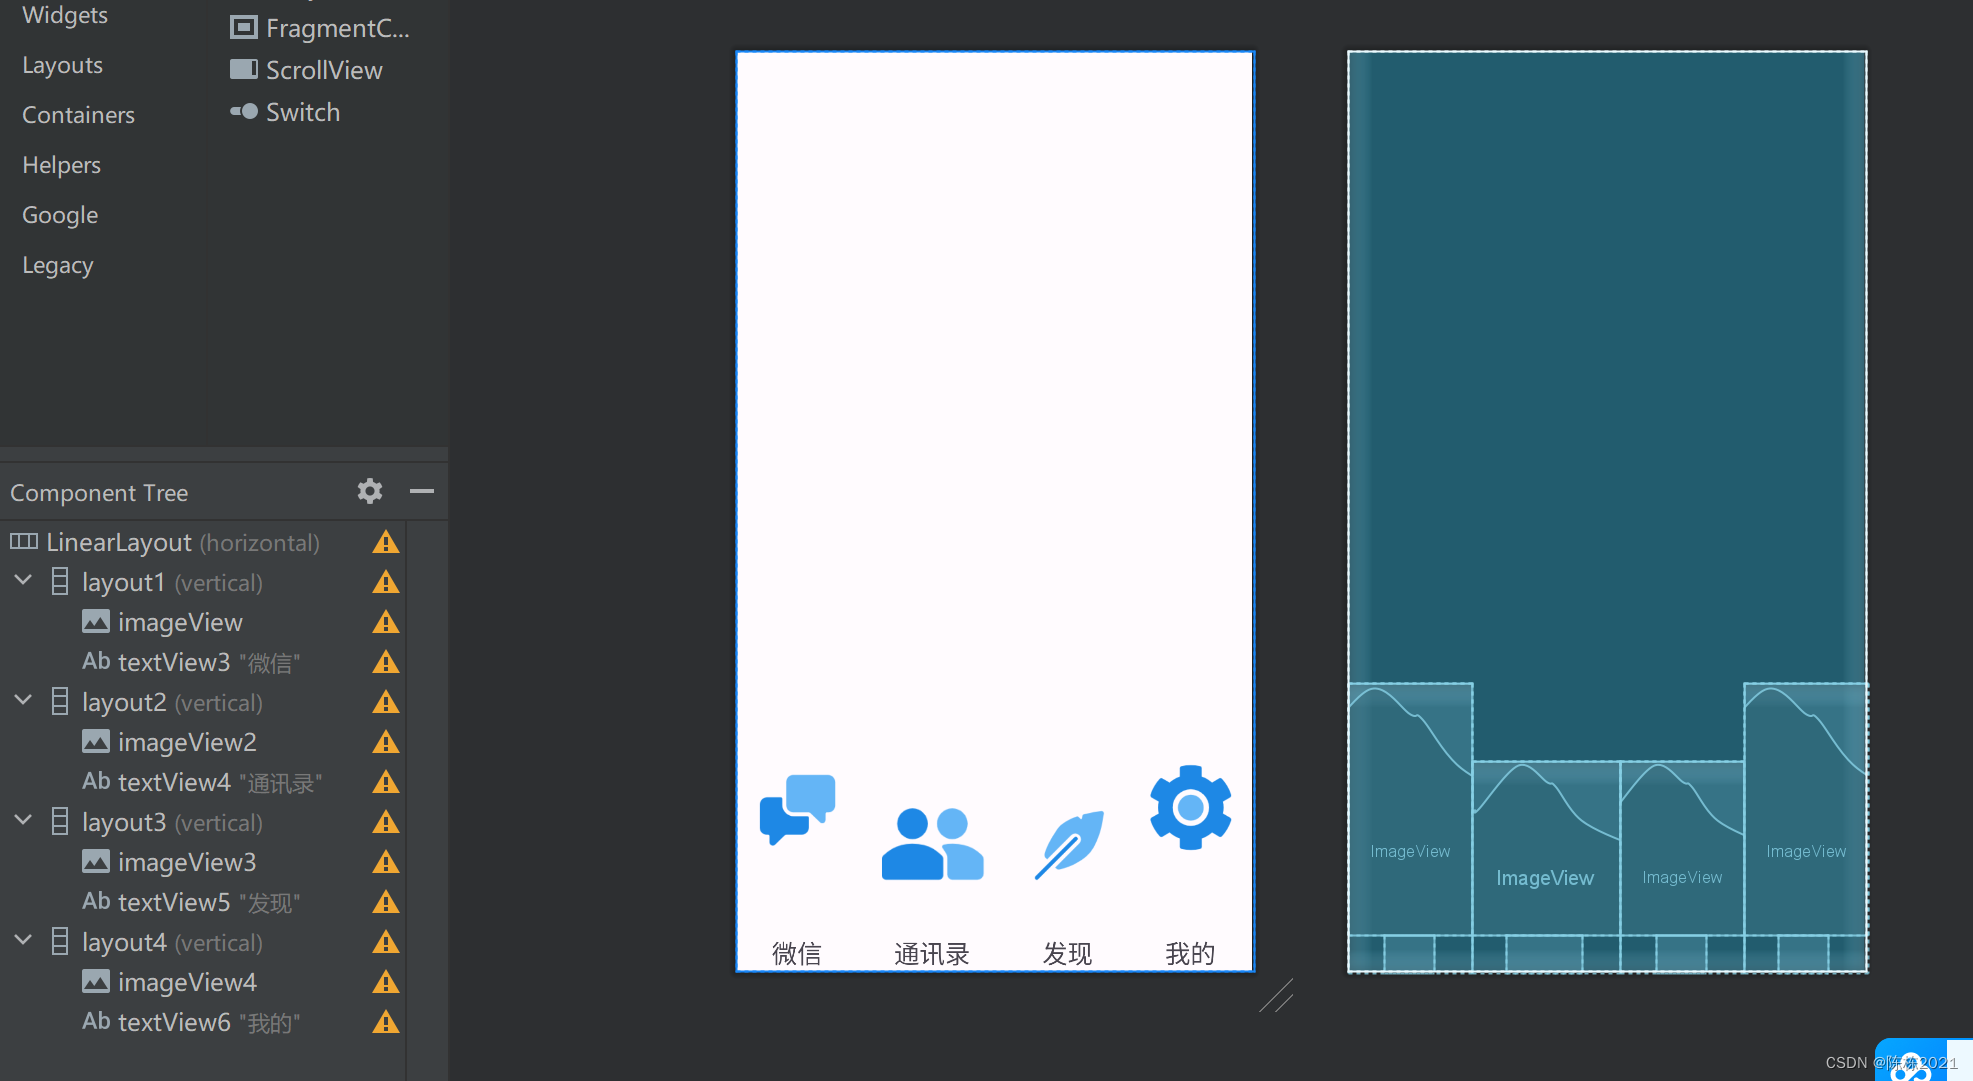
</LinearLayout>(2)在layout文件夹中新建一个xml命名dilayout,该页面有四个部件,
<LinearLayout xmlns:android="http://schemas.android.com/apk/res/android"
    xmlns:app="http://schemas.android.com/apk/res-auto"
    android:layout_width="match_parent"
    android:layout_height="match_parent"
    android:gravity="bottom">

    <LinearLayout android:id="@+id/layout1"
        android:layout_width="wrap_content"
        android:layout_height="wrap_content"
        android:layout_weight="1"
        android:onClick="onClick"
        android:orientation="vertical">

        <ImageView
            android:id="@+id/imageView"
            android:layout_width="match_parent"
            android:layout_height="wrap_content"
            android:src="@drawable/chat_pick" />

        <TextView android:id="@+id/textView3"
            android:layout_width="wrap_content"
            android:layout_height="wrap_content"
            android:layout_gravity="center"
            android:gravity="center"
            android:text="微信"
            android:textSize="20sp"/>
    </LinearLayout>
    <LinearLayout android:id="@+id/layout2"
        android:layout_width="wrap_content"
        android:layout_height="wrap_content"
        android:layout_weight="1"
        android:onClick="onClick"
        android:orientation="vertical">

        <ImageView
            android:id="@+id/imageView2"
            android:layout_width="match_parent"
            android:layout_height="138dp"
            android:src="@drawable/friends_pick" />

        <TextView
            android:id="@+id/textView4"
            android:layout_width="wrap_content"
            android:layout_height="wrap_content"
            android:layout_gravity="center"
            android:gravity="center"
            android:text="通讯录"
            android:textSize="20sp"/>

    </LinearLayout>
    <LinearLayout
        android:id="@+id/layout3"
        android:layout_width="wrap_content"
        android:layout_height="wrap_content"
        android:layout_weight="1"
        android:onClick="onClick"
        android:orientation="vertical">

        <ImageView
            android:id="@+id/imageView3"
            android:layout_width="match_parent"
            android:layout_height="138dp"
            android:src="@drawable/comm_pick" />

        <TextView android:id="@+id/textView5"
            android:layout_width="wrap_content"
            android:layout_height="wrap_content"
            android:layout_gravity="center"
            android:gravity="center"
            android:text="发现"
            android:textSize="20sp"/>
    </LinearLayout>
    <LinearLayout
        android:id="@+id/layout4"
        android:layout_width="wrap_content"
        android:layout_height="wrap_content"
        android:layout_weight="1"
        android:onClick="onClick"
        android:orientation="vertical">

        <ImageView
            android:id="@+id/imageView4"
            android:layout_width="match_parent"
            android:layout_height="wrap_content"
            android:src="@drawable/setting_pick" />

        <TextView
            android:id="@+id/textView6"
            android:layout_width="wrap_content"
            android:layout_height="wrap_content"
            android:layout_gravity="center"
            android:gravity="center"
            android:text="我的"
            android:textSize="20sp"/>
    </LinearLayout>
</LinearLayout>
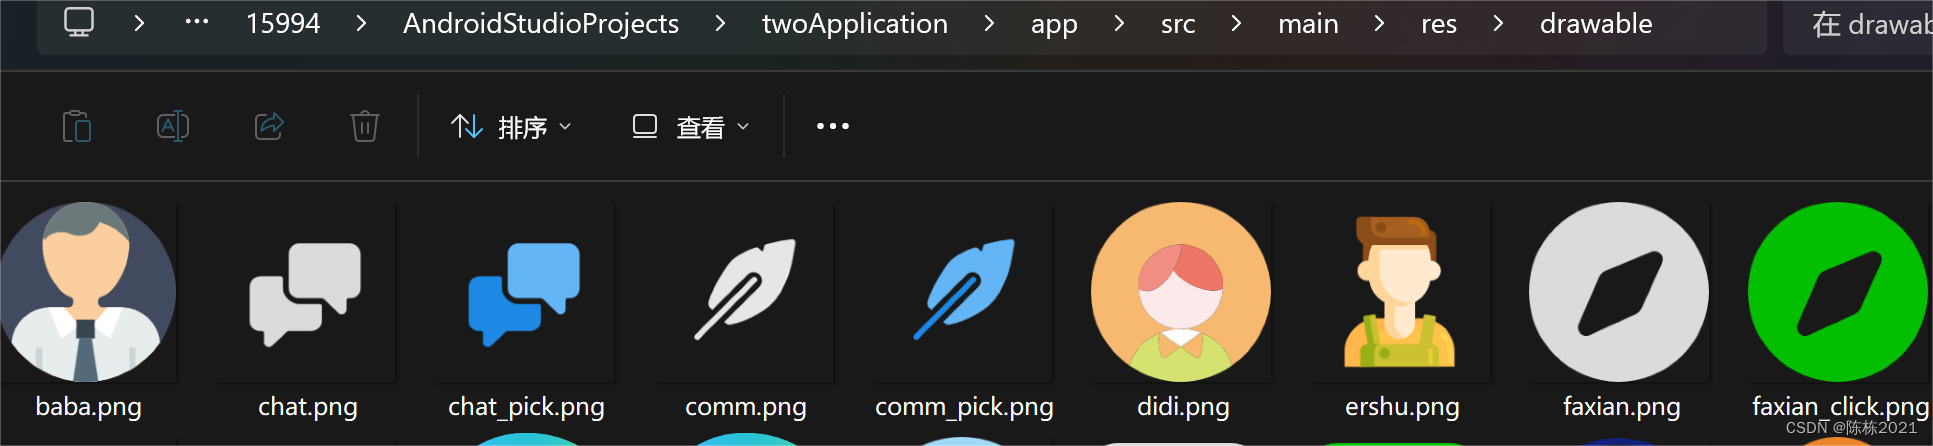
其中使用的图片在我源文件的drawable文件夹中,需拷贝使用。
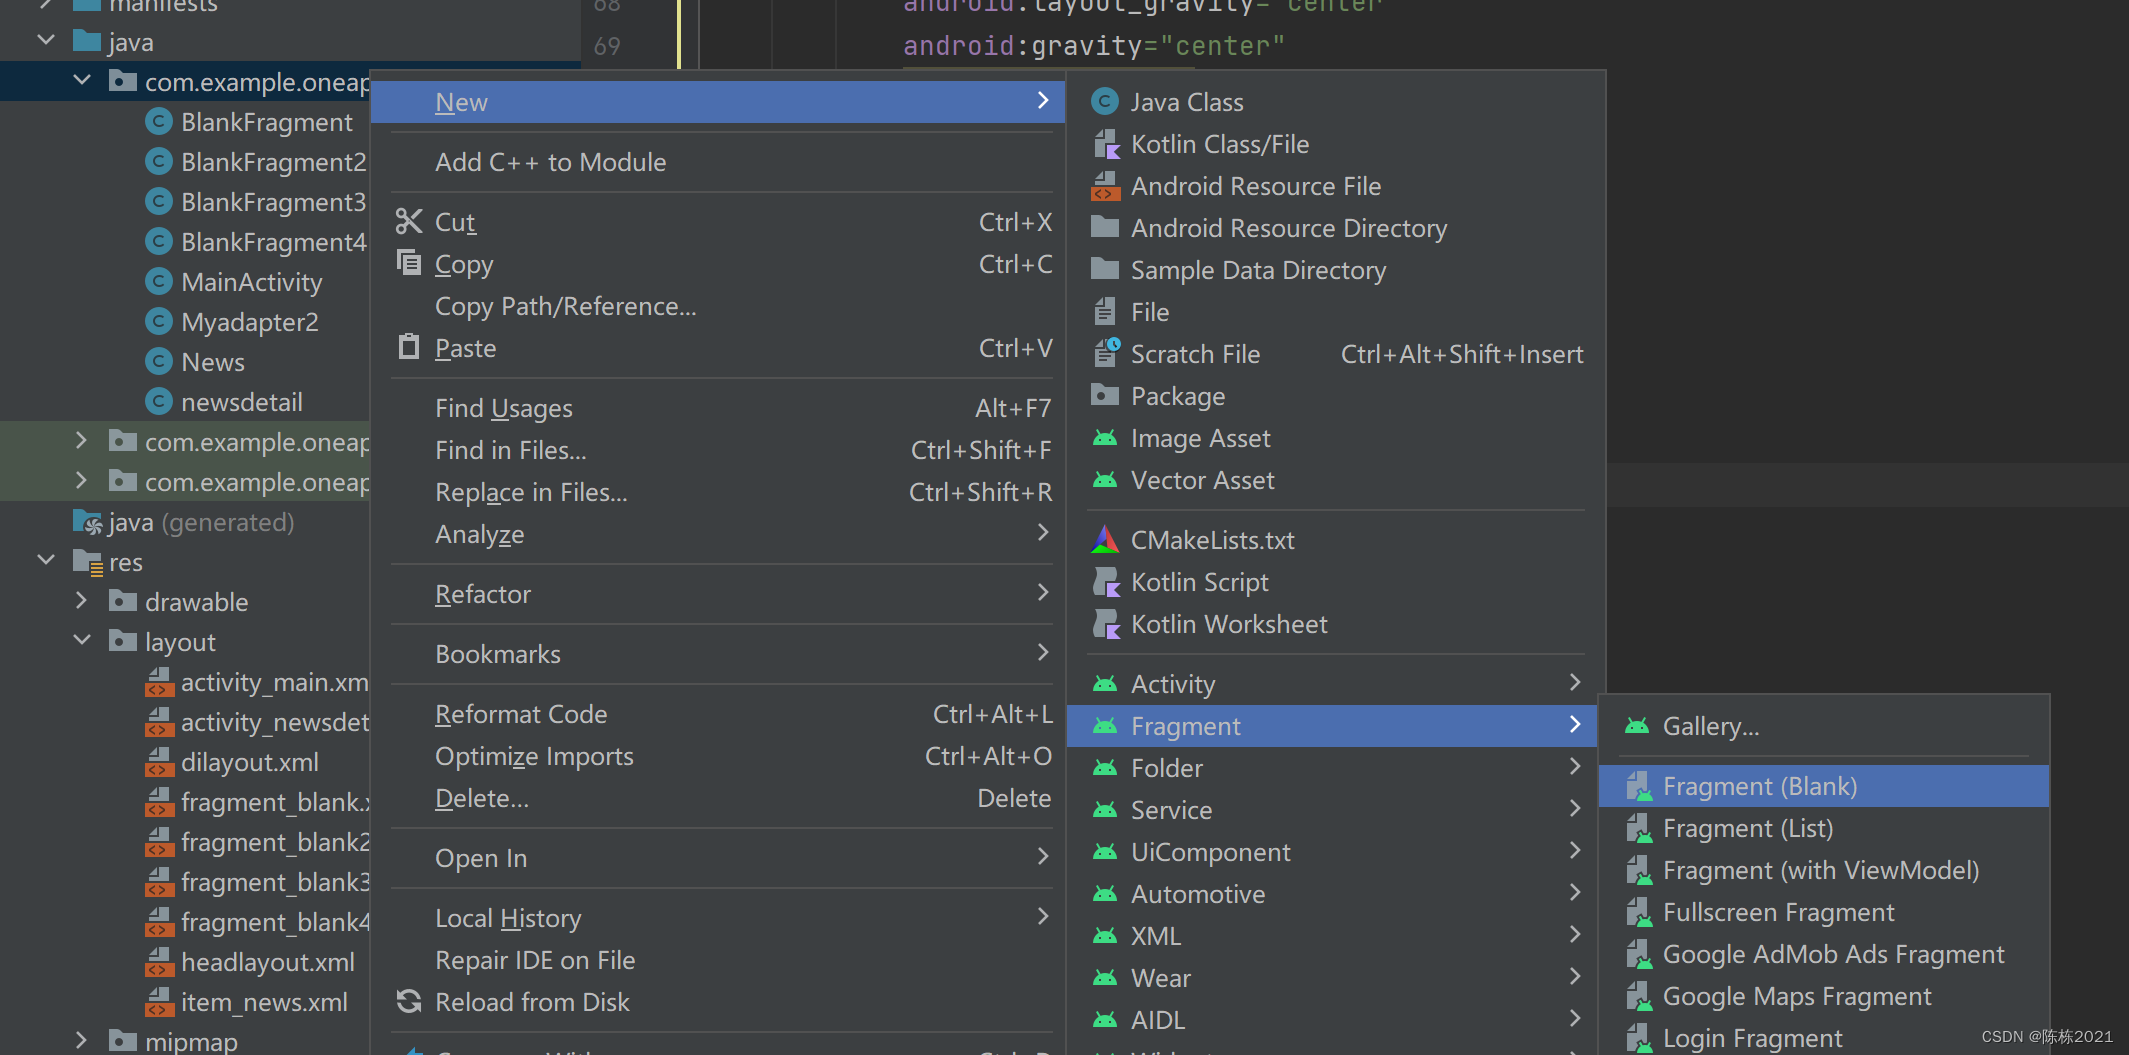
(3)在jiva文件夹下建立4个java源代码文件,名字为BlankFragment(2,3,4),之后layout中会自动生成四个xml。
四个页面代码几乎相同,第一个为
<?xml version="1.0" encoding="utf-8"?>
<FrameLayout xmlns:android="http://schemas.android.com/apk/res/android"
    xmlns:tools="http://schemas.android.com/tools"
    android:layout_width="match_parent"
    android:layout_height="match_parent"
    tools:context=".BlankFragment">

    <TextView
        android:id="@+id/content1"
        android:layout_width="match_parent"
        android:layout_height="match_parent"
        android:layout_weight="1"
        android:gravity="center"
        android:text="这是消息界面"
        android:textSize="50sp" />

</FrameLayout>
(4)在acyinity_main.xml中进行整合
<?xml version="1.0" encoding="utf-8"?>
<LinearLayout xmlns:android="http://schemas.android.com/apk/res/android"
    android:layout_width="match_parent"
    android:layout_height="match_parent"
    android:orientation="vertical">

    <include
        layout="@layout/headlayout"
        android:layout_width="match_parent"
        android:layout_height="wrap_content"
        android:layout_weight="1" />

    <FrameLayout
        android:id="@+id/content"
        android:layout_width="match_parent"
        android:layout_height="0dp"
        android:layout_weight="200" />

    <include
        layout="@layout/dilayout"
        android:layout_width="match_parent"
        android:layout_height="wrap_content" />

</LinearLayout>
2、在四个界面进行跳转,MainActivity中
package com.example.oneapplication;
import androidx.appcompat.app.AppCompatActivity;
import androidx.fragment.app.Fragment;
import androidx.fragment.app.FragmentManager;
import android.os.Bundle;
import android.view.View;
import android.widget.LinearLayout;
public class MainActivity extends AppCompatActivity implements View.OnClickListener {
int transaction;
Fragment fragment1, fragment2, fragment3, fragment4;
LinearLayout linearLayout1, linearLayout2, linearLayout3, linearLayout4;
FragmentManager manager;
@Override
protected void onCreate(Bundle savedInstanceState) {
super.onCreate(savedInstanceState);
setContentView(R.layout.activity_main);
linearLayout1 = findViewById(R.id.layout1);
linearLayout2 = findViewById(R.id.layout2);
linearLayout3 = findViewById(R.id.layout3);
linearLayout4 = findViewById(R.id.layout4); //创建linearLayout对象
manager = getSupportFragmentManager();
fragment1 = new BlankFragment();
fragment2 = new BlankFragment2();
fragment3 = new BlankFragment3();
fragment4 = new BlankFragment4(); //创建Fragment对象
initial();//初始化
fragmentHide();//隐藏页面
showfragment(fragment1);//展示页面
linearLayout1.setOnClickListener(this);
linearLayout2.setOnClickListener(this);
linearLayout3.setOnClickListener(this);
linearLayout4.setOnClickListener(this);
}
public void onClick(View view) {
fragmentHide();
if (view.getId() == R.id.layout1) {
showfragment(fragment1);
} else if (view.getId() == R.id.layout2) {
showfragment(fragment2);
} else if (view.getId() == R.id.layout3) {
showfragment(fragment3);
} else if (view.getId() == R.id.layout4) {
showfragment(fragment4);
}
}
public void initial() {
transaction = manager.beginTransaction()
.add(R.id.content, fragment1)
.add(R.id.content, fragment2)
.add(R.id.content, fragment3)
.add(R.id.content, fragment4)
.commit();
}
private void showfragment(Fragment fragment) {
transaction = manager.beginTransaction()
.show(fragment)
.commit();
}
public void fragmentHide() {
transaction = manager.beginTransaction()
.hide(fragment1)
.hide(fragment2)
.hide(fragment3)
.hide(fragment4)
.commit();
}
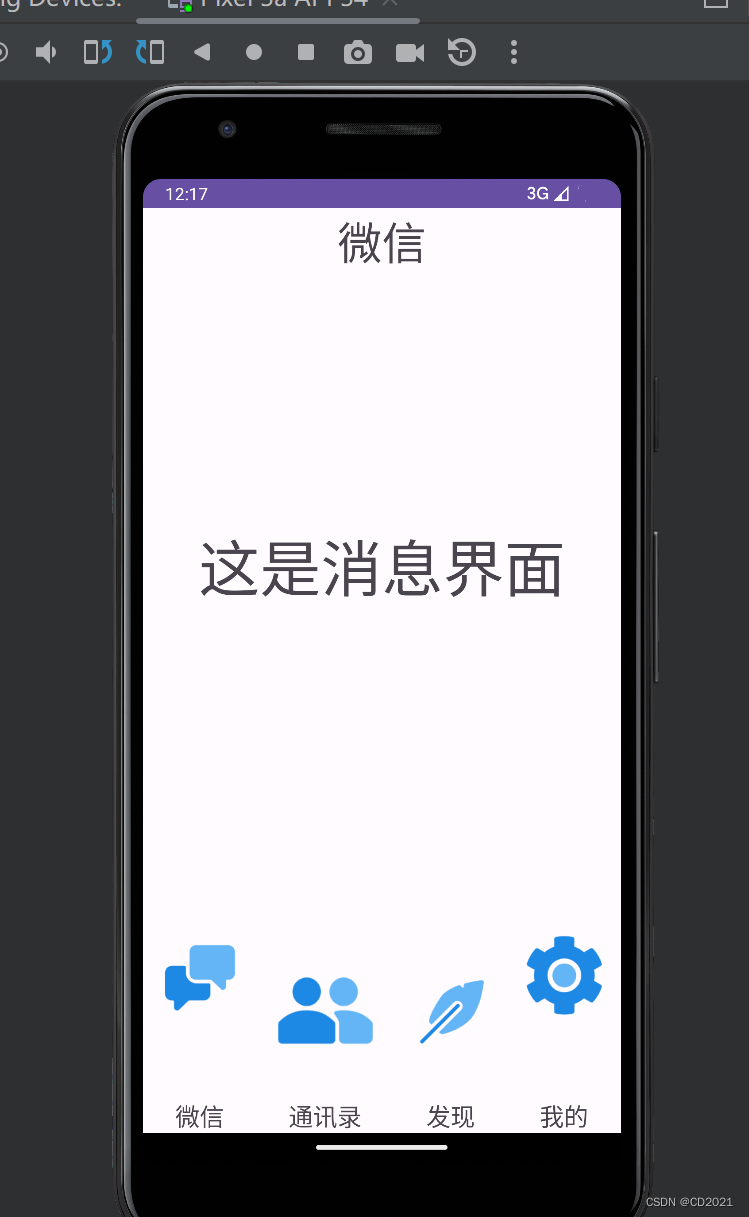
}四、结果展示
五、源码链接


 5200
5200


 被折叠的 条评论
为什么被折叠?
被折叠的 条评论
为什么被折叠?
 到【灌水乐园】发言


