


文章目录
一、学习要点
- 界面与布局
- 线性布局属性
- 案例解析
概述
- 线性布局(LinearLayout)是一种比较常用且简单的布局方式。在这种布局中,所有的子元素都是按照垂直或水平的顺序排列在界面上。如果是垂直排列,每个子元素占一行,如果是水平排列,则每个子元素占一列。线性布局可以支持布局样式嵌套实现复杂的布局样式
二、案例演示–线性布局属性
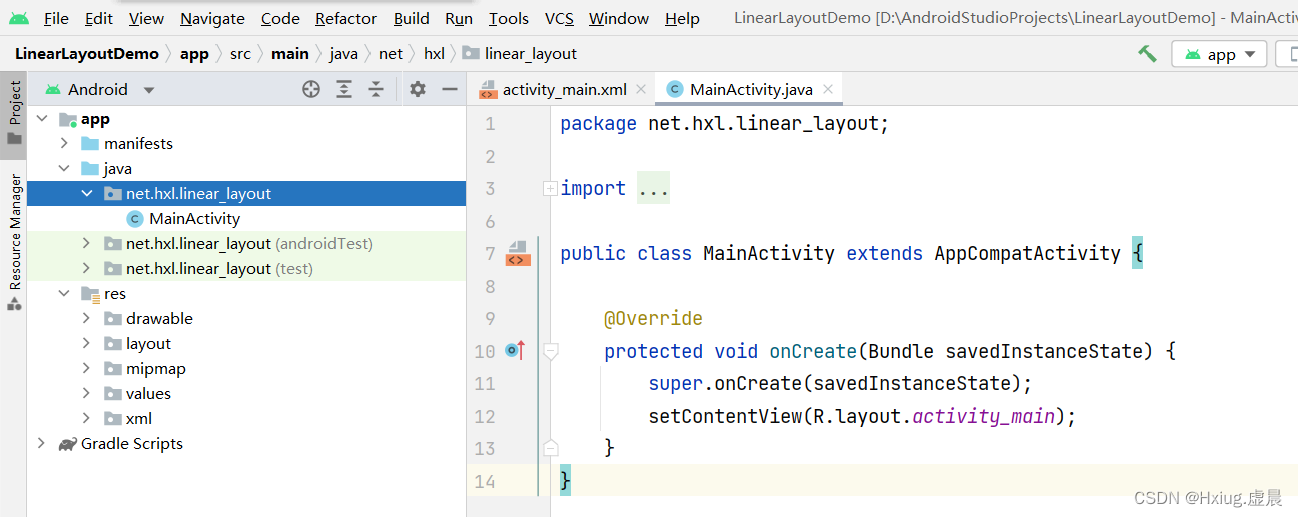
1、创建安卓应用
- 基于
Empty Activity模板创建–LinearLayoutDemo
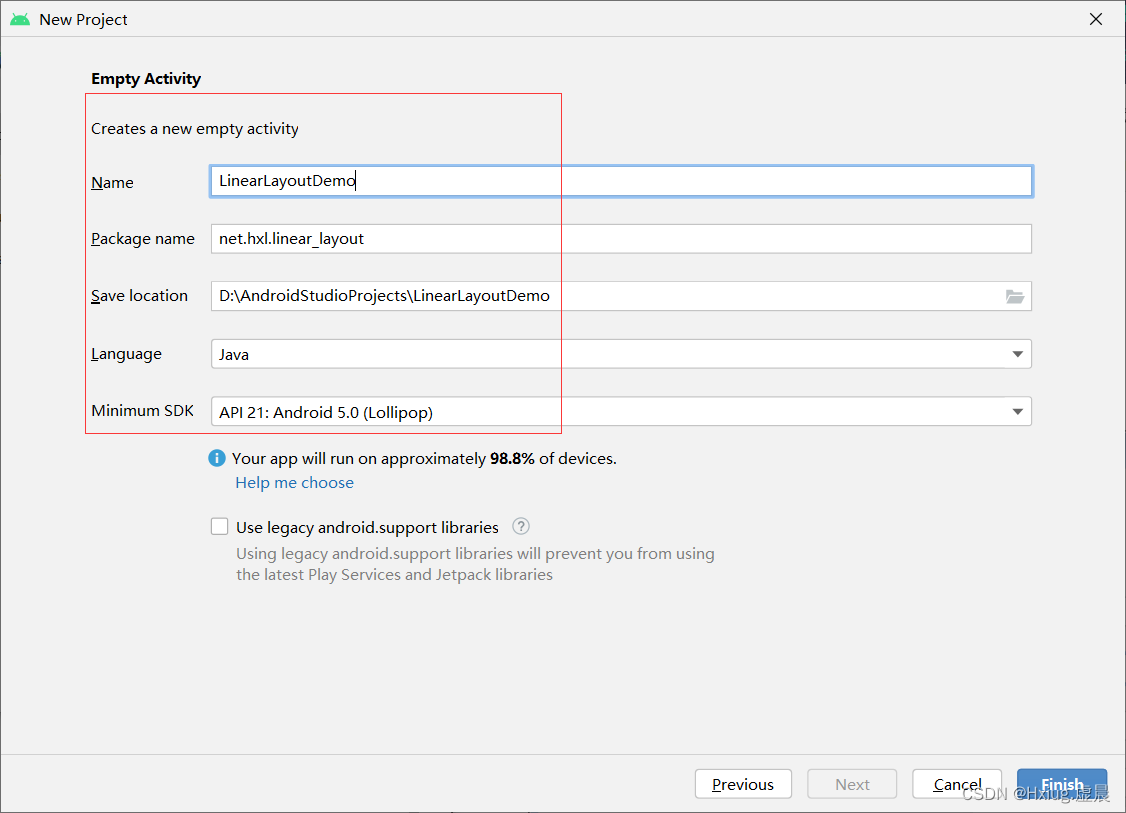
- 点击【Finis】
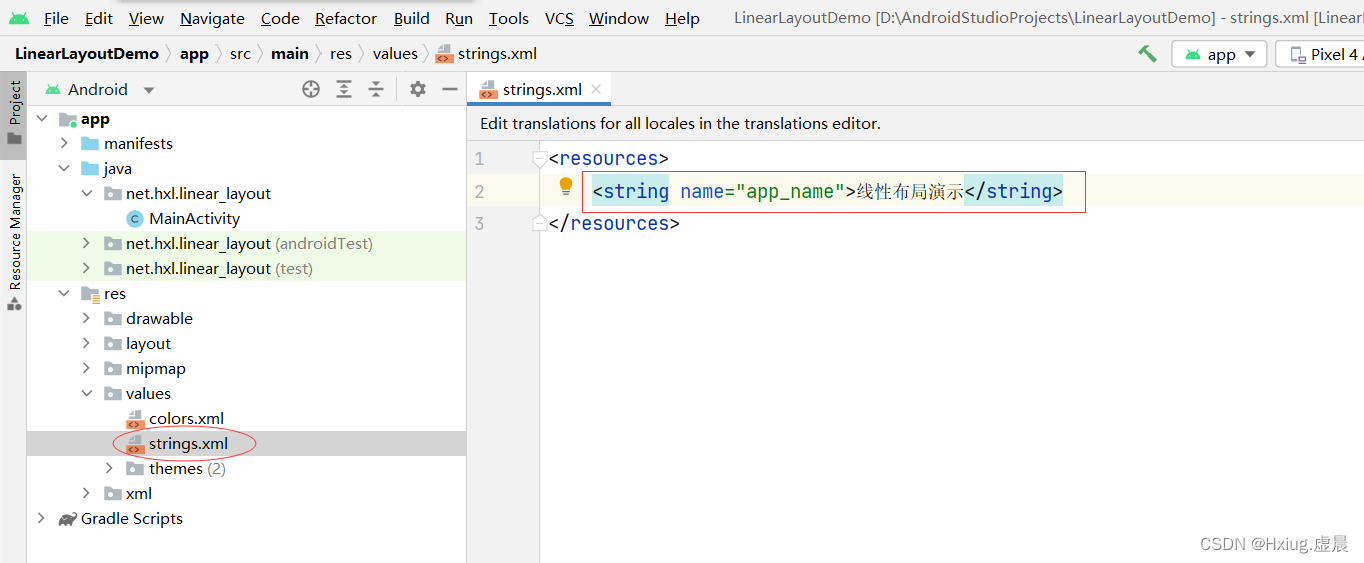
2、字符串资源文件
strings.xml
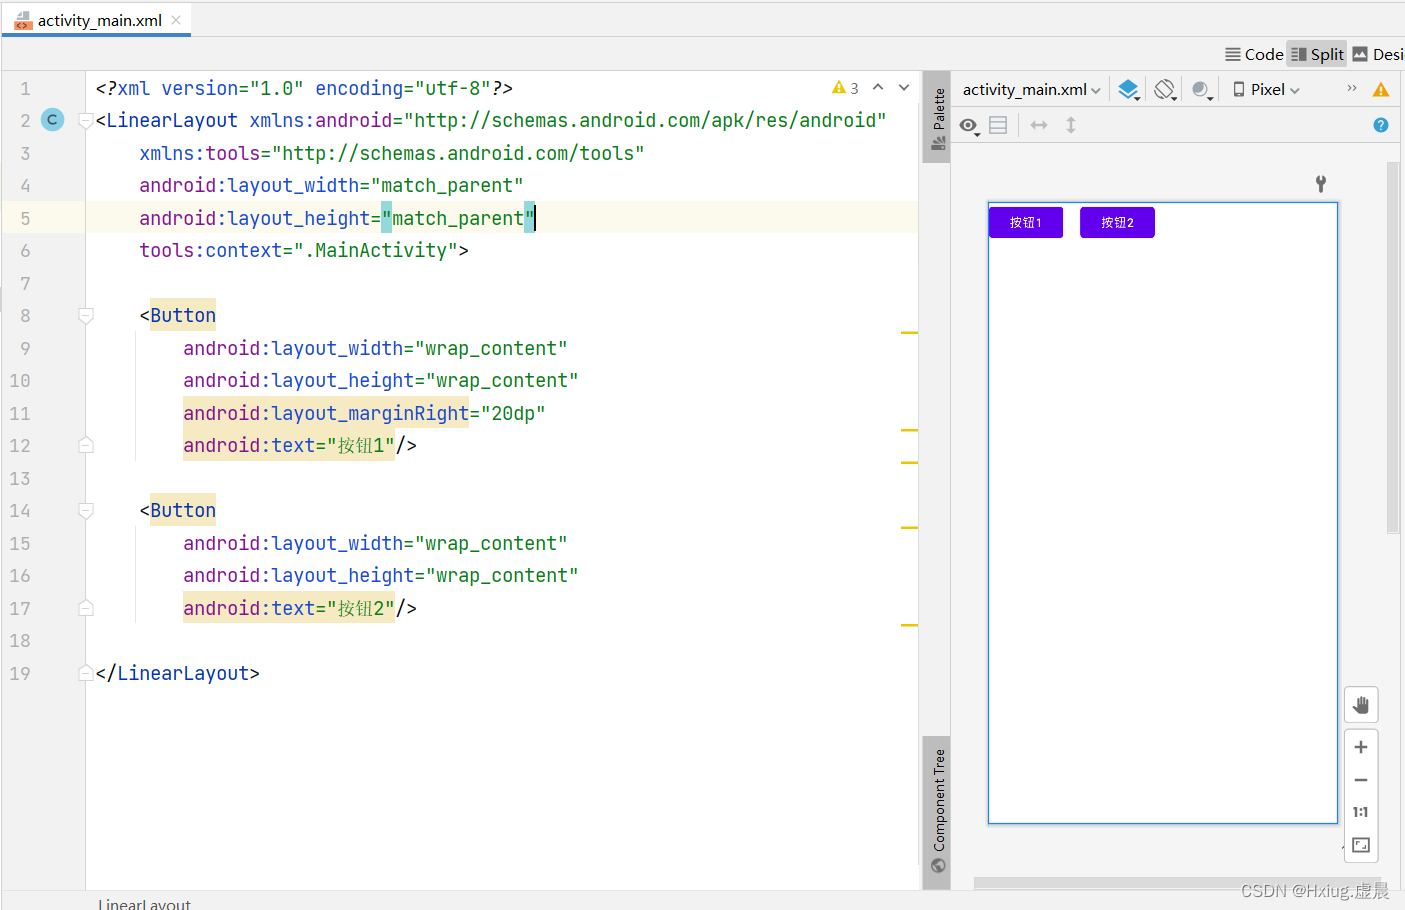
3、主布局资源文件
-
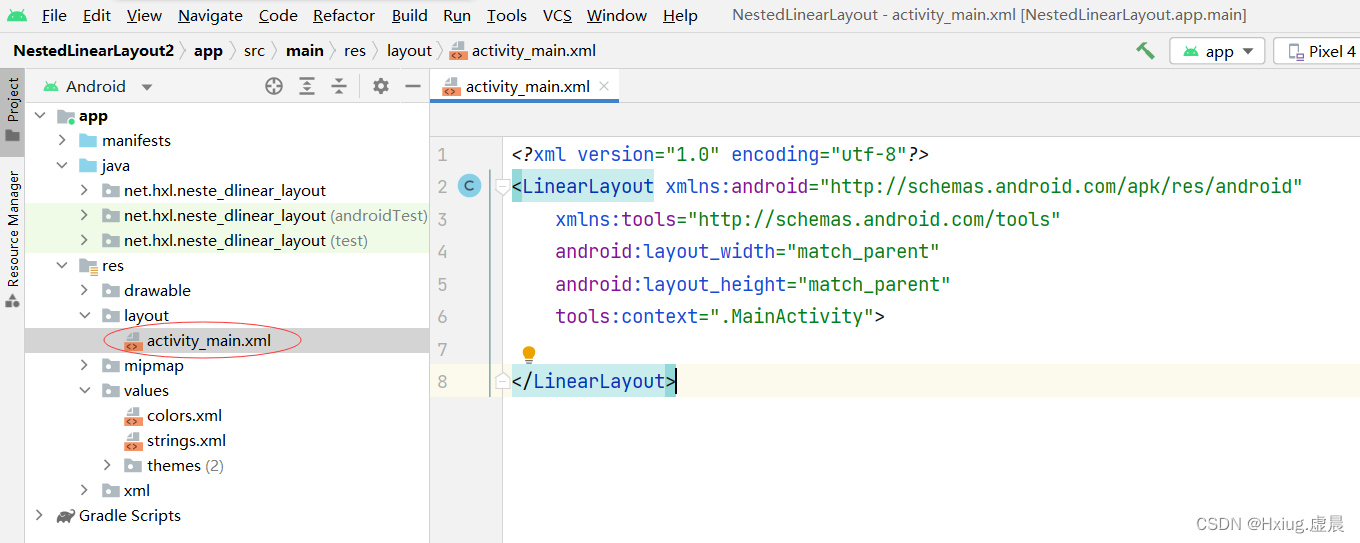
activity_main.xml -
删除多余标签,把约束布局改为线性布局

-
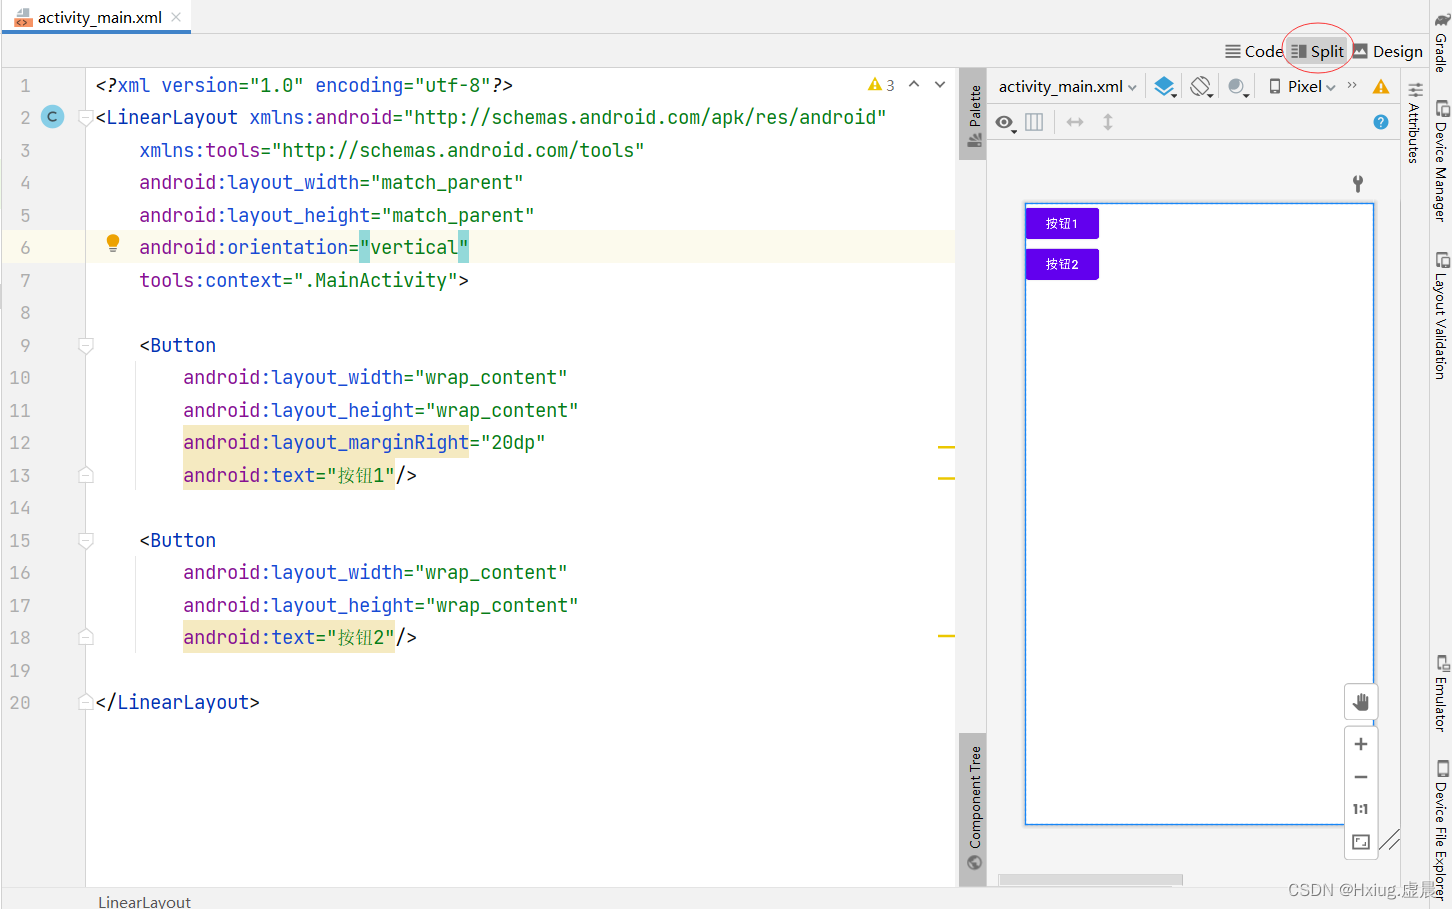
增加两个按钮

-
此时会发现两个按钮水平摆放,在窗口左上角
4、设置布局属性
(1)方向
orientation属性- 打开 Spli 视图可以随时查看其效果
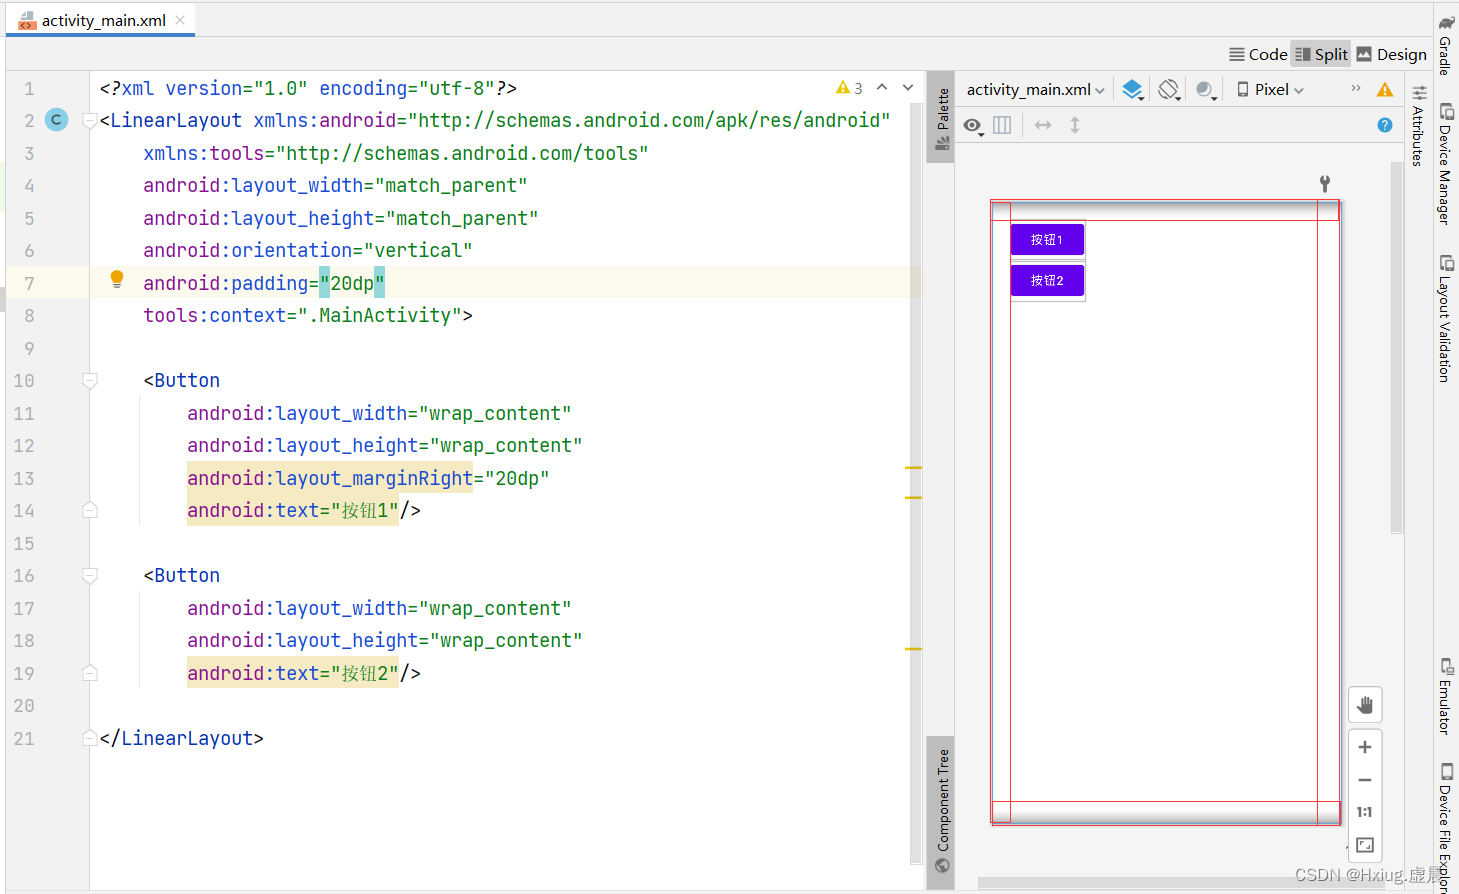
(2)内边距
padding属性
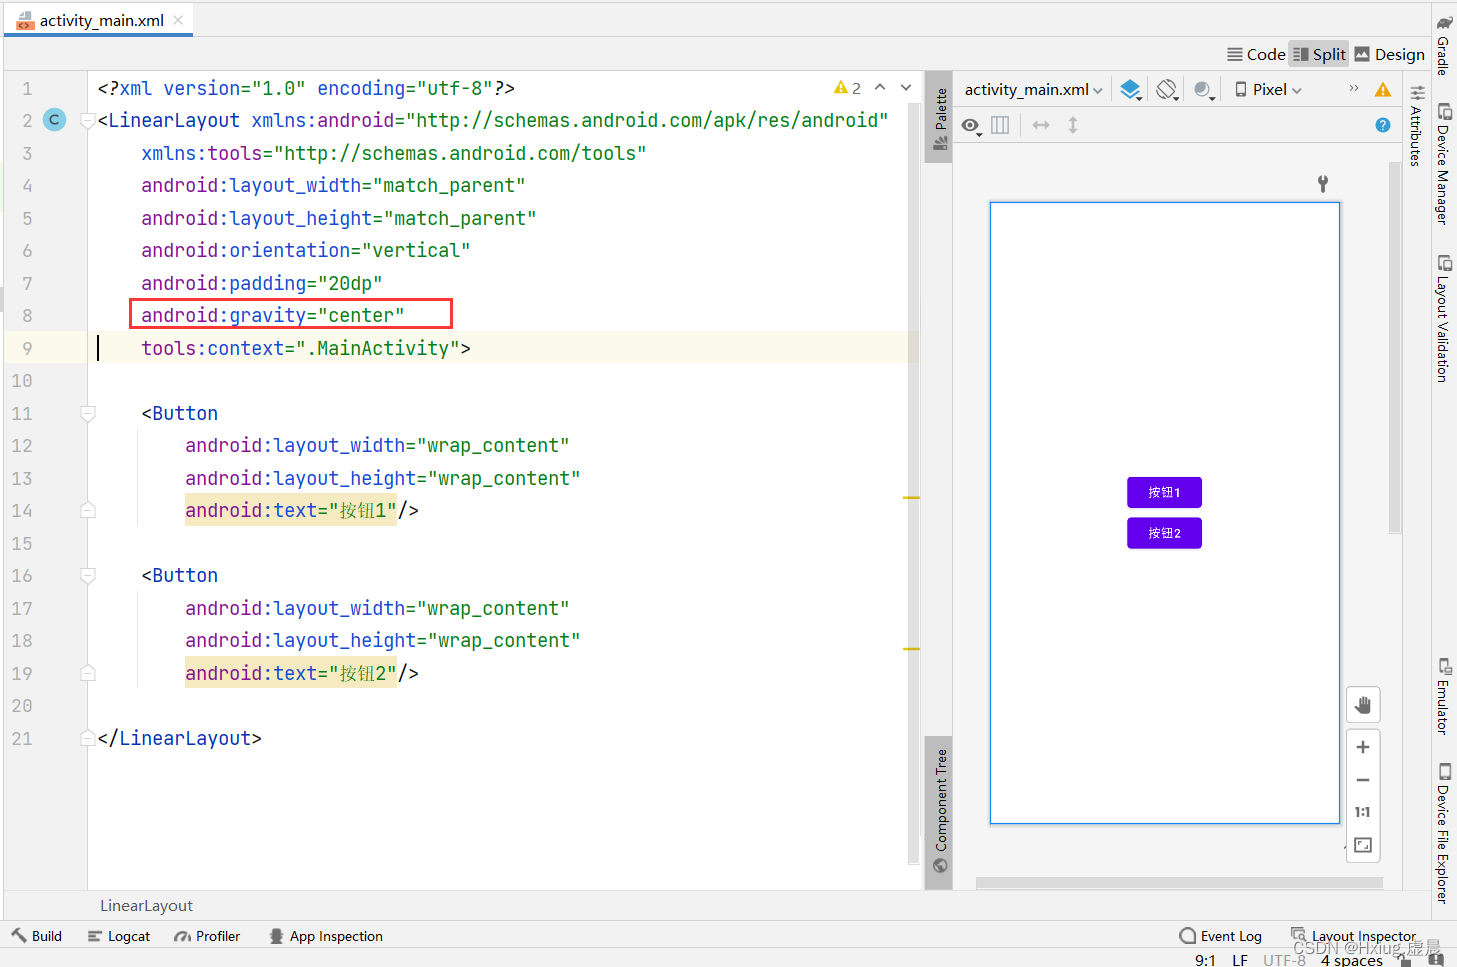
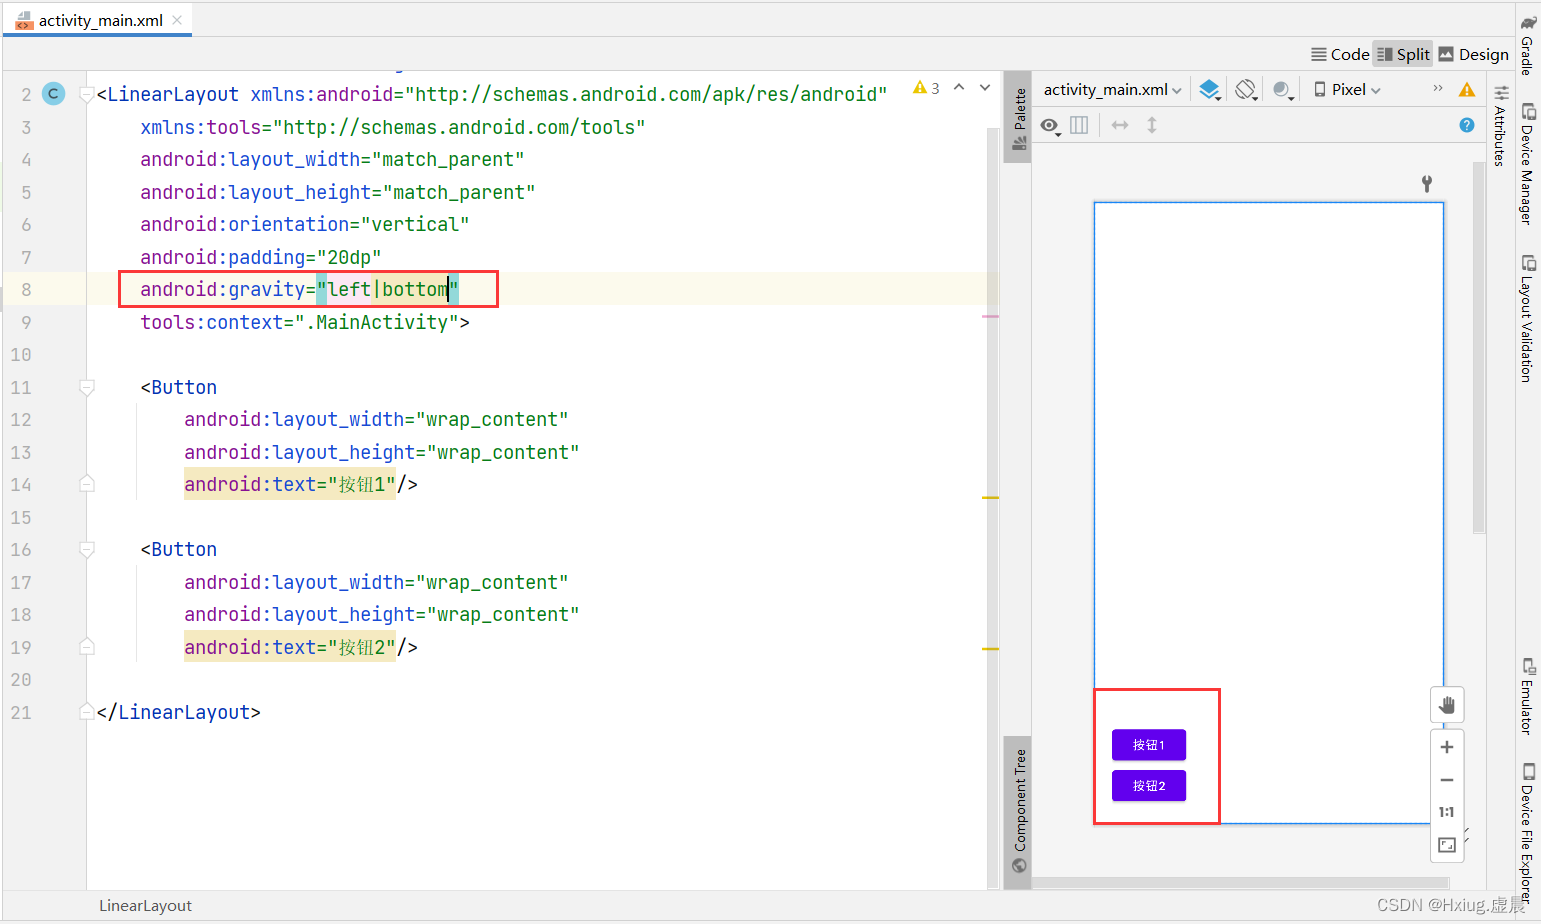
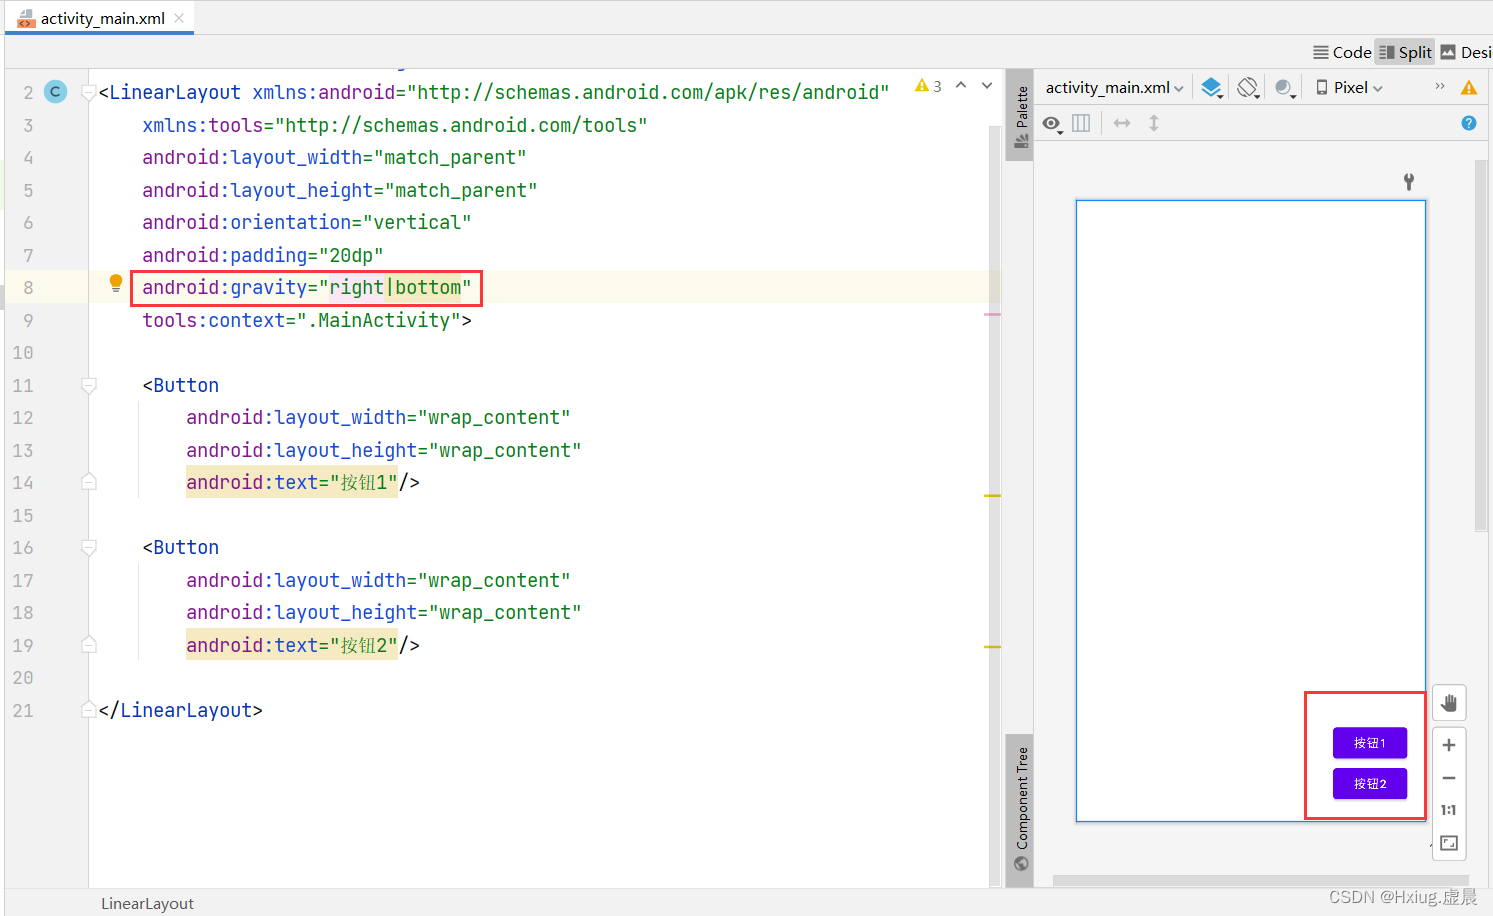
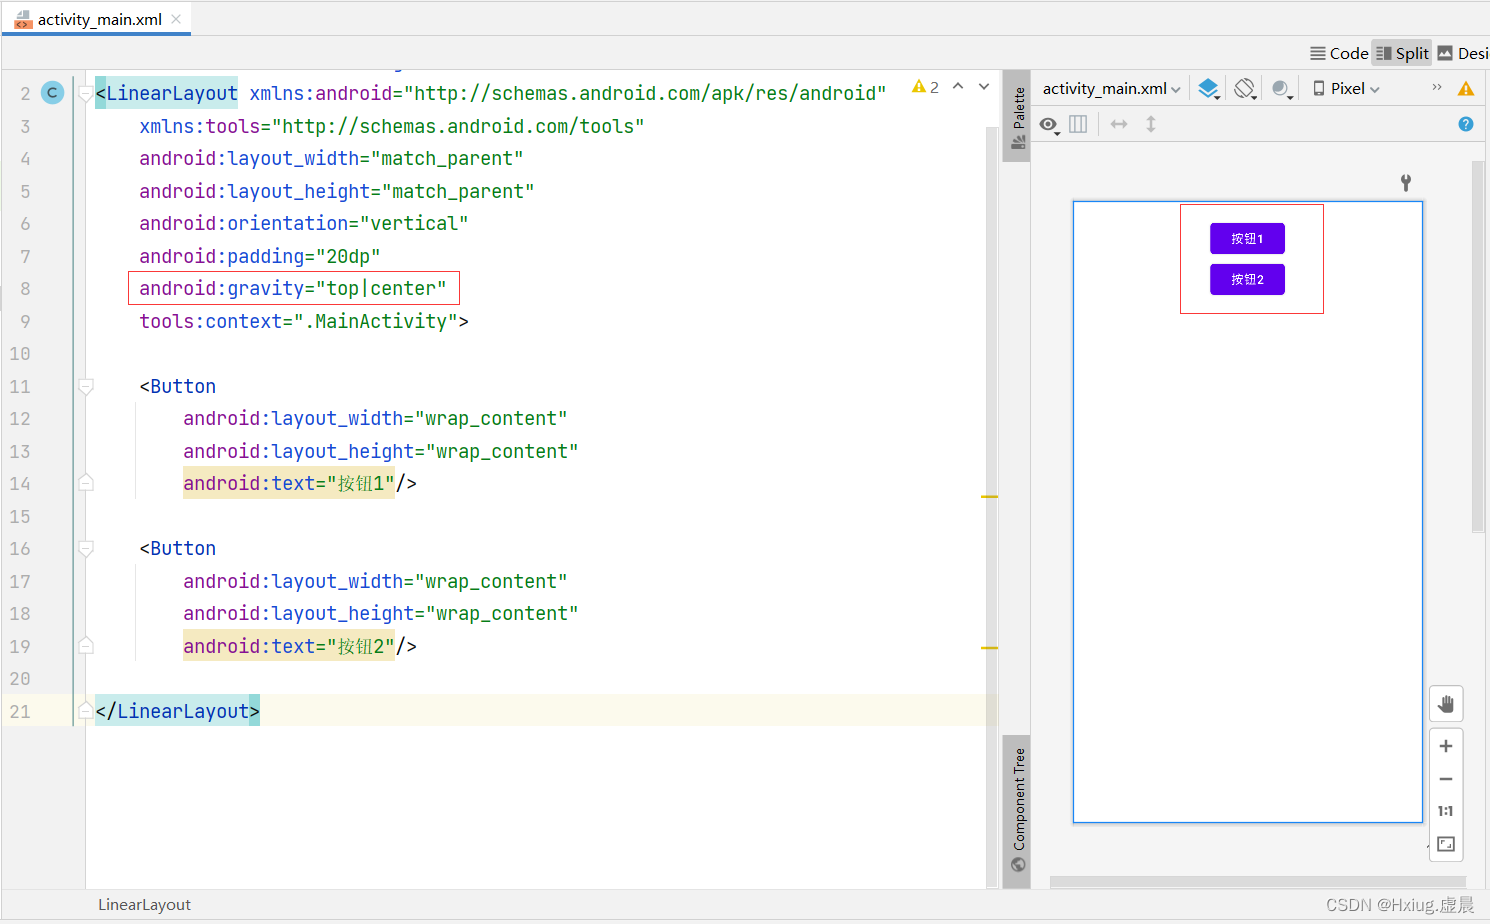
(3)对齐方式
gravity(left、center、right、top、bottom)- 组合应用如:设置右上对齐 -
right|top
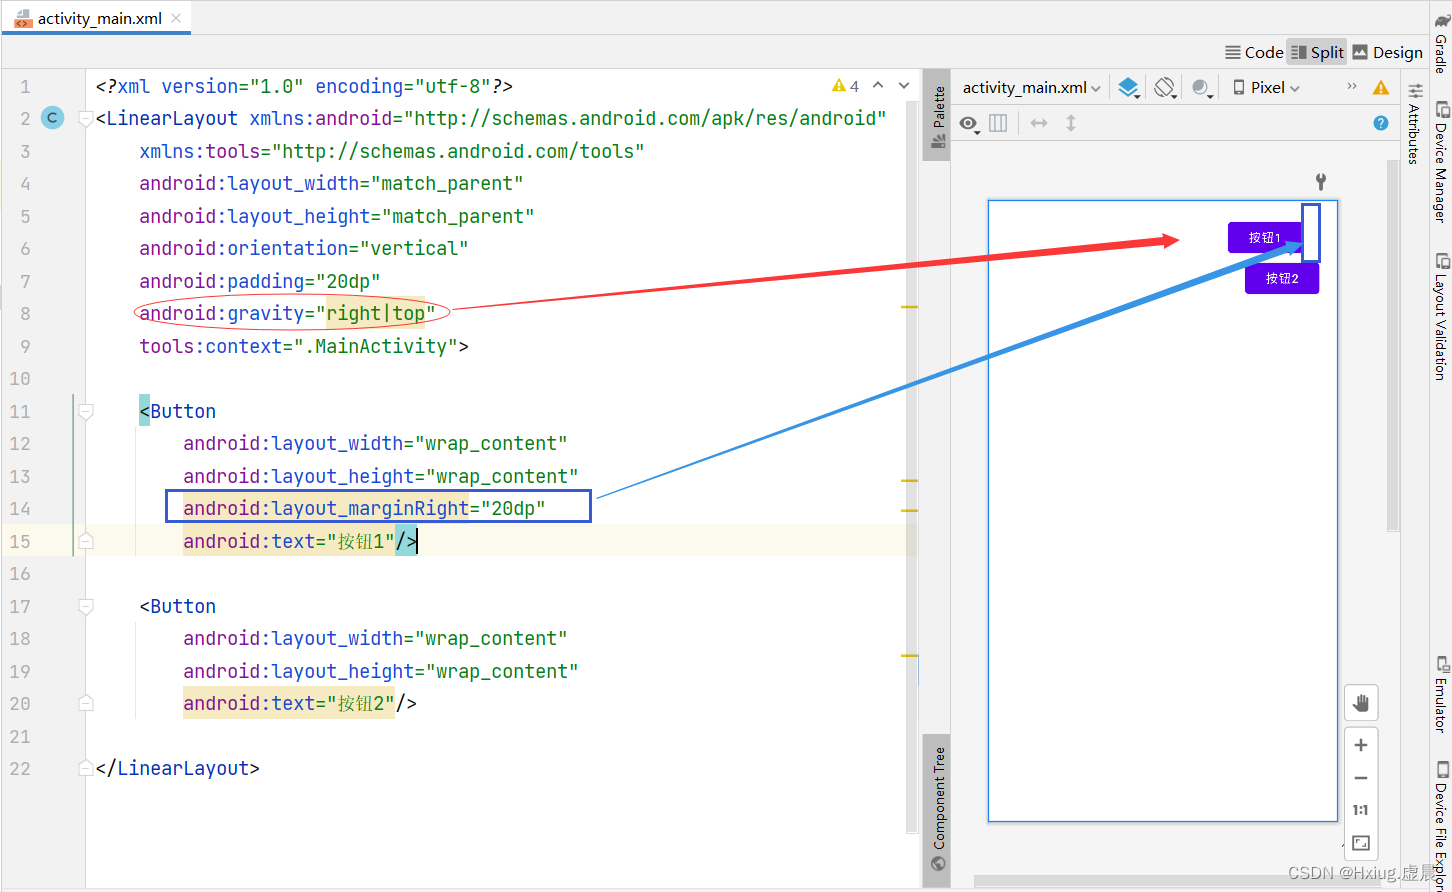
- 删掉 按钮1 的右外边距
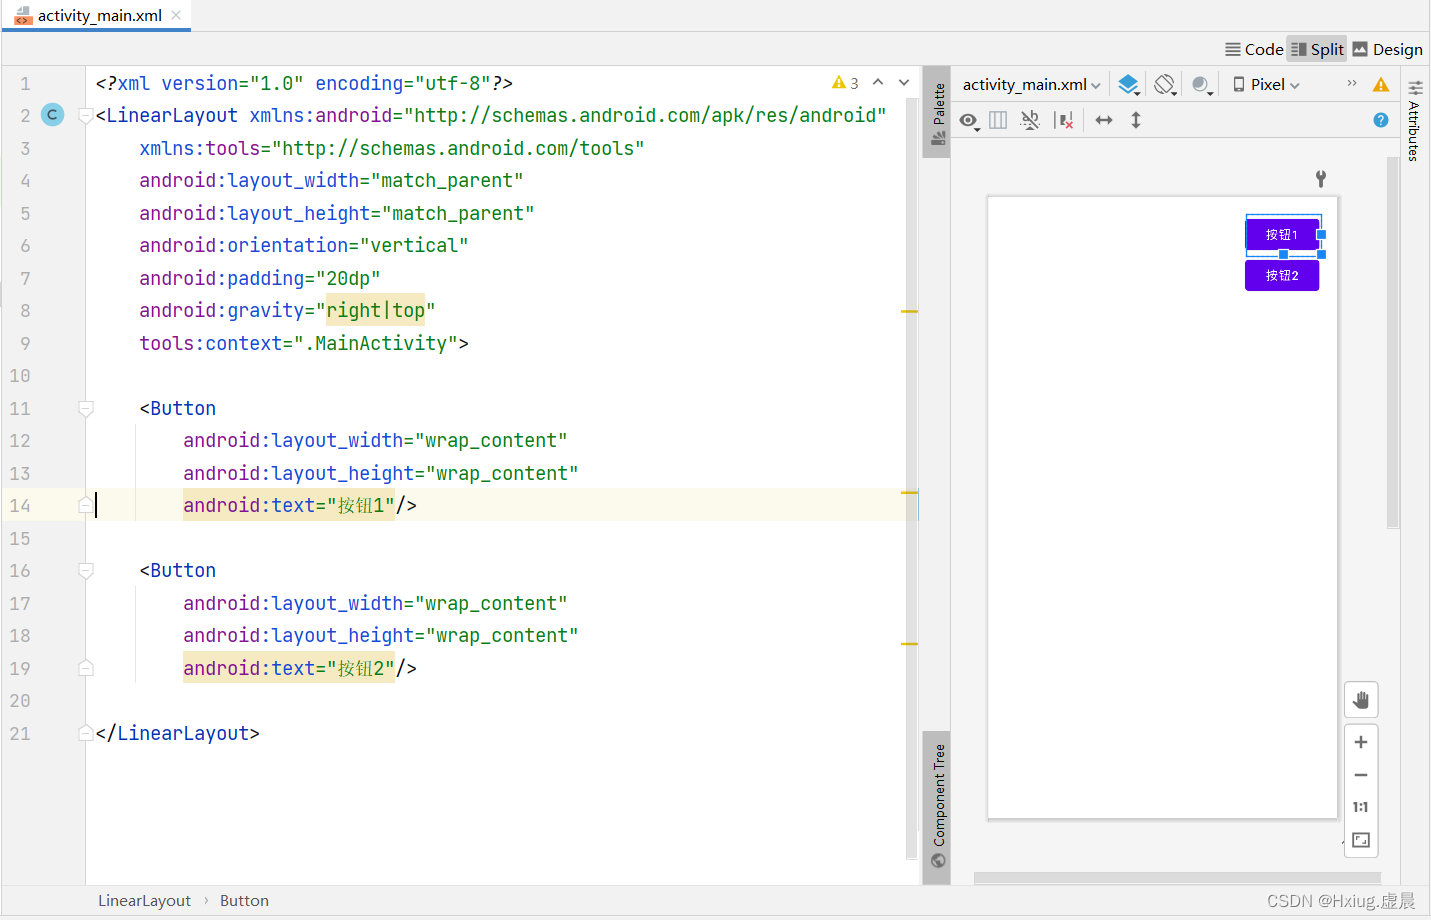
- 居中对齐
center
- 左下角对齐-
left|bottom
- 右下角对齐—
right|bottom
- 顶部居中对齐-
center|top或者top|center
- 等等……
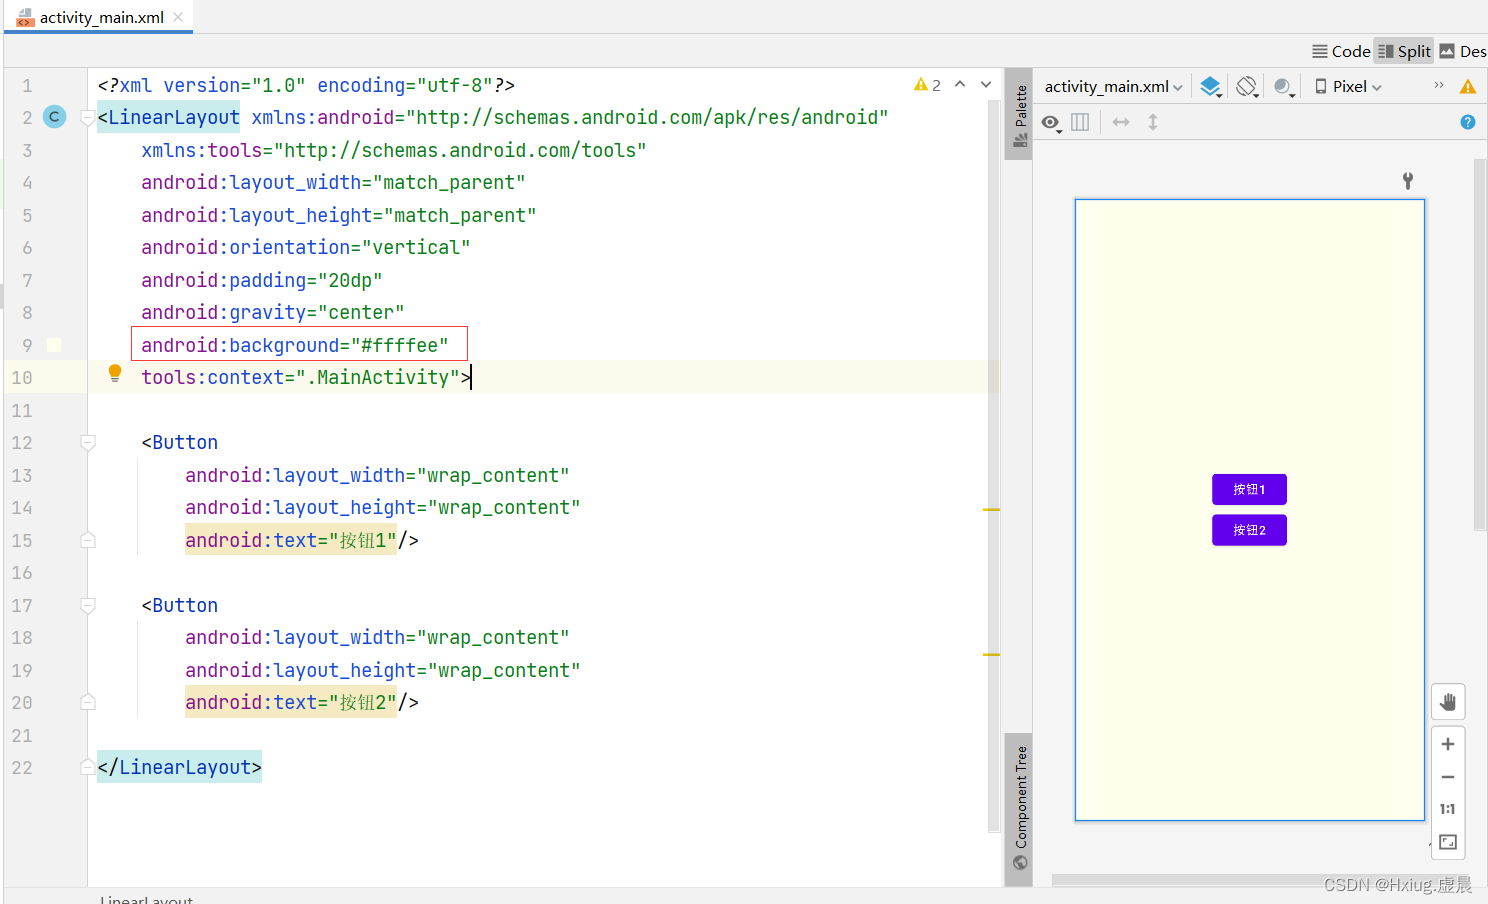
(4)背景设置
-
采用颜色常量
-
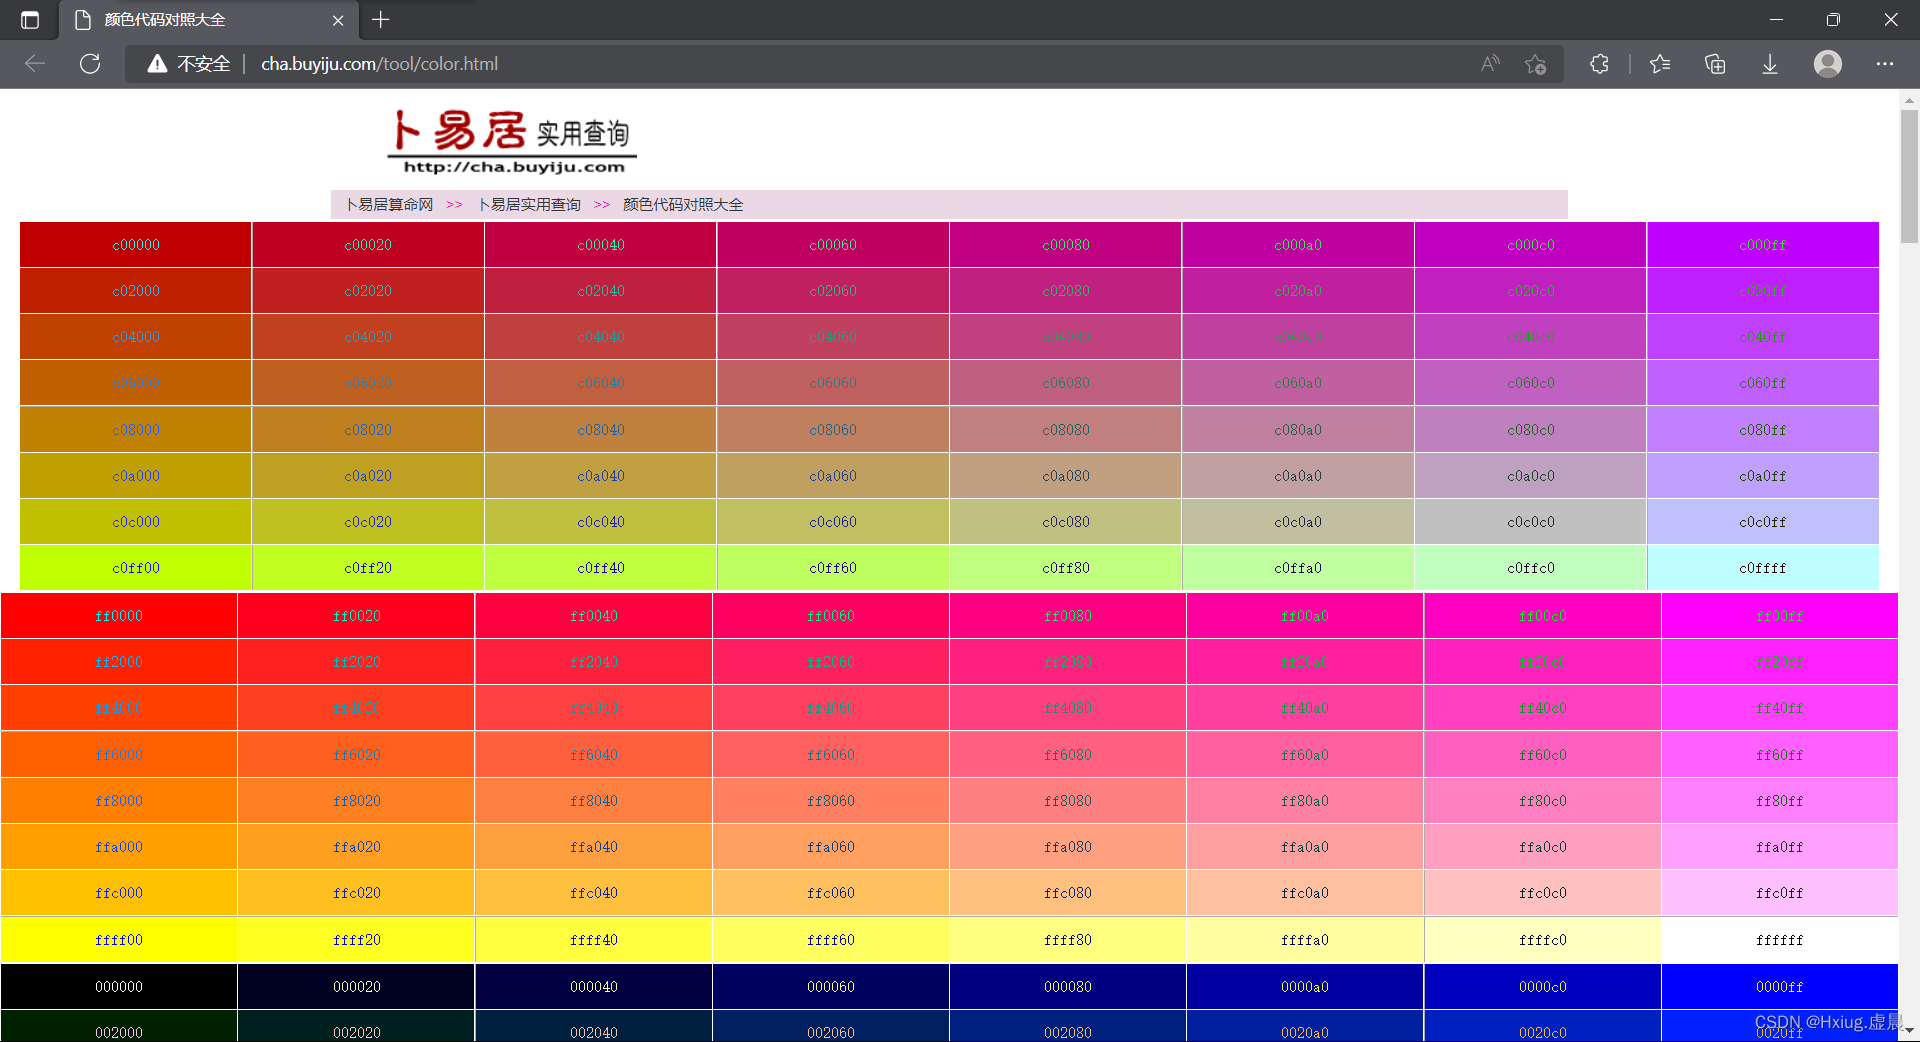
地址:http://cha.buyiju.com/tool/color.html
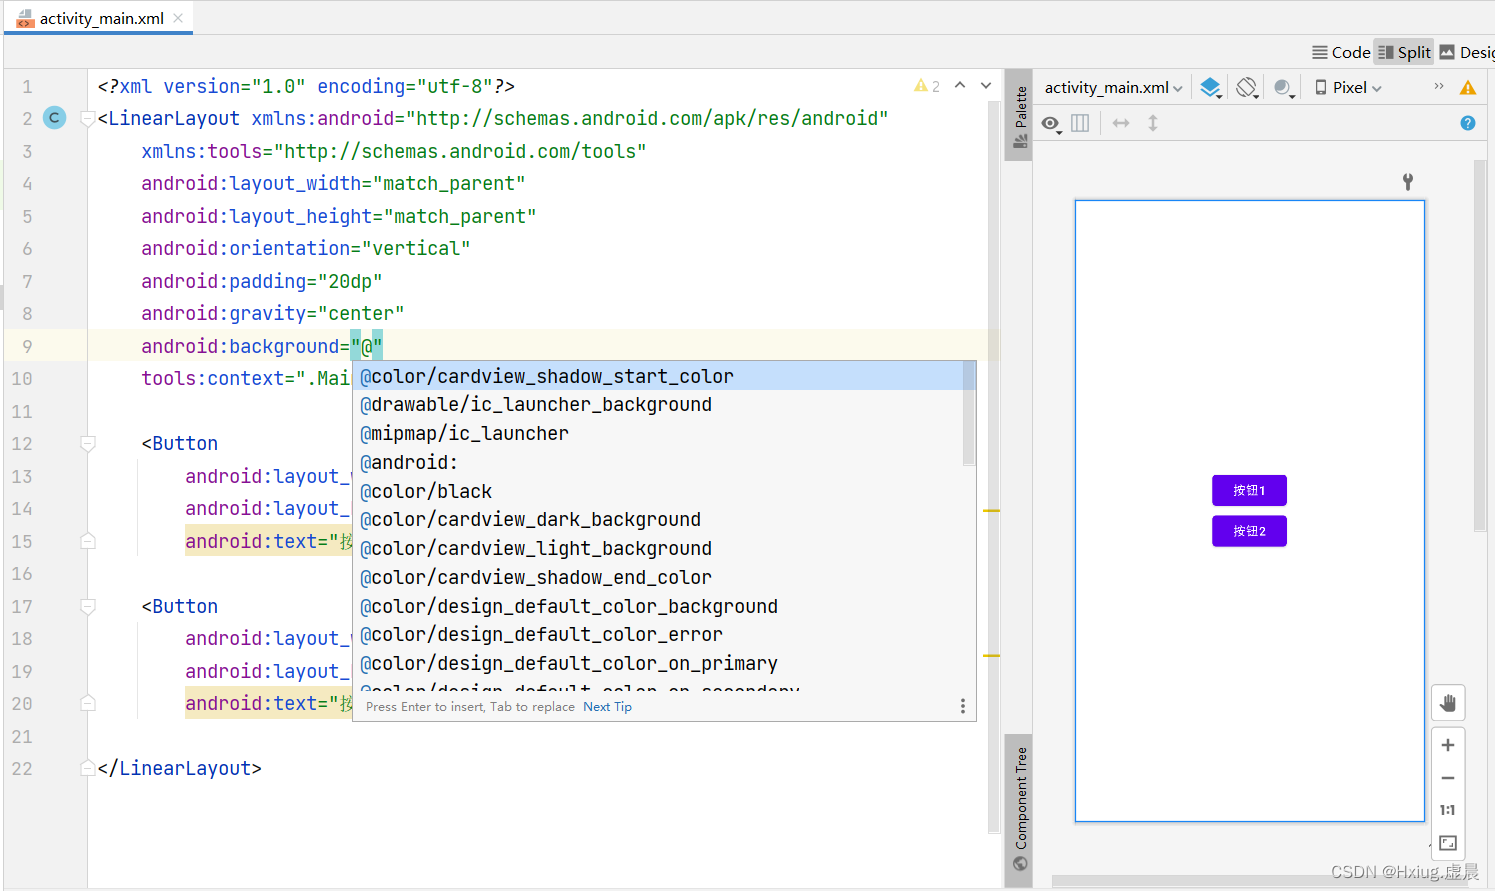
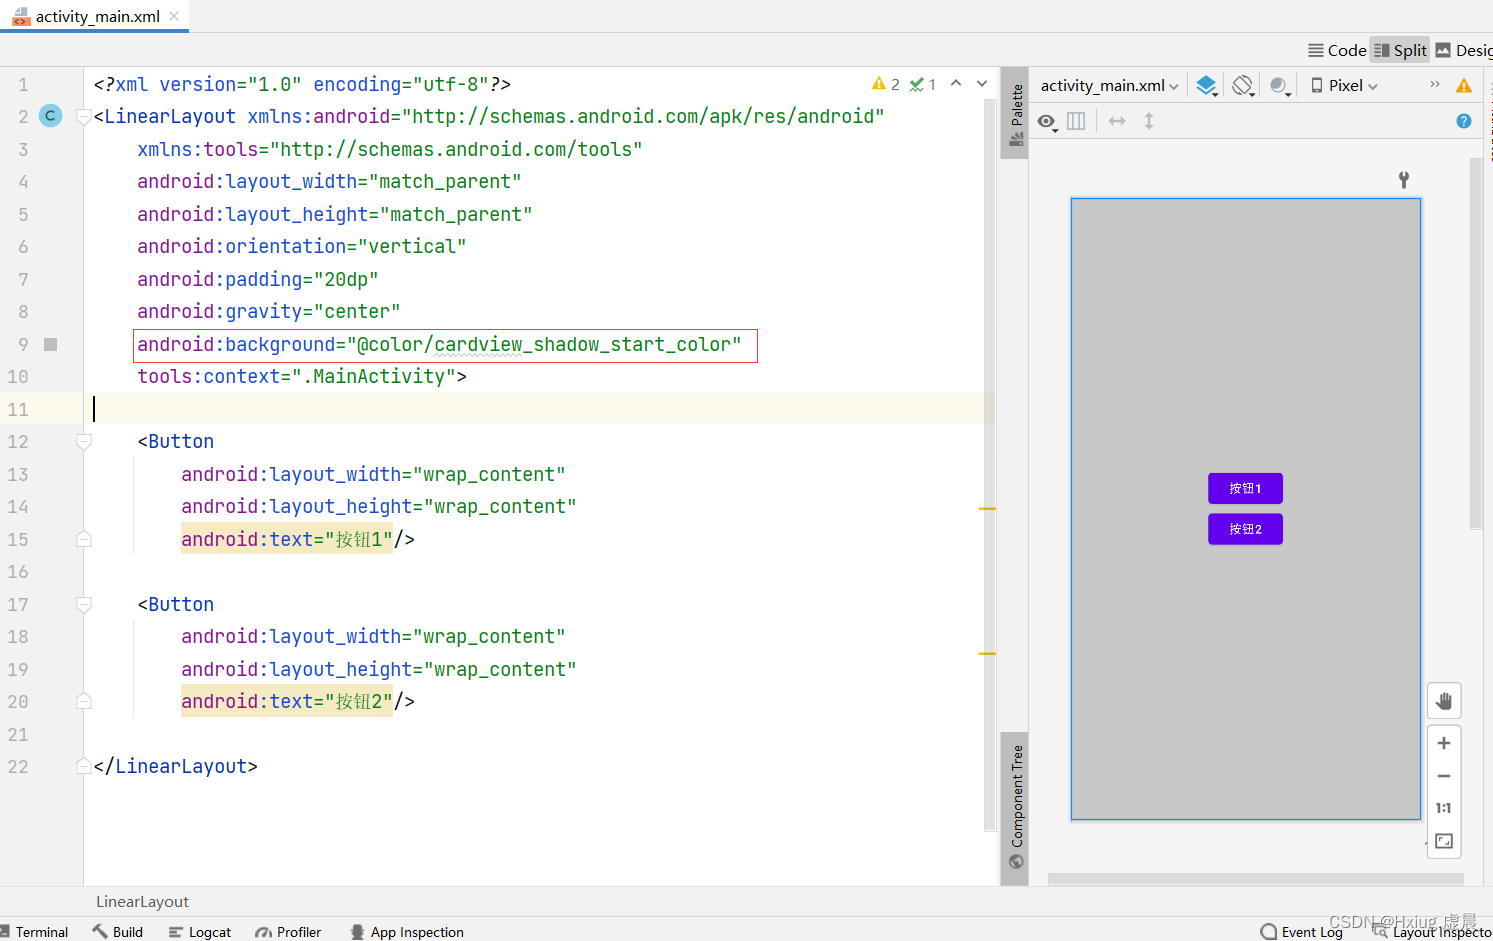
-
采用颜色变量
-
图片填充
-
准备一张图片拷贝到
drawable目录中

-
背景选择器
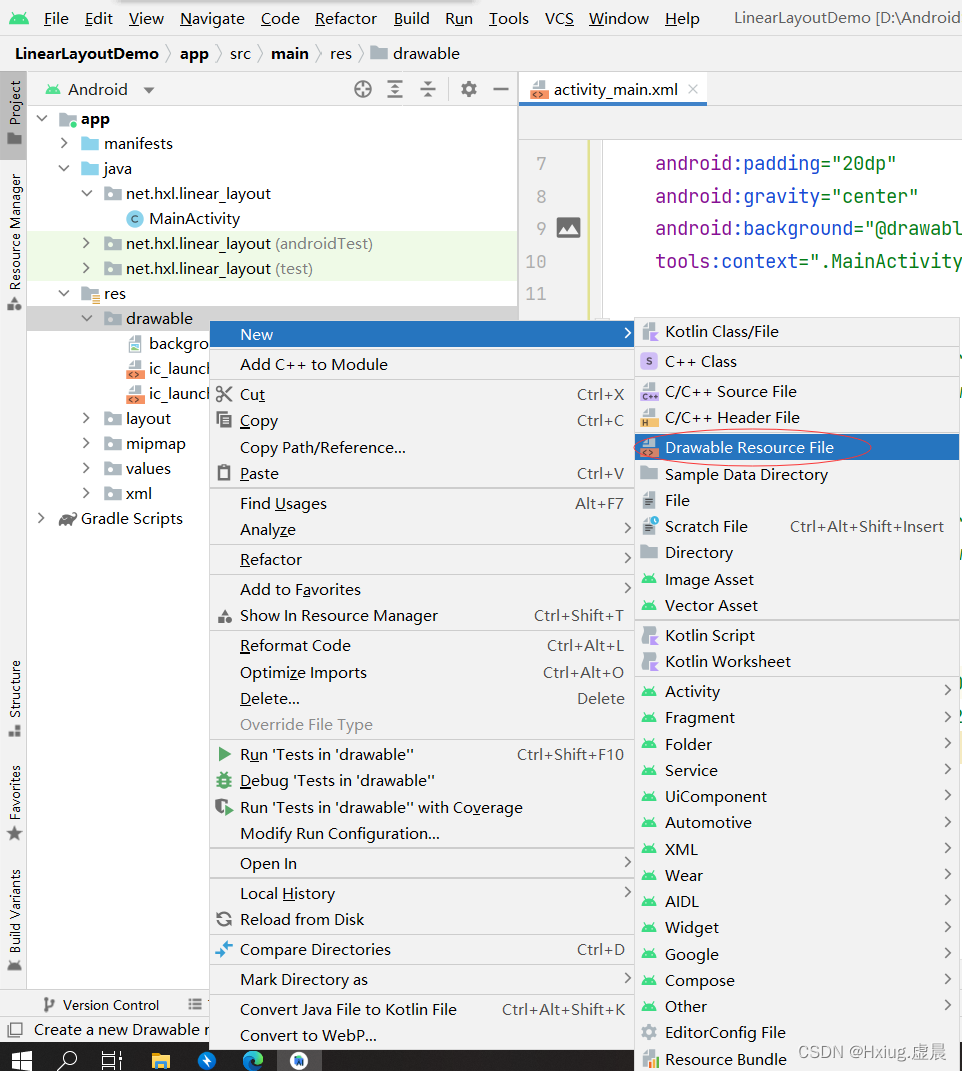
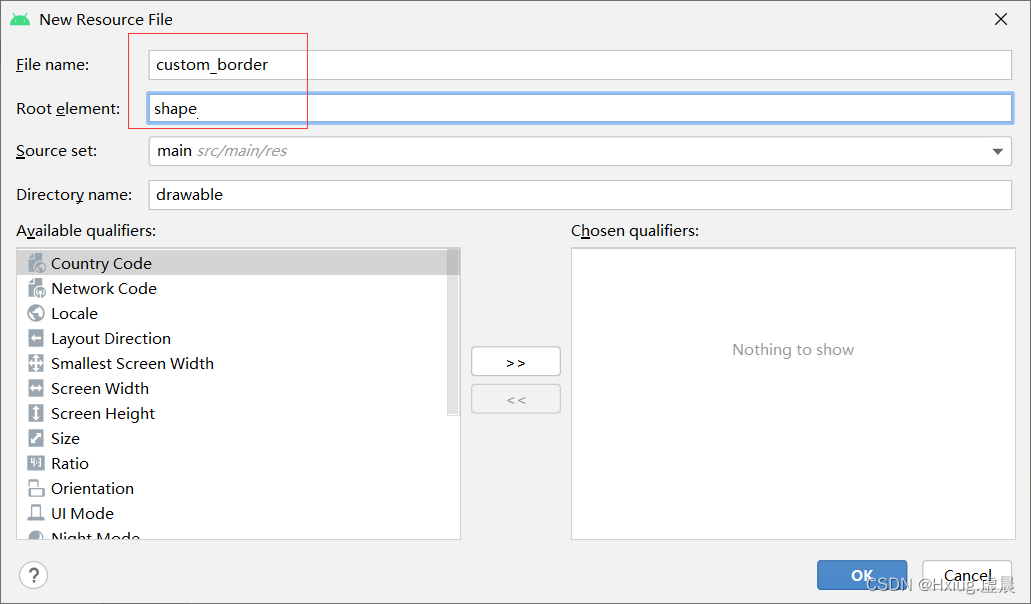
<?xml version="1.0" encoding="utf-8"?>
<shape xmlns:android="http://schemas.android.com/apk/res/android"
    android:shape="rectangle">
    <corners
        android:radius="20dp"/><!--设置圆角-->
    <stroke
        android:width="1dp"
        android:color="#ee3366"/><!--设置边框色-->
    <gradient
        android:startColor="#ffff00"
        android:centerColor="#ff0055"
        android:endColor="#aa00ff"/>
</shape>
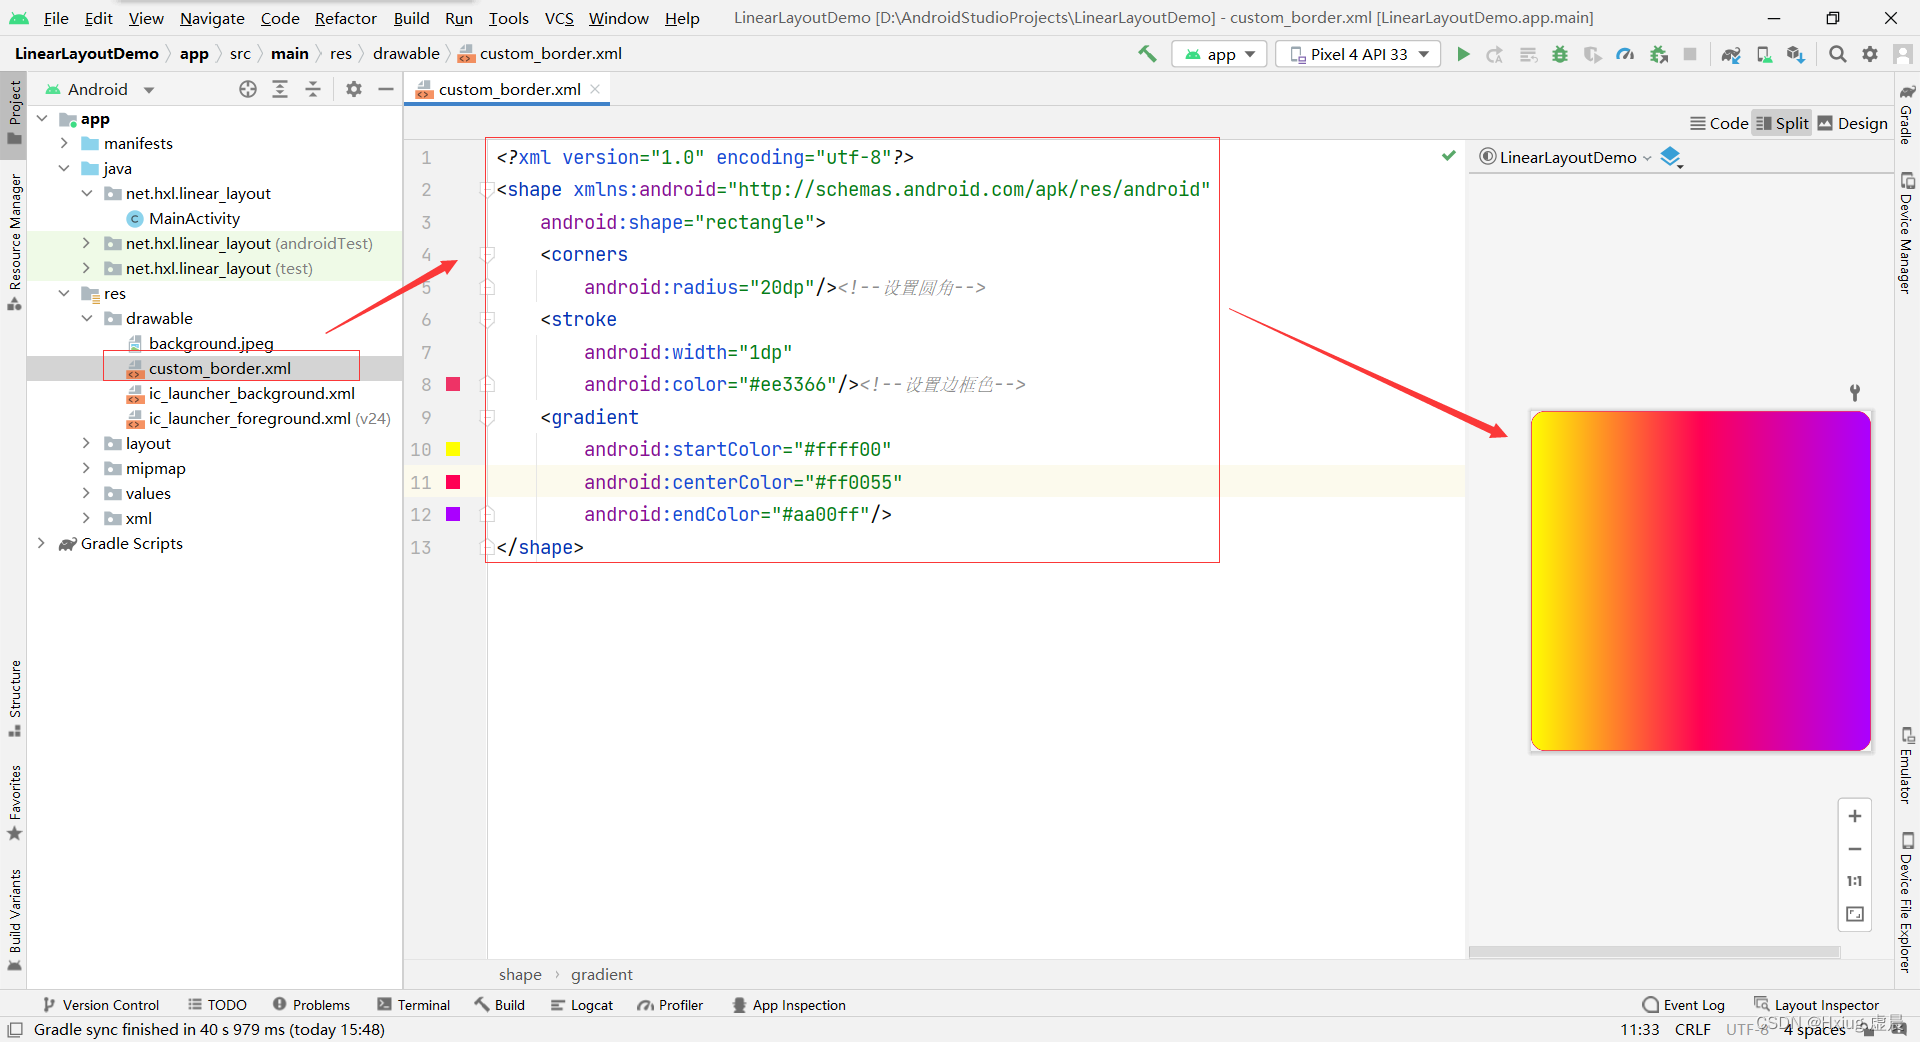
- 添加一个线性布局,设置自定义边框

<?xml version="1.0" encoding="utf-8"?>
<LinearLayout xmlns:android="http://schemas.android.com/apk/res/android"
    xmlns:tools="http://schemas.android.com/tools"
    android:layout_width="match_parent"
    android:layout_height="match_parent"
    android:orientation="vertical"
    android:padding="20dp"
    android:gravity="center"
    android:background="@drawable/background"
    tools:context=".MainActivity">

    <Button
        android:layout_width="wrap_content"
        android:layout_height="wrap_content"
        android:text="按钮1"/>

    <Button
        android:layout_width="wrap_content"
        android:layout_height="wrap_content"
        android:text="按钮2"/>

    <LinearLayout
        android:layout_width="300dp"
        android:layout_height="250dp"
        android:background="@drawable/custom_border">

    </LinearLayout>

</LinearLayout>
5、线性布局嵌套
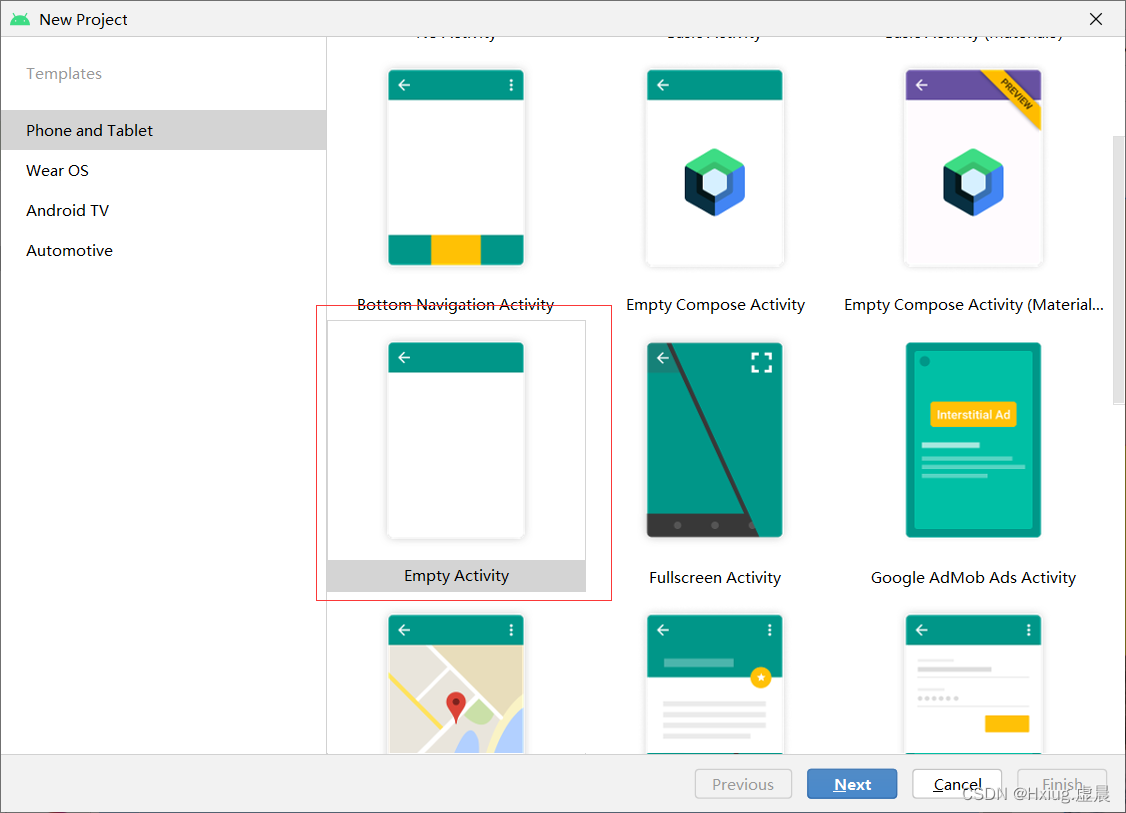
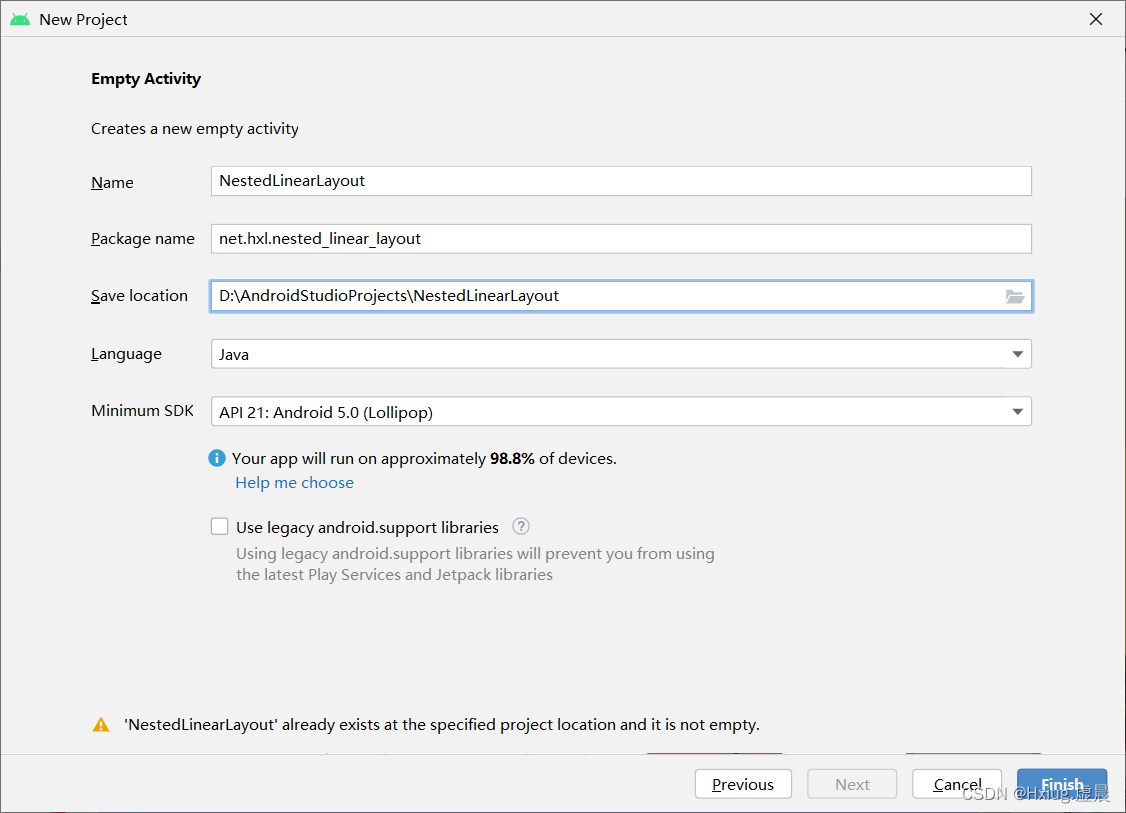
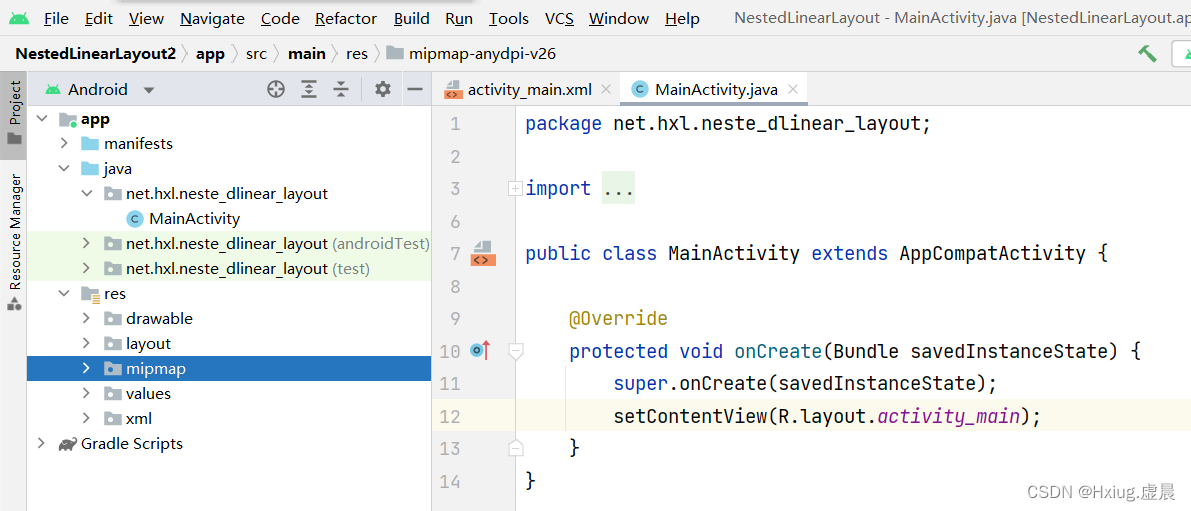
(1)创建安卓应用
- 基于
Empty Activity创建 -NestedLinearLayout
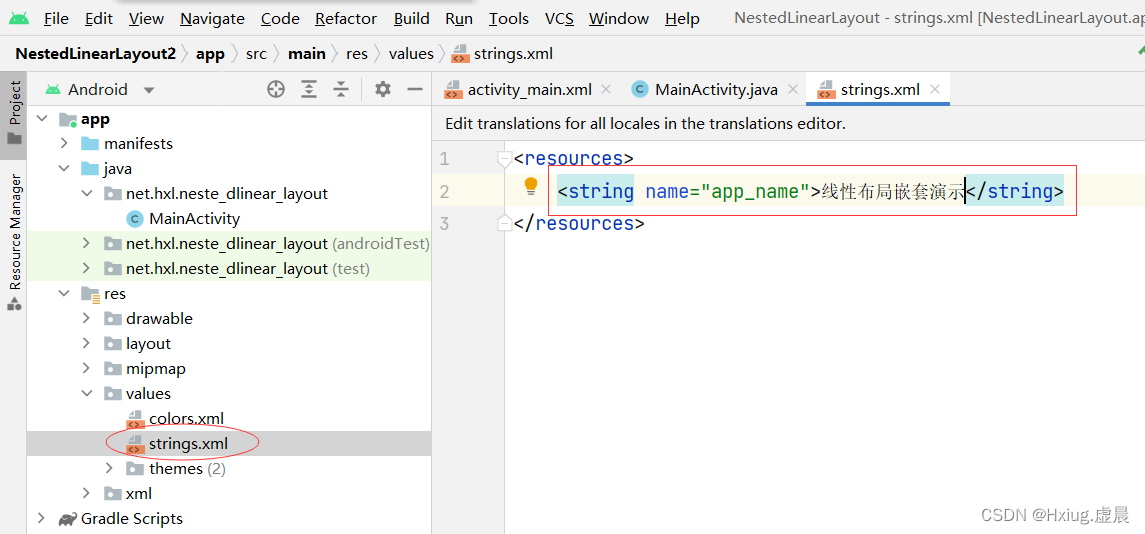
(2)字符串资源文件
strings.xml
(3)将约束布局改为线性布局
activity_main.xml- 删除多余标签
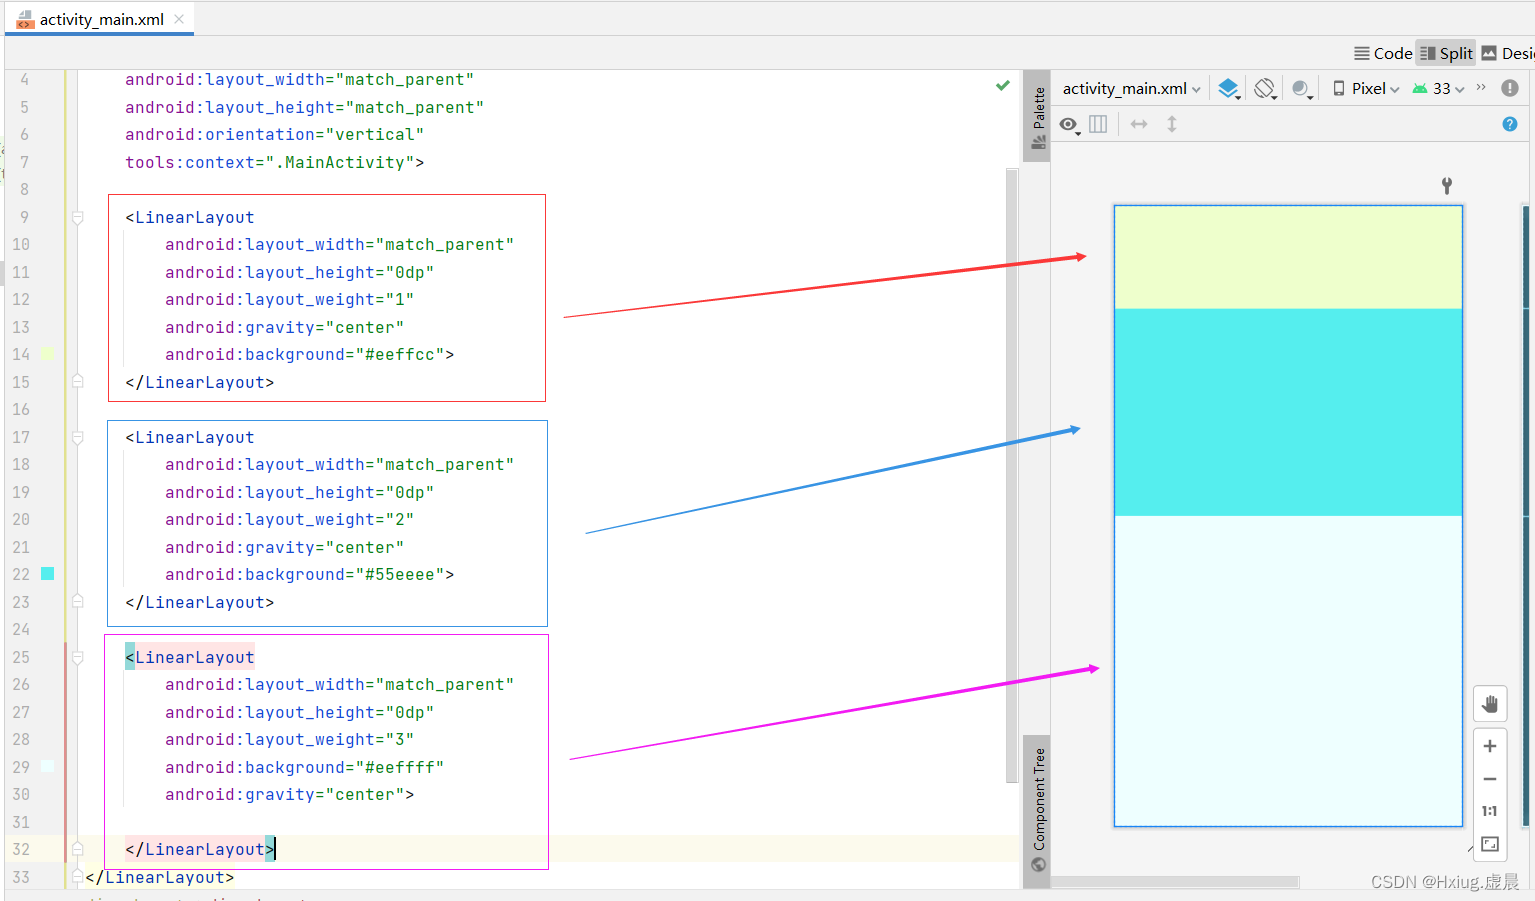
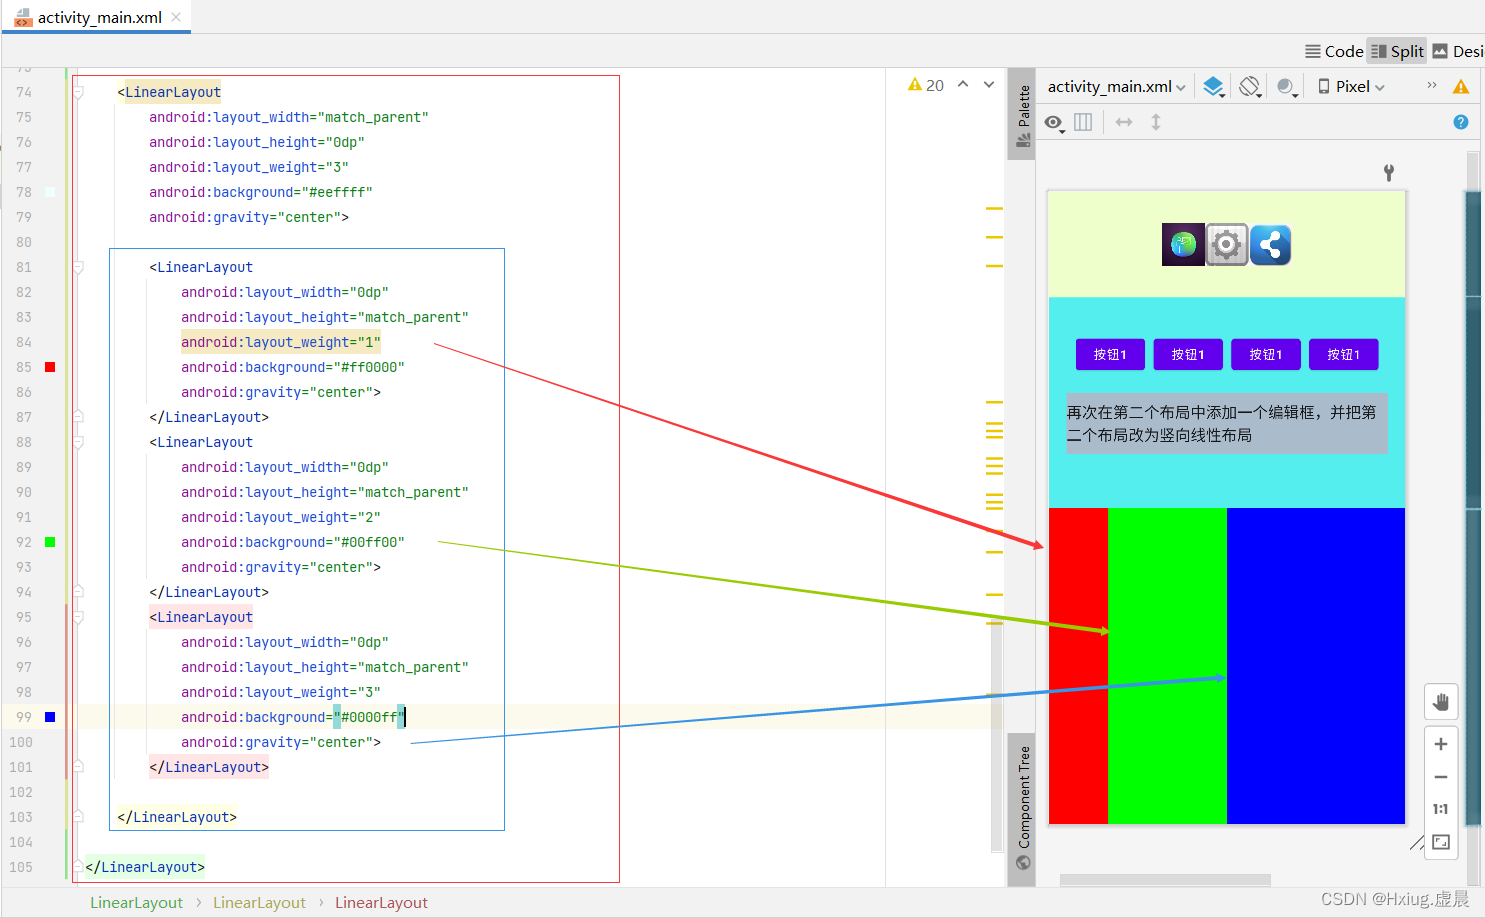
- 添加三个线性布局并按1:2:3的比例垂直瓜分界面
(4)修改布局
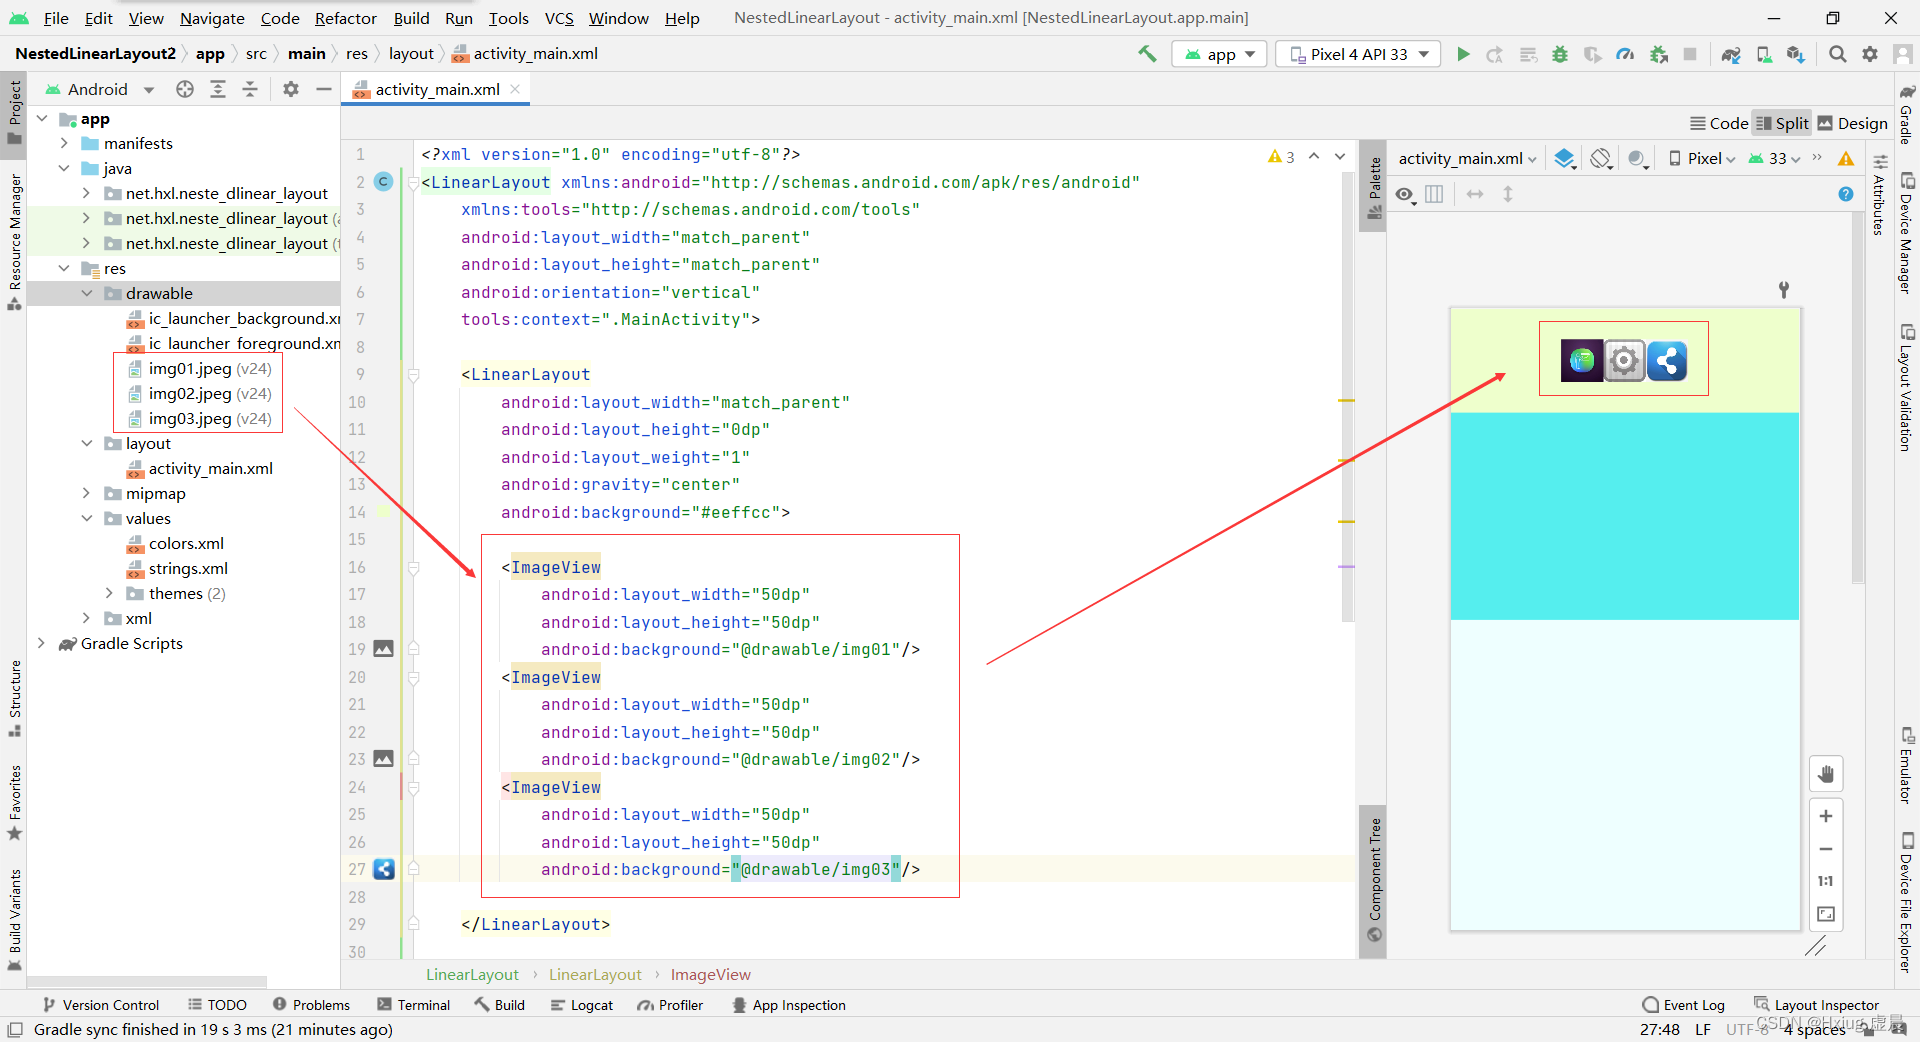
- 在第一个布局中水平插入三张图片
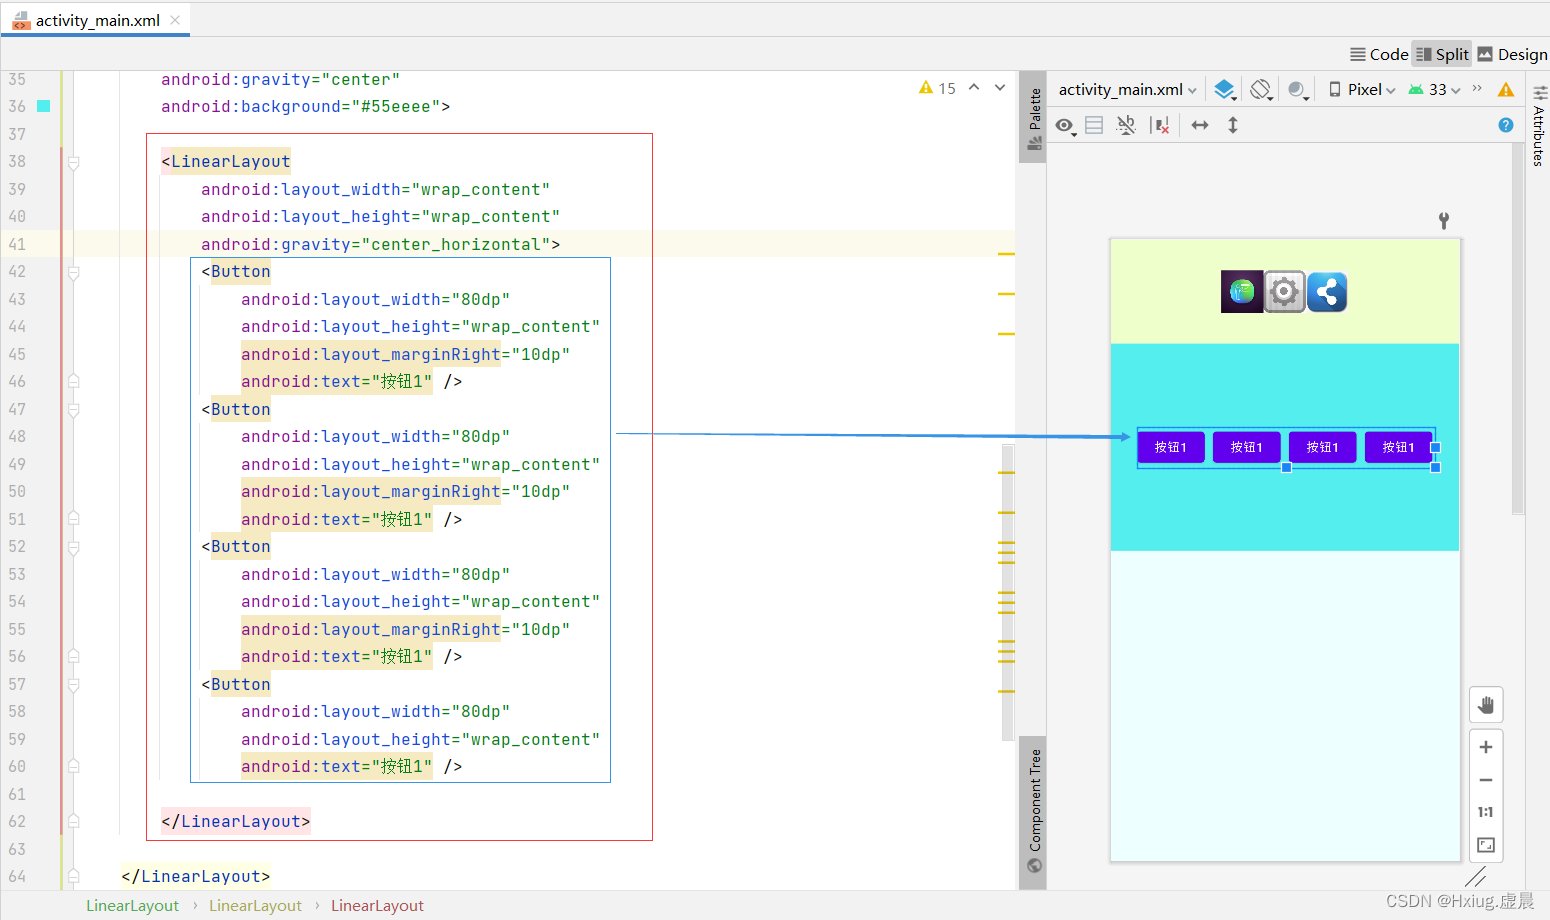
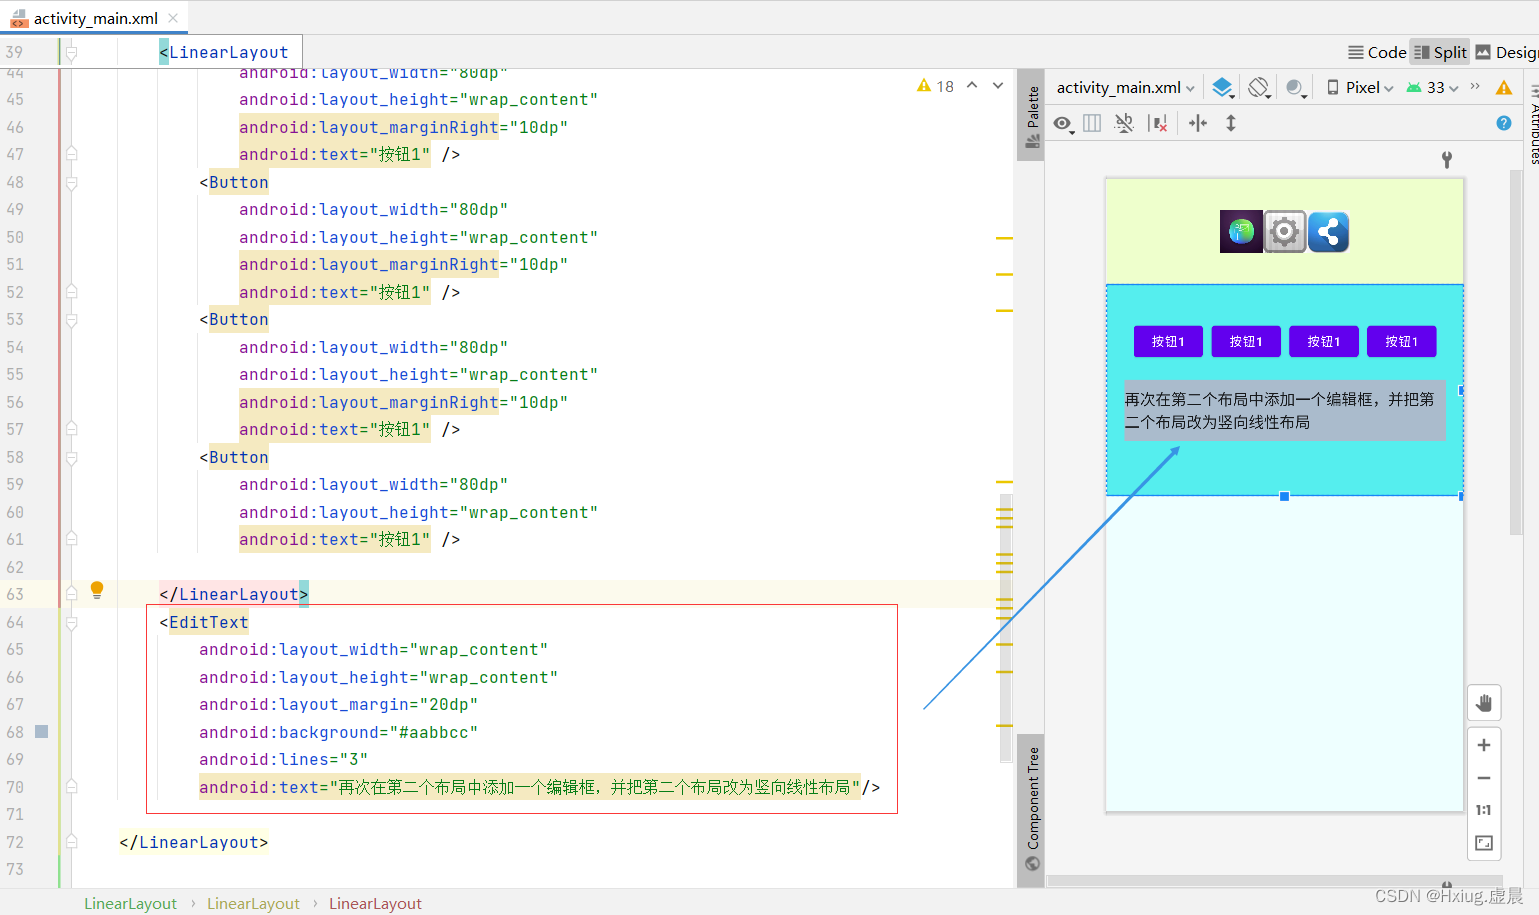
- 在第二个布局中添加一个横向线性布局,在其中添加四个按钮
- 再次在第二个布局中添加一个编辑框,并把第二个布局改为竖向线性布局-
orientation="vertical"
- 第三个布局里添加三个布局,按照1:2:3比例水平瓜分第三个布局
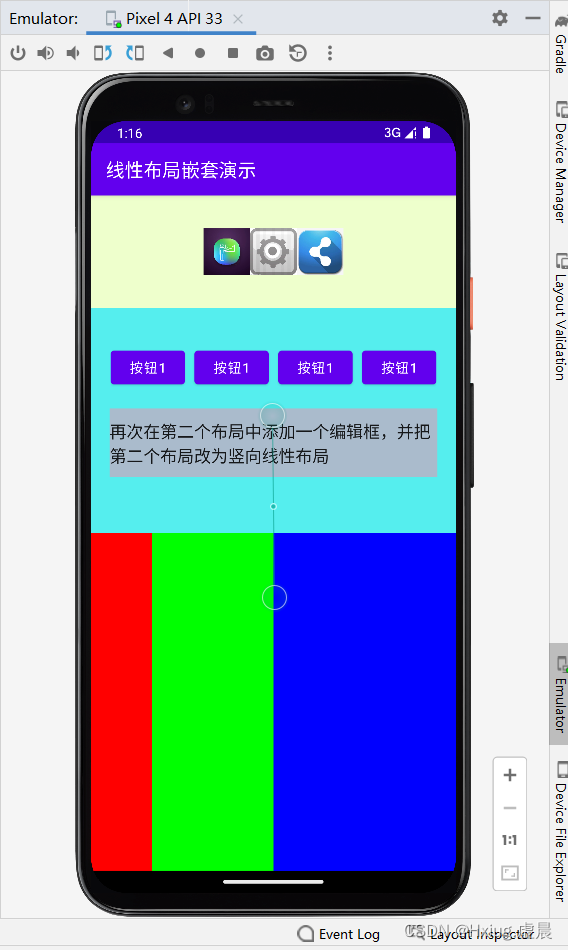
- 启动应用,查看效果
<?xml version="1.0" encoding="utf-8"?>
<LinearLayout xmlns:android="http://schemas.android.com/apk/res/android"
    xmlns:tools="http://schemas.android.com/tools"
    android:layout_width="match_parent"
    android:layout_height="match_parent"
    android:orientation="vertical"
    tools:context=".MainActivity">

    <LinearLayout
        android:layout_width="match_parent"
        android:layout_height="0dp"
        android:layout_weight="1"
        android:gravity="center"
        android:background="#eeffcc">

        <ImageView
            android:layout_width="50dp"
            android:layout_height="50dp"
            android:background="@drawable/img01"/>
        <ImageView
            android:layout_width="50dp"
            android:layout_height="50dp"
            android:background="@drawable/img02"/>
        <ImageView
            android:layout_width="50dp"
            android:layout_height="50dp"
            android:background="@drawable/img03"/>

    </LinearLayout>

    <LinearLayout
        android:layout_width="match_parent"
        android:layout_height="0dp"
        android:layout_weight="2"
        android:gravity="center"
        android:orientation="vertical"
        android:background="#55eeee">

        <LinearLayout
            android:layout_width="wrap_content"
            android:layout_height="wrap_content"
            android:gravity="center_horizontal">
            <Button
                android:layout_width="80dp"
                android:layout_height="wrap_content"
                android:layout_marginRight="10dp"
                android:text="按钮1" />
            <Button
                android:layout_width="80dp"
                android:layout_height="wrap_content"
                android:layout_marginRight="10dp"
                android:text="按钮1" />
            <Button
                android:layout_width="80dp"
                android:layout_height="wrap_content"
                android:layout_marginRight="10dp"
                android:text="按钮1" />
            <Button
                android:layout_width="80dp"
                android:layout_height="wrap_content"
                android:text="按钮1" />

        </LinearLayout>
        <EditText
            android:layout_width="wrap_content"
            android:layout_height="wrap_content"
            android:layout_margin="20dp"
            android:background="#aabbcc"
            android:lines="3"
            android:text="再次在第二个布局中添加一个编辑框,并把第二个布局改为竖向线性布局"/>

    </LinearLayout>

    <LinearLayout
        android:layout_width="match_parent"
        android:layout_height="0dp"
        android:layout_weight="3"
        android:background="#eeffff"
        android:gravity="center">

        <LinearLayout
            android:layout_width="0dp"
            android:layout_height="match_parent"
            android:layout_weight="1"
            android:background="#ff0000"
            android:gravity="center">
        </LinearLayout>
        <LinearLayout
            android:layout_width="0dp"
            android:layout_height="match_parent"
            android:layout_weight="2"
            android:background="#00ff00"
            android:gravity="center">
        </LinearLayout>
        <LinearLayout
            android:layout_width="0dp"
            android:layout_height="match_parent"
            android:layout_weight="3"
            android:background="#0000ff"
            android:gravity="center">
        </LinearLayout>

    </LinearLayout>

</LinearLayout>


 543
543


 被折叠的 条评论
为什么被折叠?
被折叠的 条评论
为什么被折叠?
 到【灌水乐园】发言


