


本文前两篇文章写了Maven的JavaWeb网站的登录、注册功能的开发,本章主要介绍使用Layui框架来做前端开发,Layui是一个开源的简介美观的前端开发框架,入门简单,下面我们将使用它来将数据库的数据展示到网页上面,步骤如下文所示:
1、在Layui网站找到需要的前端框架部分摘抄过来(仅仅需要一个表格)
2、使用Layui的JS语法将表格渲染(elem表格选择器、url、method、id表格id设置、page分页、toolbar工具栏、cols表头---对应实体数据)
3、在dao层的UserDAO封装两个方法---查找所有用户信息---用户分页功能
4、在dao-->Impl层的UserDAOImpl实现这两个方法(sql语句)
5、在servlet层的userList类实现url
步骤一:前端框架部分摘抄
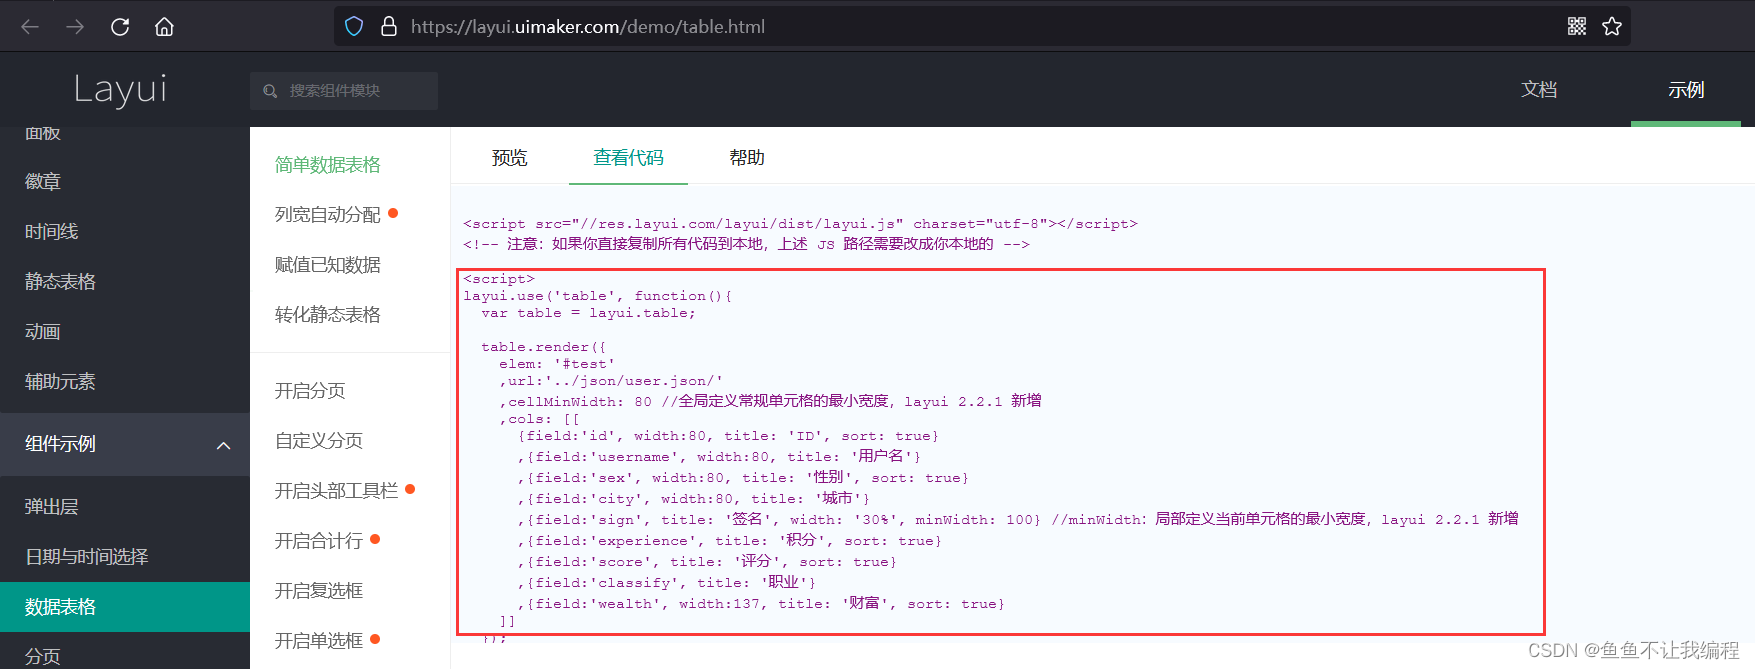
链接在这:
Layui table模块 | 数据表格 | datatable - 在线演示![]() https://layui.uimaker.com/demo/table.html
https://layui.uimaker.com/demo/table.html
步骤二:前端user_list.html
<head>
    <meta charset="UTF-8">
    <title>Title</title>
    <link rel="short cut" href="#">
    <link rel="stylesheet" href="../static/layui-v2.7.6/layui/css/layui.css">
</head>
<body>
<div><table id="userList" lay-filter="userFilter"></table></div>

<script src="../static/layui-v2.7.6/layui/layui.js"></script>
<script>
    layui.use(['table','jquery','layer'],function (){
        let table = layui.table;
        let $ = layui.jquery;
        let layer = layui.layer;
        table.render({
            elem:'#userList',
            url:'/userList',
            method:'get',
            id:'userTable',
            page:{
                limit:10,
                limits:[10,20],
                theme:'#1E9FFF'
            },
            toolbar:'',
            cols:[
                [
                    {
                        title: '序号',
                        field: 'id'
                    },
                    {
                        title: '昵称',
                        field: 'usernick',
                    },
                    {
                        title: '账号',
                        field: 'name',
                    },
                    // {
                    //     title: '密码',
                    //     field: 'password',
                    // },
                    {
                        title: '城市',
                        field: 'city',
                    },
                    {
                        title: '性别',
                        field: 'sex',
                    },
                    {
                        title: '年龄',
                        field: 'age',
                    },
                    // {
                    //     title: 'qq',
                    //     field: 'qq',
                    // },
                    // {
                    //     title: '电话',
                    //     field: 'tel',
                    // },
                    {
                        title: '操作',
                        field: '#rowTools',
                    }
                ]
            ]
        })

    })
</script>
</body>
步骤三: 在dao层的UserDAO封装两个方法
//    查找所有用户所有信息
    List<Object> selectUserAll(String page, String limit) throws SQLException;
//    用户分页
    int userCount() throws SQLException;
步骤四: 在dao-->Impl层的UserDAOImpl实现方法
 @Override
    public List<Object> selectUserAll(String page, String limit) throws SQLException {
        DBUtils db = new DBUtils();
        String sql = "select * from `user` LIMIT ?,?";
        PreparedStatement ps = db.getPreparedStatement(sql);
        int page1 = Integer.parseInt(page);
        int limit1 = Integer.parseInt(limit);
        ps.setInt(1, (page1 - 1) * limit1);
        ps.setInt(2, limit1);
        ResultSet rs = ps.executeQuery();
        List<Object> list = new ArrayList<Object>();
        while(rs.next()){
            User user = new User();
            user.setId(rs.getInt("id"));
            user.setUsernick(rs.getString("usernick"));
            user.setName(rs.getString("name"));
            user.setPassword(rs.getString("password"));
            user.setCity(rs.getString("city"));
            user.setSex(rs.getString("sex"));
            user.setAge(rs.getString("age"));
            user.setQq(rs.getString("qq"));
            user.setTel(rs.getString("tel"));
            list.add(user);
        }
        return list;
    }

    @Override
    public int userCount() throws SQLException {
        DBUtils db = new DBUtils();
        String sql = "select count(*) as sum from user";
        Statement st = db.getStatement();
        ResultSet rs = st.executeQuery(sql);
        while (rs.next()) {
            return rs.getInt("sum");
        }
        return 0;
    }
步骤五 :在servlet层的userList类实现url
@WebServlet("/userList")
public class userList extends HttpServlet {
    private final UserService userService = new UserServiceImpl();
    @Override
    protected void doGet(HttpServletRequest req, HttpServletResponse resp) throws ServletException, IOException {
        req.setCharacterEncoding("utf-8");
        resp.setCharacterEncoding("utf-8");
        resp.setContentType("text/html;charset=utf-8");
        String pageStr = req.getParameter("page");
        String limitStr = req.getParameter("limit");
        try {
            List<Object> list = userService.selectUserAll(pageStr,limitStr);
            Result result = new Result(0,list,"success",true);
            result.setCount(userService.userCount());
            String jsonObject = JSONObject.toJSON(result).toString();
            resp.getWriter().write(jsonObject);
        } catch (SQLException e) {
            throw new RuntimeException(e);
        }
    }
    @Override
    protected void doPost(HttpServletRequest req, HttpServletResponse resp) throws ServletException, IOException {
        doGet(req,resp);
    }
}
隐藏步骤六:记得把dao层方法封装到service层来调用哦
service层:UserService接口
    //    查找所有用户所有信息
    List<Object> selectUserAll(String page, String limit) throws SQLException;
    //    用户分页
    int userCount() throws SQLException;
service-->Impl层:UserServiceImpl类
@Override
public List<Object> selectUserAll(String page, String limit) throws SQLException {
return userDAO.selectUserAll(page,limit);
}
@Override
public int userCount() throws SQLException {
return userDAO.userCount();
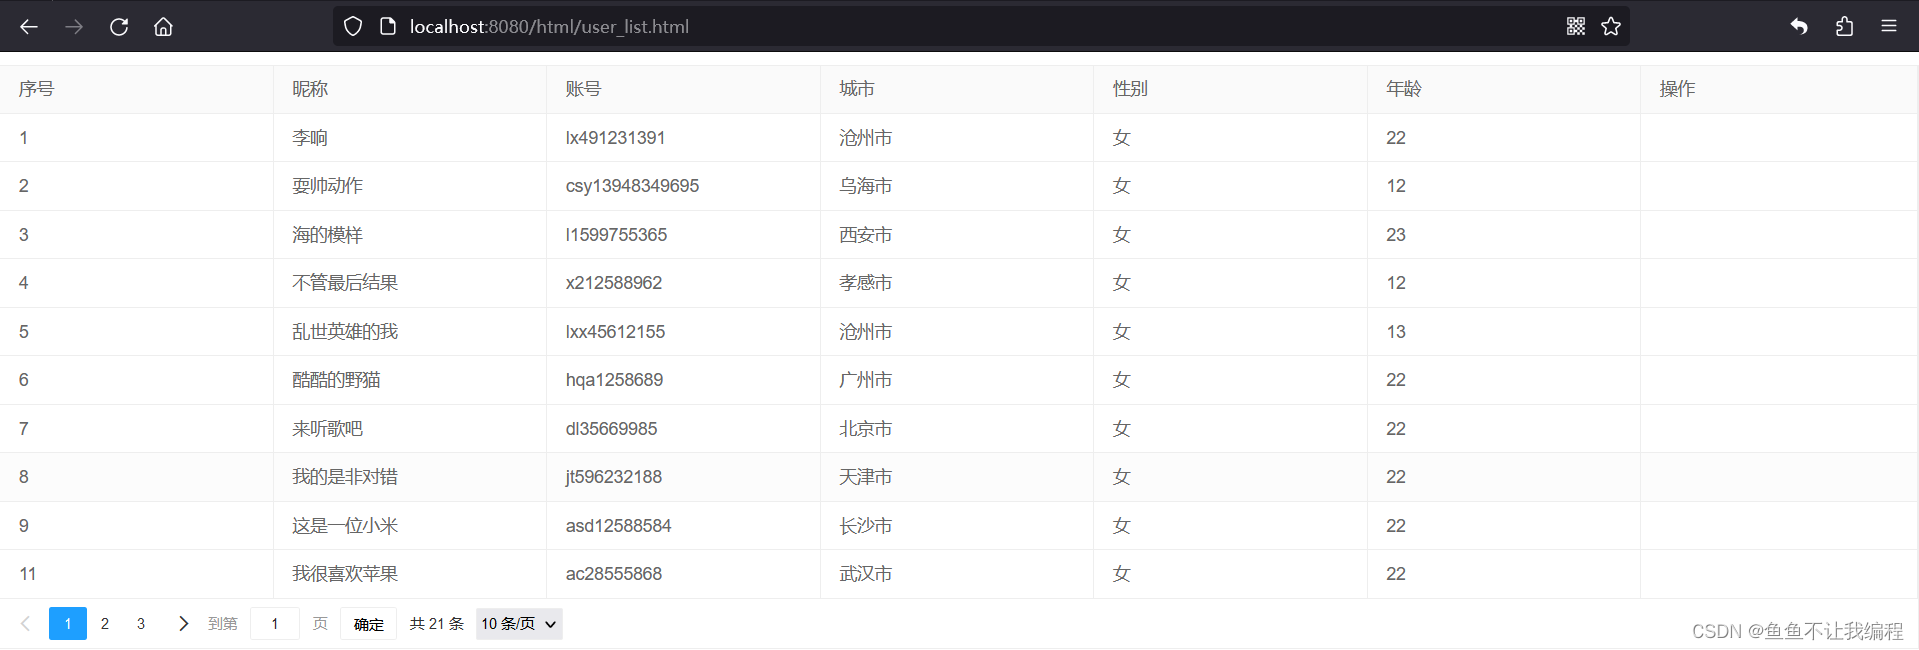
}以上就是本章全部内容啦,看看结果图吧
如有不懂,欢迎评论区留言哦
今日语录:越努力越幸运,加油!


 2371
2371


 被折叠的 条评论
为什么被折叠?
被折叠的 条评论
为什么被折叠?
 到【灌水乐园】发言


