


目录
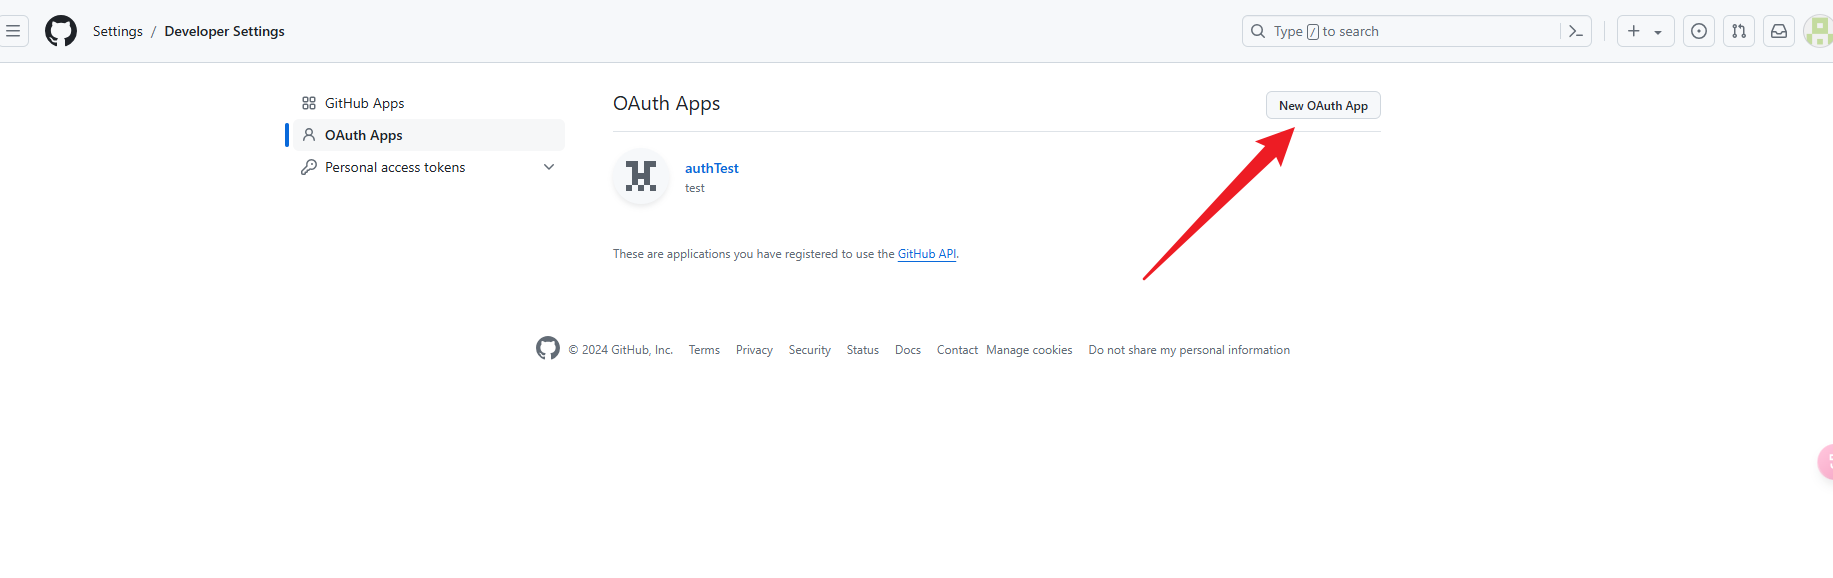
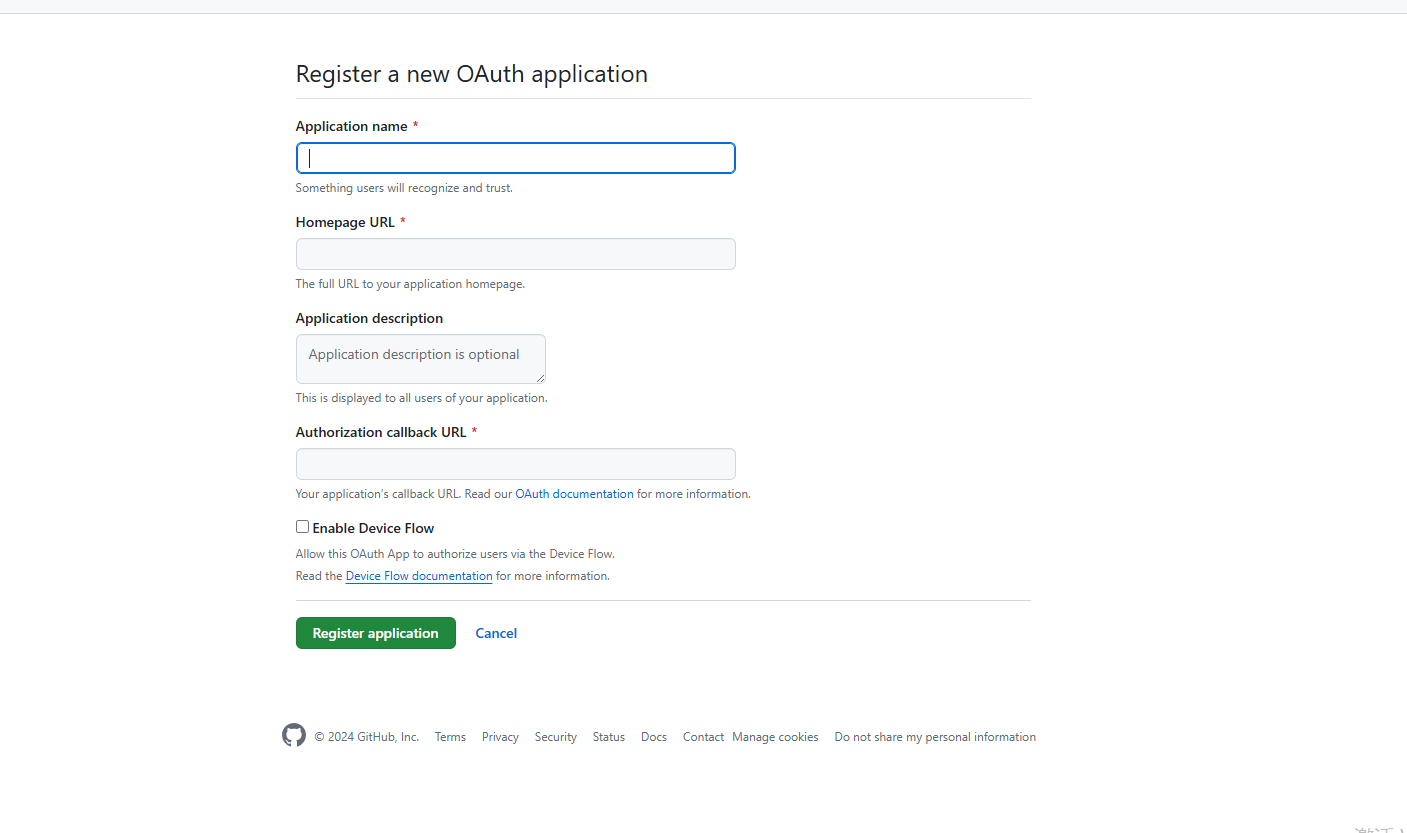
0.准备工作
你需要获取三方登陆的client-id和client-secret
以github为例
申请地址:Sign in to GitHub · GitHub

1.引入依赖
<?xml version="1.0" encoding="UTF-8"?>
<project xmlns="http://maven.apache.org/POM/4.0.0"
  xmlns:xsi="http://www.w3.org/2001/XMLSchema-instance"
  xsi:schemaLocation="http://maven.apache.org/POM/4.0.0 https://maven.apache.org/xsd/maven-4.0.0.xsd">
  <modelVersion>4.0.0</modelVersion>
  <parent>
    <groupId>org.springframework.boot</groupId>
    <artifactId>spring-boot-starter-parent</artifactId>
    <version>2.3.1.RELEASE</version>
    <relativePath/> <!-- lookup parent from repository -->
  </parent>
  <groupId>com.zhengqing</groupId>
  <artifactId>demo</artifactId>
  <version>0.0.1-SNAPSHOT</version>
  <name>demo</name>
  <description>Demo project for Spring Boot</description>

  <properties>
    <project.build.sourceEncoding>UTF-8</project.build.sourceEncoding>
    <project.reporting.outputEncoding>UTF-8</project.reporting.outputEncoding>
    <java.version>1.8</java.version>
    <justauth-spring-boot.version>1.1.0</justauth-spring-boot.version>
  </properties>

  <dependencies>
    <dependency>
      <groupId>org.springframework.boot</groupId>
      <artifactId>spring-boot-starter-web</artifactId>
    </dependency>
    <dependency>
      <groupId>org.springframework.boot</groupId>
      <artifactId>spring-boot-starter-test</artifactId>
      <scope>test</scope>
    </dependency>

    <!-- 添加适用于生产环境的功能,如性能指标和监测等功能 -->
    <dependency>
      <groupId>org.springframework.boot</groupId>
      <artifactId>spring-boot-starter-actuator</artifactId>
    </dependency>

    <!-- ====================================================== -->

    <!-- reids -->
    <dependency>
      <groupId>org.springframework.boot</groupId>
      <artifactId>spring-boot-starter-data-redis</artifactId>
    </dependency>
    <!-- 对象池,使用redis时必须引入 -->
    <dependency>
      <groupId>org.apache.commons</groupId>
      <artifactId>commons-pool2</artifactId>
    </dependency>

    <!-- oauth工具类 -->
    <dependency>
      <groupId>com.xkcoding</groupId>
      <artifactId>justauth-spring-boot-starter</artifactId>
      <version>${justauth-spring-boot.version}</version>
    </dependency>

    <!-- lombok插件 -->
    <dependency>
      <groupId>org.projectlombok</groupId>
      <artifactId>lombok</artifactId>
      <optional>true</optional>
    </dependency>

    <!-- https://mvnrepository.com/artifact/cn.hutool/hutool-all -->
    <dependency>
      <groupId>cn.hutool</groupId>
      <artifactId>hutool-all</artifactId>
      <version>5.3.8</version>
    </dependency>

    <!-- https://mvnrepository.com/artifact/com.google.guava/guava -->
    <dependency>
      <groupId>com.google.guava</groupId>
      <artifactId>guava</artifactId>
      <version>29.0-jre</version>
    </dependency>


  </dependencies>

  <build>
    <!-- 注:maven默认是不编译,因此加上如下resources才会生产对应的xml文件 目的:解决mybatis映射关系不对应问题  start =============== -->
    <resources>
      <resource>
        <directory>src/main/java</directory>
        <includes>
          <include>**/*.xml</include>
        </includes>
        <filtering>false</filtering>
      </resource>
      <resource>
        <directory>src/main/resources</directory>
      </resource>
    </resources>
    <testResources>
      <testResource>
        <directory>src/main/java</directory>
        <includes>
          <include>**/*.xml</include>
        </includes>
        <filtering>false</filtering>
      </testResource>
    </testResources>
    <!-- 注:maven默认是不编译,因此加上如下resources才会生产对应的xml文件 目的:解决mybatis映射关系不对应问题  end =============== -->

    <plugins>
      <plugin>
        <groupId>org.springframework.boot</groupId>
        <artifactId>spring-boot-maven-plugin</artifactId>
      </plugin>
    </plugins>
  </build>

</project>
2.yml文件
server:
  port: 90
  servlet:
    context-path: /demo

spring:
  application:
    name: demo

  # ======================== ↓↓↓↓↓↓ redis相关配置 ↓↓↓↓↓↓ ===============================
  redis:
    # Redis服务器地址
    host: 127.0.0.1
    # Redis服务器连接端口
    port: 6379
    # 连接超时时间(毫秒
    timeout: 10000ms
    # Redis服务器连接密码(默认为空)
    password:
    # Redis数据库索引(默认为0)
    database: 1
    lettuce:
      pool:
        # 连接池最大连接数(使用负值表示没有限制) 默认 8
        max-active: 8
        # 连接池最大阻塞等待时间(使用负值表示没有限制) 默认 -1
        max-wait: -1ms
        # 连接池中的最大空闲连接 默认 8
        max-idle: 8
        # 连接池中的最小空闲连接 默认 0
        min-idle: 0
      cache:
        # 一般来说是不用配置的,Spring Cache 会根据依赖的包自行装配
        type: redis

justauth:
  enabled: true
  type:
    github:
      client-id: Ov23l*********T6zyhg
      client-secret: fd82534****************59aefac
      redirect-uri: http://127.0.0.1:90/demo/oauth/github/callback
#    qq:
#      client-id: 10******85
#      client-secret: 1f7d************************d629e
#      redirect-uri: http://127.0.0.1/demo/oauth/qq/callback
#    wechat:
#      client-id: wxdcb******4ff4
#      client-secret: b4e9dc************************a08ed6d
#      redirect-uri: http://127.0.0.1/demo/oauth/wechat/callback
#    google:
#      client-id: 716******17-6db******vh******ttj320i******userco******t.com
#      client-secret: 9IBorn************7-E
#      redirect-uri: http://127.0.0.1/demo/oauth/google/callback
#    microsoft:
#      client-id: 7bdce8******************e194ad76c1b
#      client-secret: Iu0zZ4************************tl9PWan_.
#      redirect-uri: https://127.0.0.1/demo/oauth/microsoft/callback
#    mi:
#      client-id: 288************2994
#      client-secret: nFeTt89************************==
#      redirect-uri: http://127.0.0.1/demo/oauth/mi/callback
#    wechat_enterprise:
#      client-id: ww58******f3************fbc
#      client-secret: 8G6PCr00j************************rgk************AyzaPc78
#      redirect-uri: http://127.0.0.1/demo/oauth/wechat_enterprise/callback
#      agent-id: 1*******2
  cache:
    type: redis
    prefix: 'SOCIAL::STATE::'
    timeout: 1h
3. Controller代码
package com.zhengqing.demo;
import cn.hutool.core.util.StrUtil;
import cn.hutool.json.JSONUtil;
import com.xkcoding.justauth.AuthRequestFactory;
import java.io.IOException;
import java.util.List;
import java.util.Map;
import java.util.stream.Collectors;
import javax.servlet.http.HttpServletResponse;
import lombok.RequiredArgsConstructor;
import lombok.extern.slf4j.Slf4j;
import me.zhyd.oauth.config.AuthSource;
import me.zhyd.oauth.model.AuthCallback;
import me.zhyd.oauth.model.AuthResponse;
import me.zhyd.oauth.request.AuthRequest;
import me.zhyd.oauth.utils.AuthStateUtils;
import org.springframework.beans.factory.annotation.Autowired;
import org.springframework.web.bind.annotation.GetMapping;
import org.springframework.web.bind.annotation.PathVariable;
import org.springframework.web.bind.annotation.RequestMapping;
import org.springframework.web.bind.annotation.RestController;
/**
* <p> 第三方登录 Controller </p>
* @description : 可参考[Spring Boot 快速集成第三方登录功能](https://xkcoding.com/2019/05/22/spring-boot-login-with-oauth.html)
*/
@Slf4j
@RestController
@RequestMapping("/oauth")
@RequiredArgsConstructor(onConstructor_ = @Autowired)
public class OauthController {
private final AuthRequestFactory factory;
/**
* 登录类型
*/
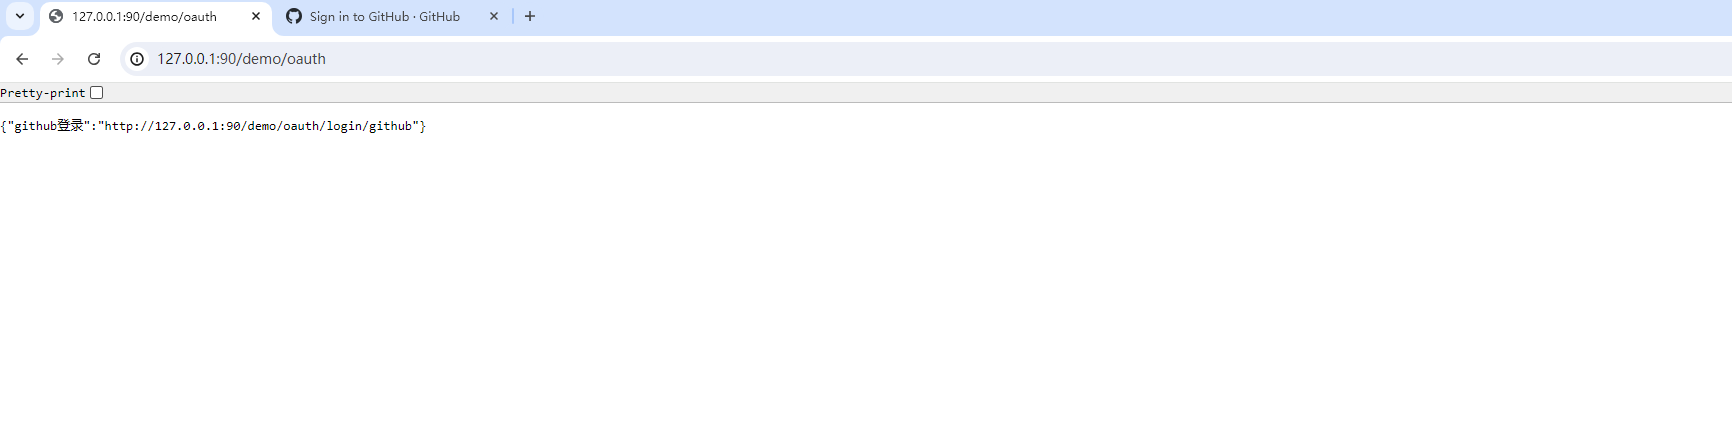
@GetMapping
public Map<String, String> loginType() {
List<String> oauthList = factory.oauthList();
return oauthList.stream().collect(Collectors
.toMap(oauth -> oauth.toLowerCase() + "登录",
oauth -> "http://127.0.0.1:90/demo/oauth/login/" + oauth.toLowerCase()));
}
/**
* 登录
*
* @param oauthType 第三方登录类型
* @param response response
* @throws IOException
*/
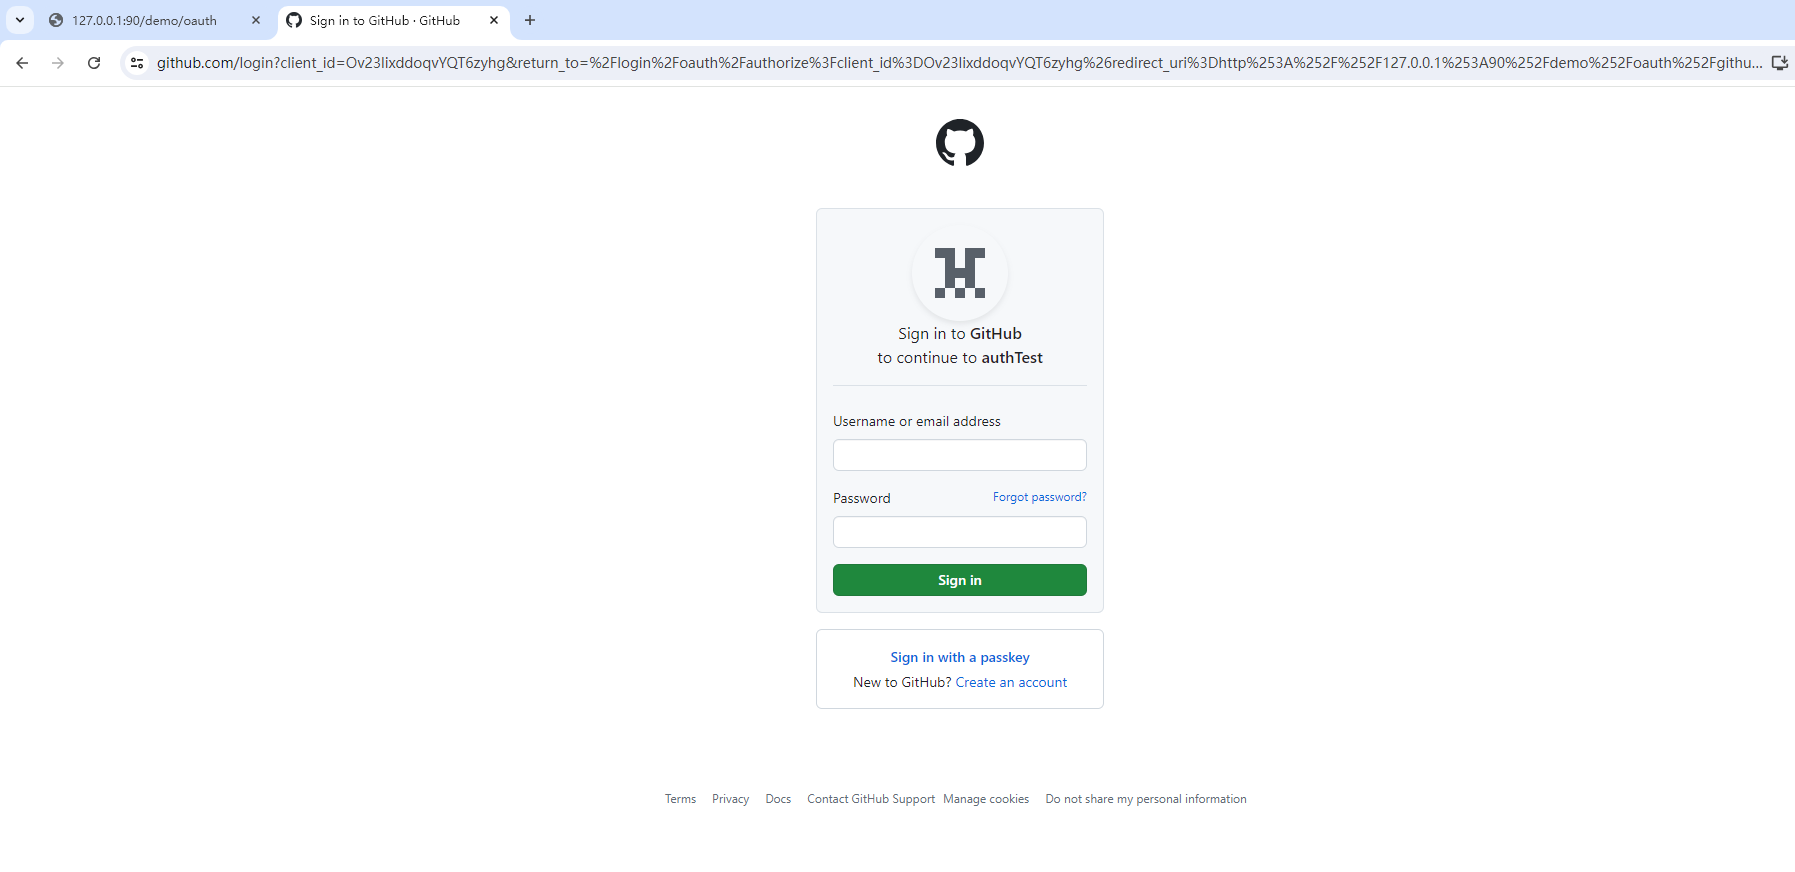
@RequestMapping("/login/{oauthType}")
public void renderAuth(@PathVariable String oauthType, HttpServletResponse response)
throws IOException {
AuthRequest authRequest = factory.get(getAuthSource(oauthType));
response.sendRedirect(authRequest.authorize(oauthType + "::" + AuthStateUtils.createState()));
}
/**
* 登录成功后的回调
*
* @param oauthType 第三方登录类型
* @param callback 携带返回的信息
* @return 登录成功后的信息
*/
@RequestMapping("/{oauthType}/callback")
public AuthResponse login(@PathVariable String oauthType, AuthCallback callback) {
AuthRequest authRequest = factory.get(getAuthSource(oauthType));
AuthResponse response = authRequest.login(callback);
log.info("【response】= {}", JSONUtil.toJsonStr(response));
return response;
}
private AuthSource getAuthSource(String type) {
if (StrUtil.isNotBlank(type)) {
return AuthSource.valueOf(type.toUpperCase());
} else {
throw new RuntimeException("不支持的类型");
}
}
}
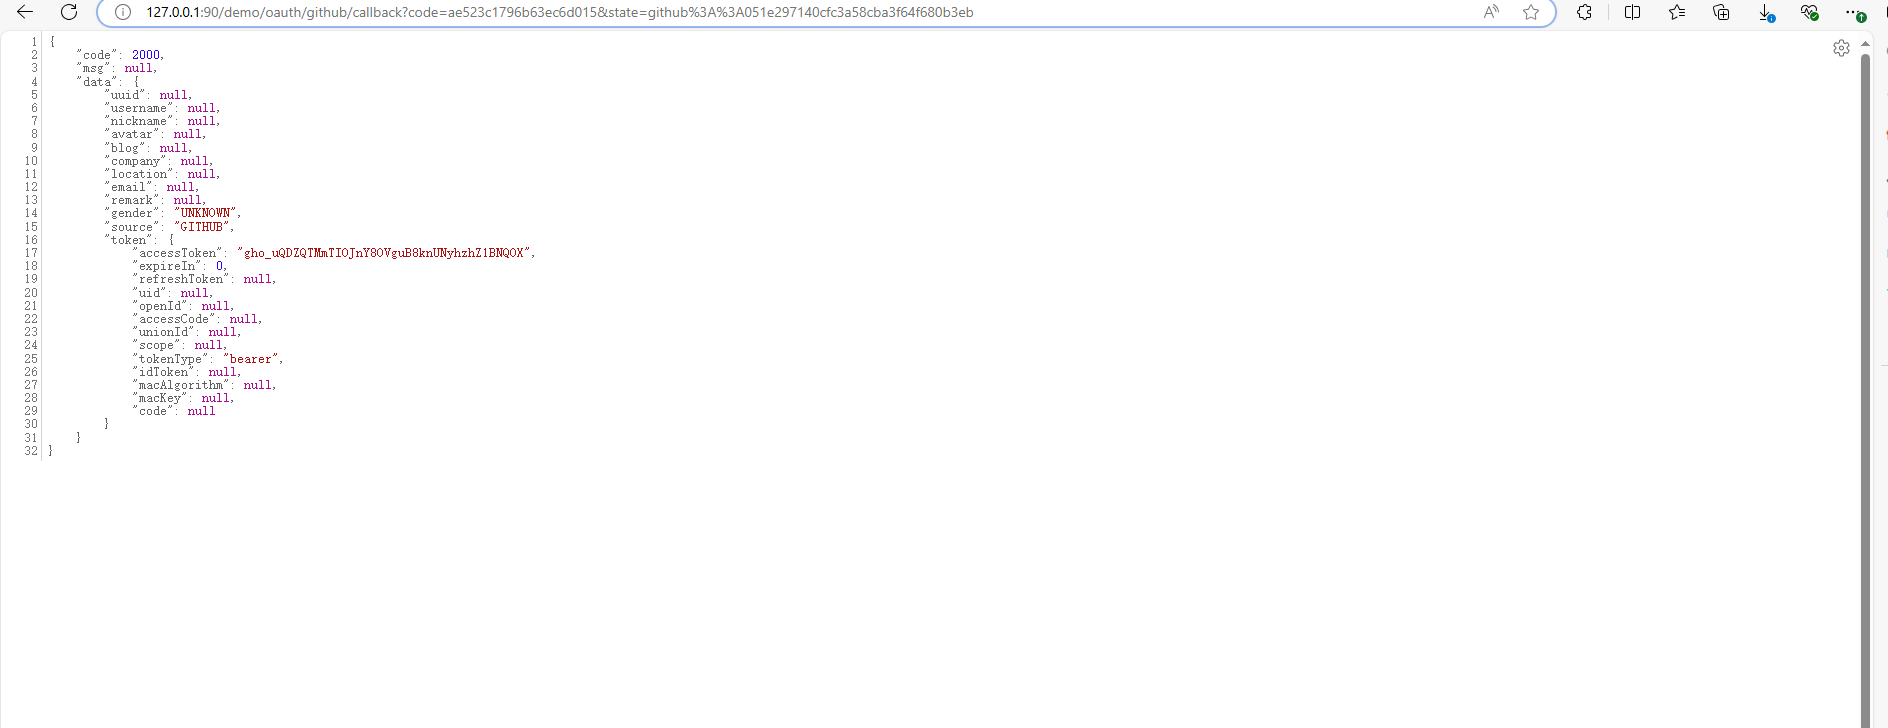
4.效果
参考
- JustAuth 项目地址:https://github.com/justauth/JustAuth
- justauth-spring-boot-starter 地址:https://github.com/justauth/justauth-spring-boot-starter
- frp 内网穿透项目地址:https://github.com/fatedier/frp
- frp 内网穿透官方中文文档:https://github.com/fatedier/frp/blob/master/README_zh.md
- Frp 实现内网穿透:https://zhuanlan.zhihu.com/p/45445979
- QQ 互联文档:http://wiki.connect.qq.com / 准备工作_oauth2-0
- 微信开放平台文档:https://open.weixin.qq.com/cgi-bin/showdocument?action=dir_list&t=resource/res_list&verify=1&id=open1419316505&token=&lang=zh_CN
- GitHub 第三方登录文档:https://developer.github.com/apps/building-oauth-apps/
- 谷歌 Oauth2 文档:https://developers.google.com/identity/protocols/OpenIDConnect
- 微软 Oauth2 文档:https://docs.microsoft.com/zh-cn/graph/auth-v2-user
- 小米开放平台账号服务文档:https://dev.mi.com/console/doc/detail?pId=707


 1479
1479

 被折叠的 条评论
为什么被折叠?
被折叠的 条评论
为什么被折叠?
 到【灌水乐园】发言


