


1.2 入门程序实现
1.2.1 准备工作
1.2.1.1 创建springboot工程
创建springboot工程,并导入 mybatis的起步依赖、mysql的驱动包。
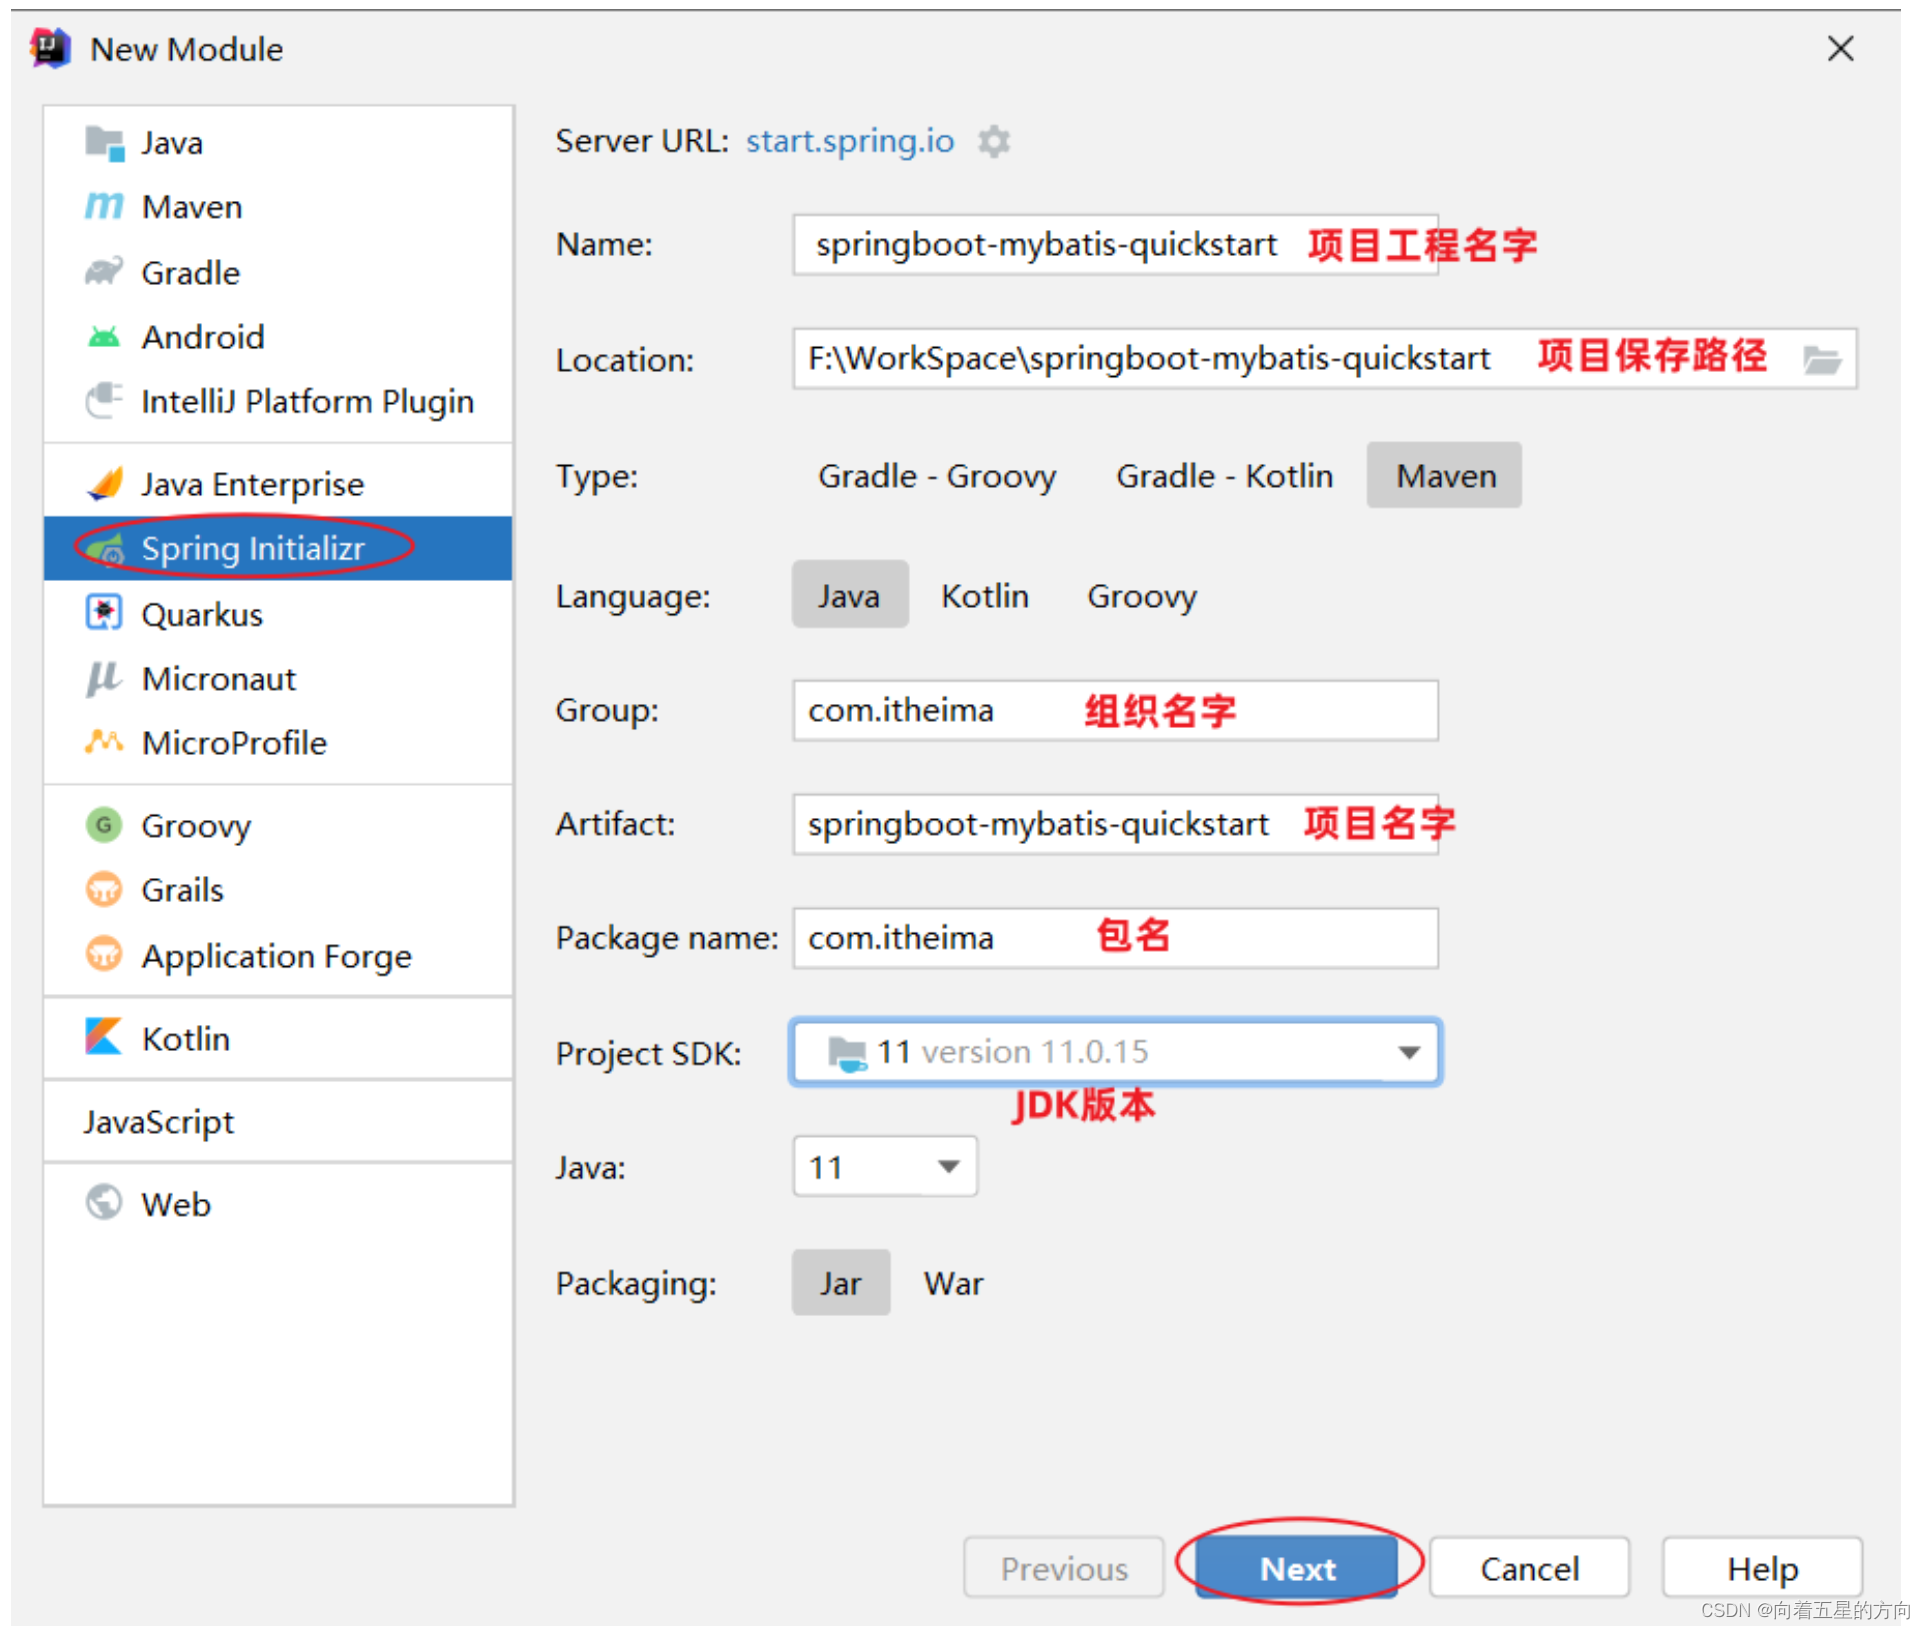
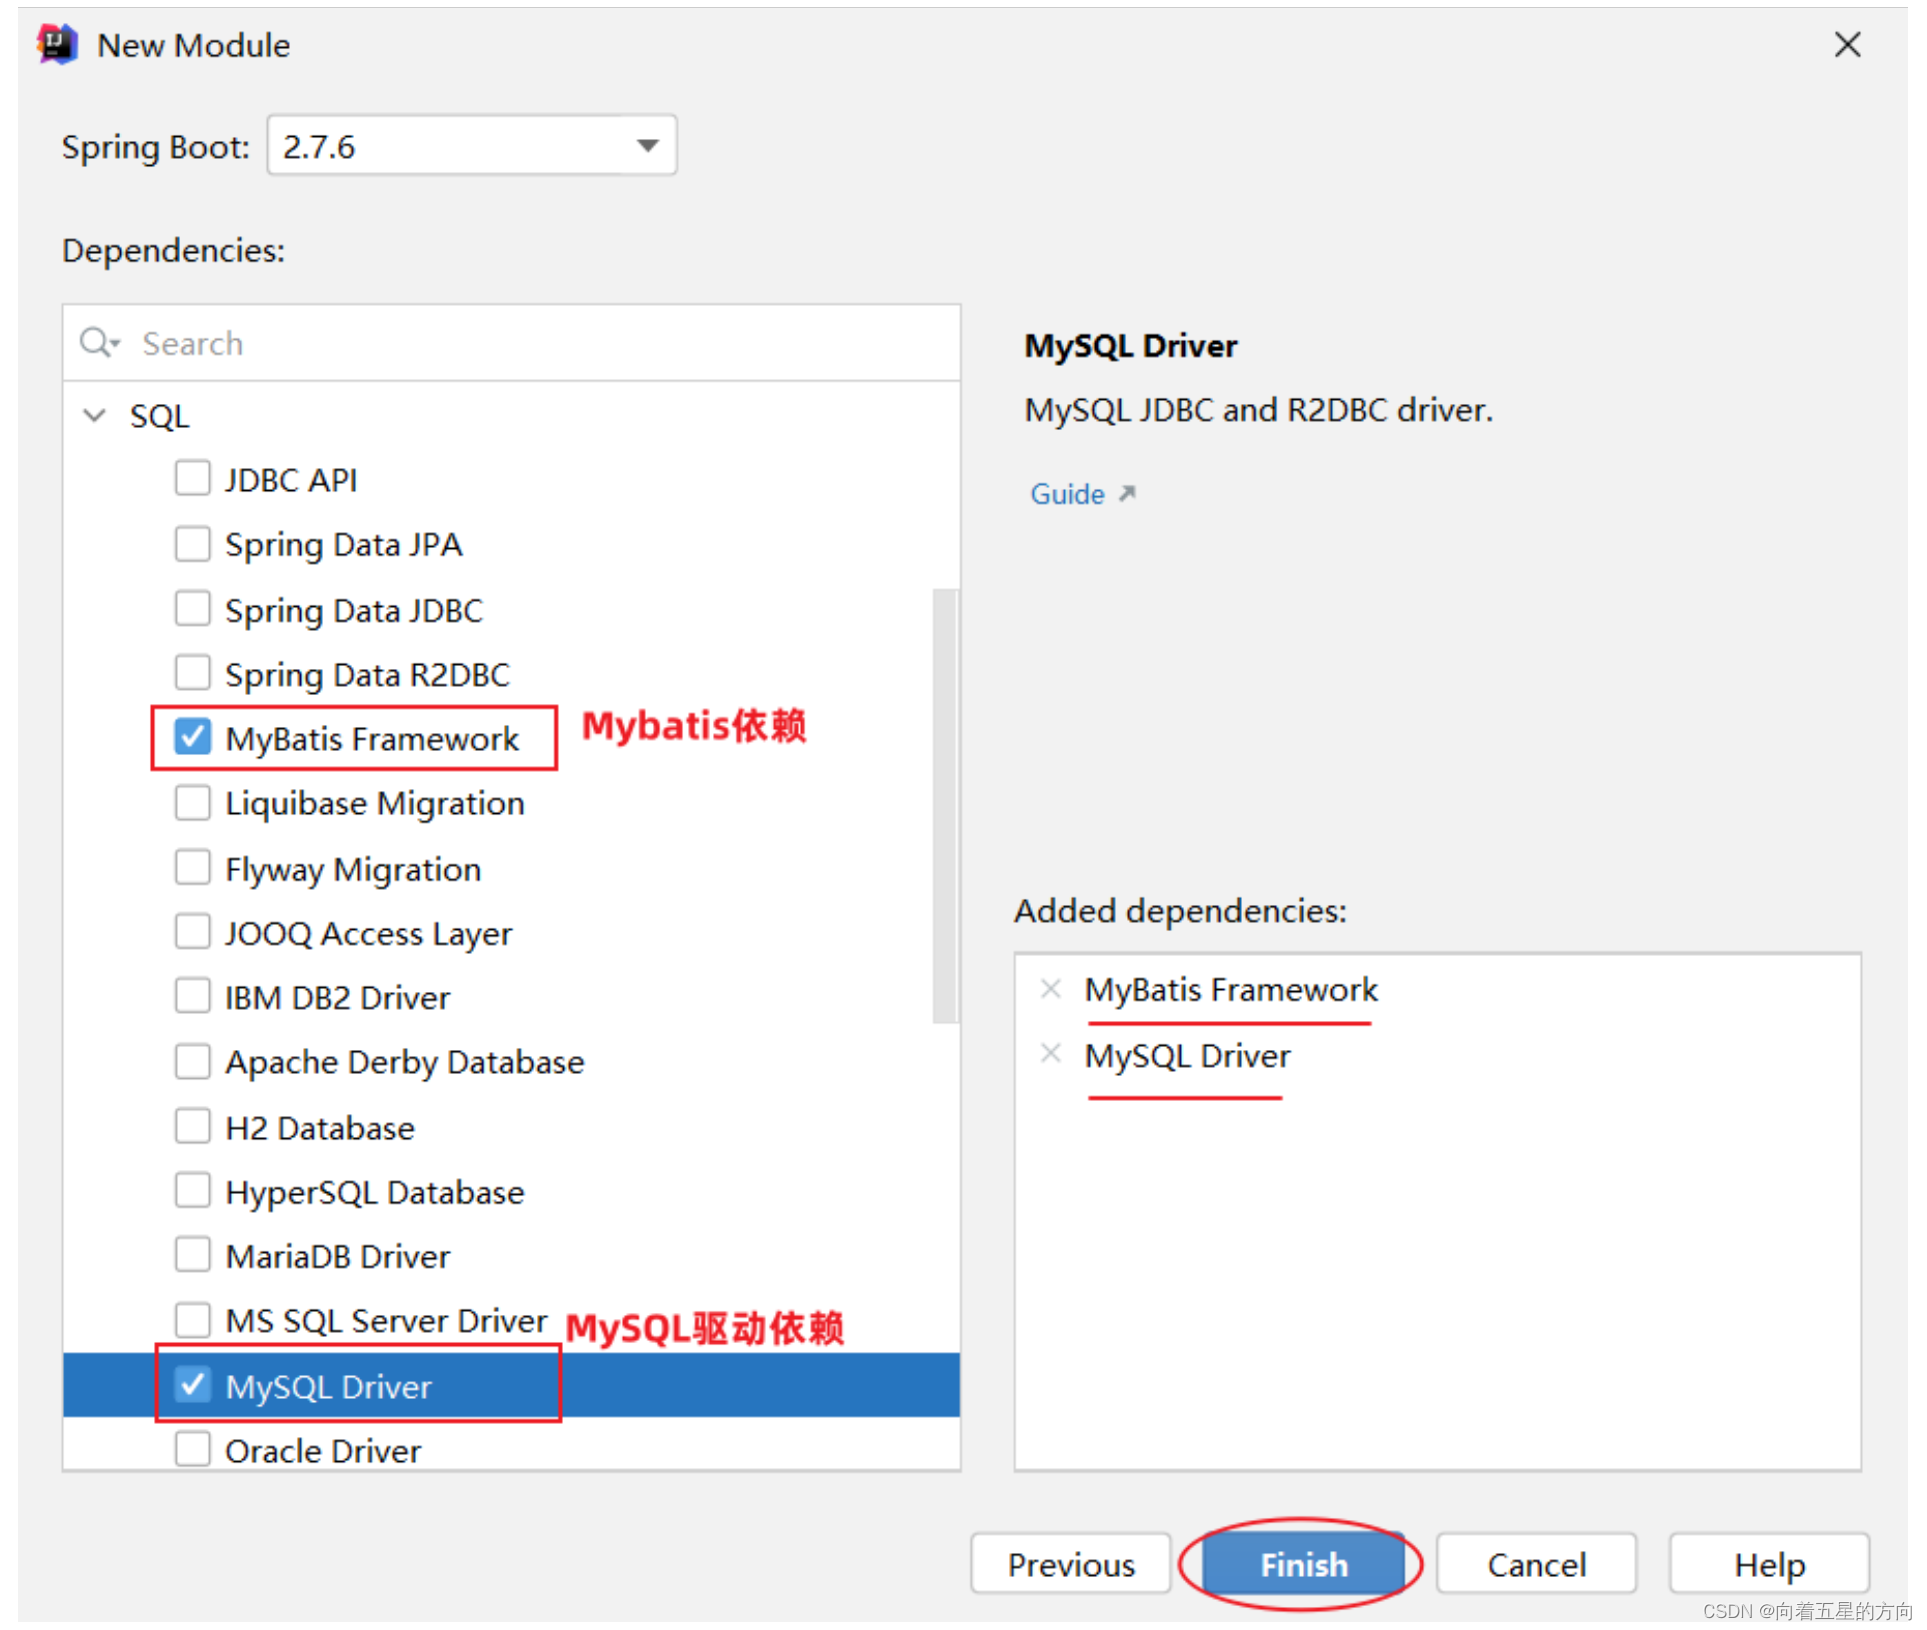
项目工程创建完成后,自动在pom.xml文件中,导入Mybatis依赖和MySQL驱动依赖
<!-- 仅供参考:只粘贴了pom.xml中部分内容 -->
<dependencies>
<!-- mybatis起步依赖 -->
<dependency>
<groupId>org.mybatis.spring.boot</groupId>
<artifactId>mybatis-spring-boot-starter</artifactId>
<version>2.3.0</version>
</dependency>
<!-- mysql驱动包依赖 -->
<dependency>
<groupId>com.mysql</groupId>
<artifactId>mysql-connector-j</artifactId>
<scope>runtime</scope>
</dependency>
<!-- spring单元测试 (集成了junit) -->
<dependency>
<groupId>org.springframework.boot</groupId>
<artifactId>spring-boot-starter-test</artifactId>
<scope>test</scope>
</dependency>
</dependencies>1.2.1.2 数据准备
创建用户表user,并创建对应的实体类User。
-
用户表:
-- 用户表
create table user(
id int unsigned primary key auto_increment comment 'ID',
name varchar(100) comment '姓名',
age tinyint unsigned comment '年龄',
gender tinyint unsigned comment '性别, 1:男, 2:女',
phone varchar(11) comment '手机号'
) comment '用户表';
-- 测试数据
insert into user(id, name, age, gender, phone) VALUES (null,'白眉鹰王',55,'1','18800000000');
insert into user(id, name, age, gender, phone) VALUES (null,'金毛狮王',45,'1','18800000001');
insert into user(id, name, age, gender, phone) VALUES (null,'青翼蝠王',38,'1','18800000002');
insert into user(id, name, age, gender, phone) VALUES (null,'紫衫龙王',42,'2','18800000003');
insert into user(id, name, age, gender, phone) VALUES (null,'光明左使',37,'1','18800000004');
insert into user(id, name, age, gender, phone) VALUES (null,'光明右使',48,'1','18800000005');-

-
实体类
-
实体类的属性名与表中的字段名一一对应。
-
public class User {
    private Integer id;   //id(主键)
    private String name;  //姓名
    private Short age;    //年龄
    private Short gender; //性别
    private String phone; //手机号

    //省略GET, SET方法
}
1.2.2 配置Mybatis
在之前使用图形化客户端工具,连接MySQL数据库时,需要配置:
连接数据库的四大参数:
MySQL驱动类
登录名
密码
数据库连接字符串
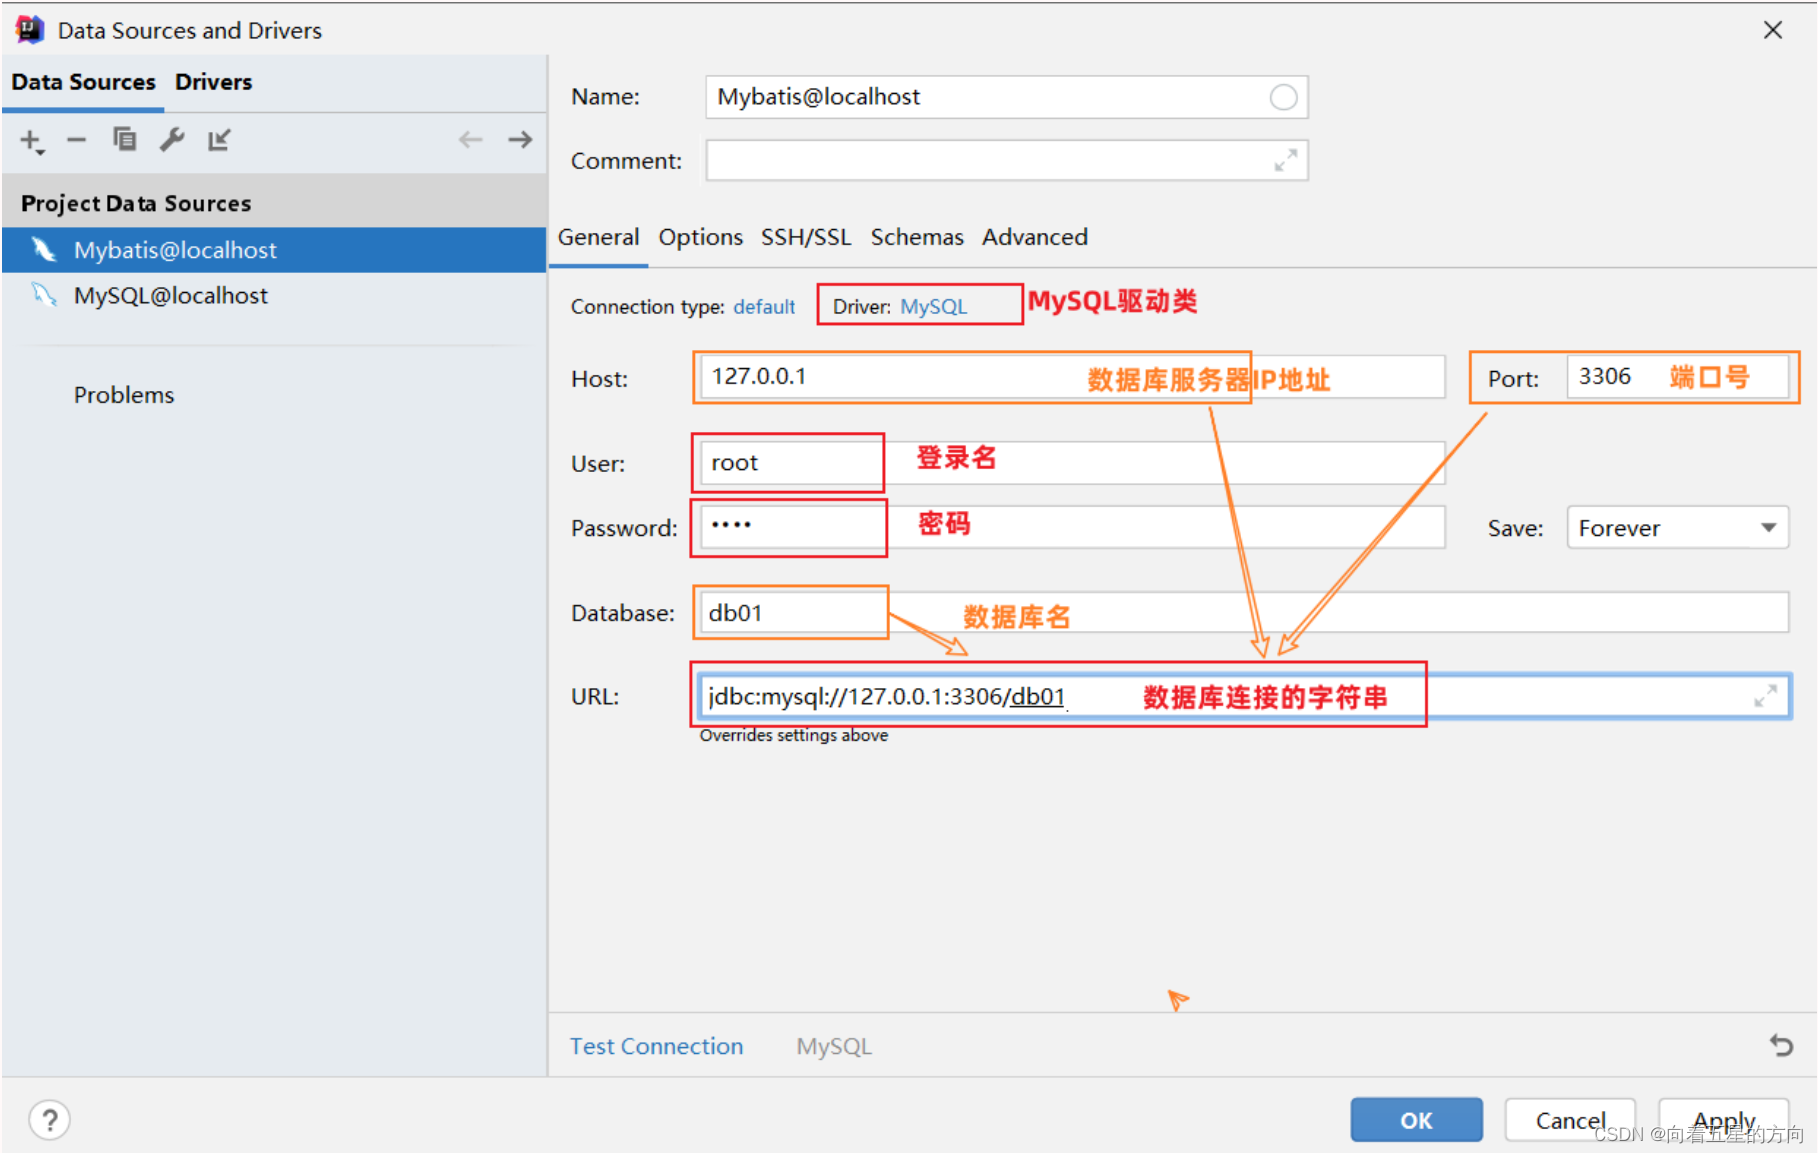
基于上述分析,在Mybatis中要连接数据库,同样也需要以上4个参数配置。
在springboot项目中,可以编写application.properties文件,配置数据库连接信息。我们要连接数据库,就需要配置数据库连接的基本信息,包括:driver-class-name、url 、username,password。
在入门程序中,大家可以直接这么配置,后面会介绍什么是驱动。
application.properties:
#驱动类名称
spring.datasource.driver-class-name=com.mysql.cj.jdbc.Driver
#数据库连接的url
spring.datasource.url=jdbc:mysql://localhost:3306/mybatis
#连接数据库的用户名
spring.datasource.username=root
#连接数据库的密码
spring.datasource.password=1234
上述的配置,可以直接复制过去,不要敲错了。 全部都是 spring.datasource.xxxx 开头。
1.2.3 编写SQL语句
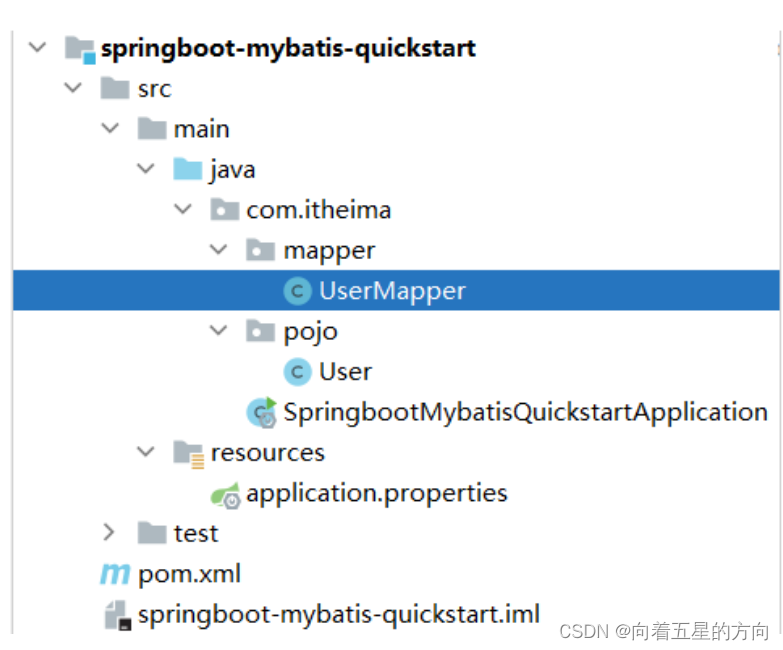
在创建出来的springboot工程中,在引导类所在包下,在创建一个包 mapper。在mapper包下创建一个接口 UserMapper ,这是一个持久层接口(Mybatis的持久层接口规范一般都叫 XxxMapper)。
UserMapper:
import com.itheima.pojo.User;
import org.apache.ibatis.annotations.Mapper;
import org.apache.ibatis.annotations.Select;
import java.util.List;
@Mapper
public interface UserMapper {
//查询所有用户数据
@Select("select id, name, age, gender, phone from user")
public List<User> list();
}@Mapper注解:表示是mybatis中的Mapper接口
程序运行时:框架会自动生成接口的实现类对象(代理对象),并给交Spring的IOC容器管理
@Select注解:代表的就是select查询,用于书写select查询语句
1.2.4 单元测试
在创建出来的SpringBoot工程中,在src下的test目录下,已经自动帮我们创建好了测试类 ,并且在测试类上已经添加了注解 @SpringBootTest,代表该测试类已经与SpringBoot整合。
该测试类在运行时,会自动通过引导类加载Spring的环境(IOC容器)。我们要测试那个bean对象,就可以直接通过@Autowired注解直接将其注入进行,然后就可以测试了。
测试类代码如下:
@SpringBootTest
public class MybatisQuickstartApplicationTests {
@Autowired
private UserMapper userMapper;
@Test
public void testList(){
List<User> userList = userMapper.list();
for (User user : userList) {
System.out.println(user);
}
}
}运行结果:
User{id=1, name='白眉鹰王', age=55, gender=1, phone='18800000000'}
User{id=2, name='金毛狮王', age=45, gender=1, phone='18800000001'}
User{id=3, name='青翼蝠王', age=38, gender=1, phone='18800000002'}
User{id=4, name='紫衫龙王', age=42, gender=2, phone='18800000003'}
User{id=5, name='光明左使', age=37, gender=1, phone='18800000004'}
User{id=6, name='光明右使', age=48, gender=1, phone='18800000005'}
1.3 解决SQL警告与提示
默认我们在UserMapper接口上加的@Select注解中编写SQL语句是没有提示的。 如果想让idea给我们提示对应的SQL语句,我们需要在IDEA中配置与MySQL数据库的链接。
默认我们在UserMapper接口上的@Select注解中编写SQL语句是没有提示的。如果想让idea给出提示,可以做如下配置:
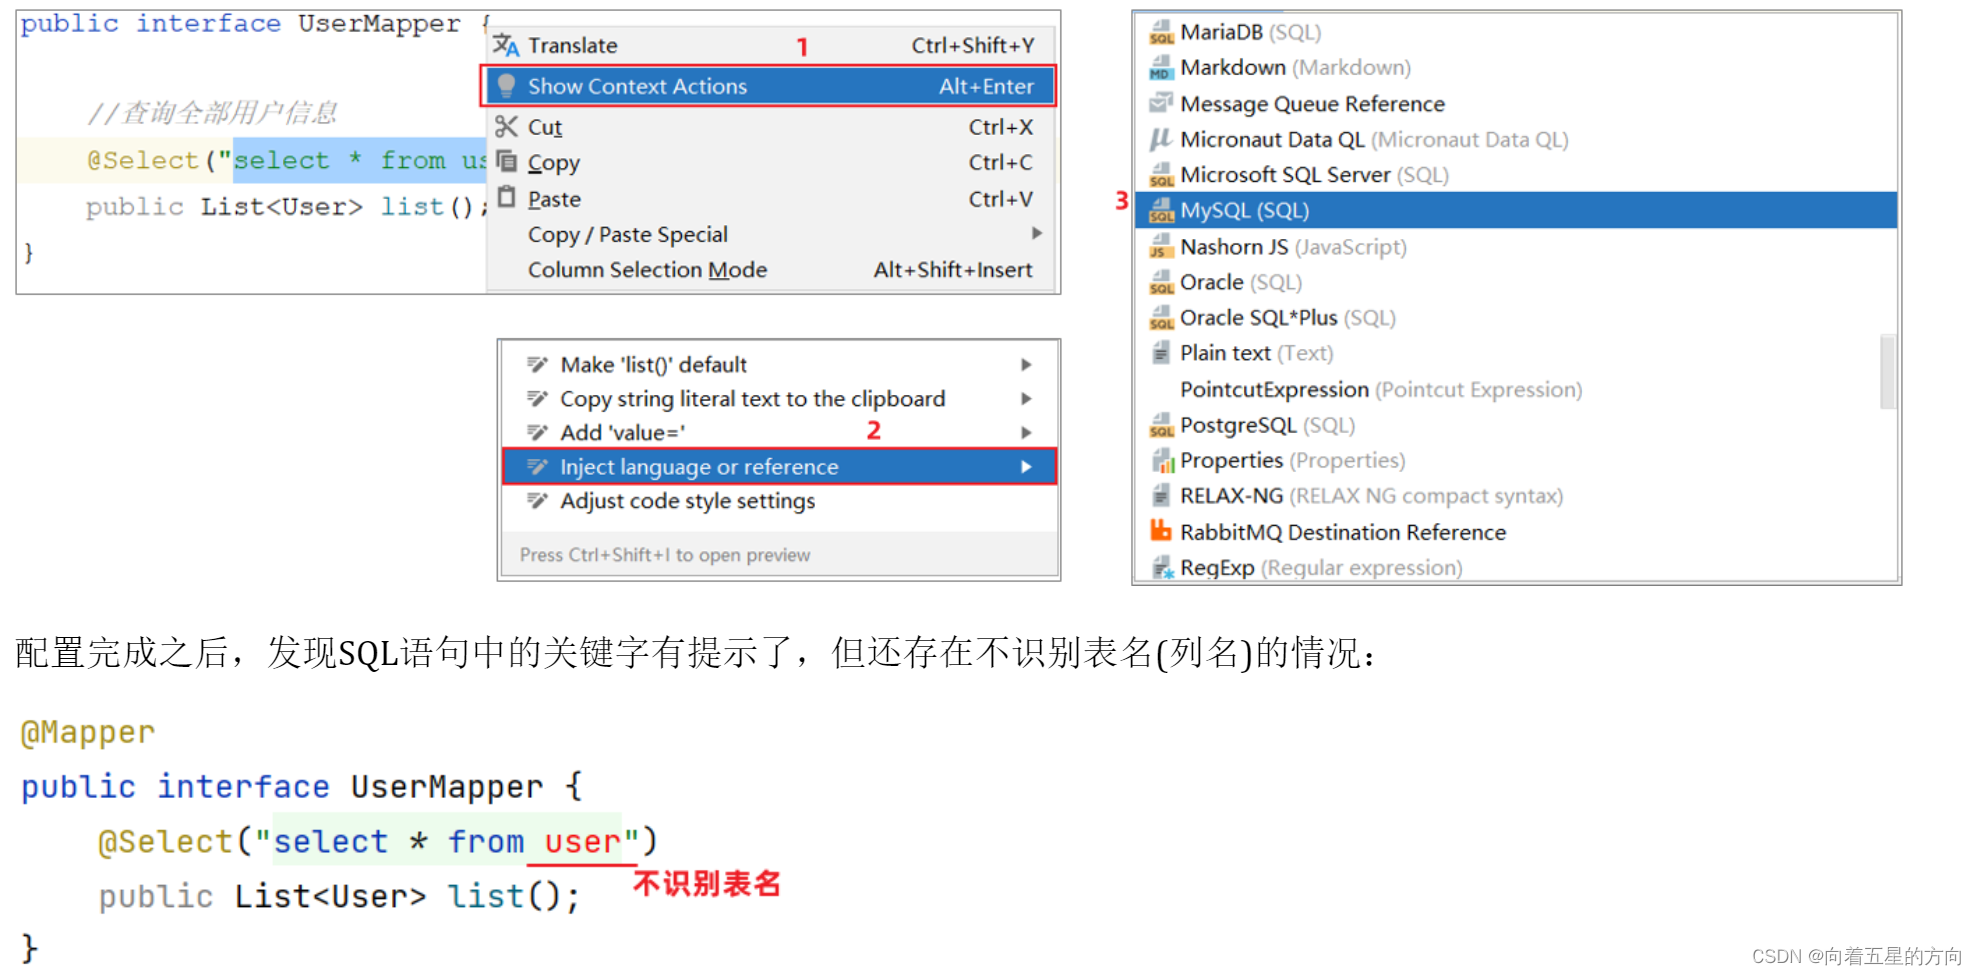
配置完成之后,发现SQL语句中的关键字有提示了,但还存在不识别表名(列名)的情况:
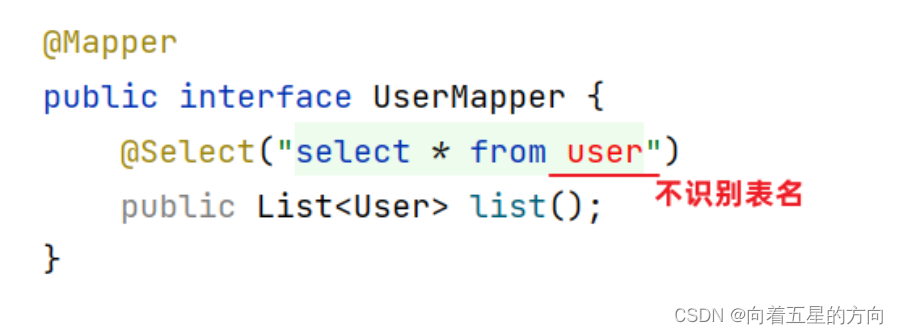
产生原因:Idea和数据库没有建立连接,不识别表信息
解决方案:在Idea中配置MySQL数据库连接
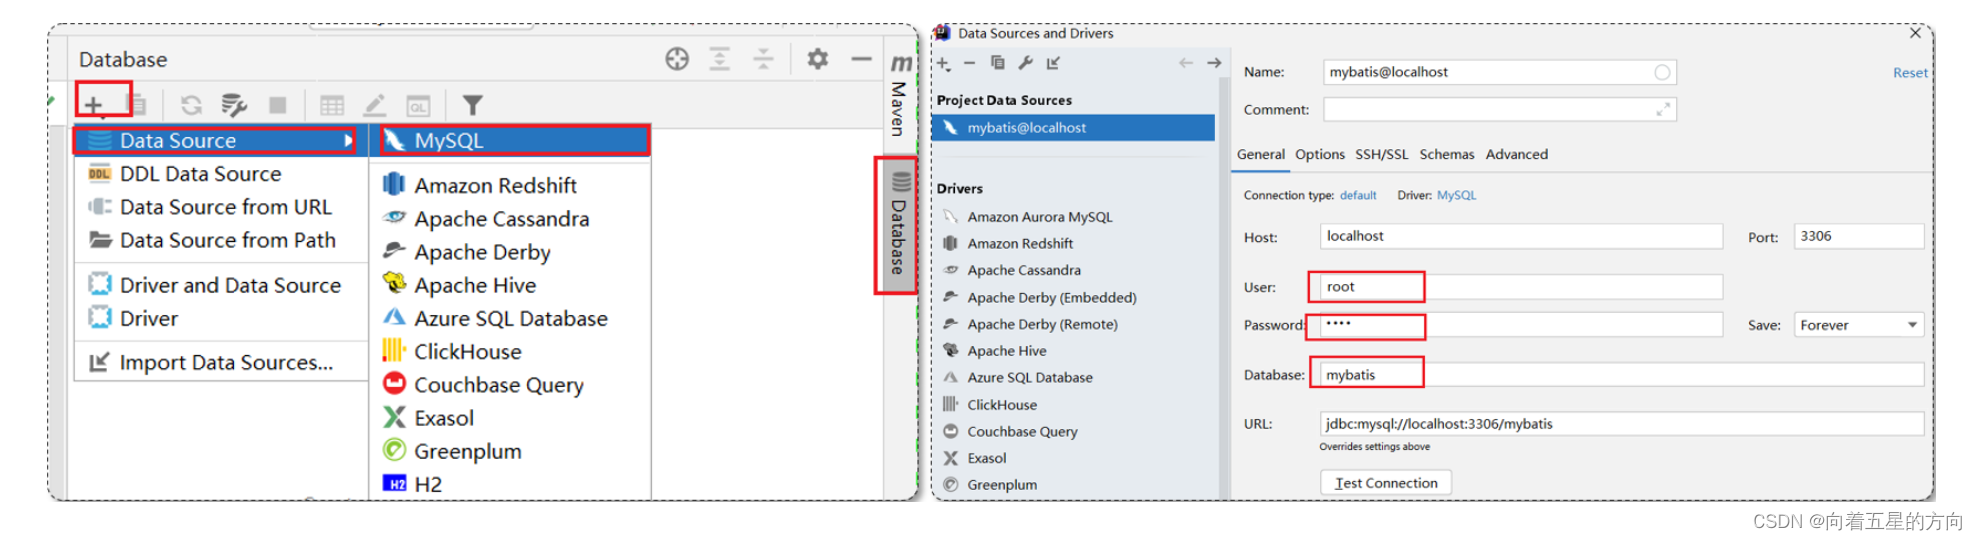
在配置的时候指定连接那个数据库,如上图所示连接的就是mybatis数据库。


 1473
1473


 被折叠的 条评论
为什么被折叠?
被折叠的 条评论
为什么被折叠?
 到【灌水乐园】发言


