


Linux系统Mysql下载安装配置
#清除环境
- 查看是否存在mysql用户的命令:
cat /etc/group | grep mysql
cat /etc/passwd |grep mysql- 增加 mysql 用户的命令:
groupadd mysql
useradd -r -g mysql mysql
1下载安装包
wget https://downloads.mysql.com/archives/get/p/23/file/mysql-5.7.28-linux-glibc2.12-x86_64.tar.gz
https://download.oracle.com/java/21/latest/jdk-21_linux-x64_bin.tar.gz #java21版本
2、解压缩
tar -zxvf mysql-5.7.28-linux-glibc2.12-x86_64.tar.gz
mv mysql-5.7.28-linux-glibc2.12-x86_64 /usr/local/mysql
3、所属组
chmod -R 755 /usr/local/mysql
mkdir -p /data/mysql #创建目录
chown mysql:mysql -R /data/mysql #网上的 赋予权限
chmod 777 /data/mysql #自己给赋的权
4、主配置文件
/etc/my.cnf
[mysqld]
#datadir=/var/lib/mysql
#socket=/var/lib/mysql/mysql.sock
# Disabling symbolic-links is recommended to prevent assorted security risks
#symbolic-links=0
# Settings user and group are ignored when systemd is used.
# If you need to run mysqld under a different user or group,
# customize your systemd unit file for mariadb according to the
# instructions in http://fedoraproject.org/wiki/Systemd
bind-address=127.0.0.1
port=3306
user=mysql
basedir=/usr/local/mysql
datadir=/data/mysql
socket=/tmp/mysql.sock
#socket=/data/mysql/mysql.sock
log-error=/data/mysql/mysql.err
pid-file=/data/mysql/mysql.pid
##character config
character_set_server=utf8mb4
symbolic-links=0
explicit_defaults_for_timestamp=true[mysqld_safe]
#log-error=/var/log/mariadb/mariadb.log
log-error=/data/mysql/mariadb.log
#pid-file=/var/run/mariadb/mariadb.pid
pid-file=/data/mysql/mariadb.pid#
# include all files from the config directory
#
!includedir /etc/my.cnf.d
5、初始化
./mysqld --initialize --user=mysql --datadir=/data/mysql --basedir=/usr/local/mysql
查看密码 cat /data/mysql/mysql.err

6、服务启动
cp /usr/local/mysql/support-files/mysql.server /etc/init.d/mysql
service mysql start
ps -ef|grep mysqlln -s /usr/local/mysql/bin/* /usr/local/bin/
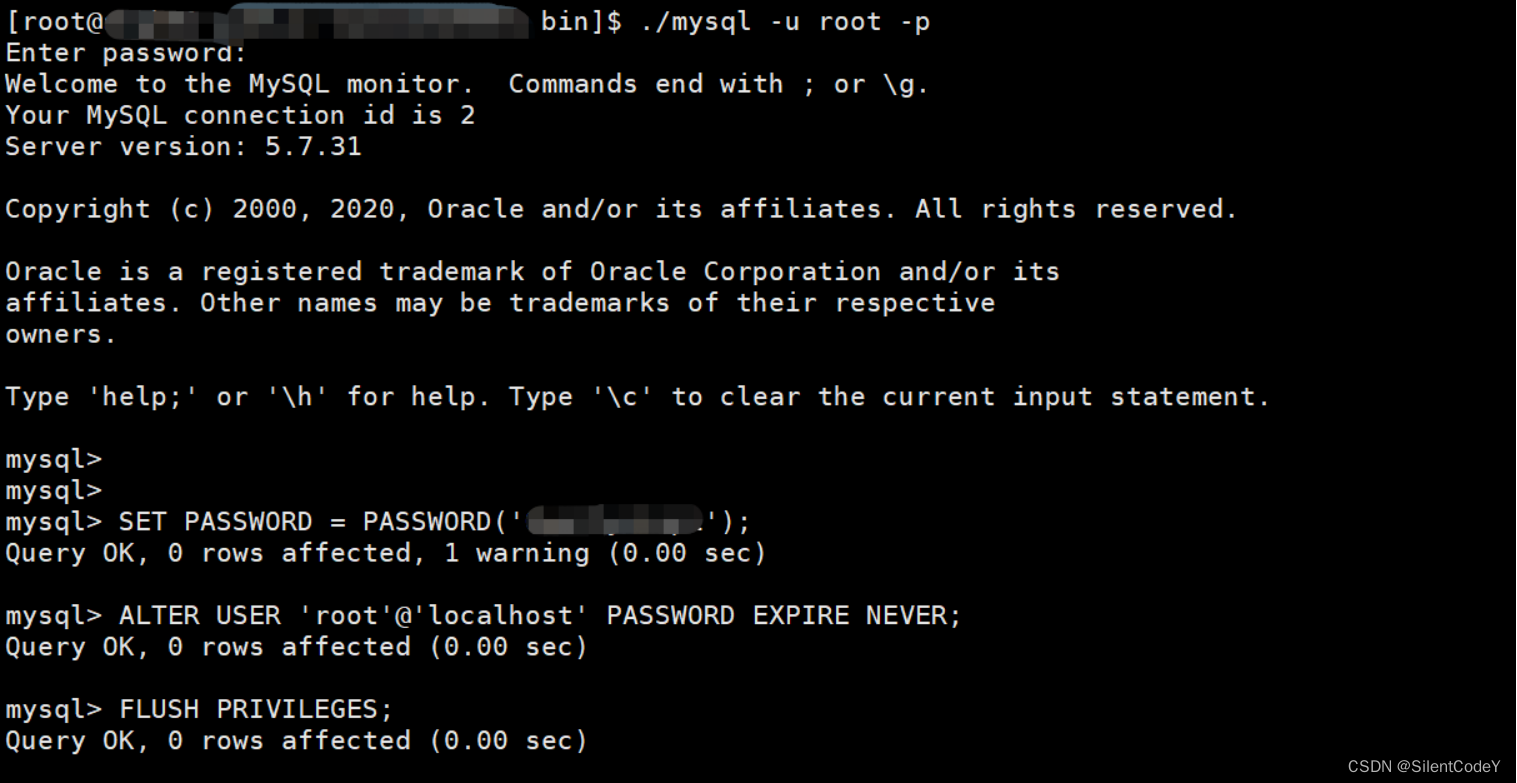
7、登录
mysql -u root -p
SET PASSWORD = PASSWORD('Qwertyuiop1');
ALTER USER 'root'@'localhost' PASSWORD EXPIRE NEVER;
或执行命令:set password for root@localhost = password('Qwertyuiop1');
FLUSH PRIVILEGES;
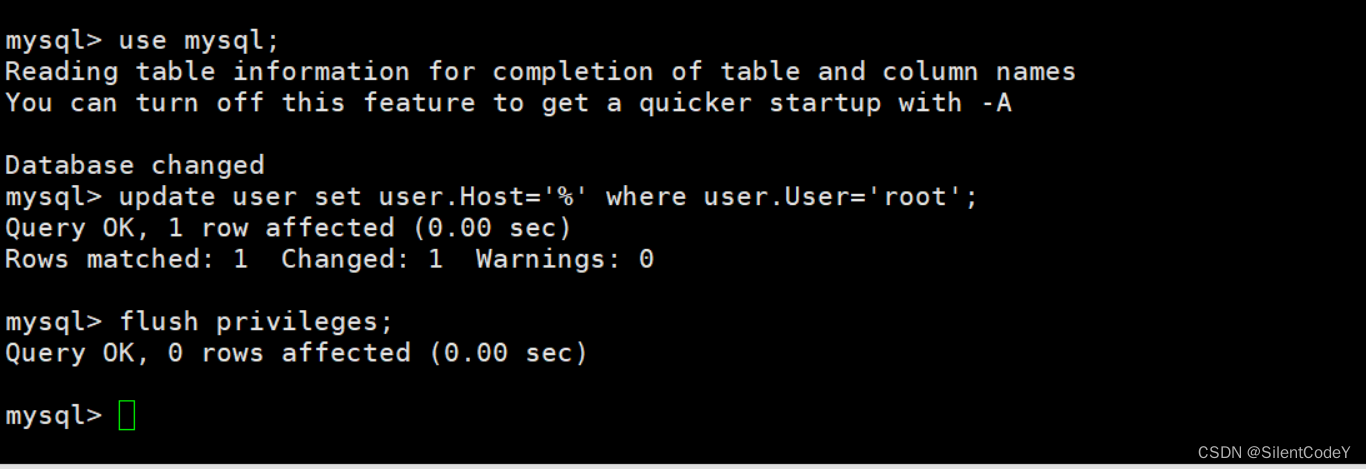
8、开启远程连接功能
use mysql;
update user set user.Host='%' where user.User='root';
flush privileges;
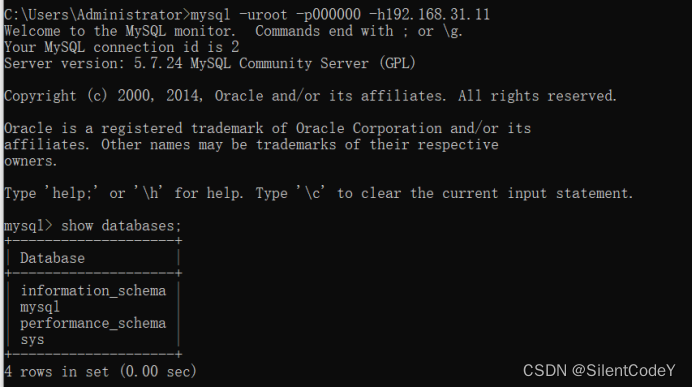
9、windows连接登录
[root@localhost bin]# vim /etc/my.cnf
bind-address=0.0.0.0 #修改此ip
[root@localhost bin]# service mysql restart
Shutting down MySQL.... SUCCESS!
Starting MySQL. SUCCESS!
[root@localhost bin]# netstat -ntlp
Active Internet connections (only servers)
Proto Recv-Q Send-Q Local Address Foreign Address State PID/Program name
tcp 0 0 0.0.0.0:3306 0.0.0.0:* LISTEN 12267/mysqld
tcp 0 0 0.0.0.0:22 0.0.0.0:* LISTEN 1018/sshd
tcp 0 0 127.0.0.1:25 0.0.0.0:* LISTEN 1203/master
tcp6 0 0 :::22 :::* LISTEN 1018/sshd
tcp6 0 0 ::1:25 :::* LISTEN 1203/master


 3211
3211

 被折叠的 条评论
为什么被折叠?
被折叠的 条评论
为什么被折叠?
 到【灌水乐园】发言


