


如何使用React 实现一个简单的待办事项列表?
本文会从如何搭建一个React环境开始写起,直到能运行出一个简单的待办事项列表,完成用户可以添加、编辑和删除待办事项的功能。
首先是在本地配置React开发环境的详细步骤:
-
安装Node.js:访问Node.js官方网站(https://nodejs.org/) 下载并安装适用于您操作系统的最新版本的Node.js。安装完成后,您可以在命令行中运行
node -v来检查Node.js是否成功安装。

-
选择代码编辑器:选择一个适合您的代码编辑器,例如Visual Studio Code、HBuilderX等。确保您已经在计算机上安装了您选择的代码编辑器,本文使用的是HBuilderX。
-
下载相关React的包:
npm install -g create-react-app -
创建新的React项目:打开命令行终端,并导航到您想要创建React项目的目录。运行以下命令来创建一个新的React项目:
create-react-app project_name
这将创建一个名为my-app的新目录,并在其中初始化一个新的React项目。
- 进入项目目录:在命令行中运行以下命令,进入新创建的React项目的目录:
cd project_name
- 启动开发服务器:运行以下命令来启动React开发服务器:
npm start
这将启动一个本地开发服务器,并在浏览器中打开http://localhost:3000,能够看到React应用程序的初始页面。
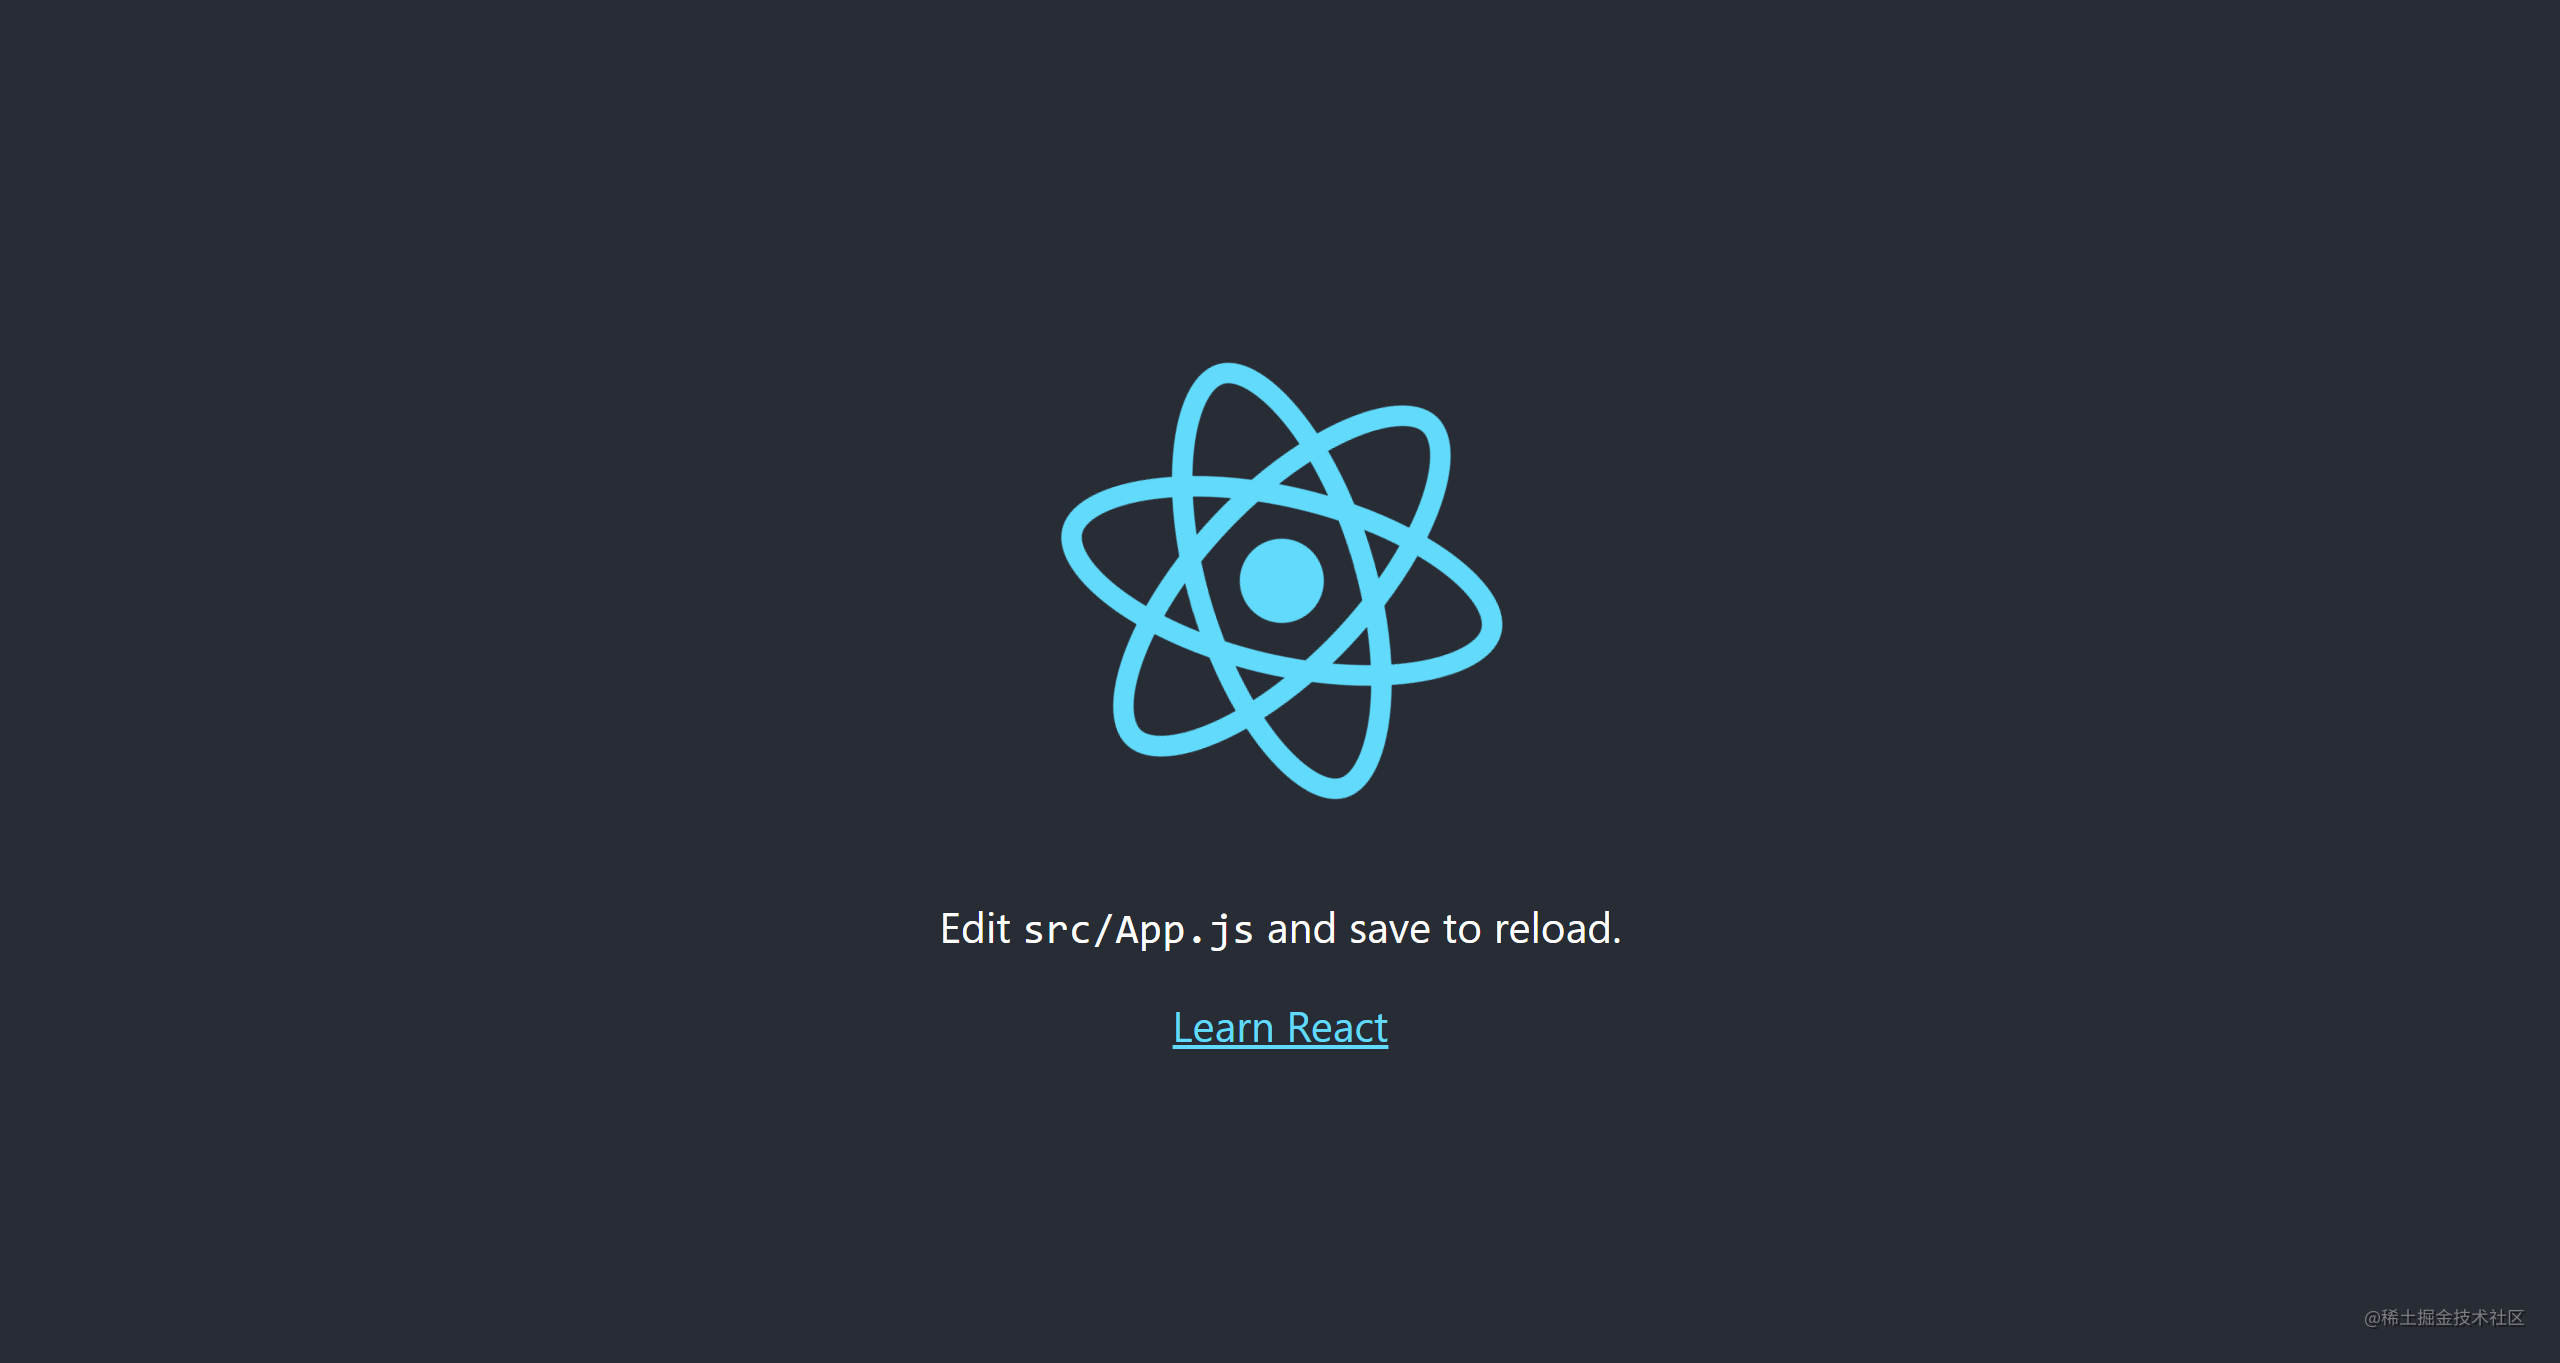
本地跑的示例(具体过程):

出现这样的画面即为成功
- 简单的待办事项列表具体实现:
编辑React应用程序:第一步:打开React项目文件夹中的src/App.css文件
.App {
  max-width: 400px;
  margin: 0 auto;
  padding: 20px;
  background-color: #f5f5f5;
  border-radius: 5px;
  box-shadow: 0 2px 4px rgba(0, 0, 0, 0.1);
}

.title {
  font-size: 24px;
  font-weight: bold;
  margin-bottom: 20px;
  text-align: center;
}

.add-todo {
  display: flex;
  margin-bottom: 20px;
}

.input {
  flex: 1;
  padding: 10px;
  border: none;
  border-radius: 5px;
  font-size: 16px;
}

.button {
  padding: 10px 20px;
  background-color: #007bff;
  color: #fff;
  border: none;
  border-radius: 5px;
  font-size: 16px;
  cursor: pointer;
}

.todo-list {
  list-style: none;
  padding: 0;
}

.todo-item {
  display: flex;
  align-items: center;
  justify-content: space-between;
  margin-bottom: 10px;
  padding: 10px;
  background-color: #fff;
  border-radius: 5px;
  box-shadow: 0 2px 4px rgba(0, 0, 0, 0.1);
}

.actions {
  display: flex;
}

.edit-button {
  margin-right: 5px;
  background-color: #ffc107;
}

.delete-button {
  background-color: #dc3545;
}
打开React项目文件夹中的src/App.js文件,并对其进行编辑。
import React, { useState } from 'react';
import './App.css';

function App() {
  const [todos, setTodos] = useState([]);
  const [newTodo, setNewTodo] = useState('');
  const [editingIndex, setEditingIndex] = useState(-1);

  const handleInputChange = (e) => {
    setNewTodo(e.target.value);
  };

  const handleAddTodo = () => {
    if (newTodo.trim() !== '') {
      setTodos([...todos, newTodo]);
      setNewTodo('');
    }
  };

  const handleEditTodo = (index) => {
    setEditingIndex(index);
    setNewTodo(todos[index]);
  };

  const handleUpdateTodo = () => {
    if (newTodo.trim() !== '') {
      const updatedTodos = [...todos];
      updatedTodos[editingIndex] = newTodo;
      setTodos(updatedTodos);
      setNewTodo('');
      setEditingIndex(-1);
    }
  };

  const handleDeleteTodo = (index) => {
    const updatedTodos = [...todos];
    updatedTodos.splice(index, 1);
    setTodos(updatedTodos);
  };

  return (
    <div className="App">
      <h1 className="title">Todo List</h1>
      <div className="add-todo">
        <input
          type="text"
          className="input"
          placeholder="Add todo..."
          value={newTodo}
          onChange={handleInputChange}
        />
        {editingIndex !== -1 ? (
          <button className="button" onClick={handleUpdateTodo}>
            Update
          </button>
        ) : (
          <button className="button" onClick={handleAddTodo}>
            Add
          </button>
        )}
      </div>
      <ul className="todo-list">
        {todos.map((todo, index) => (
          <li key={index} className="todo-item">
            <span>{todo}</span>
            <div className="actions">
              <button
                className="button edit-button"
                onClick={() => handleEditTodo(index)}
              >
                Edit
              </button>
              <button
                className="button delete-button"
                onClick={() => handleDeleteTodo(index)}
              >
                Delete
              </button>
            </div>
          </li>
        ))}
      </ul>
    </div>
  );
}

export default App;
- 查看更改效果:保存文件时,开发服务器将自动重新加载应用程序,并在浏览器中显示最新的更改。通过在浏览器中查看
http://localhost:3000,能够看到React应用程序更改的效果,此案例中可以完成增加、删除和编辑待办事项的动作。

最终效果如图所示,虽然看着很简单,但是我真的花了不少时间,以此记录自己的学习过程。


 5366
5366


 被折叠的 条评论
为什么被折叠?
被折叠的 条评论
为什么被折叠?
 到【灌水乐园】发言


