


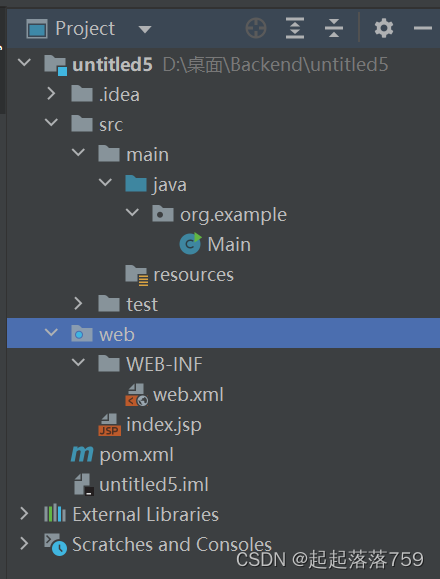
SpringMVC基础框架搭建-两种方式
NO1.创建maven工程

NO2.添加web
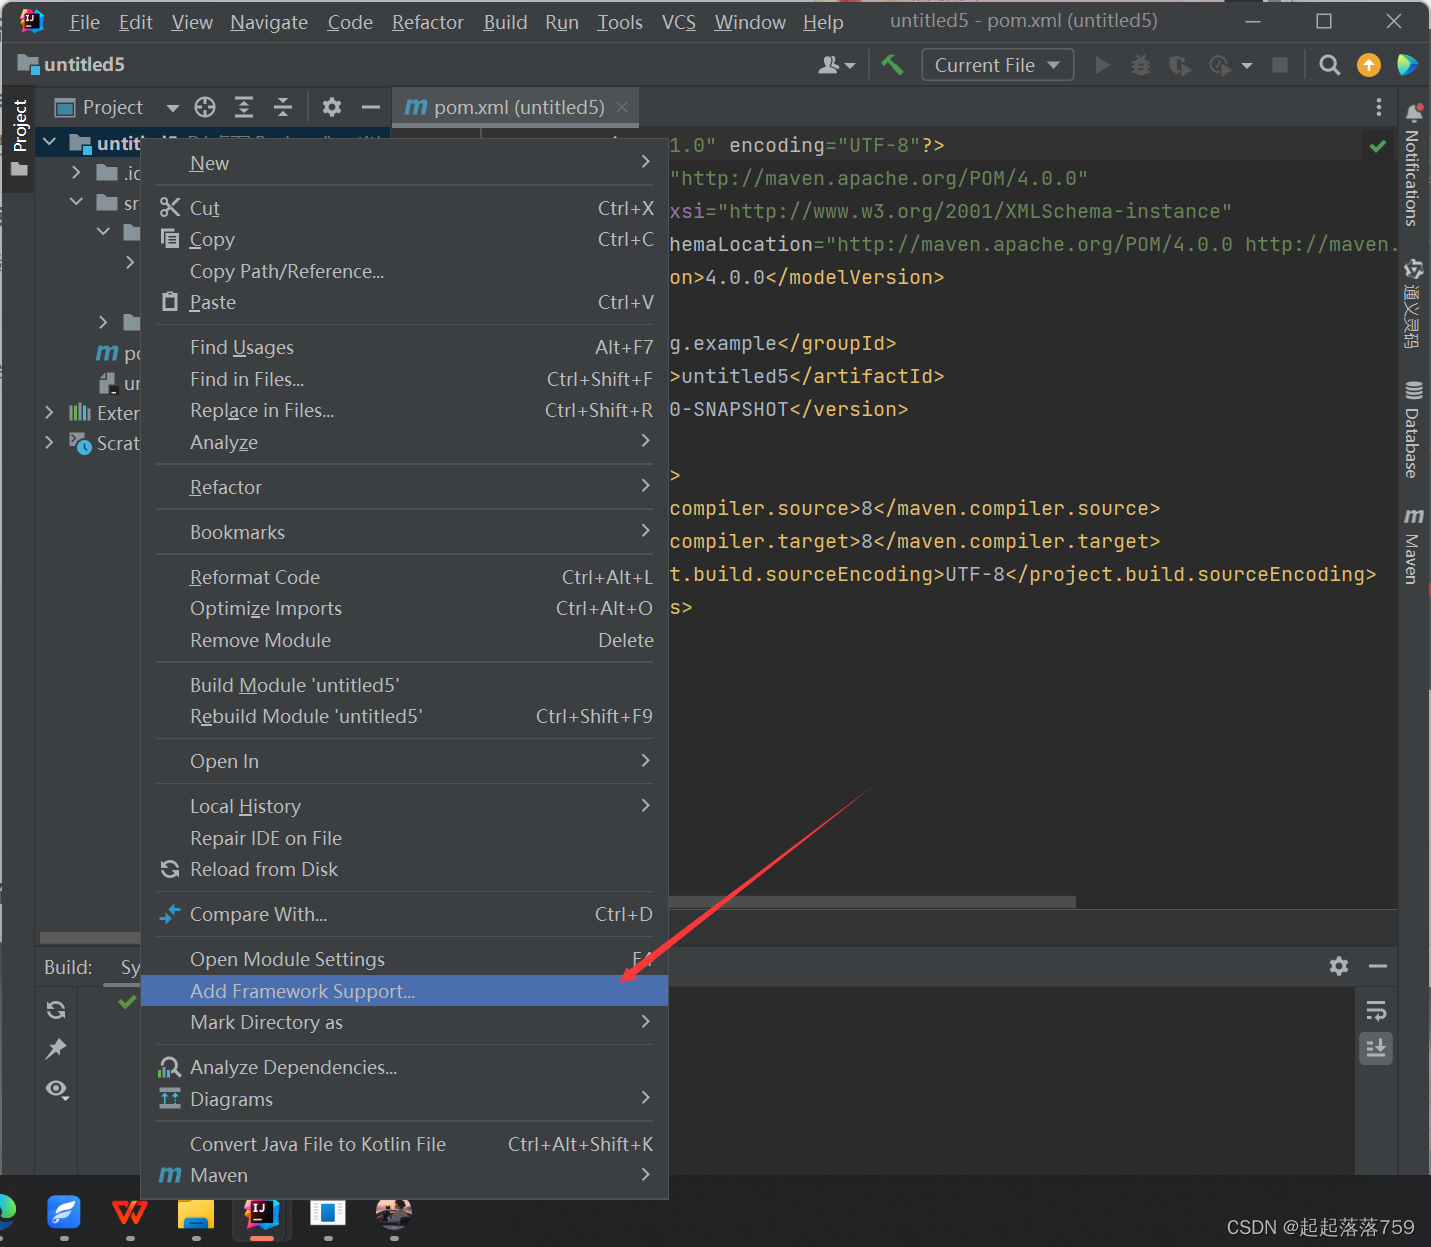
2-1.右键项目,选择Add Framework Support...
2-2.选择Web Application后,按需勾选web.xml

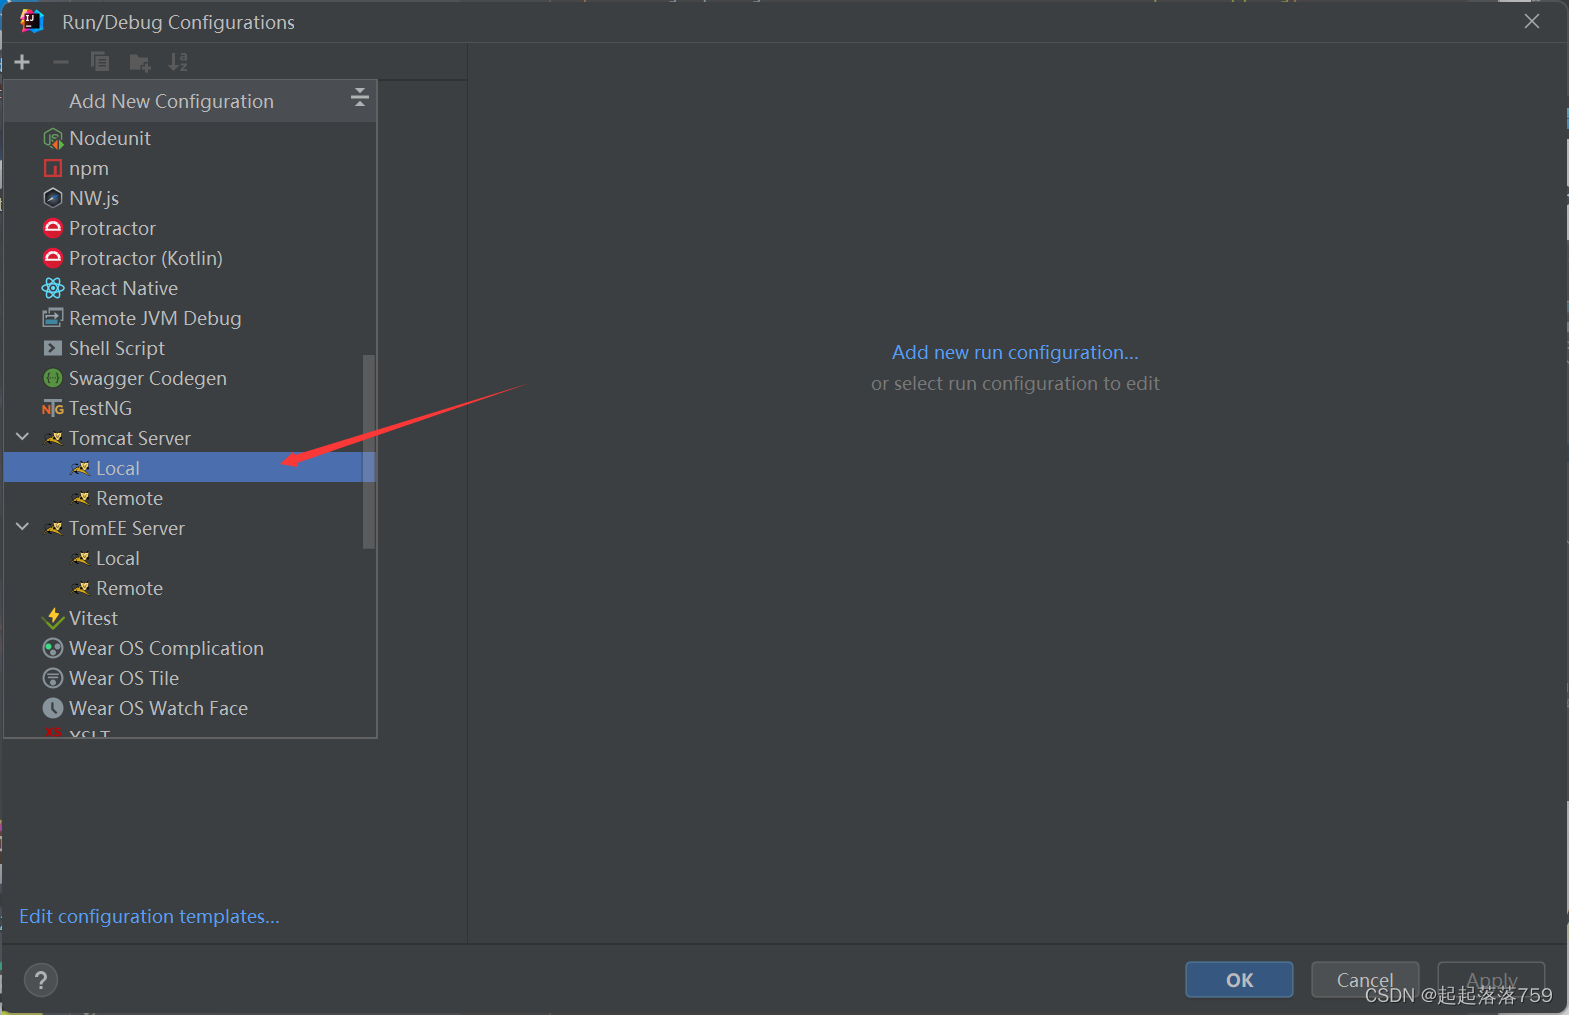
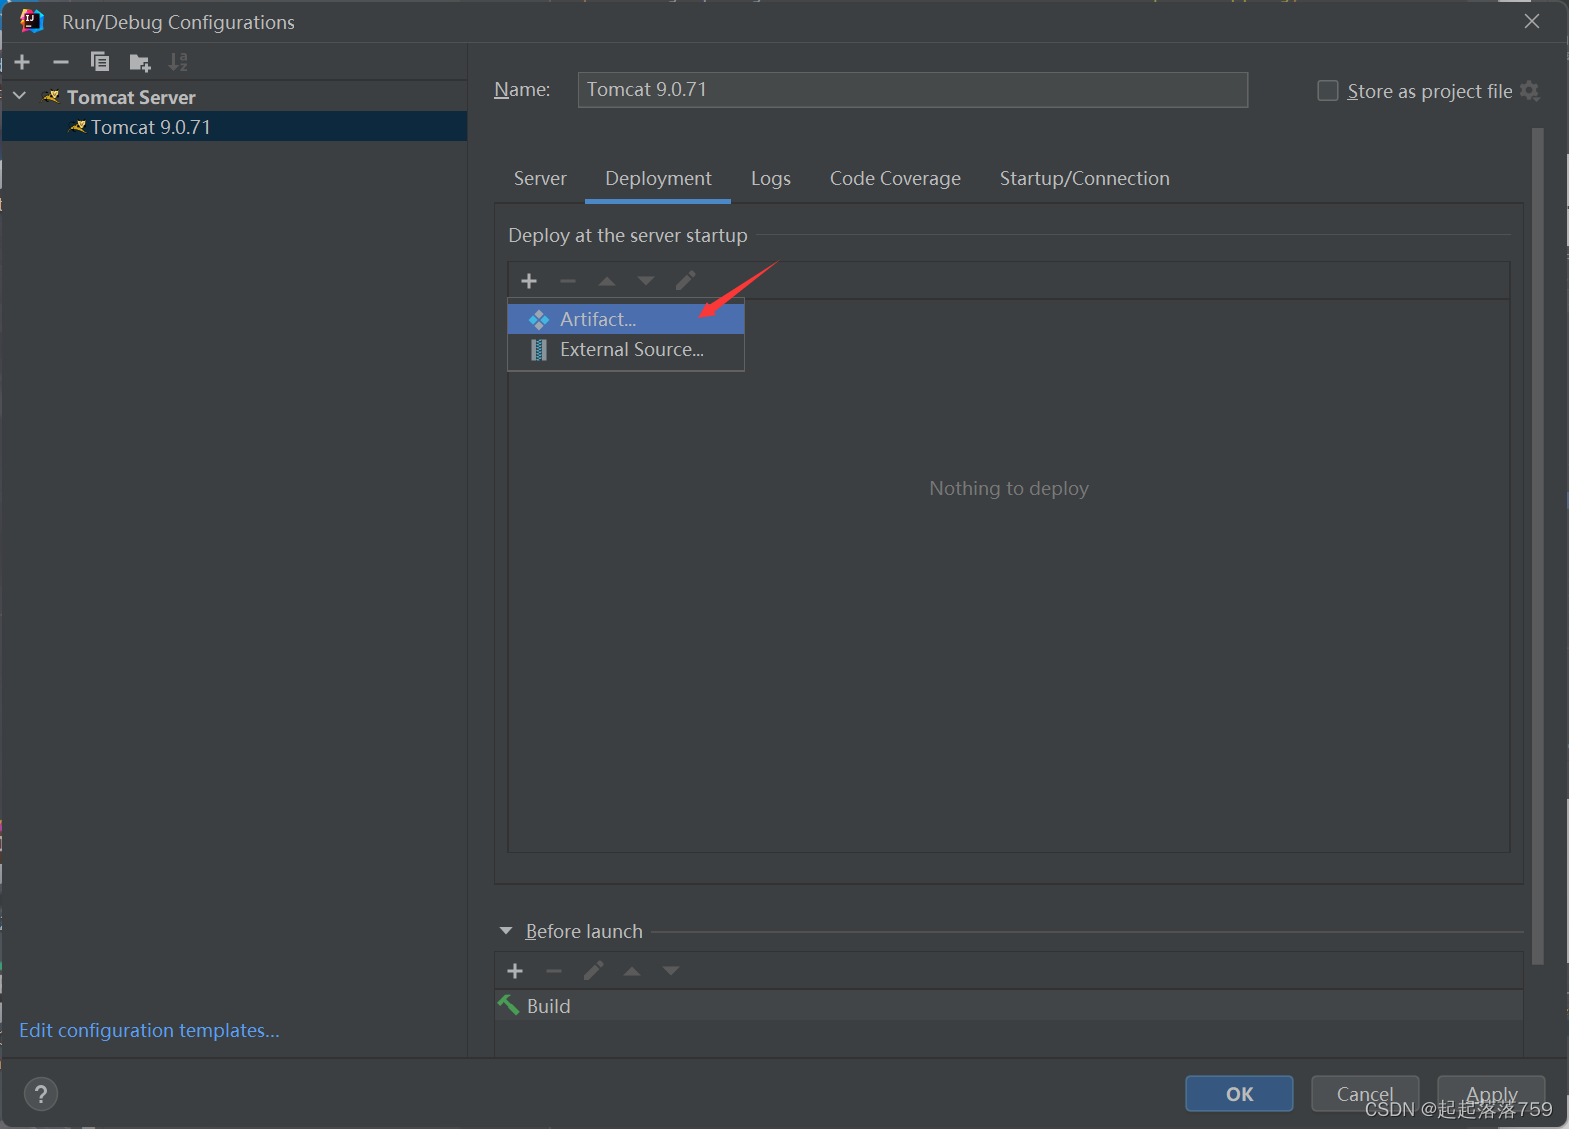
2-3添加Tomcat运行环境
2-3.1
2-3.2
2-3.3

1.使用xml方式进行搭建
1-1.在pom.xml中添加依赖
<dependencies>
    <dependency>
        <groupId>org.springframework</groupId>
        <artifactId>spring-web</artifactId>
        <version>5.3.8</version>
    </dependency>
    <dependency>
        <groupId>org.springframework</groupId>
        <artifactId>spring-webmvc</artifactId>
        <version>5.3.8</version>
    </dependency>
</dependencies>
1-2.在web.xml中配置“DispatcherServlet”
<!-- 配置DispatcherServlet -->
<servlet>
<servlet-name>springmvc</servlet-name>
<servlet-class>
org.springframework.web.servlet.DispatcherServlet
</servlet-class>
<load-on-startup>1</load-on-startup>
</servlet>
<!-- 配置DispatcherServlet接受所有URL请求 -->
<servlet-mapping>
<servlet-name>springmvc</servlet-name>
<url-pattern>/</url-pattern>
</servlet-mapping>
注:url-pattern是”/”,千万不能写成”/*”
1-3.在 web.xml添加 SpringMVC的一个过滤器,用于将请求和响应进行编码,以免中文乱码
<!-- 编码过滤器,解决中文乱码问题 -->
<filter>
<filter-name>encodingFilter</filter-name>
<filter-class>org.springframework.web.filter.CharacterEncodingFilter</filter-class>
<init-param>
<param-name>encoding</param-name>
<param-value>UTF-8</param-value>
</init-param>
<init-param>
<param-name>forceEncoding</param-name>
<param-value>true</param-value>
</init-param>
</filter>
<filter-mapping>
<filter-name>encodingFilter</filter-name>
<url-pattern>/*</url-pattern>
</filter-mapping>
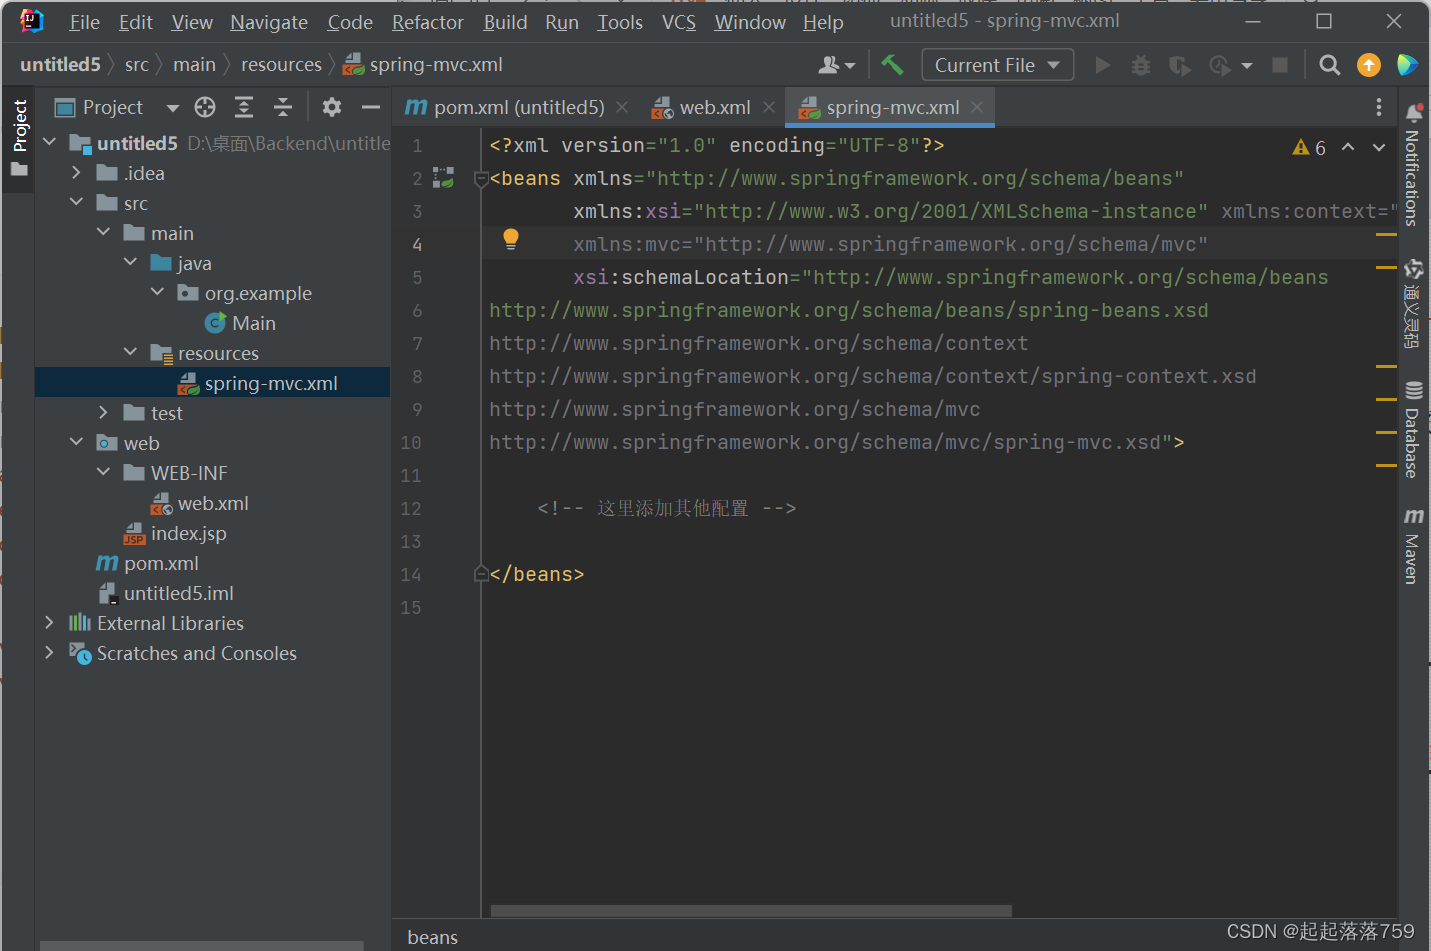
1-4.在resources目录下创建Spring MVC的配置文件“spring-mvc.xml”
1-4.1编辑“spring-mvc.xml”,添加文件头
<?xml version="1.0" encoding="UTF-8"?> <beans xmlns="http://www.springframework.org/schema/beans" xmlns:xsi="http://www.w3.org/2001/XMLSchema-instance" xmlns:context="http://www.springframework.org/schema/context" xmlns:mvc="http://www.springframework.org/schema/mvc" xsi:schemaLocation="http://www.springframework.org/schema/beans http://www.springframework.org/schema/beans/spring-beans.xsd http://www.springframework.org/schema/context http://www.springframework.org/schema/context/spring-context.xsd http://www.springframework.org/schema/mvc http://www.springframework.org/schema/mvc/spring-mvc.xsd"> <!-- 这里添加其他配置 --> <!-- 将控制器扫描到容器中 --> <context:component-scan base-package="controller"/> <!-- 开启SpringMVC框架的注解驱动 --> <mvc:annotation-driven/> </beans>
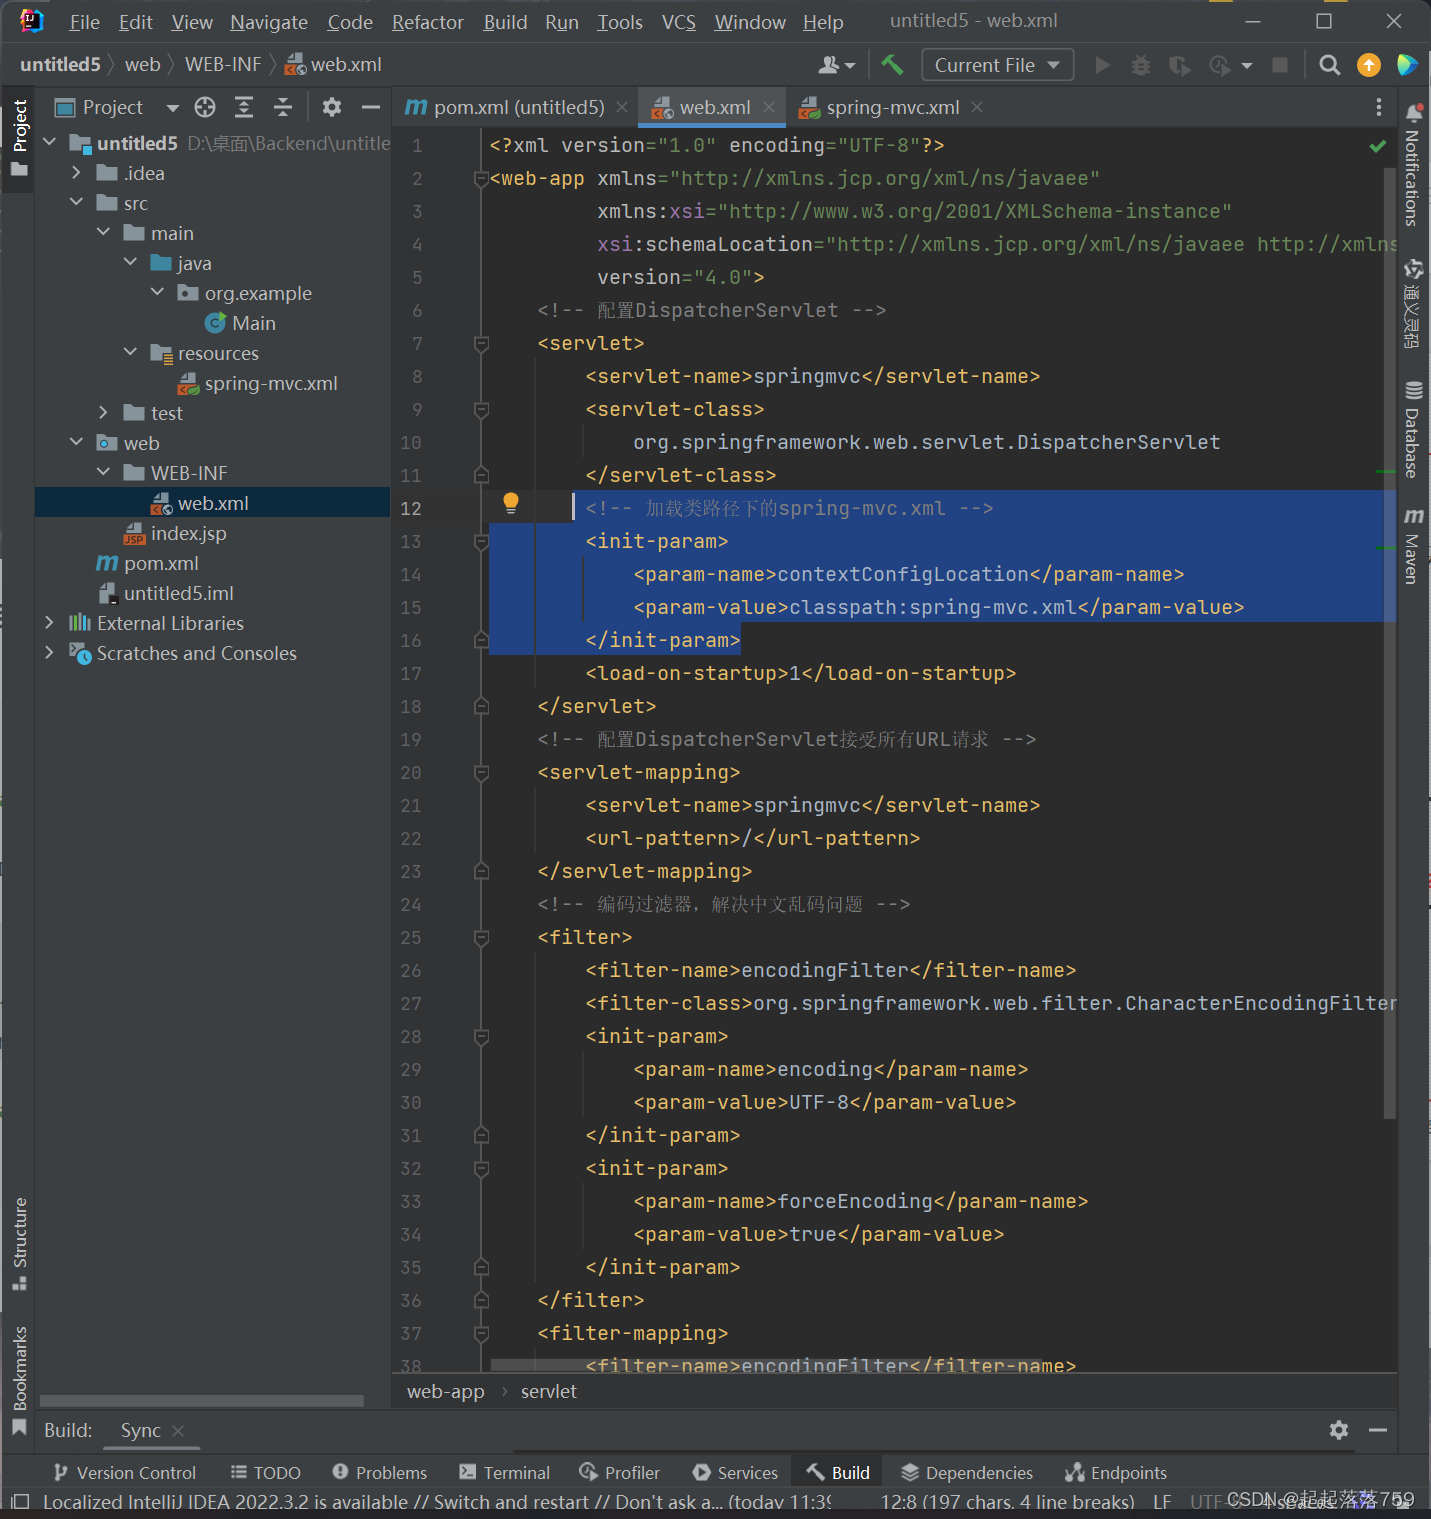
1-5.修改“web.xml”,配置在tomcat启动的时候自动加载“spring-mvc.xml”配置
<!-- 配置DispatcherServlet -->
<servlet>
<servlet-name>springmvc</servlet-name>
<servlet-class>org.springframework.web.servlet.DispatcherServlet</servlet-class>
<!-- 加载类路径下的spring-mvc.xml -->
<init-param>
<param-name>contextConfigLocation</param-name>
<param-value>classpath:spring-mvc.xml</param-value>
</init-param>
<load-on-startup>1</load-on-startup>
</servlet>
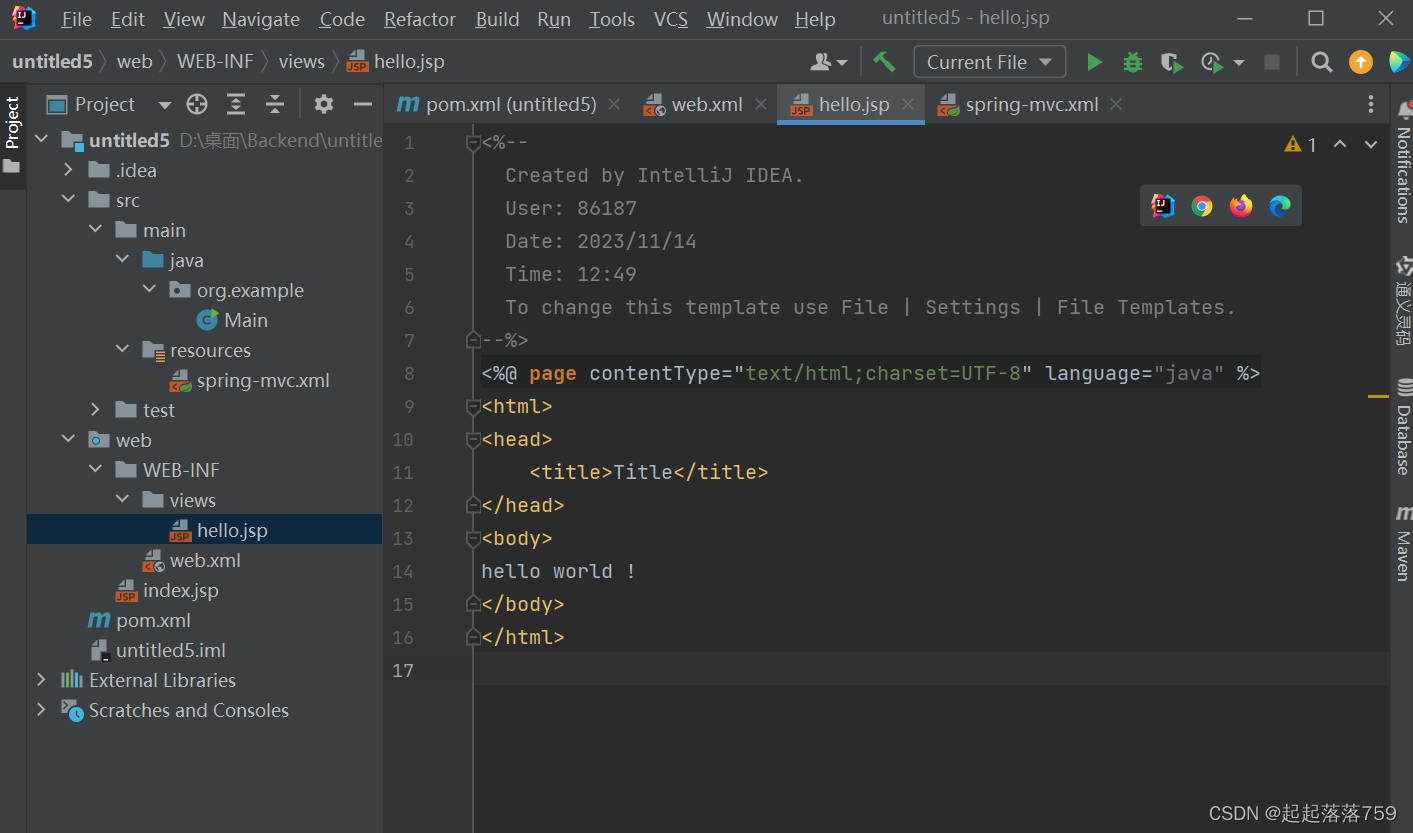
1-6.在项目中,新建“hello.jsp”页面
1-7.创建控制器Controller
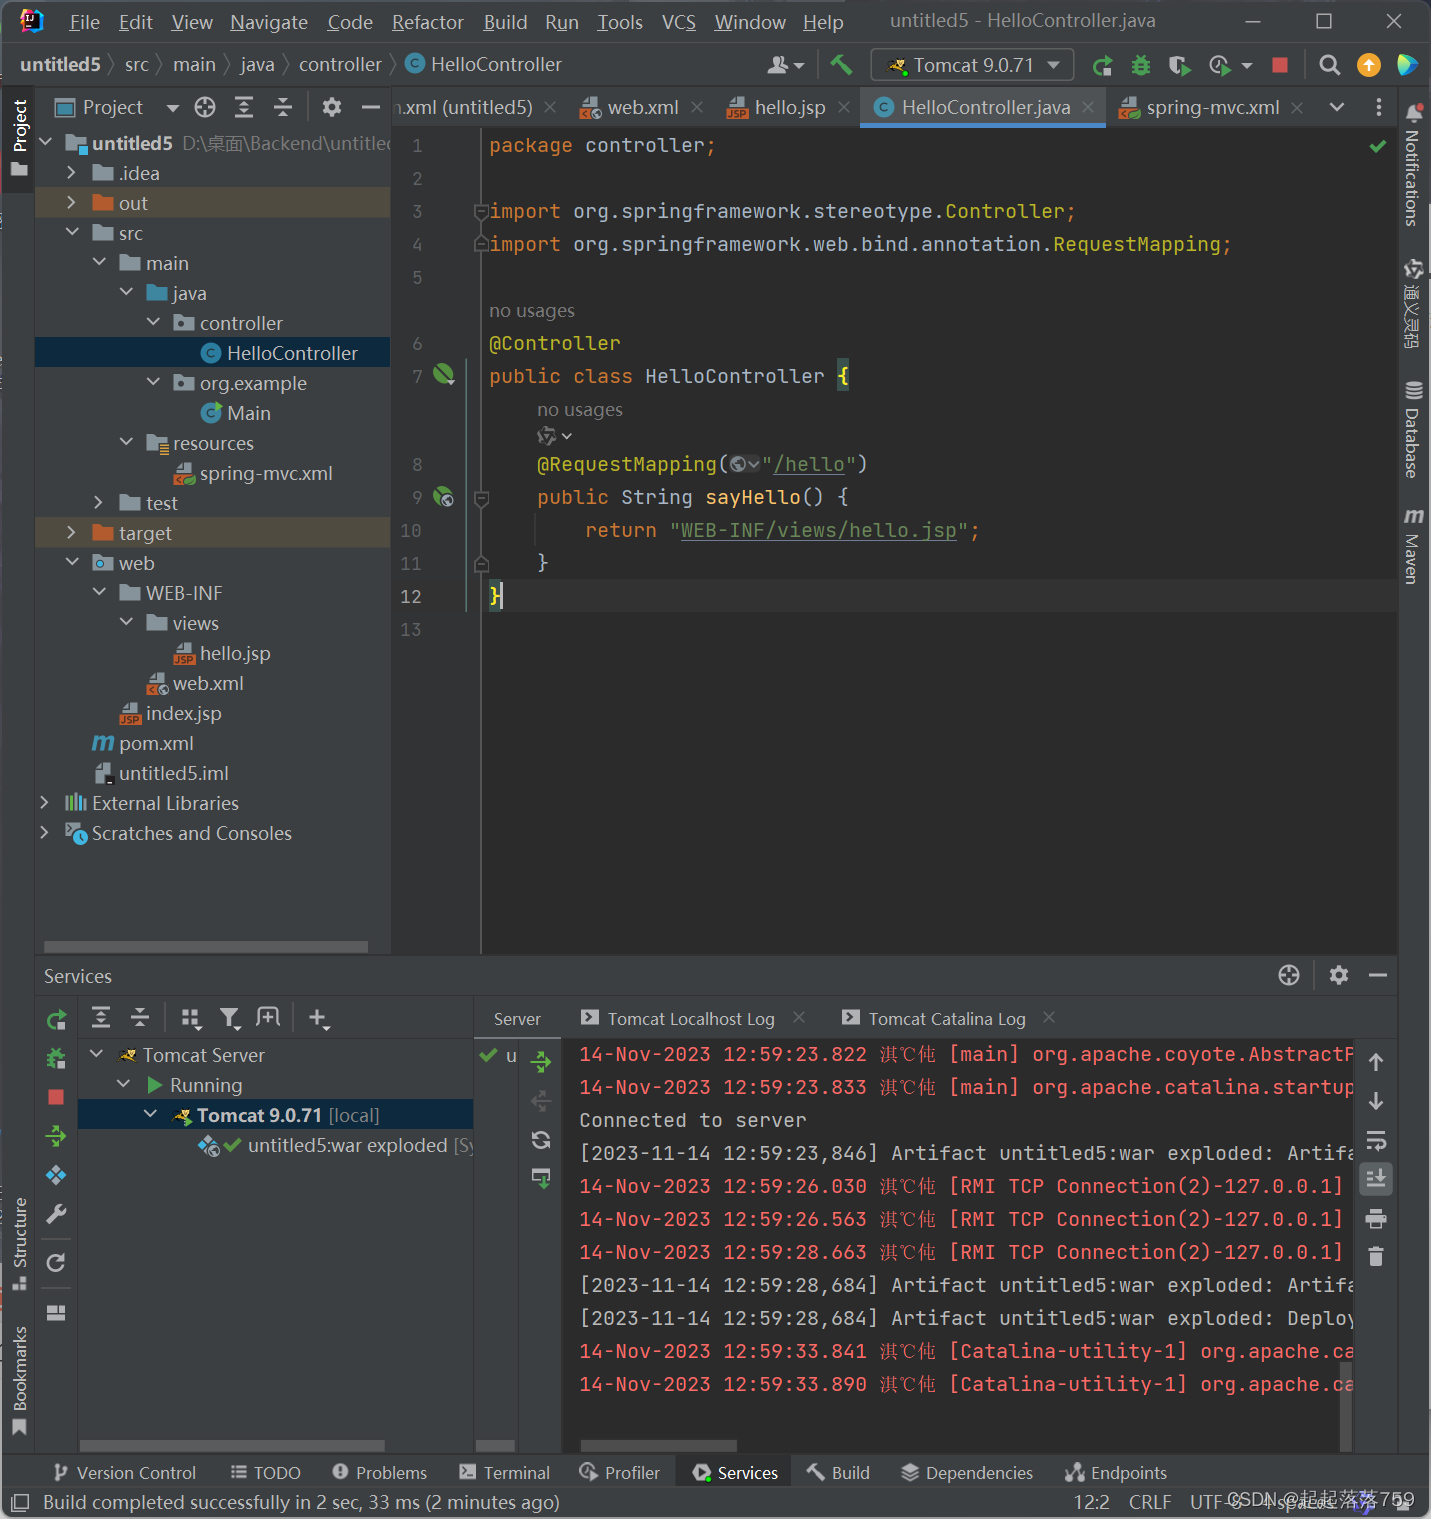
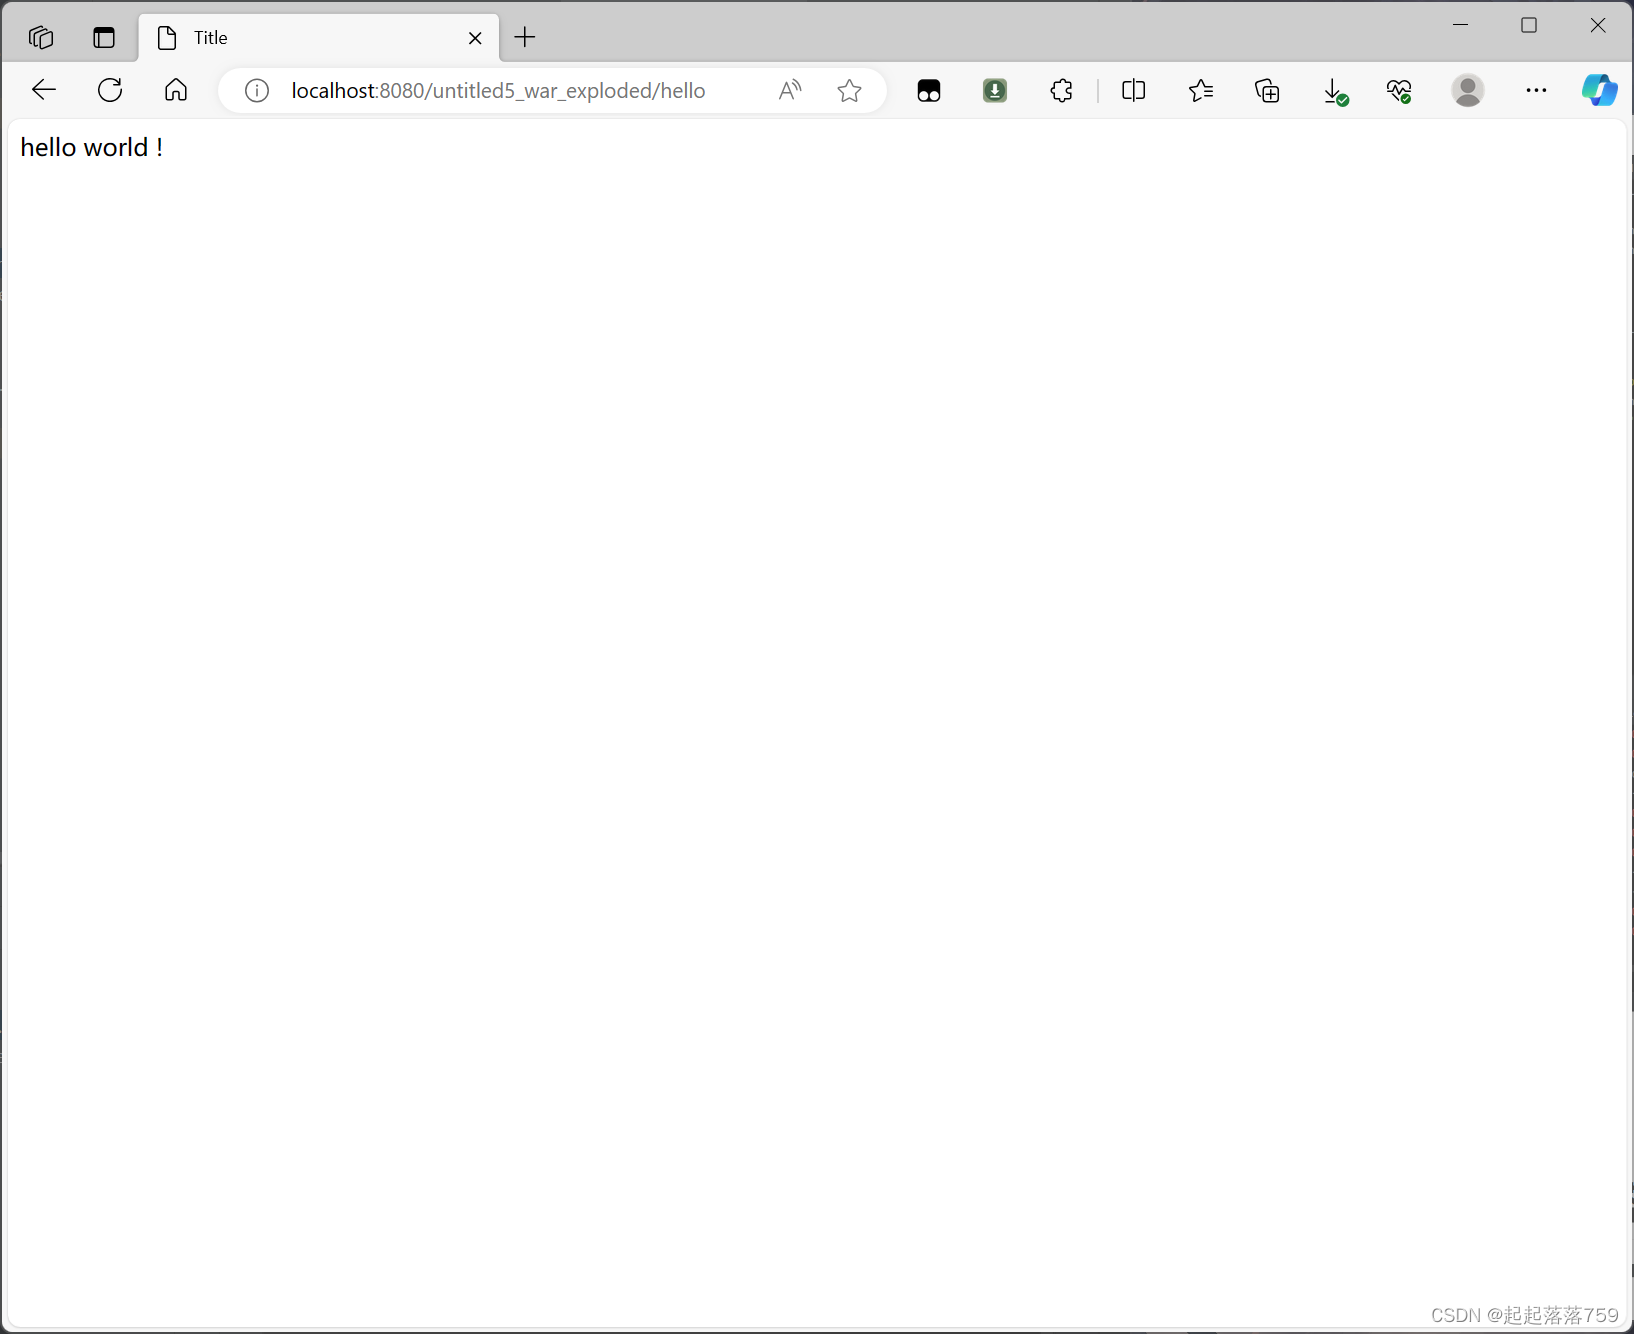
最终结果
2.使用注解方式进行搭建
2-1.在pom.xml中添加依赖
<dependencies>
    <dependency>
        <groupId>org.springframework</groupId>
        <artifactId>spring-web</artifactId>
        <version>5.3.8</version>
    </dependency>
    <dependency>
        <groupId>org.springframework</groupId>
        <artifactId>spring-webmvc</artifactId>
        <version>5.3.8</version>
    </dependency>
    <dependency>
            <groupId>javax</groupId>
            <artifactId>javaee-api</artifactId>
            <version>7.0</version>
        </dependency>
</dependencies>
2-2.配置
RootConfig
package config;
import org.springframework.context.annotation.ComponentScan;
import org.springframework.context.annotation.Configuration;
//定义了一个名为RootConfig的Java类
// @Configuration表示这个类是一个配置类,
// @ComponentScan表示从当前包开始扫描并自动注册所有被@Component、@Service、@Repository和@Autowired注解的类。
@Configuration
@ComponentScan
public class RootConfig {
}
WebAppConfig
import org.springframework.context.annotation.ComponentScan;
import org.springframework.context.annotation.Configuration;
import org.springframework.web.servlet.config.annotation.EnableWebMvc;
import org.springframework.web.servlet.config.annotation.ViewResolverRegistry;
import org.springframework.web.servlet.config.annotation.WebMvcConfigurerAdapter;
//@Configuration 标识该类是一个配置类
//@EnableWebMvc 相当于在xml中配置 <mvc:annotation-driven/>
//WebMvcConfigurerAdapter 继承该抽象类相当于指定该配置类是SpringMVC配置类
@Configuration
@EnableWebMvc
@ComponentScan("controller")
public class WebAppConfig extends WebMvcConfigurerAdapter {
@Override
public void configureViewResolvers(ViewResolverRegistry registry) {
//前缀"/WEB-INF/views/",后缀".jsp"
registry.jsp("/WEB-INF/views/",".jsp");
}
}
MyWebAppInitializer
package config;
import org.springframework.web.servlet.support.AbstractAnnotationConfigDispatcherServletInitializer;
public class MyWebAppInitializer extends AbstractAnnotationConfigDispatcherServletInitializer {
// 这里指定 Spring 的核心配置类
@Override
protected Class<?>[] getRootConfigClasses() {
return new Class[]{RootConfig.class};
}
// 这里指定 SpringMVC 的核心配置类
@Override
protected Class<?>[] getServletConfigClasses() {
return new Class[]{WebAppConfig.class};
}
// 这里指定 DispatcherServlet 的拦截规则,我们这里拦截所有请求
@Override
protected String[] getServletMappings() {
return new String[]{"/"};
}
}
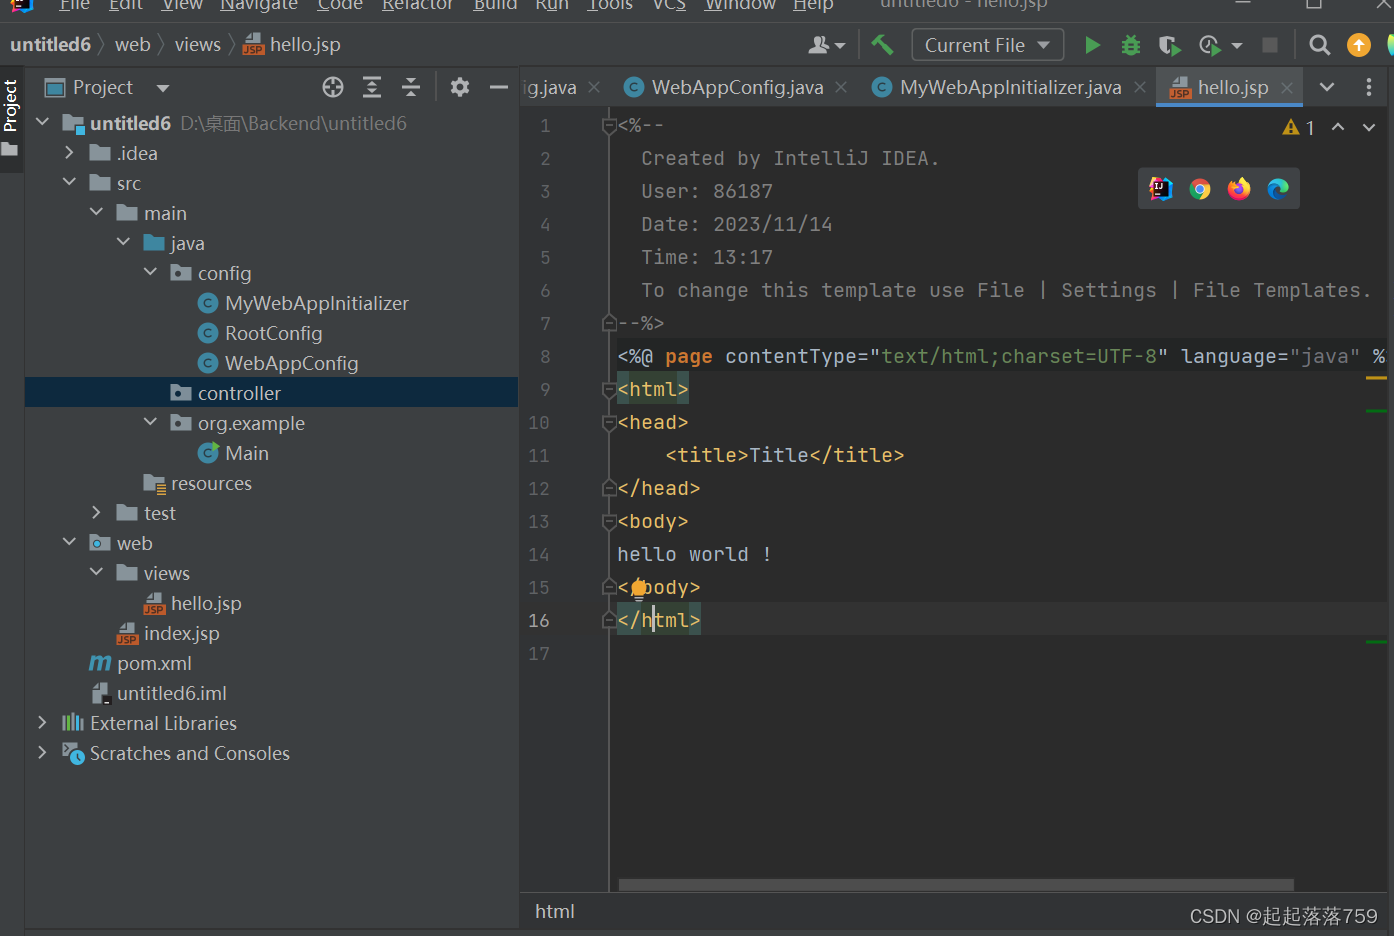
2-3创建视图hello.jsp
2-4创建Controller
package controller;
import org.springframework.stereotype.Controller;
import org.springframework.web.bind.annotation.RequestMapping;
@Controller
public class HelloController {
@RequestMapping("/hello")
public String hello(){
return "hello";
}
}
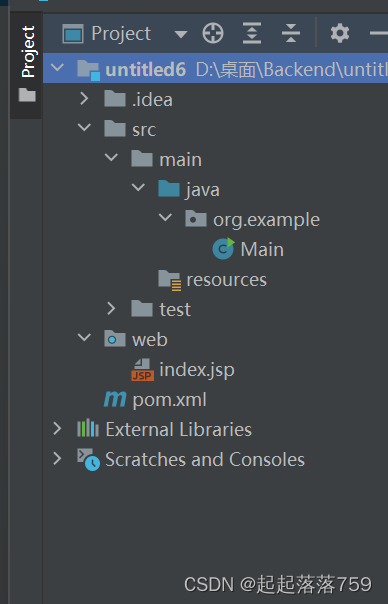
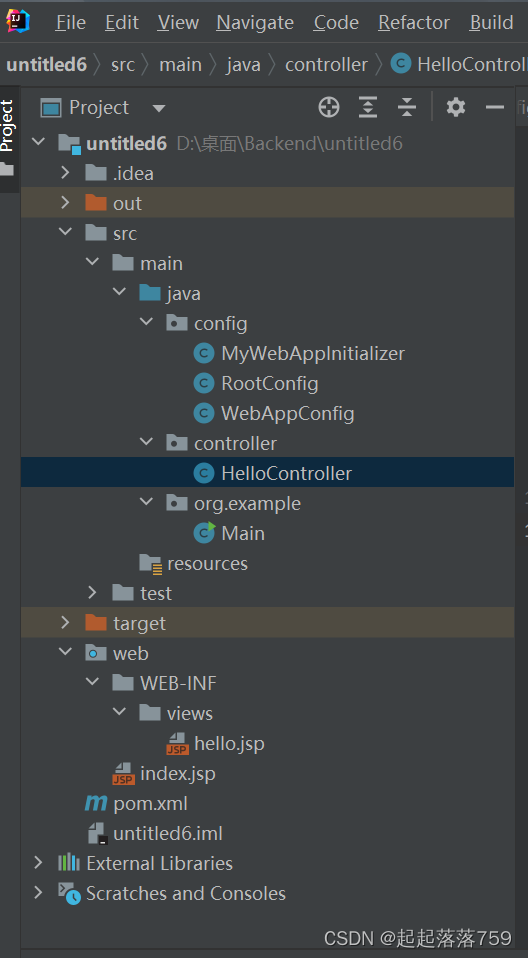
2-5具体目录
运行结果


 1056
1056


 被折叠的 条评论
为什么被折叠?
被折叠的 条评论
为什么被折叠?
 到【灌水乐园】发言


