引言
在前几篇文章中,我们深入探讨了如何通过修改Chromium源码来定制化SpeechVoice,从而实现浏览器指纹的修改。这些方法虽然有效,但对于一些用户来说,直接修改源码可能显得过于复杂和繁琐。
为了简化这一过程,本篇文章将介绍如何通过命令行来自定义浏览器指纹。通过命令行工具,您可以更加便捷地进行配置和修改,无需深入了解源码的具体实现细节。这不仅能大大提高效率,还能降低出错的风险。
接下来,我们将详细讲解如何使用命令行工具来实现对SpeechVoice的定制化处理,帮助您更好地保护隐私,避免被网络追踪。让我们开始吧!
1.注册命令行参数
在使用命令行参数时,我们需要先在文件中注册相应的关键字来告诉程序需要读取这些命令行参数,具体见前面的修改电池API的文章,这里我们只讲修改的方法
1.1 修改content/public/common/content_switches.h
在该文件中添加上我们自定义命令行参数的名称声明
CONTENT_EXPORT extern const char kSpeech[];1.2 修改content/public/common/content_switches.cc
在该文件中添加上自定义命令行参数的具体字段
const char kSpeech[] = "speech-voice";1.3 修改content/browser/renderer_host/render_process_host_impl.cc
我们在该文件的void RenderProcessHostImpl::PropagateBrowserCommandLineToRenderer中添加如下代码,说明要将这个参数传递给渲染进程
switches::kSpeech,2.规定参数格式
我们规定传入两个SpeechVoice,具体需要的值为name、lang、is_local、is_default,用|来分隔属性,用逗号分隔每一项,可以自己规定任何格式,可以解析即可,这里我们选择上述的组织方式,例如
"Google Bahasa Indonesia|id-ID|1|1,Google italiano|it-IT|1|0"3.解析参数
对应的我们需要获取到参数并进行解析
#include "base/command_line.h"
// 获取命令行参数
  std::string speech_str = base::CommandLine::ForCurrentProcess()->GetSwitchValueASCII("speech-voice");
  // 解析命令行参数,将Google français|fr-FR|1|1,Google हिन्दी|hi-IN|1|0分割成对应大小的数组
  std::vector<std::string> fake_str_vec;
  // 寻找,分割的位置并将其分割
  size_t pos = 0;
  size_t pre_pos = 0;
  while ((pos = speech_str.find(",", pre_pos)) != std::string::npos) {
    fake_str_vec.push_back(speech_str.substr(pre_pos, pos - pre_pos));
    pre_pos = pos + 1;
  }
  // 对每一个分割的字符串进行处理
  for(std::string str: fake_str_vec) {
    // 寻找|分割的位置并将其分割
    size_t pos = 0;
    size_t pre_pos = 0;
    std::vector<std::string> fake_str;
    while ((pos = str.find("|", pre_pos)) != std::string::npos) {
      fake_str.push_back(str.substr(pre_pos, pos - pre_pos));
      pre_pos = pos + 1;
    }
然后将对应的解析出来的进行再次的解析并构造
// 对分割的字符串进行处理
    mojom::blink::SpeechSynthesisVoicePtr fake_voice = mojom::blink::SpeechSynthesisVoice::New();
    fake_voice->name = WTF::String::FromUTF8(fake_str[0]);
    fake_voice->voice_uri = WTF::String::FromUTF8(fake_str[0]);
    fake_voice->lang = WTF::String::FromUTF8(fake_str[1]);
    fake_voice->is_local_service = fake_str[2] == "1";
    fake_voice->is_default = fake_str[3] == "1";
    voice_list_.push_back(
        MakeGarbageCollected<SpeechSynthesisVoice>(std::move(fake_voice)));
  }
  // 提前通知并返回
  VoicesDidChange();
  return;
  // 完成伪装
4.完整代码
void SpeechSynthesis::OnSetVoiceList(
    Vector<mojom::blink::SpeechSynthesisVoicePtr> mojom_voices) {
  voice_list_.clear();

  // 获取命令行参数
  std::string speech_str = base::CommandLine::ForCurrentProcess()->GetSwitchValueASCII("speech-voice");
  // 解析命令行参数,将"Google Bahasa Indonesia|id-ID|1|1,Google italiano|it-IT|1|0"分割成对应大小的数组
  std::vector<std::string> fake_str_vec;
  // 寻找,分割的位置并将其分割
  size_t pos = 0;
  size_t pre_pos = 0;
  while ((pos = speech_str.find(",", pre_pos)) != std::string::npos) {
    fake_str_vec.push_back(speech_str.substr(pre_pos, pos - pre_pos));
    pre_pos = pos + 1;
  }
  // 对每一个分割的字符串进行处理
  for(std::string str: fake_str_vec) {
    // 寻找|分割的位置并将其分割
    size_t pos = 0;
    size_t pre_pos = 0;
    std::vector<std::string> fake_str;
    while ((pos = str.find("|", pre_pos)) != std::string::npos) {
      fake_str.push_back(str.substr(pre_pos, pos - pre_pos));
      pre_pos = pos + 1;
    }
    // 对分割的字符串进行处理
    mojom::blink::SpeechSynthesisVoicePtr fake_voice = mojom::blink::SpeechSynthesisVoice::New();
    fake_voice->name = WTF::String::FromUTF8(fake_str[0]);
    fake_voice->voice_uri = WTF::String::FromUTF8(fake_str[0]);
    fake_voice->lang = WTF::String::FromUTF8(fake_str[1]);
    fake_voice->is_local_service = fake_str[2] == "1";
    fake_voice->is_default = fake_str[3] == "1";
    voice_list_.push_back(
        MakeGarbageCollected<SpeechSynthesisVoice>(std::move(fake_voice)));
  }
  // 提前通知并返回
  VoicesDidChange();
  return;
  // 完成伪装


  for (auto& mojom_voice : mojom_voices) {
    voice_list_.push_back(
        MakeGarbageCollected<SpeechSynthesisVoice>(std::move(mojom_voice)));
  }
  VoicesDidChange();
}
5.编译并检测
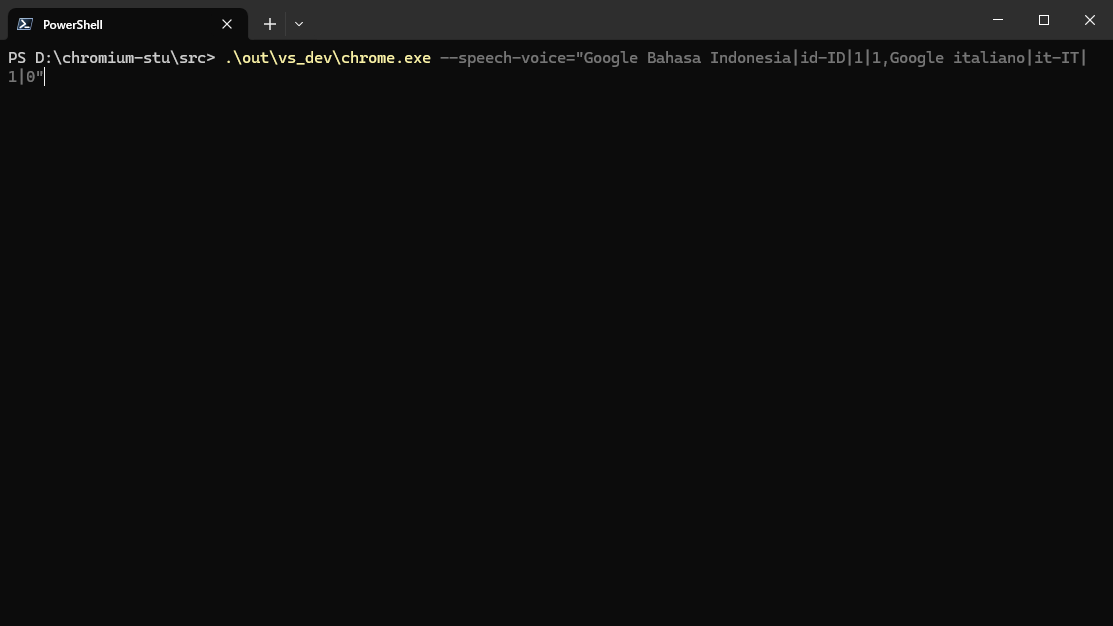
.\out\vs_dev\chrome.exe --speech-voice="Google Bahasa Indonesia|id-ID|1|1,Google italiano|it-IT|1|0"
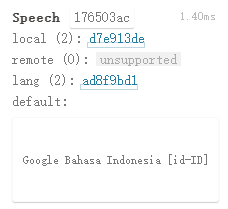
去检测站查看

结果如我们传入的值一样

证明我们的修改成功
结语
本文介绍了一种通过命令行参数来自定义Chromium浏览器SpeechVoice指纹的方法。这种方法相比直接修改源码更加灵活和便捷,使得用户可以更轻松地保护自己的隐私和避免被网络追踪。
通过本文的方法,用户可以轻松地通过命令行参数来设置自己想要的SpeechVoice配置,从而实现对浏览器指纹的有效控制。这为用户提供了一种简单而强大的工具,使其能够更好地保护自己的在线隐私。
需要注意的是,虽然这种方法相对简单,但仍然需要重新编译Chromium。对于那些希望更深入地了解和控制浏览器行为的用户来说,这是一个很好的起点。
最后,我们鼓励读者在实际应用中进行更多的尝试和探索。通过不断的实践和创新,我们可以开发出更多保护用户隐私的方法,为构建一个更安全、更尊重隐私的互联网环境做出贡献。


 1236
1236

 被折叠的 条评论
为什么被折叠?


