


pxe简介
PXE(预启动执行环境)是由Intel公司开发的网络引导技术,工作在Client/Server模式,允许客户机通过网络从远程服务器下载引导镜像,并加载安装文件或者整个操作系统。
pxe三个优点
1.规模化:同时装配多台服务器;
2.自动化:安装系统、配置各种服务;
3.远程实现:不需要光盘、U 盘等安装介质。
pxe装机的前提条件
1.客户机的网卡要支持PXE协议(集成BOOTROM芯片),且主板支持网络引导。一般大多数服务器主机都支持,只需在BIOS设置中允许从 Network 或 LAN 启动即可。
2.网络中有一台 DHCP 服务器以便为客户机自动分配地址、指定引导文件位置。
3.服务器要通过 TFTP服务(简单文件传输协议)来提供引导镜像文件的下载。
实验
实现pxe半自动化装机
1.搭建本地yum仓库,用于安装所需服务
[root@localhost ~]# mount /dev/cdrom /mnt/
[root@localhost ~]# cd /etc/yum.repos.d/
[root@localhost yum.repos.d]# mkdir backup
[root@localhost yum.repos.d]# mv CentOS* backup/
[root@localhost yum.repos.d]# vim test.repo
[root@localhost yum.repos.d]# yum clean all
[root@localhost yum.repos.d]# yum makecache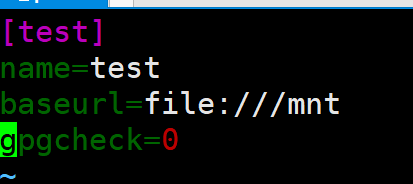
2.安装dhcp服务
[root@localhost yum.repos.d]# yum -y install dhcp
[root@localhost /]# cp /usr/share/doc/dhcp-4.2.5/dhcpd.conf.example /etc/dhcp/dhcpd.conf //将dhcp真正的配置文件复制到etc下面,并进行修改
cp: overwrite ‘/etc/dhcp/dhcpd.conf’? y
[root@localhost /]# cd /etc/dhcp/


[root@localhost dhcp]# vim dhcpd.conf
{
ddns-update-style none;
next-server 192.168.146.50; //指指定 TFTP 服务器的地址
filename "pxelinux.0";     //指定要下载的 PXE 引导程序的文件

subnet 192.168.146.0 netmask 255.255.255.0 {
  range 192.168.146.60 192.168.146.90;
  option routers 192.168.146.50;   //默认网关地址指向TFTP服务器的IP地址
}
}


[root@localhost dhcp]# systemctl restart dhcpd
[root@localhost dhcp]# systemctl enable dhcpd  //重启服务
3.安装并启用tftp服务
[root@localhost dhcp]# yum -y install tftp-server.x86_64
[root@localhost dhcp]# yum -y install xinetd.x86_64
[root@localhost dhcp]# cd /etc/xinetd.d/
[root@localhost xinetd.d]# vim tftp
[root@localhost xinetd.d]# systemctl restart tftp.socket
[root@localhost xinetd.d]# systemctl enable tftp.socket
[root@localhost xinetd.d]# systemctl restart xinetd.service
[root@localhost xinetd.d]# systemctl enable xinetd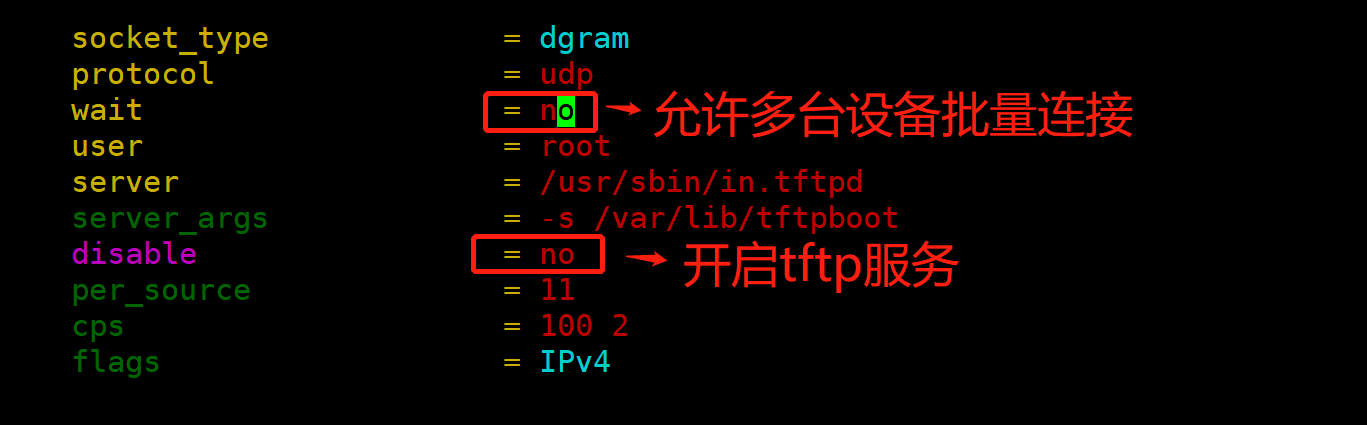
4.准备 Linux 内核、初始化镜像文件
[root@localhost xinetd.d]# cd /mnt
[root@localhost mnt]# cd images/
[root@localhost images]# cd pxeboot/
[root@localhost pxeboot]# cp initrd.img vmlinuz /var/lib/tftpboot/
5.安装syslinux,准备pxe引导程序
[root@localhost pxeboot]# yum -y install syslinux
[root@localhost pxeboot]# cp /usr/share/syslinux/pxelinux.0 /var/lib/tftpboot/
6.安装FTP服务,准备CentOS 7 安装源
[root@localhost pxeboot]# yum -y install syslinux
[root@localhost pxeboot]# cd /var/ftp/
[root@localhost ftp]# mkdir centos7
[root@localhost ftp]# cp -rf /mnt/* /var/ftp/centos7/  //将镜像复制过来。也可以先解挂,然后将镜像挂到centos7下面
[root@localhost ftp]# systemctl restart vsftpd
[root@localhost ftp]# systemctl enable vsftpd
7.配置启动菜单
[root@localhost ftp]# cd /var/lib/tftpboot/
[root@localhost tftpboot]# ls
initrd.img  pxelinux.0  vmlinuz
[root@localhost tftpboot]# mkdir pxelinux.cfg
[root@localhost tftpboot]# cd pxelinux.cfg/


[root@localhost pxelinux.cfg]# vim default
default auto   //指定默认入口名称
prompt 1     //设置是否等待用户选择,“1”表示等待用户控制

label auto    //图形安装(默认)引导入口
kernel vmlinuz
append initrd=initrd.img method=ftp://192.168.146.50/centos7

label linux text   //文本安装引导入口
kernel vmlinuz
append text initrd=initrd.img method=ftp://192.168.146.50/centos7

label linux rescue   //救援模式引导入口
kernel vmlinuz
append rescue initrd=initrd.img method=ftp://192.168.146.50/centos7
8.关闭防火墙,安全机制,重启所有相关的服务
[root@localhost pxelinux.cfg]# systemctl stop firewalld.service
[root@localhost pxelinux.cfg]# setenforce 0
[root@localhost pxelinux.cfg]# systemctl enable dhcpd
[root@localhost pxelinux.cfg]# systemctl enable vsftpd
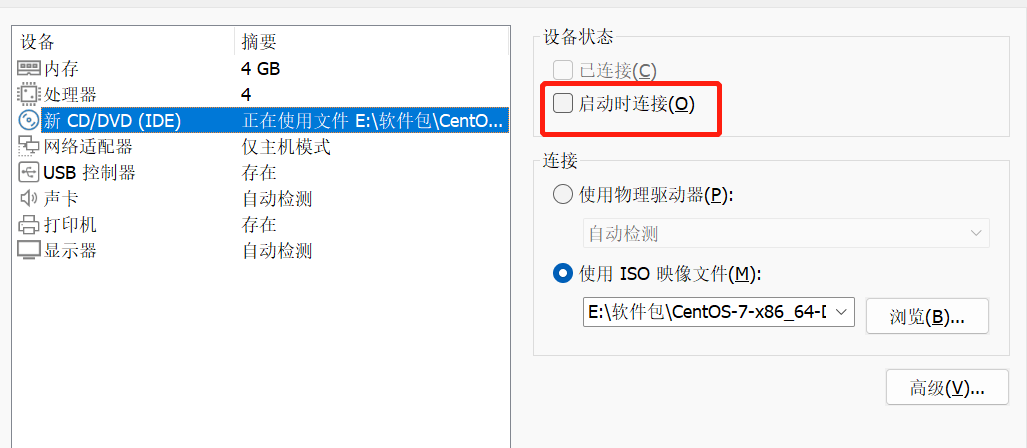
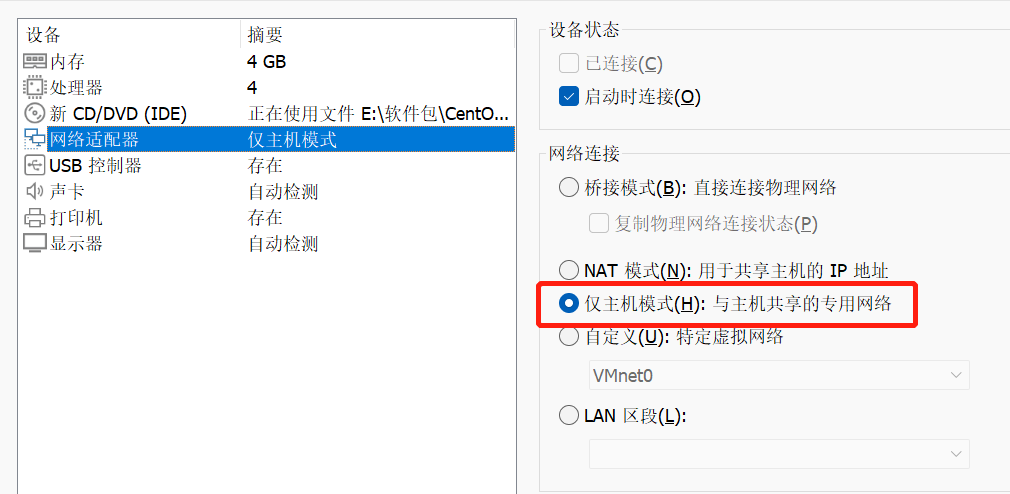
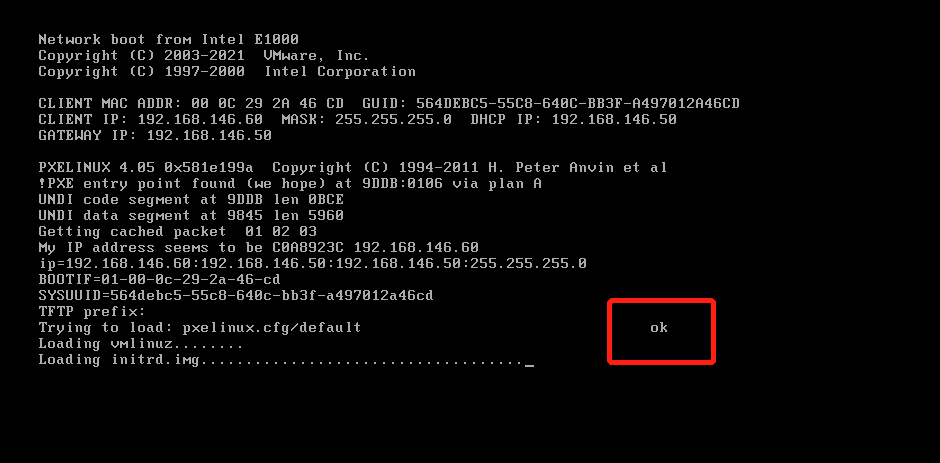
[root@localhost pxelinux.cfg]# systemctl enable tftp9.安装一个测试机,将服务器端和测试机都设为仅主机模式。注意安装测试机的时候,要将CD/DVD的启动时连接去掉。且测试机的内存至少要大于2G。
在提示字串“boot:”后直接按 Enter 键(或执行“auto”命令),将会进入默认的图形安装入口;
若执行“linux text”命令,则进入文本安装入口;
若执行“linux rescue”命令,则进入救援模式。
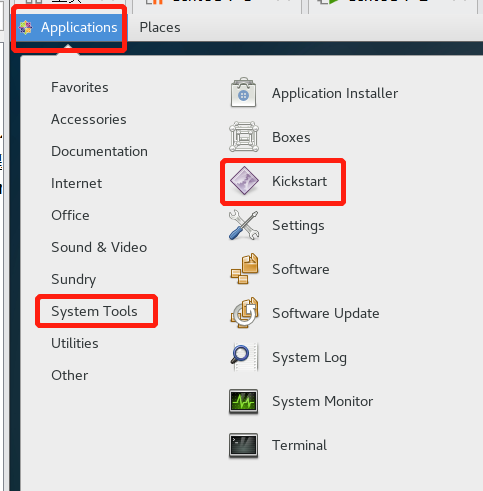
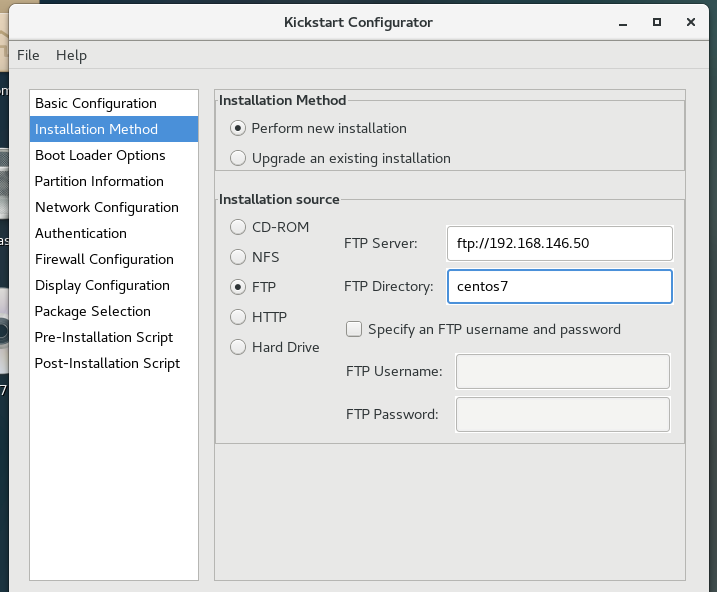
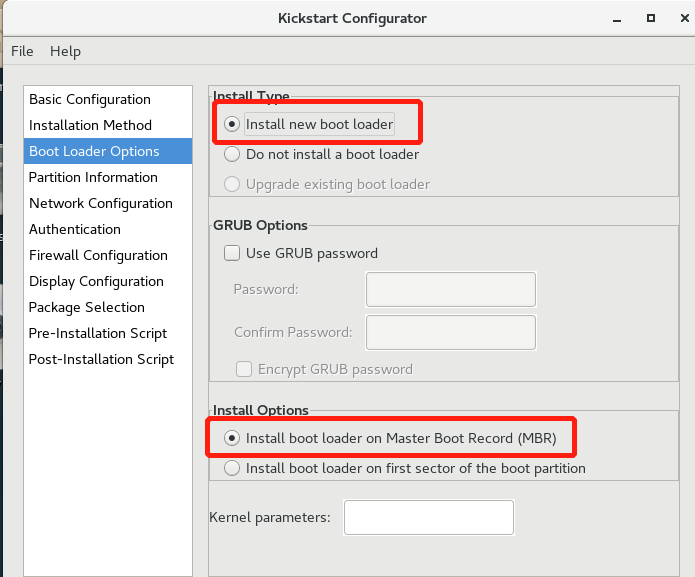
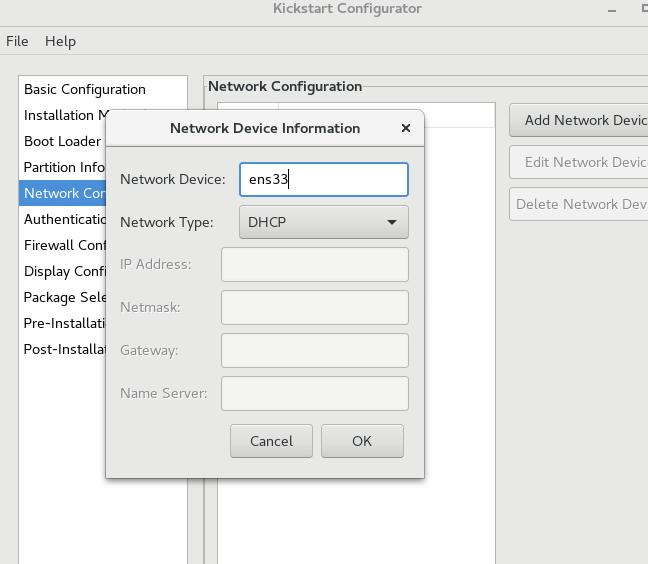
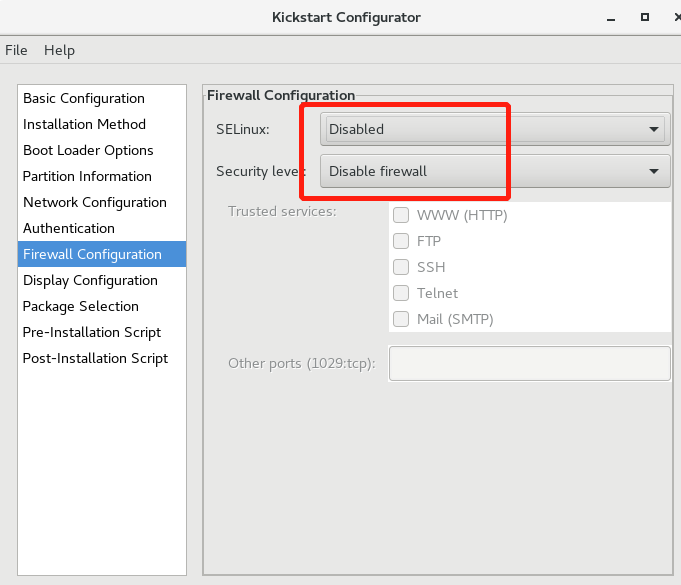
实现Kickstart 无人值守安装
[root@localhost ~]# yum -y install system-config-kickstart.noarch //安装kickstart工具如果不是在root下,可以用命令system-config-kickstart打开配置窗口

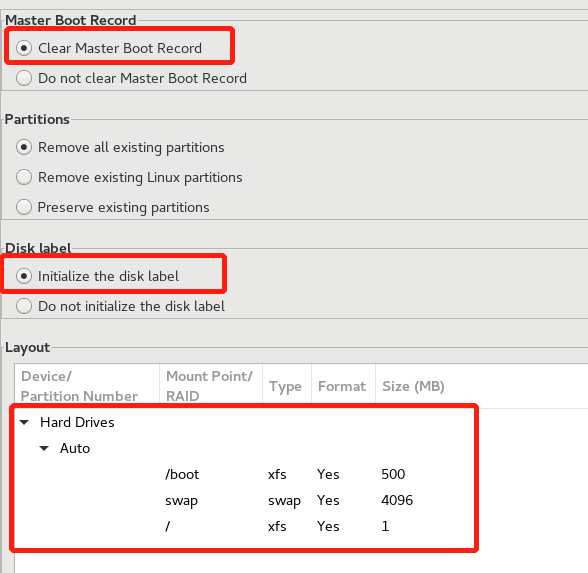

默认保存到root下
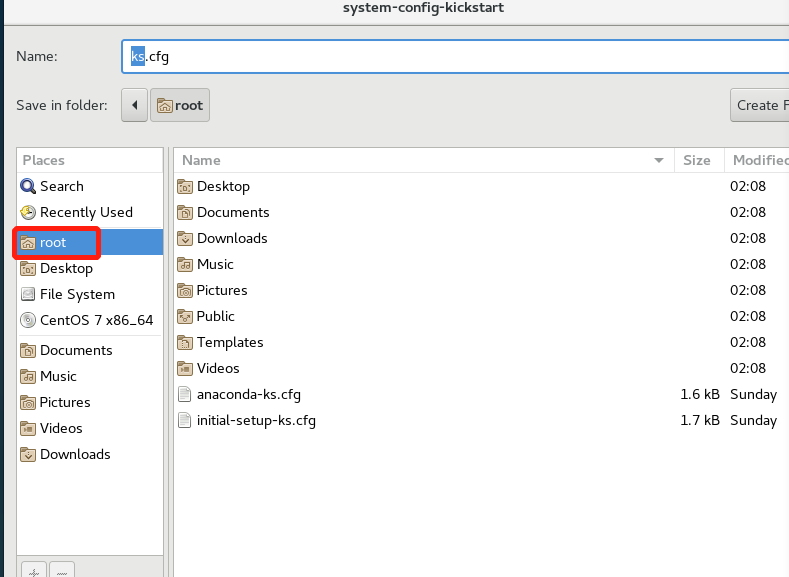
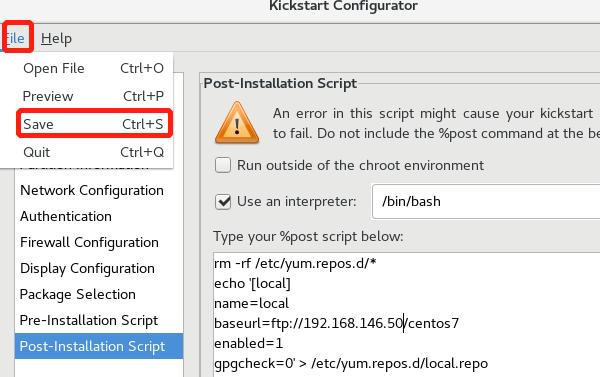
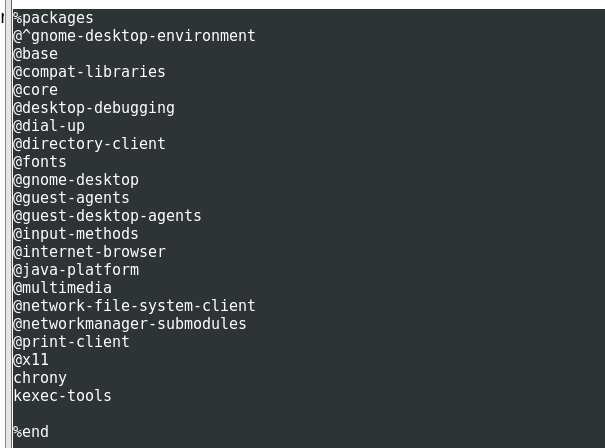
将家目录下的anaconda-ks.cfg 的配置文件中复制一段进入ks.cfg
将root下的ks.cfg复制到/var/ftp/ks.cfg
[root@localhost ftp]# vim /var/lib/tftpboot/pxelinux.cfg/default //修改引导菜单文件 default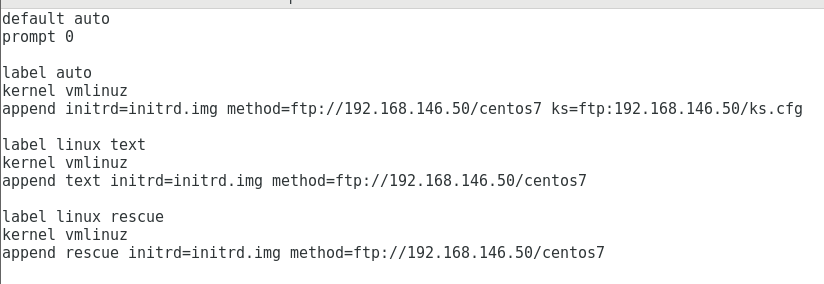


 152
152


 被折叠的 条评论
为什么被折叠?
被折叠的 条评论
为什么被折叠?
 到【灌水乐园】发言


