


今天分享一个超简单快捷且灵活的安装 kubernetes 的方式,私有化必备。
Sealos 就先不介绍了,大家先知道它提供一套强大的工具,使得用户可以管理安装 Kubernetes 就可以了,后续有空再分享其他的东西,今天的目的是搭建一套 k8s 集群。
官网文档:
https://sealos.run/docs/self-hosting/lifecycle-management/
使用 Sealos,可以安装一个不包含任何组件的裸 Kubernetes 集群。此外,Sealos 还可以在 Kubernetes 之上,通过集群镜像能力组装各种上层分布式应用,如数据库、消息队列等。
Sealos 不仅可以安装一个单节点的 Kubernetes 开发环境,还能构建数千节点的生产高可用集群。
Sealos 具有自由伸缩集群、备份恢复、释放集群等功能,即使在离线环境中,Sealos 也能提供出色的 Kubernetes 运行体验。
好了,废话不多说,直接开整。
本期目标:先搭建单节点的 k8s 环境,然后再向集群中添加节点。
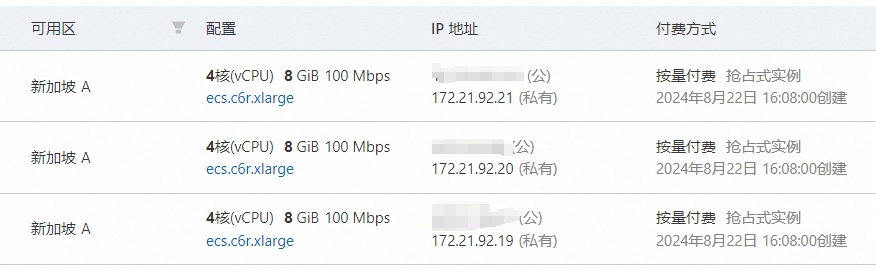
主机准备
为了省劲,用 money 换时间,直接云平台开 3 台抢占式 实例,大概每小时 0.7 元,预计也就使用 1-2 个小时吧,可以接受,从晚饭里扣。
关于云主机的使用可以参照我的另一篇文章:【还装什么虚拟机?云主机比网吧都便宜100倍,还不整起来?_云主机和虚拟机-CSDN博客】
这里直接开好了。
安装命令行工具
获取当前最新的版本(写文章时这里当前 v5.0.0)
VERSION=`curl -s https://api.github.com/repos/labring/sealos/releases/latest | grep -oE '"tag_name": "[^"]+"' | head -n1 | cut -d'"' -f4`

echo $VERSION
v5.0.0
自动下载并安装(其中的 ghproxy 是下载 github 资源的代理网站,也可以去掉)
curl -sfL https://mirror.ghproxy.com/https://raw.githubusercontent.com/labring/sealos/main/scripts/install.sh | PROXY_PREFIX=https://mirror.ghproxy.com sh -s ${VERSION} labring/sealos

[INFO]  Using v5.0.0 as release
[INFO]  Using labring/sealos as your repo
[INFO]  Downloading tar curl https://mirror.ghproxy.com/https://github.com/labring/sealos/releases/download/v5.0.0/sealos_5.0.0_linux_arm64.tar.gz
[INFO]  Downloading sealos, waiting...
######################################################################## 100.0%
sealos
[INFO]  Installing sealos to /usr/bin/sealos
SealosVersion:
  buildDate: "2024-07-11T10:14:51Z"
  compiler: gc
  gitCommit: 02327d53e
  gitVersion: 5.0.0
  goVersion: go1.20.14
  platform: linux/arm64

# 执行 version 命令
sealos version
SealosVersion:
  buildDate: "2024-07-11T10:14:51Z"
  compiler: gc
  gitCommit: 02327d53e
  gitVersion: 5.0.0
  goVersion: go1.20.14
  platform: linux/arm64
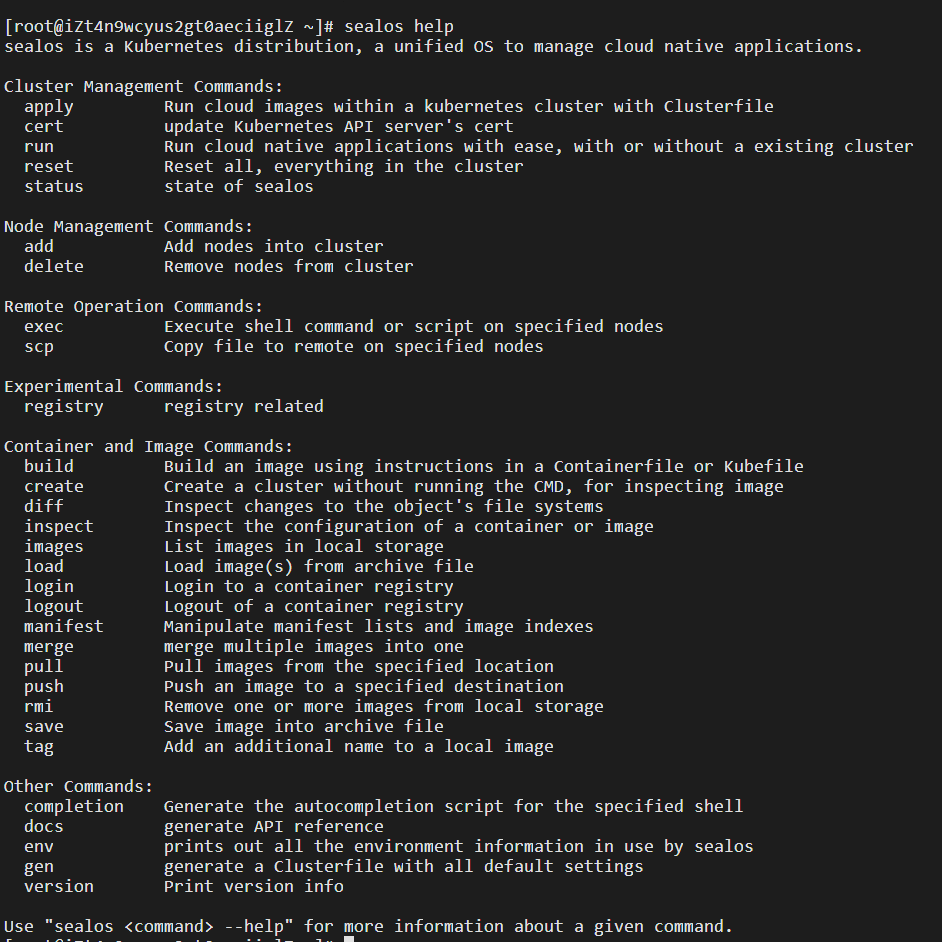
查看 help ,内容挺多的,忽略即可。
安装 k8s 单机版
使用 sealos 只需要一条命令即可安装 k8s ,相当简单,安装之前,看看当前有哪些最新的 k8s 版本吧。
Docker Hub 上可以通过以下链接查看 Sealos 所有的集群镜像:
https://hub.docker.com/u/labring
使用 Registry Explorer 可以查看 K8s 集群镜像的所有版本,直接输入 registry.cn-shanghai.aliyuncs.com/labring/kubernetes,然后点击 “提交”:
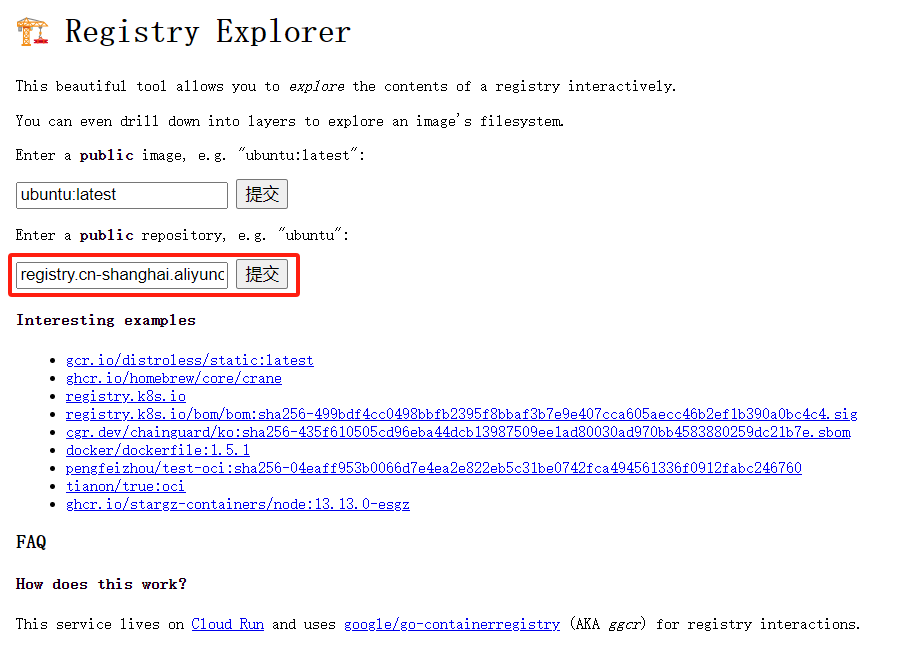
https://explore.ggcr.dev/?repo=registry.cn-shanghai.aliyuncs.com%2Flabring%2Fkubernetes
我这里安装 k8s v1.28.9
# sealos version must >= v4.1.0
sealos run registry.cn-shanghai.aliyuncs.com/labring/kubernetes:v1.28.9 registry.cn-shanghai.aliyuncs.com/labring/helm:v3.9.4 registry.cn-shanghai.aliyuncs.com/labring/cilium:v1.13.4 --single

# 输出
Flag --single has been deprecated, it defaults to running cluster in single mode when there are no master and node
2024-08-22T16:30:53 info Start to create a new cluster: master [172.21.92.19], worker [], registry 172.21.92.19
2024-08-22T16:30:53 info Executing pipeline Check in CreateProcessor.
2024-08-22T16:30:53 info checker:hostname [172.21.92.19:22]
2024-08-22T16:30:53 info checker:timeSync [172.21.92.19:22]
2024-08-22T16:30:53 info checker:containerd [172.21.92.19:22]
2024-08-22T16:30:53 info Executing pipeline PreProcess in CreateProcessor.
Trying to pull registry.cn-shanghai.aliyuncs.com/labring/kubernetes:v1.28.9...
...
Trying to pull registry.cn-shanghai.aliyuncs.com/labring/helm:v3.9.4...
...
Trying to pull registry.cn-shanghai.aliyuncs.com/labring/cilium:v1.13.4...
...
 INFO [2024-08-22 16:33:24] >> Check port kubelet port 10249..10259, reserved port 5050..5054 inuse. Please wait...
/usr/bin/which: no docker in (/usr/local/sbin:/usr/local/bin:/usr/sbin:/usr/bin:/root/bin)
 WARN [2024-08-22 16:33:24] >> Replace disable_apparmor = false to disable_apparmor = true
 INFO [2024-08-22 16:33:24] >> check root,port,cri success
2024-08-22T16:33:24 info domain sealos.hub:172.21.92.19 append success
Created symlink /etc/systemd/system/multi-user.target.wants/registry.service → /etc/systemd/system/registry.service.
 INFO [2024-08-22 16:33:24] >> Health check registry!
 INFO [2024-08-22 16:33:24] >> registry is running
 INFO [2024-08-22 16:33:24] >> init registry success
2024-08-22T16:33:24 info domain apiserver.cluster.local:172.21.92.19 append success
Created symlink /etc/systemd/system/multi-user.target.wants/containerd.service → /etc/systemd/system/containerd.service.
 INFO [2024-08-22 16:33:26] >> Health check containerd!
 INFO [2024-08-22 16:33:26] >> containerd is running
 INFO [2024-08-22 16:33:26] >> init containerd success
Created symlink /etc/systemd/system/multi-user.target.wants/image-cri-shim.service → /etc/systemd/system/image-cri-shim.service.
 INFO [2024-08-22 16:33:26] >> Health check image-cri-shim!
 INFO [2024-08-22 16:33:26] >> image-cri-shim is running
 INFO [2024-08-22 16:33:26] >> init shim success
127.0.0.1   localhost localhost.localdomain localhost4 localhost4.localdomain4
::1         localhost localhost.localdomain localhost6 localhost6.localdomain6
unknown system, use default to stop firewalld
* Applying /usr/lib/sysctl.d/10-default-yama-scope.conf ...
* Applying /etc/sysctl.d/50-aliyun.conf ...
...
 INFO [2024-08-22 16:33:27] >> pull pause image sealos.hub:5000/pause:3.9
...
Created symlink /etc/systemd/system/multi-user.target.wants/kubelet.service → /etc/systemd/system/kubelet.service.
 INFO [2024-08-22 16:33:27] >> init kubelet success
 INFO [2024-08-22 16:33:27] >> init rootfs success
...
[config/images] Pulled registry.k8s.io/kube-apiserver:v1.28.9
[config/images] Pulled registry.k8s.io/kube-controller-manager:v1.28.9
[config/images] Pulled registry.k8s.io/kube-scheduler:v1.28.9
[config/images] Pulled registry.k8s.io/kube-proxy:v1.28.9
[config/images] Pulled registry.k8s.io/pause:3.9
[config/images] Pulled registry.k8s.io/etcd:3.5.12-0
[config/images] Pulled registry.k8s.io/coredns/coredns:v1.10.1
W0822 16:33:40.520126    3186 utils.go:69] The recommended value for "healthzBindAddress" in "KubeletConfiguration" is: 127.0.0.1; the provided value is: 0.0.0.0
[init] Using Kubernetes version: v1.28.9
[preflight] Running pre-flight checks
        [WARNING FileExisting-tc]: tc not found in system path
        [WARNING Hostname]: hostname "izt4n9wcyus2gt0aeciiglz" could not be reached
        [WARNING Hostname]: hostname "izt4n9wcyus2gt0aeciiglz": lookup izt4n9wcyus2gt0aeciiglz on 100.100.2.136:53: no such host
[preflight] Pulling images required for setting up a Kubernetes cluster
[preflight] This might take a minute or two, depending on the speed of your internet connection
[preflight] You can also perform this action in beforehand using 'kubeadm config images pull'
W0822 16:33:40.699807    3186 checks.go:835] detected that the sandbox image "sealos.hub:5000/pause:3.9" of the container runtime is inconsistent with that used by kubeadm. It is recommended that using "registry.k8s.io/pause:3.9" as the CRI sandbox image.
[certs] Using certificateDir folder "/etc/kubernetes/pki"
...
[kubeconfig] Using kubeconfig folder "/etc/kubernetes"
[kubeconfig] Using existing kubeconfig file: "/etc/kubernetes/admin.conf"
[kubeconfig] Using existing kubeconfig file: "/etc/kubernetes/kubelet.conf"
W0822 16:33:42.135254    3186 kubeconfig.go:264] a kubeconfig file "/etc/kubernetes/controller-manager.conf" exists already but has an unexpected API Server URL: expected: https://172.21.92.19:6443, got: https://apiserver.cluster.local:6443
[kubeconfig] Using existing kubeconfig file: "/etc/kubernetes/controller-manager.conf"
W0822 16:33:42.620173    3186 kubeconfig.go:264] a kubeconfig file "/etc/kubernetes/scheduler.conf" exists already but has an unexpected API Server URL: expected: https://172.21.92.19:6443, got: https://apiserver.cluster.local:6443
[kubeconfig] Using existing kubeconfig file: "/etc/kubernetes/scheduler.conf"
[etcd] Creating static Pod manifest for local etcd in "/etc/kubernetes/manifests"
[control-plane] Using manifest folder "/etc/kubernetes/manifests"
[control-plane] Creating static Pod manifest for "kube-apiserver"
[control-plane] Creating static Pod manifest for "kube-controller-manager"
[control-plane] Creating static Pod manifest for "kube-scheduler"
[kubelet-start] Writing kubelet environment file with flags to file "/var/lib/kubelet/kubeadm-flags.env"
[kubelet-start] Writing kubelet configuration to file "/var/lib/kubelet/config.yaml"
[kubelet-start] Starting the kubelet
[wait-control-plane] Waiting for the kubelet to boot up the control plane as static Pods from directory "/etc/kubernetes/manifests". This can take up to 4m0s
[apiclient] All control plane components are healthy after 7.001546 seconds
[upload-config] Storing the configuration used in ConfigMap "kubeadm-config" in the "kube-system" Namespace
[kubelet] Creating a ConfigMap "kubelet-config" in namespace kube-system with the configuration for the kubelets in the cluster
...

Your Kubernetes control-plane has initialized successfully!

To start using your cluster, you need to run the following as a regular user:

  mkdir -p $HOME/.kube
  sudo cp -i /etc/kubernetes/admin.conf $HOME/.kube/config
  sudo chown $(id -u):$(id -g) $HOME/.kube/config

Alternatively, if you are the root user, you can run:

  export KUBECONFIG=/etc/kubernetes/admin.conf

You should now deploy a pod network to the cluster.
Run "kubectl apply -f [podnetwork].yaml" with one of the options listed at:
  https://kubernetes.io/docs/concepts/cluster-administration/addons/

You can now join any number of control-plane nodes by copying certificate authorities
and service account keys on each node and then running the following as root:

  kubeadm join apiserver.cluster.local:6443 --token <value withheld> \
        --discovery-token-ca-cert-hash sha256:a6f327ead790b3c731d6eb9300ec668aaa8d4088d045ab37cc8aaae0af75b837 \
        --control-plane --certificate-key <value withheld>

Then you can join any number of worker nodes by running the following on each as root:

kubeadm join apiserver.cluster.local:6443 --token <value withheld> \
        --discovery-token-ca-cert-hash sha256:a6f327ead790b3c731d6eb9300ec668aaa8d4088d045ab37cc8aaae0af75b837
...
ℹ️  Using Cilium version 1.13.4
🔮 Auto-detected cluster name: kubernetes
🔮 Auto-detected datapath mode: tunnel
🔮 Auto-detected kube-proxy has been installed
2024-08-22T16:33:53 info succeeded in creating a new cluster, enjoy it!
2024-08-22T16:33:53 info
      ___           ___           ___           ___       ___           ___
     /\  \         /\  \         /\  \         /\__\     /\  \         /\  \
    /::\  \       /::\  \       /::\  \       /:/  /    /::\  \       /::\  \
   /:/\ \  \     /:/\:\  \     /:/\:\  \     /:/  /    /:/\:\  \     /:/\ \  \
  _\:\~\ \  \   /::\~\:\  \   /::\~\:\  \   /:/  /    /:/  \:\  \   _\:\~\ \  \
 /\ \:\ \ \__\ /:/\:\ \:\__\ /:/\:\ \:\__\ /:/__/    /:/__/ \:\__\ /\ \:\ \ \__\
 \:\ \:\ \/__/ \:\~\:\ \/__/ \/__\:\/:/  / \:\  \    \:\  \ /:/  / \:\ \:\ \/__/
  \:\ \:\__\    \:\ \:\__\        \::/  /   \:\  \    \:\  /:/  /   \:\ \:\__\
   \:\/:/  /     \:\ \/__/        /:/  /     \:\  \    \:\/:/  /     \:\/:/  /
    \::/  /       \:\__\         /:/  /       \:\__\    \::/  /       \::/  /
     \/__/         \/__/         \/__/         \/__/     \/__/         \/__/

                  Website: https://www.sealos.io/
                  Address: github.com/labring/sealos
                  Version: 5.0.0-02327d53e
至此,一个裸奔的单机集群就好了,可以执行 kubectl 命令了

运行测试容器
集群好了,我们来跑一个 echo-server 吧:jmalloc/echo-server
编写一个 app.yml 文件,采用 deploy 方式部署
apiVersion: apps/v1
kind: Deployment
metadata:
  name: test
  namespace: default
spec:
  replicas: 2
  selector:
    matchLabels:
      k8s-app: test
  template:
    metadata:
      labels:
        k8s-app: test
    spec:
      terminationGracePeriodSeconds: 10
      containers:
      - name: test
        image: jmalloc/echo-server
        resources:
          limits:
            cpu: 2000m
            memory: 4000Mi
          requests:
            cpu: 100m
            memory: 150Mi
        securityContext:
          privileged: false
部署服务并验证
kubectl apply -f app.yml
deployment.apps/test created

kubectl get pod -o wide
NAME                    READY   STATUS              RESTARTS   AGE   IP           NODE                      NOMINATED NODE   READINESS GATES
test-74cdc6b945-l27bz   1/1     Running             0          9s    10.0.0.133   izt4n9wcyus2gt0aeciiglz   <none>           <none>
test-74cdc6b945-x2gvw   0/1     ContainerCreating   0          9s    <none>       izt4n9wcyus2gt0aeciiglz   <none>           <none>

kubectl get pod -o wide
NAME                    READY   STATUS    RESTARTS   AGE   IP           NODE                      NOMINATED NODE   READINESS GATES
test-74cdc6b945-l27bz   1/1     Running   0          49s   10.0.0.133   izt4n9wcyus2gt0aeciiglz   <none>           <none>
test-74cdc6b945-x2gvw   1/1     Running   0          49s   10.0.0.124   izt4n9wcyus2gt0aeciiglz   <none>           <none>

# 测试请求
curl http://10.0.0.124:8080
Request served by test-74cdc6b945-x2gvw

GET / HTTP/1.1

Host: 10.0.0.124:8080
Accept: */*
User-Agent: curl/7.61.1
至此,单机版集群看起来使用正常。
接下来添加点新节点吧。
添加新节点
添加节点也是一条命令,非常简单,注意使用 -p 目标节点密码。
sealos add --nodes 172.21.92.20 -p your_node_password
2024-08-22T17:11:50 info start to scale this cluster
2024-08-22T17:11:50 info Executing pipeline JoinCheck in ScaleProcessor.
2024-08-22T17:11:50 info checker:hostname [172.21.92.19:22 172.21.92.20:22]
2024-08-22T17:11:50 info checker:timeSync [172.21.92.19:22 172.21.92.20:22]
...

2024-08-22T17:12:04 info succeeded in joining 172.21.92.20:22 as worker
2024-08-22T17:12:04 info start to sync lvscare static pod to node: 172.21.92.20:22 master: [172.21.92.19:6443]
172.21.92.20:22 2024-08-22T17:12:04 info generator lvscare static pod is success
2024-08-22T17:12:04 info Executing pipeline RunGuest in ScaleProcessor.
2024-08-22T17:12:04 info succeeded in scaling this cluster
2024-08-22T17:12:04 info
      ___           ___           ___           ___       ___           ___
     /\  \         /\  \         /\  \         /\__\     /\  \         /\  \
    /::\  \       /::\  \       /::\  \       /:/  /    /::\  \       /::\  \
   /:/\ \  \     /:/\:\  \     /:/\:\  \     /:/  /    /:/\:\  \     /:/\ \  \
  _\:\~\ \  \   /::\~\:\  \   /::\~\:\  \   /:/  /    /:/  \:\  \   _\:\~\ \  \
 /\ \:\ \ \__\ /:/\:\ \:\__\ /:/\:\ \:\__\ /:/__/    /:/__/ \:\__\ /\ \:\ \ \__\
 \:\ \:\ \/__/ \:\~\:\ \/__/ \/__\:\/:/  / \:\  \    \:\  \ /:/  / \:\ \:\ \/__/
  \:\ \:\__\    \:\ \:\__\        \::/  /   \:\  \    \:\  /:/  /   \:\ \:\__\
   \:\/:/  /     \:\ \/__/        /:/  /     \:\  \    \:\/:/  /     \:\/:/  /
    \::/  /       \:\__\         /:/  /       \:\__\    \::/  /       \::/  /
     \/__/         \/__/         \/__/         \/__/     \/__/         \/__/

                  Website: https://www.sealos.io/
                  Address: github.com/labring/sealos
                  Version: 5.0.0-02327d53e
执行 查看节点,查看集群节点状态。
kubectl get node -o wide
NAME                      STATUS   ROLES           AGE     VERSION   INTERNAL-IP    EXTERNAL-IP   OS-IMAGE                                 KERNEL-VERSION              CONTAINER-RUNTIME
izt4n9wcyus2gt0aeciiglz   Ready    control-plane   40m     v1.28.9   172.21.92.19   <none>        Alibaba Cloud Linux 3 (Soaring Falcon)   5.10.134-16.3.al8.aarch64   containerd://1.7.16
izt4n9wcyus2gt0aeciignz   Ready    <none>          2m27s   v1.28.9   172.21.92.20   <none>        Alibaba Cloud Linux 3 (Soaring Falcon)   5.10.134-16.3.al8.aarch64   containerd://1.7.16
删除一个刚才部署的 test Pod,验证是否会在新节点上创建
kubectl get pod -A -o wide
NAMESPACE     NAME                                              READY   STATUS    RESTARTS   AGE     IP             NODE                      NOMINATED NODE   READINESS GATES
default       test-74cdc6b945-l27bz                             1/1     Running   0          8m47s   10.0.0.133     izt4n9wcyus2gt0aeciiglz   <none>           <none>
default       test-74cdc6b945-x2gvw                             1/1     Running   0          8m47s   10.0.0.124     izt4n9wcyus2gt0aeciiglz   <none>           <none>

kubectl delete pod test-74cdc6b945-x2gvw
pod "test-74cdc6b945-x2gvw" deleted

kubectl get pod -A -o wide
NAMESPACE     NAME                                              READY   STATUS              RESTARTS   AGE     IP             NODE                      NOMINATED NODE   READINESS GATES
default       test-74cdc6b945-l27bz                             1/1     Running             0          9m13s   10.0.0.133     izt4n9wcyus2gt0aeciiglz   <none>           <none>
default       test-74cdc6b945-wm7rk                             0/1     ContainerCreating   0          4s      <none>         izt4n9wcyus2gt0aeciignz   <none>           <none>
正常,在新节点上成功创建新的 Pod.
删除节点
有时候不仅仅要增加 node 还需要删除 node, 一样一行命令,不同之处是需要确认,不需要指定 -p 密码。
sealos delete --nodes 172.21.92.20
2024-08-22T17:22:22 info are you sure to delete these nodes?
Yes [y/yes], No [n/no]: y
2024-08-22T17:22:26 info start to scale this cluster
2024-08-22T17:22:26 info Executing pipeline DeleteCheck in ScaleProcessor.
...

kubectl get node -o wide

NAME                      STATUS   ROLES           AGE   VERSION   INTERNAL-IP    EXTERNAL-IP   OS-IMAGE                                 KERNEL-VERSION              CONTAINER-RUNTIME
izt4n9wcyus2gt0aeciiglz   Ready    control-plane   50m   v1.28.9   172.21.92.19   <none>        Alibaba Cloud Linux 3 (Soaring Falcon)   5.10.134-16.3.al8.aarch64   containerd://1.7.16


kubectl get pod -A -o wide

NAMESPACE     NAME                                              READY   STATUS    RESTARTS   AGE   IP             NODE                      NOMINATED NODE   READINESS GATES
default       test-74cdc6b945-hbq88                             1/1     Running   0          81s   10.0.0.135     izt4n9wcyus2gt0aeciiglz   <none>           <none>
default       test-74cdc6b945-l27bz                             1/1     Running   0          18m   10.0.0.133     izt4n9wcyus2gt0aeciiglz   <none>           <none>
kube-system   cilium-operator-596cc99774-hbvzp                  1/1     Running   0          50m   172.21.92.19   izt4n9wcyus2gt0aeciiglz   <none>           <none>
kube-system   cilium-x9t6r                                      1/1     Running   0          50m   172.21.92.19   izt4n9wcyus2gt0aeciiglz   <none>           <none>
kube-system   coredns-5dd5756b68-9xqlb                          1/1     Running   0          50m   10.0.0.86      izt4n9wcyus2gt0aeciiglz   <none>           <none>
kube-system   coredns-5dd5756b68-cdp5b                          1/1     Running   0          50m   10.0.0.32      izt4n9wcyus2gt0aeciiglz   <none>           <none>
kube-system   etcd-izt4n9wcyus2gt0aeciiglz                      1/1     Running   0          50m   172.21.92.19   izt4n9wcyus2gt0aeciiglz   <none>           <none>
kube-system   kube-apiserver-izt4n9wcyus2gt0aeciiglz            1/1     Running   0          50m   172.21.92.19   izt4n9wcyus2gt0aeciiglz   <none>           <none>
kube-system   kube-controller-manager-izt4n9wcyus2gt0aeciiglz   1/1     Running   0          50m   172.21.92.19   izt4n9wcyus2gt0aeciiglz   <none>           <none>
kube-system   kube-proxy-dcqzz                                  1/1     Running   0          50m   172.21.92.19   izt4n9wcyus2gt0aeciiglz   <none>           <none>
kube-system   kube-scheduler-izt4n9wcyus2gt0aeciiglz            1/1     Running   0          50m   172.21.92.19   izt4n9wcyus2gt0aeciiglz   <none>           <none>
清理 k8s 集群
也来体验一下清理 K8s 集群吧,随便折腾。
sealos reset
2024-08-22T17:27:15 info are you sure to delete these nodes?
Yes [y/yes], No [n/no]: y
2024-08-22T17:27:18 info start to delete Cluster: master [172.21.92.19], node []
2024-08-22T17:27:18 info start to reset nodes: []
2024-08-22T17:27:18 info start to reset masters: [172.21.92.19:22]
2024-08-22T17:27:18 info start to reset node: 172.21.92.19:22
...

2024-08-22T17:27:22 info succeeded in deleting current cluster
2024-08-22T17:27:22 info
      ___           ___           ___           ___       ___           ___
     /\  \         /\  \         /\  \         /\__\     /\  \         /\  \
    /::\  \       /::\  \       /::\  \       /:/  /    /::\  \       /::\  \
   /:/\ \  \     /:/\:\  \     /:/\:\  \     /:/  /    /:/\:\  \     /:/\ \  \
  _\:\~\ \  \   /::\~\:\  \   /::\~\:\  \   /:/  /    /:/  \:\  \   _\:\~\ \  \
 /\ \:\ \ \__\ /:/\:\ \:\__\ /:/\:\ \:\__\ /:/__/    /:/__/ \:\__\ /\ \:\ \ \__\
 \:\ \:\ \/__/ \:\~\:\ \/__/ \/__\:\/:/  / \:\  \    \:\  \ /:/  / \:\ \:\ \/__/
  \:\ \:\__\    \:\ \:\__\        \::/  /   \:\  \    \:\  /:/  /   \:\ \:\__\
   \:\/:/  /     \:\ \/__/        /:/  /     \:\  \    \:\/:/  /     \:\/:/  /
    \::/  /       \:\__\         /:/  /       \:\__\    \::/  /       \::/  /
     \/__/         \/__/         \/__/         \/__/     \/__/         \/__/

                  Website: https://www.sealos.io/
                  Address: github.com/labring/sealos
                  Version: 5.0.0-02327d53e


kubectl
-bash: /usr/bin/kubectl: No such file or directory
离线安装
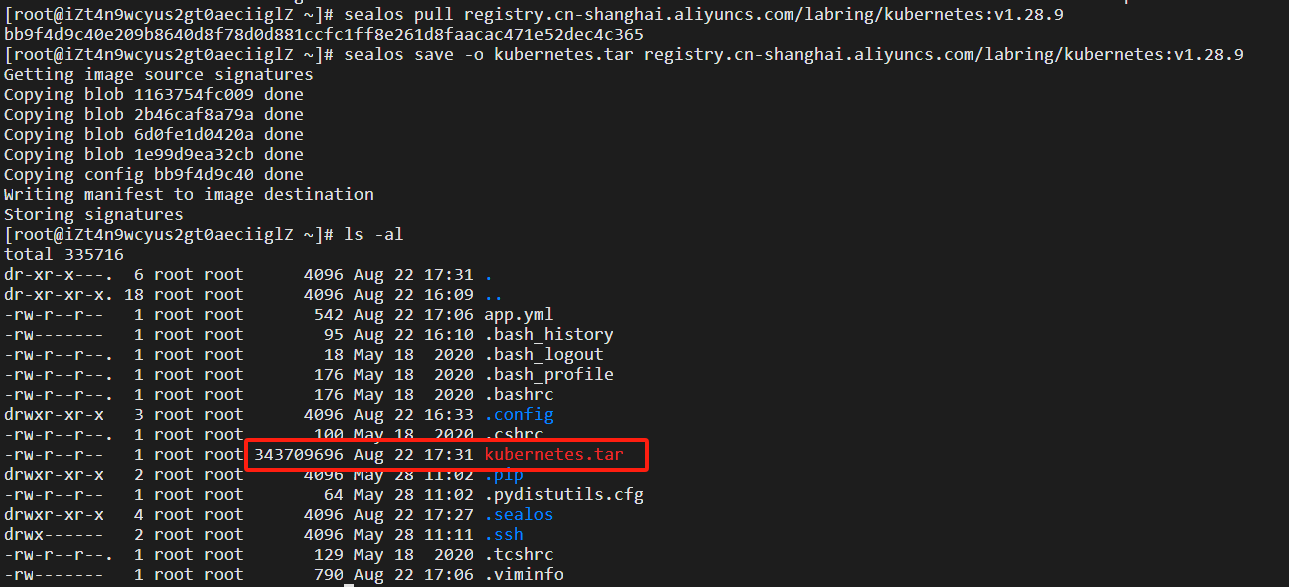
离线安装也比较简单,sealos 本身是一个二进制文件,你放置到机器上 /usr/bin/ 目录下即可,sealos 安装依赖的镜像可以通过有网络环境的机器进行导出为 tar 包,再导入即可。
sealos pull registry.cn-shanghai.aliyuncs.com/labring/kubernetes:v1.28.9
sealos save -o kubernetes.tar registry.cn-shanghai.aliyuncs.com/labring/kubernetes:v1.28.9
其他镜像同理。
然后在无外网环境的机器上导入即可。
sealos load -i kubernetes.tar
sealos images
总结
好了,今天给大家分享了一个超简单且便捷的 k8s 集群环境安装方式,你学会了吗?有任何问题欢迎通过我的个人公&号:新质程序猿,找到我,一起升级打怪(刚买了 黑神话:悟空,周末好好玩一玩)。


 被折叠的 条评论
为什么被折叠?
被折叠的 条评论
为什么被折叠?
 到【灌水乐园】发言


