


在手动创建SpringBoot应用中,我们讲过手动创建SpringBoot工程是比较麻烦的,尤其是公司内部不有自定义扩展和集成的情况下。利用Maven的archetype:generate能基于项目模板生成功能,自定义模板能让整个创建过程自动化,这样既能大大降低创建和集成SpringBoot的复杂度,还能做到公司内部的标准化。要自定义archetype,需要做7个步骤:
- 创建archetype的工程
- 定义archetype的pom,方便在mvn archetype:generate时引用当前模板
- 定义archetype的描述文件,配置哪些属性/文件/模块应该包含在生成的项目内,位于 src/main/resources/META-INF/maven/archetype-metadata.xml
- 定义原型的pom,编辑后作为新生成项目的pom,位于 src/main/resources/archetype-resources/pom.xml
- 定义原型的文件,编辑后作为新生成项目的内容,位于 src/main/resources/archetype-resources/
- 安装archetype到仓库,供后续生成项目时使用
- 使用自定义archetype生成项目
1. 创建工程
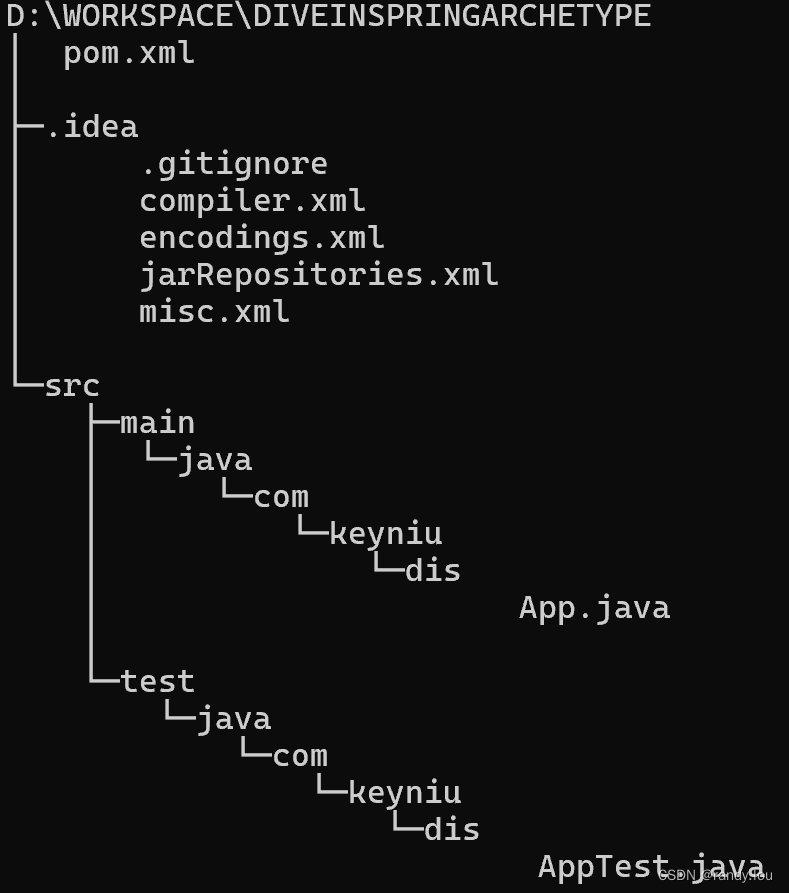
其实archetype也是普通的Maven工程,可以通过maven-archetype-quickstart能生成一个简单的Maven项目,我们将它命名为DiveInSpringArchetype
mvn archetype:generate -DarchetypeGroupId=org.apache.maven.archetypes
    -DarchetypeArtifactId=maven-archetype-quickstart
    -DarchetypeVersion=1.4
    -DgroupId=com.keyniu.dis
    -DartifactId=DiveInSpringArchetype
    -Dversion=0.1
    -Dpackage=com.keyniu.dis
    -DinteractiveMode=false
这和我们之前创建的项目完全一样,整个目录树看起来是这样的
2. 定义archetype的pom
在DiveInSpringArchetype根目录下已经生成了pom.xml文件,我们修改一下pom.xml的内容,只保留GAV信息,添加archetype-packaging扩展
<?xml version="1.0" encoding="UTF-8"?>

<project xmlns="http://maven.apache.org/POM/4.0.0" xmlns:xsi="http://www.w3.org/2001/XMLSchema-instance"
         xsi:schemaLocation="http://maven.apache.org/POM/4.0.0 http://maven.apache.org/xsd/maven-4.0.0.xsd">

  <modelVersion>4.0.0</modelVersion>

  <groupId>com.keyniu.dis</groupId>
  <artifactId>DiveInSpringArchetype</artifactId>
  <version>0.1</version>

  <build>
    <extensions>
      <extension>
        <groupId>org.apache.maven.archetype</groupId>
        <artifactId>archetype-packaging</artifactId>
        <version>3.1.1</version>
      </extension>
    </extensions>
  </build>
</project>
3. 定义archetype的描述文件
接着来定义archetype-metadata.xml,这个文件存放在src/main/resources/META-INF/maven/archetype-metadata.xml,重点关注下面3个点
- archetype-descriptor.name,值必须和artifactId相同
- requiredProperty,在archetype:generate时,由用户输入,可以在工程内部引用,通过filtered=true,替换引用的变量
- fileSet,设置那些文件包含在生成的工程中,为了后续验证,可以在src/main/java、srce/main/resources创建一个模板文件
<?xml version="1.0" encoding="UTF-8"?>

<archetype-descriptor name="DiveInSpringArchetype">

    <requiredProperties>
        <requiredProperty key="env">
            <defaultValue>prod</defaultValue>
        </requiredProperty>
    </requiredProperties>

    <fileSets>
        <fileSet filtered="true" packaged="true" encoding="UTF-8">
            <directory>src/main/java</directory>
            <includes>
                <include>**/*.java</include>
            </includes>
        </fileSet>
        <fileSet filtered="true" encoding="UTF-8">
            <directory>src/main/resources</directory>
            <includes>
                <include>**/*.xml</include>
                <include>**/*.factories</include>
                <include>**/*.yaml</include>
                <include>**/*.yml</include>
                <include>**/*.properties</include>
            </includes>
        </fileSet>
    </fileSets>

</archetype-descriptor>
4. 定义原型的pom
接着要创建src/main/resources/archetype-resources目录下,预定义要放入目标工程的内容,首先是放在原型的pom.xml文件,pom.xml能引用环境变量,包括执行archetype:generate时传入的GAV信息
<?xml version="1.0" encoding="UTF-8"?>

<project xmlns="http://maven.apache.org/POM/4.0.0" xmlns:xsi="http://www.w3.org/2001/XMLSchema-instance"
         xsi:schemaLocation="http://maven.apache.org/POM/4.0.0 https://maven.apache.org/xsd/maven-4.0.0.xsd">
    <modelVersion>4.0.0</modelVersion>
    <groupId>${groupId}</groupId>
    <artifactId>${artifactId}</artifactId>
    <version>${version}</version>
    <packaging>jar</packaging>
    <name>${artifactId}</name>
    <dependencies>
        <dependency>
            <groupId>junit</groupId>
            <artifactId>junit</artifactId>
            <version>4.12</version>
            <scope>test</scope>
        </dependency>
    </dependencies>
</project>
5. 定义原型的文件
src/main/resources/archetype-resources除了能定义pom.xml,还可以放正常工程的文件,比如src/main/resources/archetype-resources/src/main/java里我们可以放AppConfig.java类,内容如下
package ${package};

@ApplicationPath("${env}")
public class AppConfig extends Application {
}
这里的package ${package};根据调用mvn archetype:generate -Dpackage=xxx的值将AppConfig.java放到指定的包中。除此以外,我们还在src/main/resources/archetype-resources/src/main/resources中定义了一个application.properties文件,最终整个工程的结构是下面这样的。

6. 安装archetype到仓库
到这一步archetype创建完成了,现在可以将这个自定义archetype安装到本地仓库
mvn clean package install7. 使用自定义archetype
现在一切准备就绪了,是时候用自定义archetype来创建工程了,通过执行命令
mvn archetype:generate -DarchetypeGroupId=com.keyniu.dis
    -DarchetypeArtifactId=DiveInSpringArchetype
    -DarchetypeVersion=0.1
    -DgroupId=com.keyniu.generate.example
    -DartifactId=GenExa
    -Dversion=0.1
    -Dpackage=com.keyniu.gen.exa
    -DinteractiveMode=false
执行成功后整个GenExa工程的结构如下,AppConfig.java会正确的放入到对于的包中。
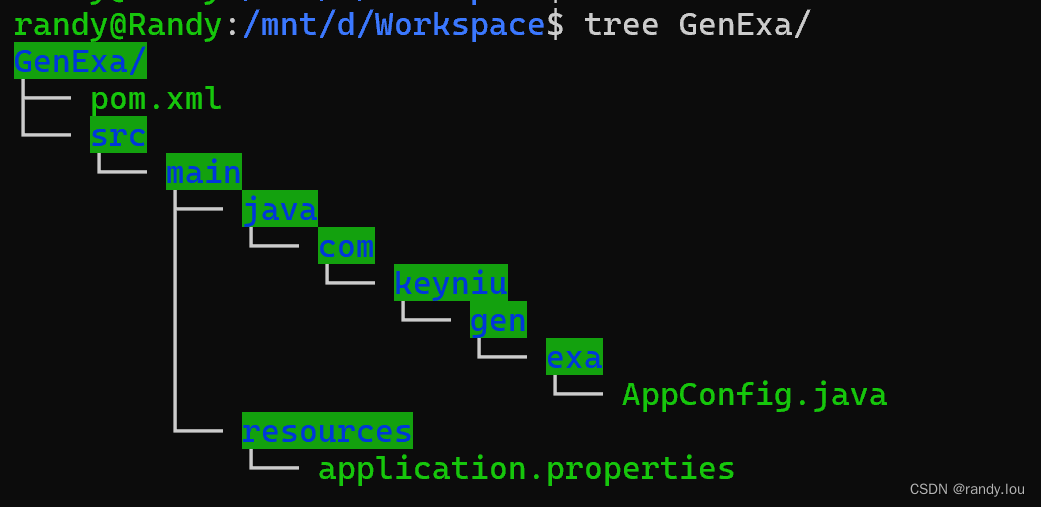
通过这一整套的流程,我们能做到的是创建任意格式的模板,可以在pom.xml、代码、配置中预定义所有的集成。不过用它的创建一个完整工程的模板还是有点麻烦的,我们编辑archetype-resources目录,而这个目录是没有包结构,不支持IDE错误提示的。mvn提供了一个命令来支持这种场景,这个我们在下一篇讲解。


 1107
1107


 被折叠的 条评论
为什么被折叠?
被折叠的 条评论
为什么被折叠?
 到【灌水乐园】发言


