


背景
我们的系统建设初期,使用腾讯云 CLB 负载均衡实现蓝绿发布,由于 CLB 的设计只能绑定腾讯云 CVM 服务器,对于 Serverless 集群架构很不友好。为解决这个问题,笔者尝试在腾讯云部署 NGINX Ingress Controller 实现金丝雀发布。
目标
探索 NGINX Ingress Controller 实现金丝雀发布。
部署
准备 Nginx 测试用例
部署 nginx-v1 和 nginx-v2 两个工作负载作为测试用例,使用 openresty/openresty:centos 作为基础镜像。
nginx-v1 部署代码片段如下。
# StatefulSet
apiVersion: apps/v1
kind: StatefulSet
metadata:
  labels:
    k8s-app: nginx
    qcloud-app: nginx
    version: v1
  name: nginx-v1
  namespace: default
spec:
  podManagementPolicy: OrderedReady
  replicas: 1
  revisionHistoryLimit: 10
  selector:
    matchLabels:
      k8s-app: nginx
      qcloud-app: nginx
      version: v1
  serviceName: ""
  template:
    metadata:
      labels:
        k8s-app: nginx
        qcloud-app: nginx
        version: v1
    spec:
      containers:
      - env:
        - name: TZ
          value: Asia/Shanghai
        image: openresty/openresty:centos
        imagePullPolicy: IfNotPresent
        name: nginx
        resources:
          limits:
            cpu: 250m
            memory: 512Mi
          requests:
            cpu: 250m
            memory: 512Mi
        securityContext:
          privileged: false
        terminationMessagePath: /dev/termination-log
        terminationMessagePolicy: File
        volumeMounts:
        - mountPath: /usr/local/openresty/nginx/conf/nginx.conf
          name: conf
          subPath: nginx.conf
      dnsPolicy: ClusterFirst
      restartPolicy: Always
      schedulerName: default-scheduler
      securityContext: {}
      terminationGracePeriodSeconds: 30
      volumes:
      - configMap:
          defaultMode: 420
          name: nginx-v1
        name: conf
  updateStrategy:
    rollingUpdate:
      partition: 0
    type: RollingUpdate

# Service
apiVersion: v1
kind: Service
metadata:
  labels:
    k8s-app: nginx
    qcloud-app: nginx
  name: nginx-v1
  namespace: default
spec:
  clusterIP: 10.0.0.1
  ports:
  - name: http
    port: 80
    protocol: TCP
    targetPort: 80
  selector:
    k8s-app: nginx
    qcloud-app: nginx
    version: v1
  sessionAffinity: None
  type: ClusterIP
status:
  loadBalancer: {}

# ConfigMap
apiVersion: v1
kind: ConfigMap
metadata:
  labels:
    k8s-app: nginx
    qcloud-app: nginx
    version: v1
  name: nginx-v1
  namespace: default
data:
  nginx.conf: |
   "worker_processes auto;
    error_log /usr/local/openresty/nginx/logs/error.log warn;
    pid /var/run/nginx.pid;

    events {
      accept_mutex on;
      multi_accept on;
      use epoll;
      worker_connections 1024;
    }

    http {
      sendfile on;
      gzip on;
      keepalive_timeout 30;

      ignore_invalid_headers off;
            server {
                listen 80;
                location / {
                    access_by_lua '
                        local header_str = ngx.say("nginx-v1")
                    ';
                }
        }

        include /etc/nginx/conf.d/*.conf;
    }"
nginx-v2 部署代码片段如下。
# StatefulSet
apiVersion: apps/v1
kind: StatefulSet
metadata:
  labels:
    k8s-app: nginx
    qcloud-app: nginx
    version: v2
  name: nginx-v2
  namespace: default
spec:
  podManagementPolicy: OrderedReady
  replicas: 1
  revisionHistoryLimit: 10
  selector:
    matchLabels:
      k8s-app: nginx
      qcloud-app: nginx
      version: v2
  serviceName: ""
  template:
    metadata:
      labels:
        k8s-app: nginx
        qcloud-app: nginx
        version: v2
    spec:
      containers:
      - env:
        - name: TZ
          value: Asia/Shanghai
        image: openresty/openresty:centos
        imagePullPolicy: IfNotPresent
        name: nginx
        resources:
          limits:
            cpu: 250m
            memory: 512Mi
          requests:
            cpu: 250m
            memory: 512Mi
        securityContext:
          privileged: false
        terminationMessagePath: /dev/termination-log
        terminationMessagePolicy: File
        volumeMounts:
        - mountPath: /usr/local/openresty/nginx/conf/nginx.conf
          name: conf
          subPath: nginx.conf
      dnsPolicy: ClusterFirst
      restartPolicy: Always
      schedulerName: default-scheduler
      securityContext: {}
      terminationGracePeriodSeconds: 30
      volumes:
      - configMap:
          defaultMode: 420
          name: nginx-v2
        name: conf
  updateStrategy:
    rollingUpdate:
      partition: 0
    type: RollingUpdate

# Service
apiVersion: v1
kind: Service
metadata:
  labels:
    k8s-app: nginx
    qcloud-app: nginx
  name: nginx-v2
  namespace: default
spec:
  clusterIP: 10.0.0.2
  ports:
  - name: http
    port: 80
    protocol: TCP
    targetPort: 80
  selector:
    k8s-app: nginx
    qcloud-app: nginx
    version: v2
  sessionAffinity: None
  type: ClusterIP
status:
  loadBalancer: {}

# ConfigMap
apiVersion: v1
kind: ConfigMap
metadata:
  labels:
    k8s-app: nginx
    qcloud-app: nginx
    version: v2
  name: nginx-v2
  namespace: default
data:
  nginx.conf: |
   "worker_processes auto;
    error_log /usr/local/openresty/nginx/logs/error.log warn;
    pid /var/run/nginx.pid;

    events {
      accept_mutex on;
      multi_accept on;
      use epoll;
      worker_connections 1024;
    }

    http {
      sendfile on;
      gzip on;
      keepalive_timeout 30;

      ignore_invalid_headers off;
            server {
                listen 80;
                location / {
                    access_by_lua '
                        local header_str = ngx.say("nginx-v2")
                    ';
                }
        }

        include /etc/nginx/conf.d/*.conf;
    }"
创建 NGINX Ingress Controller
apiVersion: cloud.tencent.com/v1alpha1
kind: NginxIngress
metadata:
  name: nginx-ingress
spec:
  ingressClass: nginx-ingress
  service:
    type: LoadBalancer
  watchNamespace: default
  workLoad:
    hpa:
      enable: true
      maxReplicas: 2
      metrics:
      - pods:
          metricName: k8s_pod_rate_cpu_core_used_limit
          targetAverageValue: "80"
        type: Pods
      minReplicas: 1
    template:
      affinity: {}
      container:
        image: shjrccr.ccs.tencentyun.com/paas/nginx-ingress-controller:v0.49.3
        resources:
          limits:
            cpu: "0.25"
            memory: 512Mi
          requests:
            cpu: "0.25"
            memory: 512Mi
    type: deployment
对应的 ConfigMap 如下。
apiVersion: v1
data:
  access-log-path: /var/log/nginx/nginx_access.log
  allow-snippet-annotations: "false"
  error-log-path: /var/log/nginx/nginx_error.log
  keep-alive-requests: "10000"
  log-format-upstream: $remote_addr - $remote_user [$time_iso8601] $msec "$request"
    $status $body_bytes_sent "$http_referer" "$http_user_agent" $request_length $request_time
    [$proxy_upstream_name] [$proxy_alternative_upstream_name] [$upstream_addr] [$upstream_response_length]
    [$upstream_response_time] [$upstream_status] $req_id
  max-worker-connections: "65536"
  upstream-keepalive-connections: "200"
kind: ConfigMap
metadata:
  labels:
    k8s-app: nginx-ingress-ingress-nginx-controller
    qcloud-app: nginx-ingress-ingress-nginx-controller
    manager: tke-nginx-ingress-controller
  name: nginx-ingress-ingress-nginx-controller
  namespace: default
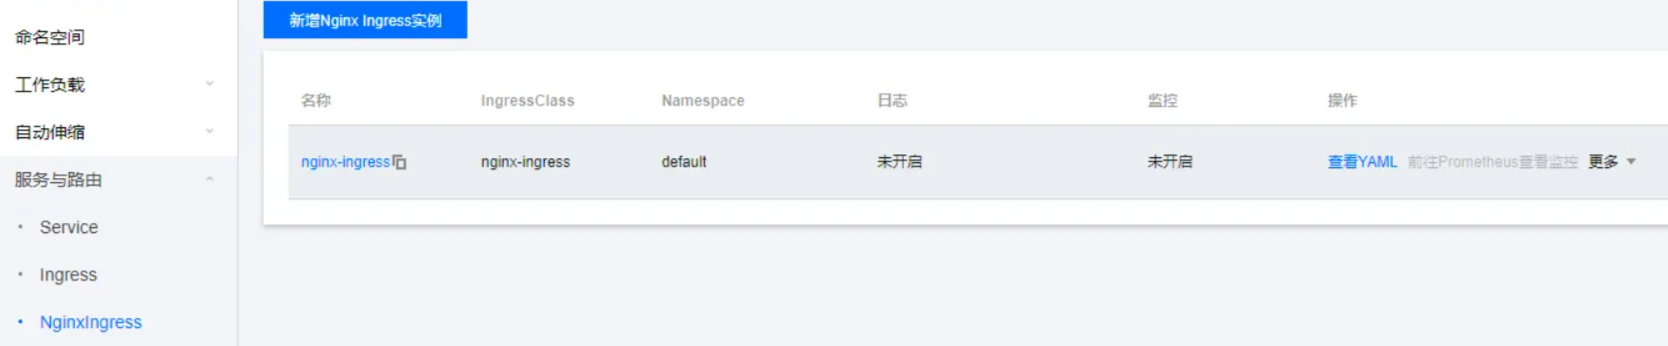
在腾讯云控制台可以看到 NGINX Ingress 实例已成功部署。
创建 NGINX Ingress
创建 nginx-ingress 指向 nginx-v1 服务。客户端请求默认路由到这个 Ingress。
apiVersion: networking.k8s.io/v1beta1
kind: Ingress
metadata:
  annotations:
    kubernetes.io/ingress.class: nginx-ingress
    kubernetes.io/ingress.rule-mix: "false"
    kubernetes.io/ingress.subnetId: subnet-1234567
  name: nginx-ingress
  namespace: default
spec:
  rules:
  - http:
      paths:
      - backend:
          serviceName: nginx-v1 # 绑定 Service
          servicePort: 80
        pathType: ImplementationSpecific
status:
  loadBalancer:
    ingress:
    - ip: 172.28.84.54
创建 nginx-ingress-canary 指向 nginx-v2 服务,通过 nginx.ingress.kubernetes.io/canary: "true" 注解实现灰度。
apiVersion: networking.k8s.io/v1beta1
kind: Ingress
metadata:
  annotations:
    kubernetes.io/ingress.class: nginx-ingress
    kubernetes.io/ingress.rule-mix: "false"
    kubernetes.io/ingress.subnetId: subnet-1234567
    # 开启灰度
    nginx.ingress.kubernetes.io/canary: "true"
  name: nginx-ingress-canary
  namespace: default
spec:
  rules:
  - http:
      paths:
      - backend:
          serviceName: nginx-v2 # 绑定 Service
          servicePort: 80
        pathType: ImplementationSpecific
status:
  loadBalancer:
    ingress:
    - ip: 172.28.84.54
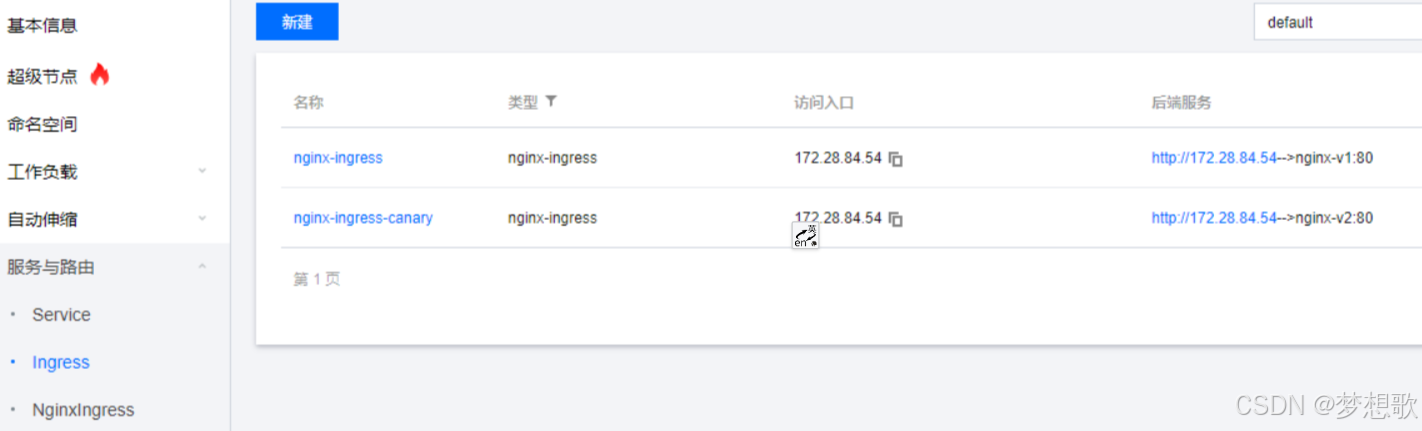
腾讯云控制台可以看到,nginx-ingress 和 nginx-ingress-canary 指向同一个访问 IP 172.28.84.54。
验证 A/B 测试
使用 curl 验证流量切分是否有效。
在未开启流量切分之前,curl 请求情况如下。
[root@localhost ~]# for i in {1..10}; do curl http://172.28.84.54; done;
nginx-v1
nginx-v1
nginx-v1
nginx-v1
nginx-v1
nginx-v1
nginx-v1
nginx-v1
nginx-v1
nginx-v1
给 nginx-ingress-canary 添加如下代码。
apiVersion: extensions/v1beta1
kind: Ingress
metadata:
  annotations:
    kubernetes.io/ingress.class: nginx
    nginx.ingress.kubernetes.io/canary: "true"
    # 基于 Header 的流量切分
    nginx.ingress.kubernetes.io/canary-by-header: region
    nginx.ingress.kubernetes.io/canary-by-header-pattern: gz|sz # 如果 Http 请求头包含 region=gz 或者 region=sz 都会转发到该 Ingress
在 curl 请求头添加 region=gz,请求情况如下。
[root@localhost ~]# curl http://172.28.84.54;
nginx-v1
[root@localhost ~]# curl -H "region: gz" http://172.28.84.54;
nginx-v2
[root@localhost ~]# curl -H "region: bj" http://172.28.84.54;
nginx-v1
[root@localhost ~]# curl -H "region: sz" http://172.28.84.54;
nginx-v2
验证通过,使用 nginx.ingress.kubernetes.io/canary-by-header-pattern: gz|sz 表示我们要灰度新版本到 gz 区域或者 sz 区域,客户端携带这些请求,流量就会进入灰度的 Ingress。
验证金丝雀发布
金丝雀发布主要通过权重逐步分流,基于 nginx.ingress.kubernetes.io/canary-weight 控制。
apiVersion: extensions/v1beta1
kind: Ingress
metadata:
  annotations:
    kubernetes.io/ingress.class: nginx
    nginx.ingress.kubernetes.io/canary: "true"
    nginx.ingress.kubernetes.io/canary-weight: "10"
发起 curl 请求,响应情况如下。
[root@localhost ~]# for i in {1..10}; do curl http://172.28.84.54; done;
nginx-v1
nginx-v2
nginx-v1
nginx-v2
nginx-v1
nginx-v1
nginx-v1
nginx-v1
nginx-v1
nginx-v1
验证通过,从结果可以看出,流量约 10% 的比例被灰度版本分流。
总结
基于 NGINX Ingress Controller 实现 A/B 测试、金丝雀发布还是比较简单的,但是 NGINX reload 问题并没有彻底解决。笔者更倾向于使用 APISIX Ingress Controller 实现金丝雀发布。


 被折叠的 条评论
为什么被折叠?
被折叠的 条评论
为什么被折叠?
 到【灌水乐园】发言


