


IOC容器操作Bean
注解格式:@注解名称(属性名称=属性值,属性名称=属性值) 放在类,方法,属性都可以
目的:简化XML配置
对象创建四大注解
1)用的位置不是强制的
@Component 最普通
@Service 用在service层
@Controller 用在controller
@Repostory 用在持久层 如dto
以上四个功能一样,都可以用来创建Bean实例
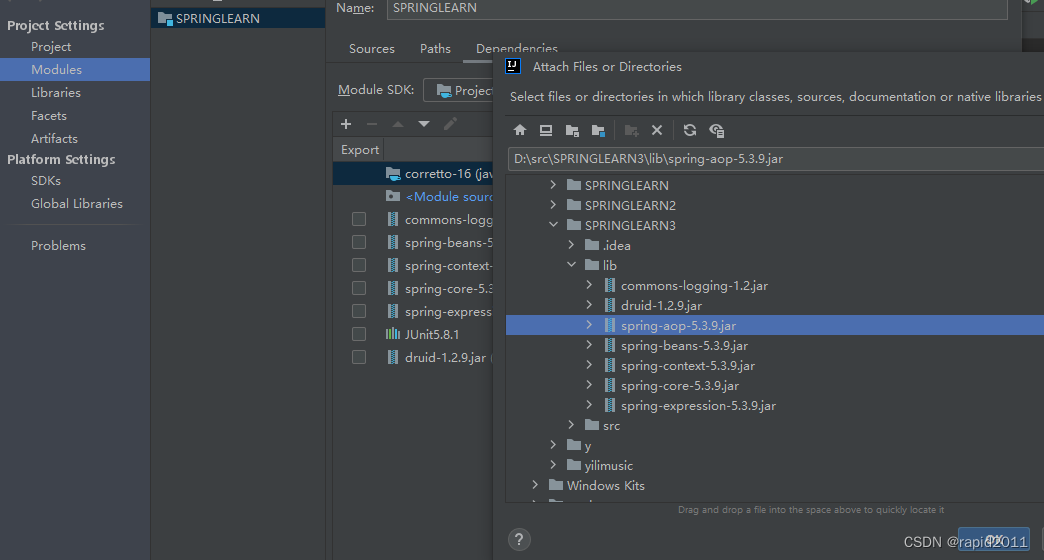
2)lib文件夹中额外引入依赖aop
![]()
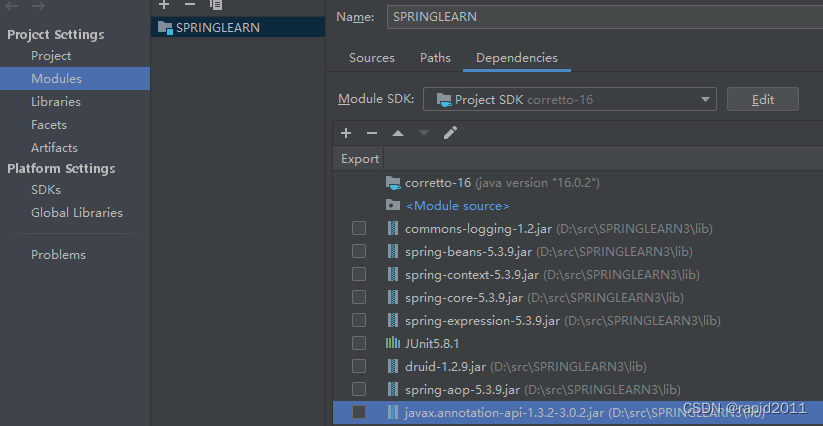
引入到项目里
3)开启组件扫描,目的是告诉spring,哪些文件有注解
再次在xml中引入context,增加一行xmlns,增加两个http,把其中三处beans修改为context
<beans xmlns="http://www.springframework.org/schema/beans"
       xmlns:xsi="http://www.w3.org/2001/XMLSchema-instance"
       xmlns:context="http://www.springframework.org/schema/context"
       xsi:schemaLocation="http://www.springframework.org/schema/beans http://www.springframework.org/schema/beans/spring-beans.xsd
                            http://www.springframework.org/schema/context http://www.springframework.org/schema/context/spring-context.xsd
      ">
指定扫描范围
<!--   开启组件扫描多个包之间可以用,隔开,或者扫描上层-->
<!--    <context:component-scan base-package="com.i7i8i9.spring5.dao,com.i7i8i9.spring5.service"></context:component-scan>-->
    <context:component-scan base-package="com.i7i8i9"></context:component-scan>
正式写类
//括号内容可以不写,不写默认将类首字符小写
@Component(value = "userService")  //等效于在XML中配置<bean id=userService  class=
public class UserService {
    public void add(){
总结:new ClassPathXmlApplicationContext("bean1.xml") 首先找到XML,然后根据里面的注解指引,找到注解
【补充】扫描进一步设置扫描范围
<!--  例1  use-default-filters="false" 不加会使用默认filter,如果为false,表示不使用默认的filter  -->
    <context:component-scan base-package="com.i7i8i9" use-default-filters="false">
        <!--  include-filter设置包含那些来扫描  type="annotation" expression=Controller 表示只扫描带注解@Controller的类-->
    <context:include-filter type="annotation" expression="org.springframework.stereotype.Controller"/>


    </context:component-scan>
<!--    例2  扫描所有类-->
    <context:component-scan base-package="com.i7i8i9">
        <!-- 设置注解是@Controller不扫描   -->
        <context:exclude-filter type="annotation" expression="org.springframework.stereotype.Controller"/>
    </context:component-scan>
基于注解实现属性注入
对象级别三个
@AutoWired 根据类型注入 等同XMLBy Type 举例 service 和dao
第一步:两个对象创建,在dao和service
dao文件下有接口,注解不能加接口上,只能加在实现类上
@Repository
public interface UserDao {
    public  void add();
}


@Service
public class UserService {
    public void add(){
        System.out.println("hello啊");


    }
第二步:因为service要用到dao,所以要注入dao
定义要引入的对象的属性,在其上加@AutoWired
@Service
public class UserService {
    @Autowired
    private UserDao userDao; //定义要引入的对象的属性,在其上加@AutoWired,不需要像XML那样定义set方法
    public void add(){
       userDao.add();
    }
}
[报错]Caused by: org.springframework.beans.factory.NoSuchBeanDefinitionException: No qualifying bean of type 'com.i7i8i9.spring5.dao.UserDao' available: expected at least 1 bean which qualifies as autowire candidate. Dependency annotations: {@org.springframework.beans.factory.annotation.Autowired(required=true)}
原因:在接口上不能放注解,要放在实现类上
@Qualifier根据对象名称进行注入
要配合上面的@AutoWired一起使用
主要解决如下UserDao有多个实现类,类型都是UserDao,别人要使用时就不知道用哪个,所以增加名称
@Repository(value = "userDaoImpl1")
public class UserDaoImpl implements UserDao{
    @Override
    public void add() {
        System.out.println("dao add");
    }
}
这样注入时在@Qualifier进一步指定名称
@Service
public class UserService {
    @Autowired
    @Qualifier(value = "userDaoImpl1")
    private UserDao userDao; //定义要引入的对象的属性,在其上加@AutoWired,不需要像XML那样定义set方法
    public void add(){
       userDao.add();
    }
}
@Resoure 可以根据类型或名称注入
它是 java扩展包 Javax中的,所以Spring官方不建议使用
引入
https://github.com/RationalityFrontline/javax.annotation-api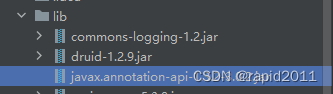
可以根据类型或名称将需要的对象注入
@Service
public class UserService {
//    @Autowired
//    @Qualifier(value = "userDaoImpl1")
//    private UserDao userDao; //定义要引入的对象的属性,在其上加@AutoWired,不需要像XML那样定义set方法


     //@Resource  //这是根据类型
     @Resource(name = "userDaoImpl1") //这是根据名称
    private UserDao userDao;
    public void add(){
       userDao.add();
    }
}
@Value 注入普通类型属性
@Value(value="hhihi")
private String name;
完全注解开发
1)创建任意名称配置类,代替XML配置文件
在其上增加@Configuration //把当前类变成Spring配置类,代替XML
另外因为现在bean1.xml中只有1行,扫描范围,改为以下@ComponentScan(basePackages = {"com.i7i8i9"})
package com.i7i8i9.spring5.config;

import org.springframework.context.annotation.ComponentScan;
import org.springframework.context.annotation.Configuration;

@Configuration   //把当前类变成Spring配置类,代替XML
@ComponentScan(basePackages = {"com.i7i8i9"})
public class SpringConfig {
}
2)修改测试方法
因为删掉了bean1.xml,所以需要更换context获取方法
    //全注解开发
    @Test
    public void testUser1(){
        //更换源头
        ApplicationContext context=new AnnotationConfigApplicationContext("SpringConfig.class");
        UserService userService=context.getBean("userService", UserService.class);
        userService.add();

    }
}
报错 org.springframework.beans.factory.NoSuchBeanDefinitionException: No bean named 'userService' available
原因:SpringConfig.class不能带双引号
ApplicationContext context=new AnnotationConfigApplicationContext(SpringConfig.class);
修正
  //全注解开发
    @Test
    public void testUser1(){
        //更换源头
        ApplicationContext context=new AnnotationConfigApplicationContext(SpringConfig.class);
        UserService userService=context.getBean("userService", UserService.class);
        userService.add();

    }


 139
139


 被折叠的 条评论
为什么被折叠?
被折叠的 条评论
为什么被折叠?
 到【灌水乐园】发言


