


先安装
npm install axios
引入
import axios from 'axios'
跨域出现的问题

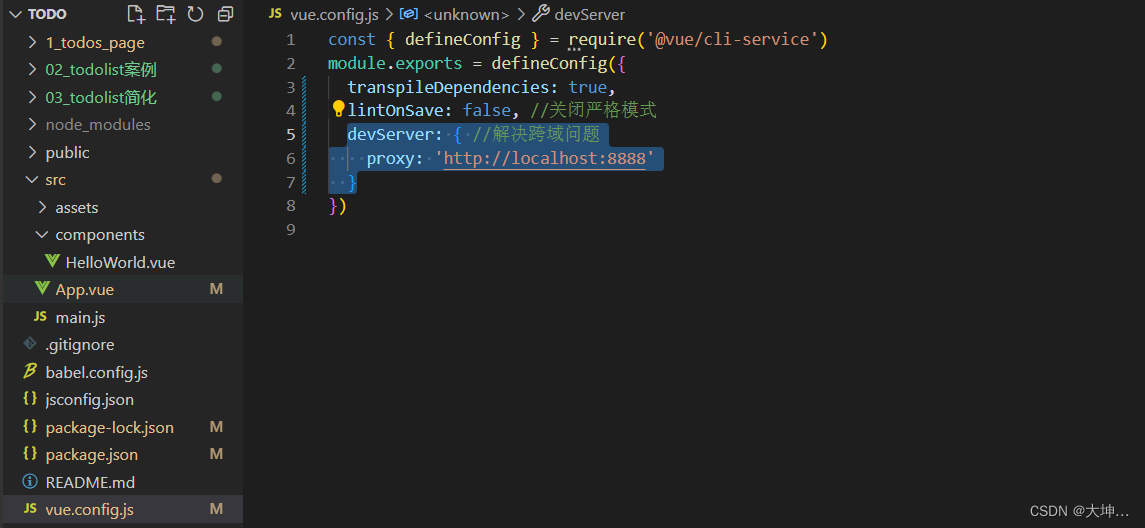
第一种方式 在客户端修改脚手架的配置 代理服务器
向客户端本身创建一个代理服务器 再让代理服务端向 服务端传递就不存在跨域问题了
代理服务器的方式 在congfig.js里面添加 devServer
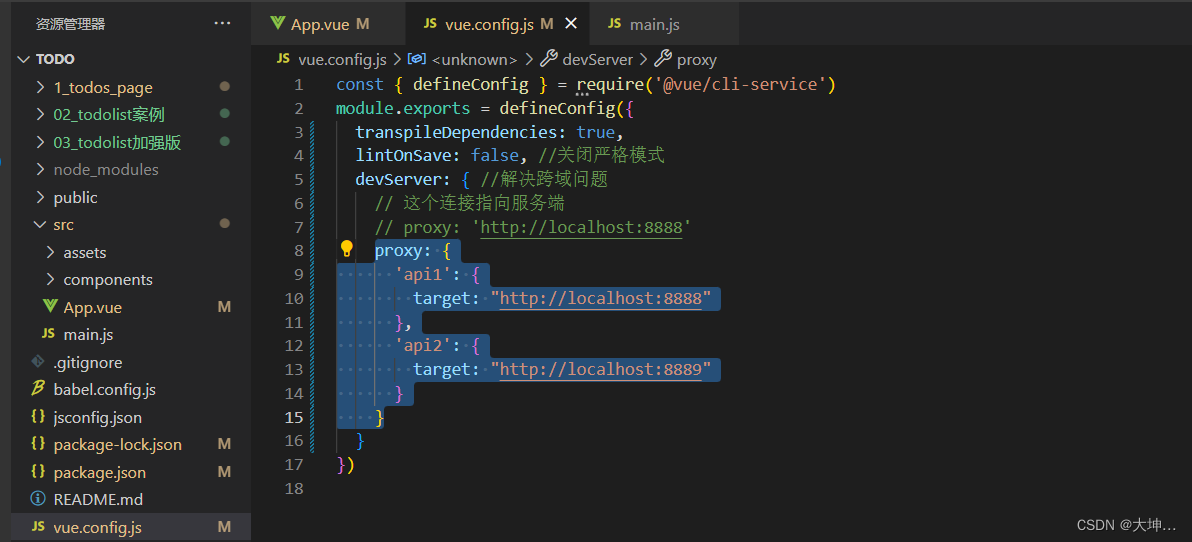
代理服务器需要访问多个服务器不同的api时需要
- 每次修改vue.config.js都需要保存后重新启动一下项目
- 客户端请求的api会分别找到找到不同的api1和api2
- 自己测试的时候(请求的两个服务器)时要查看服务器是否都打开
第二种方式 在服务器段修改跨域问题
安装cors: npm i cors 在使用就可以了
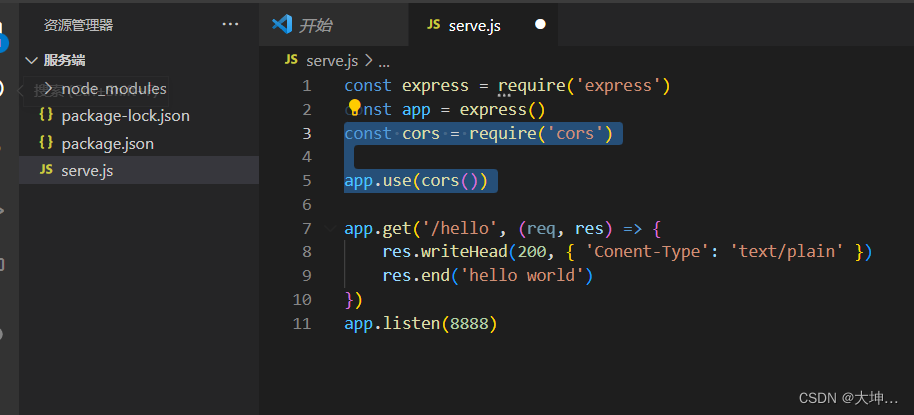
测试:
简单的一个服务端可以实现跨域请求就行
const express = require('express')
const app = express()
// body-parser是一个HTTP请求体解析的中间件,使用这个模块可以解析JSON、Raw、文本、URL-encoded格式的请求体,
const bodyparser = require('body-parser')

app.use(bodyparser.json())
// const cors = require('cors')

// // 配置中间键
// app.use(cors())

app.get('/hello', (req, res) => {
    res.writeHead(200, { 'Content-Type': 'text/plain' })
    res.end('hello world')
})
// get 请求 user
app.get('/user/:id', (req, res) => {
    const obj = {
        id: req.params.id,
        firstName: "张",
        lastName: "四"
    }
    res.writeHead(200, { 'Content-Type': 'text/plain;charset=utf-8' })
    res.end(JSON.stringify(obj))
})
// post 请求 user
app.post('/user', (req, res) => {
    const obj = {
        firstName: req.body.first_name,
        lastName: req.body.last_name
    }
    console.log(obj);
    res.writeHead(200, { 'Content-Type': 'text/plain;charset=utf-8' })
    res.end(JSON.stringify(obj))
})
    +
    // put() 修改请求 user
    app.put('/user/:id', (req, res) => {
        const obj = {
            id: req.params.id,
            firstName: req.body.first_name,
            lastName: req.body.last_name
        }
        console.log(obj);
        res.writeHead(200, { 'Content-Type': 'text/plain;charset=utf-8' })
        res.end(JSON.stringify(obj))
    })
// delete 删除
app.delete('/user/:id', (req, res) => {
    const obj = {
        id: req.params.id
    }
    console.log(obj);
    res.writeHead(200, { 'Content-Type': 'text/plain;charset=utf-8' })
    res.end(`成功删除了${req.params.id}的数据`)
})


app.listen(8888)
客户端
get请求
    // get
    sendGet(){
      axios.get('http://localhost:8080/api1/user/1').then(res=>{ //接收数据
        console.log(res.data);
      }).catch(err=>{ //捕获异常
        console.log(err);
      })
    },
post
    // post
    sendPost(){
      axios.post('http://localhost:8080/api1/user',{
        first_name:"张",
        last_name:"三"
      }).then(res=>{ //接收数据
        console.log(res.data);
      }).catch(err=>{ //捕获异常
        console.log(err);
      })
    },
put
    // put
    sendPut(){
      axios.put('http://localhost:8080/api1/user/:id',{
        first_name:"老",
        last_name:"六"
      }).then(res=>{ //接收数据
        console.log(res.data);
      }).catch(err=>{ //捕获异常
        console.log(err);
      })
    },
delete
    // delete
    sendDelete(){
      axios.delete('http://localhost:8080/api1/user/1').then(res=>{ //接收数据
        console.log(res.data);
      }).catch(err=>{ //捕获异常
        console.log(err);
      })
    },
和并发送
    // 和并发送
    sendArr(){
      const get1 = axios.get('http://localhost:8080/api1/hello')
      const get2 = axios.get('http://localhost:8080/api2/hello')
      axios.all([get1,get2]).then(
        axios.spread((res1,res2)=>{
          console.log(res1.data,res2.data);
        })
      ).catch(err=>{
          console.log(err);
        })
    },
基本的axios请求
    sendApi(){
      axios.defaults.baseURL='http://localhost:8080'
      axios({
        url:"/api1/user",
        // baseURL:"http://localhost:8080",
        method:"post",
        data:{
          first_name:"张",
        last_name:"三"
        }
      }).then(res=>{ //接收数据
        console.log(res.data);
      }).catch(err=>{ //捕获异常
        console.log(err);
      })
    },
timeout :设置超时时间 端口请求时间不可超出时间
sendApitwo(){
      const instance = axios.create({
        baseURL:"http://localhost:8080",
        timeout:1000
      });
      instance.get('/api1/user/1').then(res=>{
        console.log(res.data);
      }).catch(err=>{
        console.log(err);
      })
    }


 254
254


 被折叠的 条评论
为什么被折叠?
被折叠的 条评论
为什么被折叠?
 到【灌水乐园】发言


