


1.先登录服务器安装lnmp环境,可以执行下面脚本
使用ssh登录到服务器:
ssh root@104.224.106.36可以使用 命名 ,下次免密登录:
cat ~/.ssh/id_rsa.pub | ssh -p 27988 root@104.224.166.36 "umask 077; mkdir -p .ssh; cat>>.ssh/authorized_keys"
lnmp安装命令如下:
wget http://soft.vpser.net/lnmp/lnmp1.5.tar.gz -cO lnmp1.5.tar.gz && tar zxf lnmp1.5.tar.gz && cd lnmp1.5 && LNMP_Auto="y" DBSelect="2" DB_Root_Password="root" InstallInnodb="y" PHPSelect="5" SelectMalloc="1" ./install.sh lnmp
出现如下界面表示安装成功,这个过程可能会需要10分钟左右,请耐心等待.


2.nginx文件配置
nginx.conf
user  www www;

worker_processes auto;

error_log  /home/wwwlogs/nginx_error.log  crit;

pid        /usr/local/nginx/logs/nginx.pid;

#Specifies the value for maximum file descriptors that can be opened by this process.
worker_rlimit_nofile 51200;

events
    {
        use epoll;
        worker_connections 51200;
        multi_accept on;
    }

http
    {
        include       mime.types;
        default_type  application/octet-stream;

        server_names_hash_bucket_size 128;
        client_header_buffer_size 32k;
        large_client_header_buffers 4 32k;
        client_max_body_size 50m;

        sendfile   on;
        tcp_nopush on;

        keepalive_timeout 60;

        tcp_nodelay on;

        fastcgi_connect_timeout 300;
        fastcgi_send_timeout 300;
        fastcgi_read_timeout 300;
        fastcgi_buffer_size 64k;
        fastcgi_buffers 4 64k;
        fastcgi_busy_buffers_size 128k;
        fastcgi_temp_file_write_size 256k;

        gzip on;
        gzip_min_length  1k;
        gzip_buffers     4 16k;
        gzip_http_version 1.1;
        gzip_comp_level 2;
        gzip_types     text/plain application/javascript application/x-javascript text/javascript text/css application/xml application/xml+rss;
        gzip_vary on;
        gzip_proxied   expired no-cache no-store private auth;
        gzip_disable   "MSIE [1-6]\.";

        #limit_conn_zone $binary_remote_addr zone=perip:10m;
        ##If enable limit_conn_zone,add "limit_conn perip 10;" to server section.

        server_tokens off;
        access_log off;

server
    {
        listen 7888 default_server; #修改此端口号
        #listen [::]:80 default_server ipv6only=on;
        server_name _;
        index index.html index.htm index.php;
        root  /home/wwwroot/default;

        #error_page   404   /404.html;

        # Deny access to PHP files in specific directory
        #location ~ /(wp-content|uploads|wp-includes|images)/.*\.php$ { deny all; }

        include enable-php.conf;

        location /nginx_status
        {
            stub_status on;
            access_log   off;
        }

        location ~ .*\.(gif|jpg|jpeg|png|bmp|swf)$
        {
            expires      30d;
        }

        location ~ .*\.(js|css)?$
        {
            expires      12h;
        }

        location ~ /.well-known {
            allow all;
        }

        location ~ /\.
        {
            deny all;
        }

        access_log  /home/wwwlogs/access.log;
    }
include vhost/*.conf;
}
其中tp5.conf放在vhost目录下面

tp5.conf
server
    {
        listen 80;
        server_name www.dadalang.top;
        index index.html index.htm index.php default.html default.htm default.php;
        #根目录设置到Public下
        root  /home/wwwroot/default/tp5/public;


        #=======================================
        # 添加内容部分

        #定义变量
        set $root /home/wwwroot/default/tp5/public;

        location ~ [^/]\.php(/|$)
        {
            try_files $uri =404;
            fastcgi_pass  unix:/tmp/php-cgi.sock;
            fastcgi_index index.php;
            #设置PATH_INFO
            fastcgi_split_path_info ^((?U).+.php)(/?.+)$;
            fastcgi_param PATH_INFO $fastcgi_path_info;
            fastcgi_param PATH_TRANSLATED $document_root$fastcgi_path_info;
            fastcgi_param SCRIPT_FILENAME $root$fastcgi_script_name;
            #引入fastcgi配置
            include fastcgi.conf;
        }

        #从URL中去掉index.php入口文件
        location /
        {
            if (!-e $request_filename) {
                rewrite  ^(.*)$  /index.php?s=/$1  last;
                break;
            }
        }

        # 添加内容结束
        #==================================
        location ~ .*\.(gif|jpg|jpeg|png|bmp|swf)$
        {
            expires      30d;
        }

        location ~ .*\.(js|css)?$
        {
            expires      12h;
        }

        location ~ /.well-known {
            allow all;
        }

        location ~ /\.
        {
            deny all;
        }

        access_log off;
    }
访问 http://104.224.166.36:7888/出现下图表示安装lnmp环境ok

3.数据库配置

出现此问题 需要在 /etc/my.cnf 在[mysqld]加入 skip-grant-tables


将数据库文件zoo.sql上传 使用命令 scp /Users/xym/Downloads/zoo.sql root@104.224.166.36:/var/local/

创建数据库,导入表

4.使用filezilla上传项目文件,并且修改数据库配置文件

运行下列脚本修改mysql密码,
wget http://soft.vpser.net/lnmp/ext/reset_mysql_root_password.sh;sh reset_mysql_root_password.sh


5.其他配置


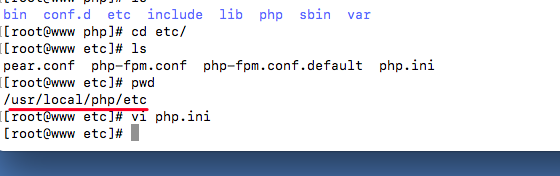
修改PHP配置
vi /usr/local/php/etc/php.ini
cgi.fix_pathinfo = 1
配置好后.执行 lnmp restart
6.运行项目,浏览器输入104.224.166.36出现下面页面表示部署成功,也可以访问域名http://www.dadalang.top/


后台地址访问http://104.224.166.36/admin/login 或者访问域名http://www.dadalang.top/admin/login


ps:注意
部署的时候,将debug模式关闭,出于安全性考虑,避免报错时,黑客利用网站漏洞攻击网站.
将app.php文件中的app_debug改为false


 1万+
1万+


 被折叠的 条评论
为什么被折叠?
被折叠的 条评论
为什么被折叠?
 到【灌水乐园】发言


