一、说明
1.1 软件版本
ubuntu
root@hecs-356455:~# cat /etc/issue
Ubuntu 20.04.4 LTS \n \l
1.2 更新
root@hecs-356455:/etc/apache2# sudo apt-get update
root@hecs-356455:/etc/apache2# sudo apt-get upgrade
1.3 取消云服务器的端口限制
tcp8003,给apache2备用
二、apache2+phpmyadmin管理mysql
2.1 安装apache2
root@hecs-356455:~# sudo apt-get install apache2
root@hecs-356455:~# sudo /etc/init.d/apache2 restart
Restarting apache2 (via systemctl): apache2.service.
浏览器访问IP:80可以打开如下页面,则说明apache2安装成功。

2.2 安装php
root@hecs-356455:~# sudo apt-get install php
root@hecs-356455:~# php -v
#安装成功后查询php版本,本次安装的php7.4
PHP 7.4.3 (cli) (built: Nov  2 2022 09:53:44) ( NTS )
Copyright (c) The PHP Group
Zend Engine v3.4.0, Copyright (c) Zend Technologies
    with Zend OPcache v7.4.3, Copyright (c), by Zend Technologies
root@hecs-356455:~#
2.3 构造apache2支持php的链接
root@hecs-356455:~# sudo apt-cache search libapache2-mod-php
#php和Apache2安装后需让Apache2识别解析php文件,先搜一下有没有适合php7.4插件
libapache2-mod-php - server-side, HTML-embedded scripting language (Apache 2 module) (default)
libapache2-mod-php7.4 - server-side, HTML-embedded scripting language (Apache 2 module)
php7.4-fpm - server-side, HTML-embedded scripting language (FPM-CGI binary)
root@hecs-356455:~#
root@hecs-356455:~# sudo apt-get install libapache2-mod-php7.4
#安装插件libapache2-mod-php7.4
安装成功后,构造一个test.php页面,如果浏览器可以访问成功,则说明链接成功。(此时apache2默认监听tcp80,所以浏览器访问时未指定端口号会自动填充:80,所以看浏览器访问链接时看不到端口号)
root@hecs-356455:~# cd /var/www/html/
root@hecs-356455:/var/www/html# pwd
/var/www/html
root@hecs-356455:/var/www/html# ls
index.html
root@hecs-356455:/var/www/html# vim test.php
root@hecs-356455:/var/www/html# ls
index.html  test.php
root@hecs-356455:/var/www/html# cat test.php
hello world!
root@hecs-356455:/var/www/html# 
2.4 修改apache2的listen端口tcp80->tcp8003
root@hecs-356455:/# cd /etc/apache2/
root@hecs-356455:/etc/apache2# pwd
/etc/apache2
root@hecs-356455:/etc/apache2# ls
apache2.conf  conf-available  conf-enabled  envvars  magic  mods-available  mods-enabled  ports.conf  sites-available  sites-enabled
root@hecs-356455:/etc/apache2# vim ports.conf
root@hecs-356455:/etc/apache2# cat ports.conf
# If you just change the port or add more ports here, you will likely also
# have to change the VirtualHost statement in
# /etc/apache2/sites-enabled/000-default.conf

Listen 8003

<IfModule ssl_module>
        Listen 443
</IfModule>

<IfModule mod_gnutls.c>
        Listen 443
</IfModule>

# vim: syntax=apache ts=4 sw=4 sts=4 sr noet
root@hecs-356455:/etc/apache2#
root@hecs-356455:/etc/apache2# sudo /etc/init.d/apache2 restart
root@hecs-356455:/etc/apache2# netstat -nplt | grep 8003
tcp6 0 0 :::8003 :::* LISTEN 15886/apache2
root@hecs-356455:/etc/apache2# 
2.5 安装mysql
root@hecs-356455:/etc/apache2# sudo apt-get install mysql-server
root@hecs-356455:/etc/apache2# mysql -v
Welcome to the MySQL monitor.  Commands end with ; or \g.
Your MySQL connection id is 8
Server version: 8.0.31-0ubuntu0.20.04.2 (Ubuntu)

Copyright (c) 2000, 2022, Oracle and/or its affiliates.

Oracle is a registered trademark of Oracle Corporation and/or its
affiliates. Other names may be trademarks of their respective
owners.

Reading history-file /root/.mysql_history
Type 'help;' or '\h' for help. Type '\c' to clear the current input statement.

mysql>
2.6 配置php支持mysql
ubuntu不能使用apt-get install libapache2-mod-auth-mysql的解决方法
libapache2-mod-auth-mysql是apache2早期的方式,ubuntu14.04适用,以后版本apache2都改为mod_authn_dbd的验证方式
root@hecs-356455:/etc/apache2# sudo apt-get install php7.4-mysql
root@hecs-356455:/etc/apache2# sudo apt-get install libaprutil1-dbd-mysql
root@hecs-356455:/etc/apache2# sudo /etc/init.d/apache2 restart
2.7 安装phpMyAdmin
#安装必要的依赖包,php-mbstring和php7.4-gettext
#注意php7.4-gettext可能会根据php的版本不同而变化,推理php7.3-gettext、php-gettext等乱七八糟的。
root@hecs-356455:/etc/apache2# sudo apt-get install php-mbstring
root@hecs-356455:/etc/apache2# sudo apt-get install php7.4-gettext
root@hecs-356455:/etc/apache2# sudo /etc/init.d/apache2 restart
#安装phpMyAdmin
root@hecs-356455:/etc/apache2# sudo apt-get install phpmyadmin
#第一步,选择apache2,回车
#第二步,Configure database for phpmyadmin with dbconfig-common,YES,回车
#第三步,配置phpmyadmin的密码,请设置一个复杂密码,回车
#第四步,再次输入phpmyadmin的密码,回车
#安装完成
构造链接:此时phpmyadmin文件夹被安装在/usr/share/phpmyadmin下,为了能在浏览器中访问到phpmyadmin,需要在/var/www/html下做一个软连接到该文件夹:进入/var/www/html文件夹,在该目录下执行如下操作
root@hecs-356455:/# cd /usr/share/phpmyadmin/
root@hecs-356455:/usr/share/phpmyadmin# pwd
/usr/share/phpmyadmin
root@hecs-356455:/usr/share/phpmyadmin# cd /var/www/html/
root@hecs-356455:/var/www/html# pwd
/var/www/html
root@hecs-356455:/var/www/html# ls
index.html  test.php
root@hecs-356455:/var/www/html# sudo ln -s /usr/share/phpmyadmin
root@hecs-356455:/var/www/html# pwd
/var/www/html
root@hecs-356455:/var/www/html# ls
index.html  phpmyadmin  test.php
root@hecs-356455:/var/www/html#
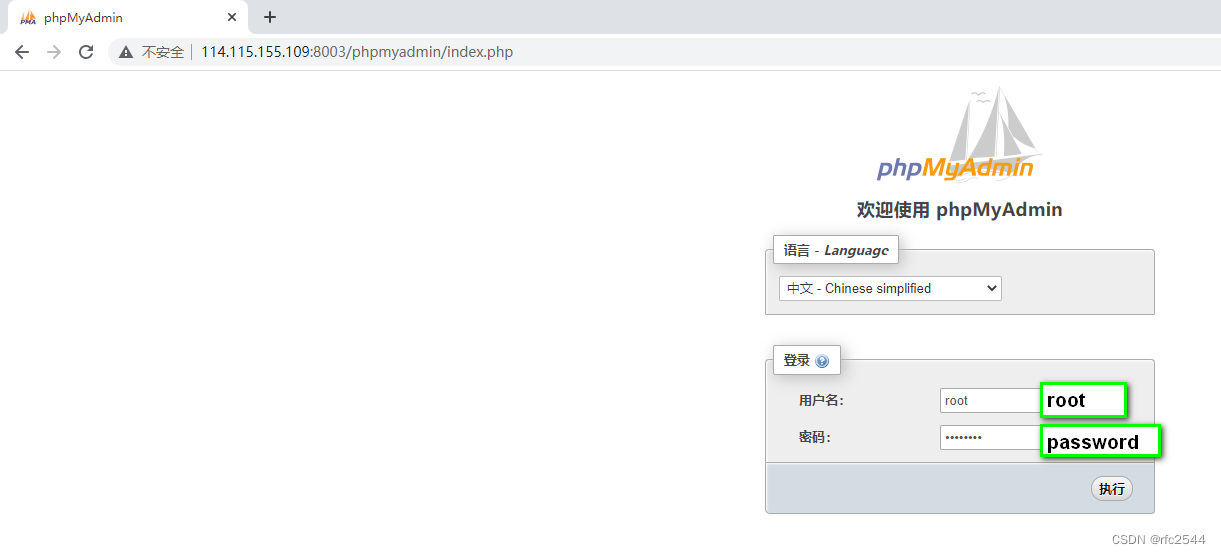
2.8 浏览器访问phpmyadmin
# http://114.115.155.109:8003/phpmyadmin/

2.9 配置mysql密码,使phpmyadmin可以登录mysql
未配置mysql密码时,采用root/password登录,提示“mysqli_real_connect(): (HY000/1698): Access denied for user 'root'@'localhost'”。

配置mysql密码,默认安装的mysql密码是空的,但是phpmyadmin不允许空密码登录。所以先配置password密码“password”。
root@hecs-356455:/#
root@hecs-356455:/# mysql -u root -p
Enter password:
Welcome to the MySQL monitor.  Commands end with ; or \g.
Your MySQL connection id is 24
Server version: 8.0.31-0ubuntu0.20.04.2 (Ubuntu)

Copyright (c) 2000, 2022, Oracle and/or its affiliates.

Oracle is a registered trademark of Oracle Corporation and/or its
affiliates. Other names may be trademarks of their respective
owners.

Type 'help;' or '\h' for help. Type '\c' to clear the current input statement.

mysql> ALTER USER 'root'@'localhost' IDENTIFIED WITH mysql_native_password BY 'password';
Query OK, 0 rows affected (0.01 sec)

mysql>
2.10 浏览器访问phpmyadmin登录mysql
用户名:root
密码:password


 3281
3281


 被折叠的 条评论
为什么被折叠?


