


1 输出原始测试报告
目前已经很过关于pytest测试报告优化的帖子,结合自己和工作经验和先知们的帖子,这里进行总结概述。原始测试用例脚本
from time import sleep
import pytest

def  test_login():
    """
    func:登录测试
    :return:
    """
    print("测试用例1")
    sleep(1)
    assert 1==1

def  test_logout():
    """
    func:登出测试
    :return:
    """
    print("测试用例2")
    assert 2==2

def  test_case03():
    """
    func:流程验证测试
    :return:
    """
    print("测试用例3")
    assert 1==3

if __name__ == '__main__':
    pytest.main(['-sv','--html=./report.html'])
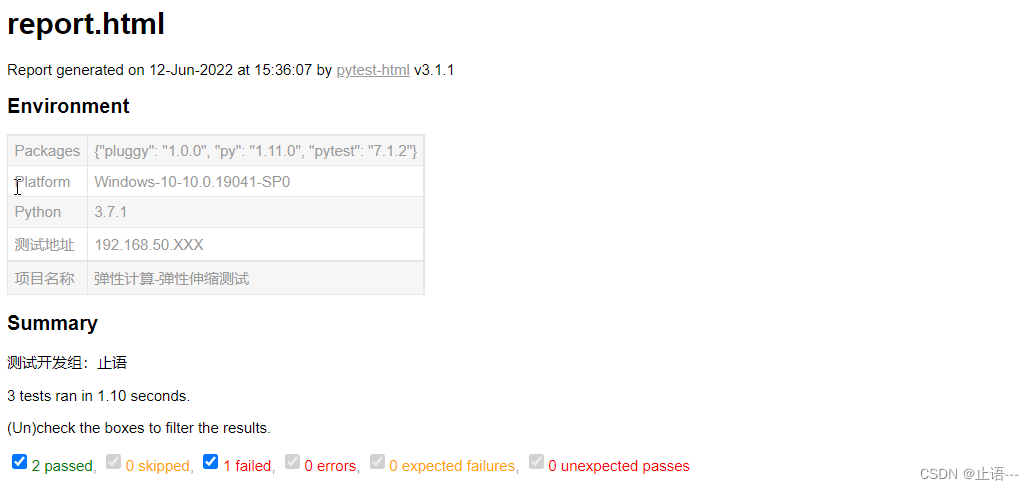
输出测试报告如下:
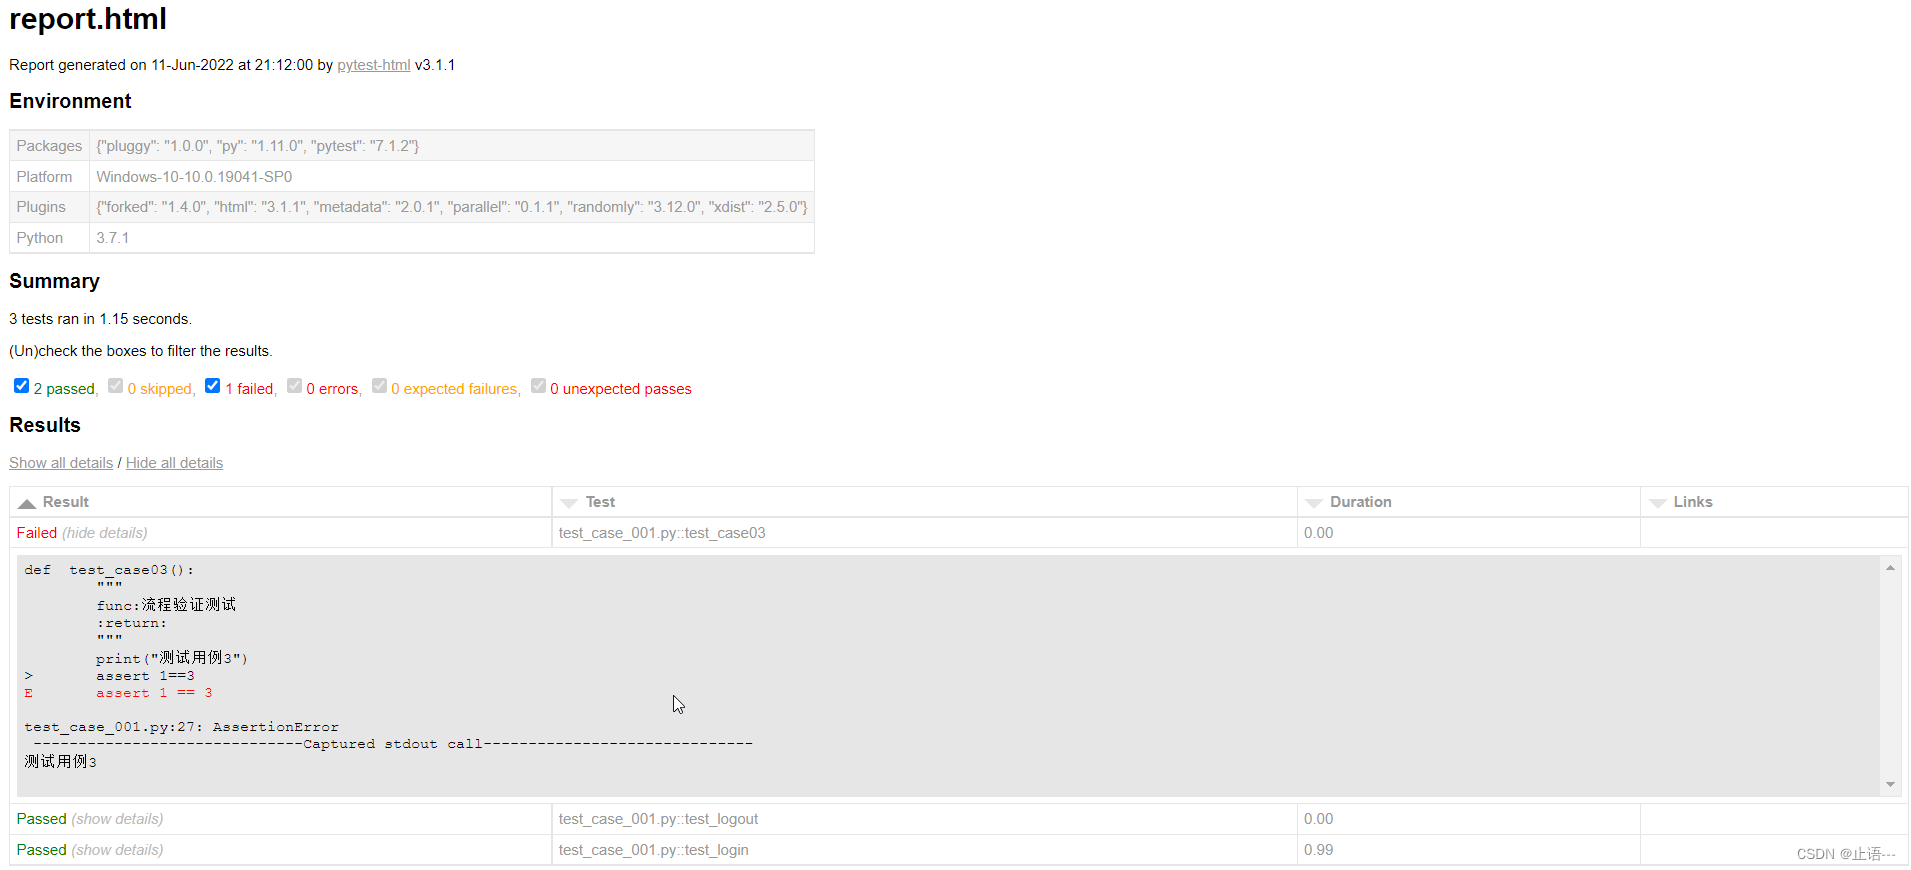
基本能展示每个测试用例,但是实际项目中发现,一个小的版本迭代可能涉及到几百上千条测试用例,而且对于不同的测试情况下,存在基本功能一致,侧重点不同的场景,只能通过使用后缀_001,_002…来区分。比如以创建云计算-弹性伸缩中的,创建伸缩组为例,较好命名习惯是见其名知其意,比如ScalingGroup_Create_Func_001,ScalingGroup_Create_Func_002.诸如此类命名,那对于测试报告中test下展示为*_001,*_002.。不方便区分改测试用例的基本功能,因此希望将函数文档,即这里测试功能描述展示出来。那如何实现,就可以使用pytest中的钩子函数hook来实现。pytest中共有6类钩子。
参考:API Reference
Hook钩子函数完整API总结
在conftest.py脚本中使用测试函数docstring添加描述(Description)列,添加可排序时间(Time)列,并删除链接(Link)列。
既然这里是修改测试报告的相关内容,定位到使用 Reporting 报告钩子 中的函数目前共有5类,参考:pytest-html
pytest_html.hooks.pytest_html_report_title(report)
设置测试报告标题
pytest_html.hooks.pytest_html_results_summary(prefix, summary, postfix)
在Summary部分,添加自定义内容
pytest_html.hooks.pytest_html_results_table_header(cells)
定制 Result 部分,表单的头部
pytest_html.hooks.pytest_html_results_table_html(report, data)
定制Result部分,每行测试Case的内容
pytest_html.hooks.pytest_html_results_table_row(report, cells)
在完成Result渲染后,详情新增写html标记语言内容
2 pytest执行过程
pytest可以通过Hook函数(pytest_runtest_makereport)获取测试用例的执行结果。为了方便区分,新建一个文件夹为pytest_run
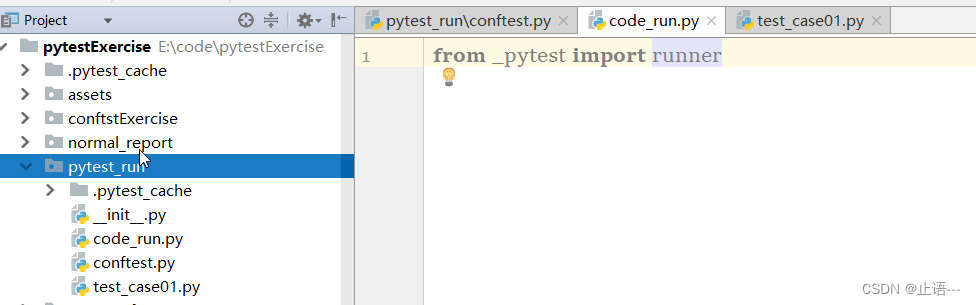
# code_run.py
from _pytest import runner
进入到runnner有一个 pytest_runtest_makereport 函数。
def pytest_runtest_makereport(item: Item, call: CallInfo[None]) -> TestReport:
    return TestReport.from_item_and_call(item, call)
解释一下,这里的item是测试用例,call是测试步骤。具体执行过程如下所示:
- 先执行when=“setup”,返回setup的执行结果
- 再执行wen=“call”,返回call的执行结果
- 最后执行when=“teardown”,返回teardown的执行结果
# pytest_casepy
import pytest

def test_case01():
    """
    用例描述:test_Case1测试流程验证
    """
    print("用例运行时》》》》》")
    print("执行test_Case01流程验证")
    print("用例运行时》》》》》")

if __name__ == '__main__':
    pytest.main(["-s","test_case01.py"])
接着我们重写一下pytest_runtest_makereport函数,在conftest.py中
# conftest.py
import pytest

@pytest.hookimpl(hookwrapper=True,tryfirst=True)
def pytest_runtest_makereport(item,call):
    print("**************************************************************")
    # 获取常规钩子函数的调用结果,返回一个result结果
    out = yield

    print("执行结果:",out)
    # 获取调用结果的测试报告,返回一个report对象,report的对象属性包括
    # when(setup,call,teardown三个值)。nodeid(测试用例的名称),outcome(用例执行结果:passed等)
    report = out.get_result()
    print("测试步骤为: %s" % report.when)
    print("用例名称nodeid: %s" % report.nodeid)
    print("用例描述: %s" % str(item.function.__doc__))
    print("运行结果: %s" % report.outcome)
    print("测试报告: %s" % report)
执行结果如下:
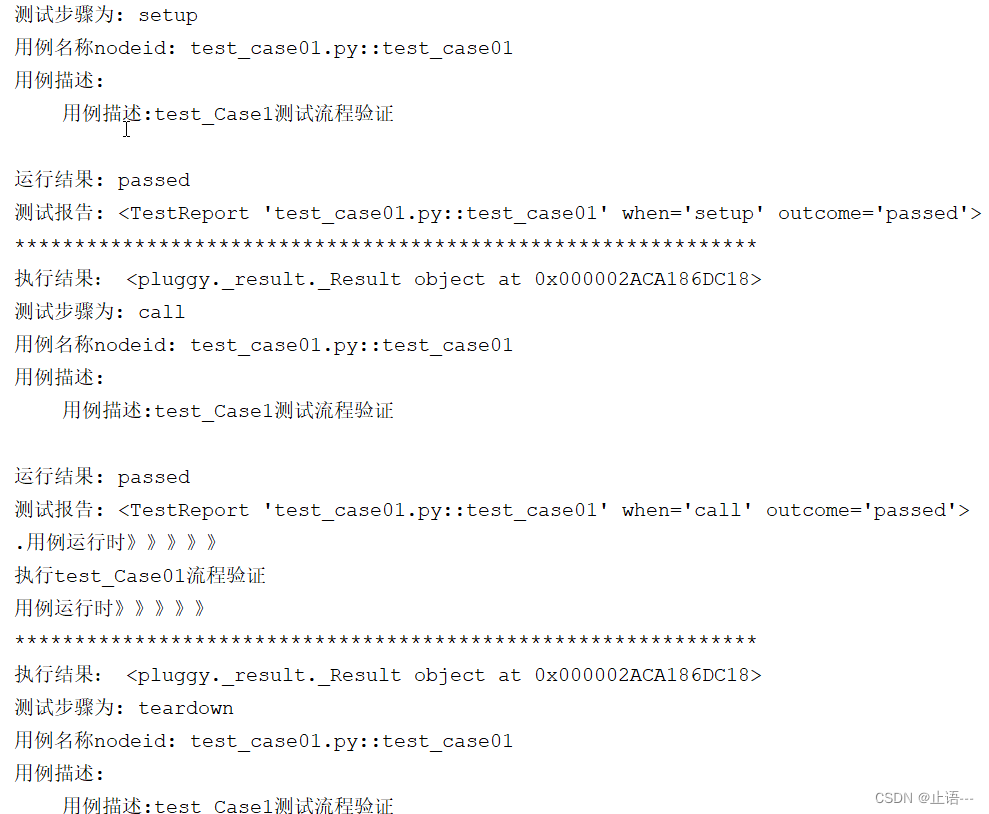
这样就清晰的展示了执行过程。用例执行的过程历经:setup-call-teardown,每个阶段都会返回result对象和TestReport对象。因此通过钩子函数pytest_runtest_makereport可以捕捉到测试用例执行过程的相关数据,这些数据也就是用来对pytest-html测试报告进行优化的或者二次开发的基础。
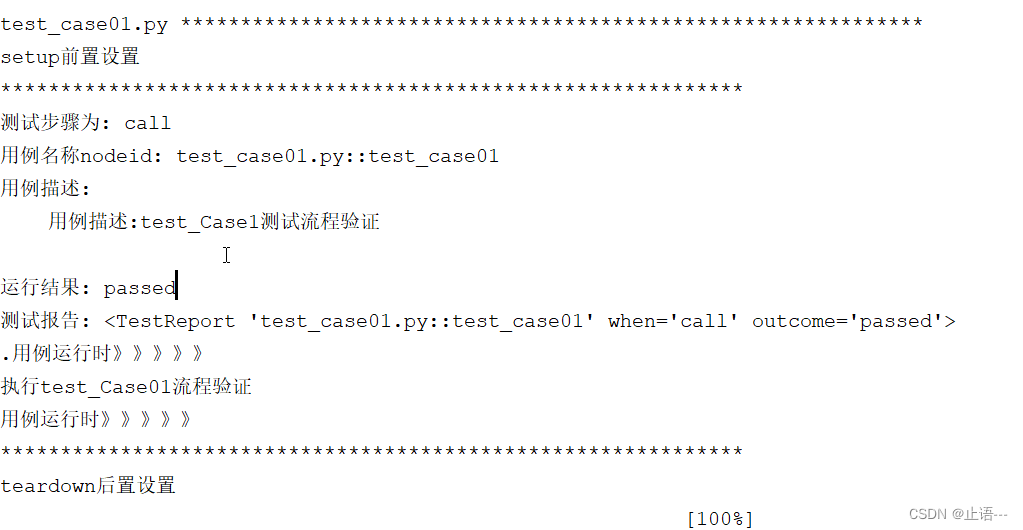
如果只关注测试用例本身的情况,那对于上午的conftest.py可以做如下改造
# conftest.py
import pytest

@pytest.hookimpl(hookwrapper=True,tryfirst=True)
def pytest_runtest_makereport(item,call):
    print("**************************************************************")
    # 获取常规钩子函数的调用结果,返回一个result结果
    out = yield

    # print("执行结果:",out)
    # 获取调用结果的测试报告,返回一个report对象,report的对象属性包括
    # when(setup,call,teardown三个值)。nodeid(测试用例的名称),outcome(用例执行结果:passed等)
    report = out.get_result()


    if report.when == "call":
        print("测试步骤为: %s" % report.when)
        print("用例名称nodeid: %s" % report.nodeid)
        print("用例描述: %s" % str(item.function.__doc__))
        print("运行结果: %s" % report.outcome)
        print("测试报告: %s" % report)

@pytest.fixture(scope="session", autouse=True)
def fix():
    print("\nsetup前置设置")
    yield
    print("\nteardown后置设置")
再次执行输出结果如下:
3 测试报告新增函数doc
接着上面的示例,在对应的目录下新增一个conftest.py文件
from datetime import datetime
from py.xml import html
import pytest

@pytest.mark.optionalhook
def pytest_html_results_table_header(cells):
    #  表头添加Description 和Time,同时删除表头的Link
    cells.insert(2, html.th('Description'))
    cells.insert(1, html.th('Time', class_='sortable time', col='time'))
    cells.pop()

@pytest.mark.optionalhook
def pytest_html_results_table_row(report, cells):
    # 插入对应的内容
    cells.insert(2, html.td(report.description))
    cells.insert(1, html.td(datetime.utcnow(), class_='col-time'))
    cells.pop()

@pytest.mark.hookwrapper
def pytest_runtest_makereport(item, call):
    # description取值为用例说明'''doc'''
    outcome = yield
    report = outcome.get_result()
    report.description = str(item.function.__doc__)
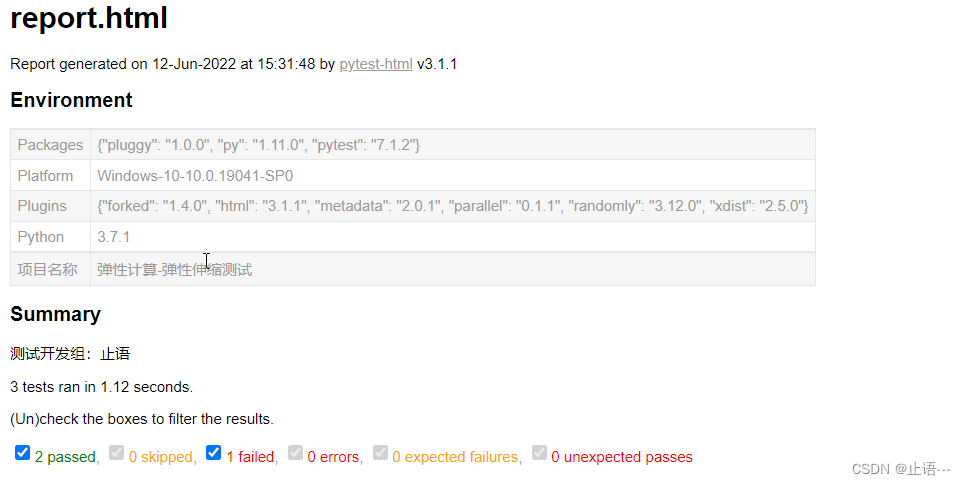
再次执行输出测试报告如下所示:

既然报告中展示了summary和环境信息,这里对该部分也进行定制下。对于summary中,接上述的conftest.py中新增函数如下:
def pytest_html_results_summary(prefix):
    '''Summary部分在此设置'''
    prefix.extend([html.p("测试开发组:止语")])
新增环境信息
def pytest_configure(config):#修改Environment展示信息
    #添加项目名称
    config._metadata["项目名称"] = "弹性计算-弹性伸缩测试"
    config._metadata['测试地址'] = '192.168.50.XXX'
    # #删除Plugins
    config._metadata.pop("Plugins")
4 hook二次开发
上面的过程其实已经实现了hook函数的二次开发。接着我们介绍一下 pytest-html中示例
4.1 创建一个自含css的测试报告
pytest --html=report.html
之前示例中执行输出测试报告如下,css和html单独存在,显得较为冗余
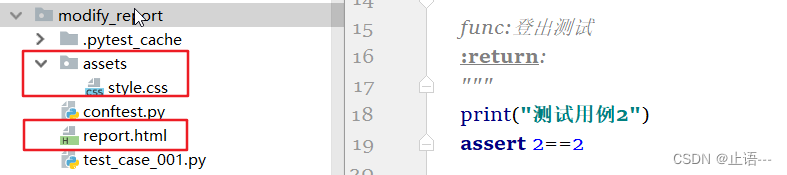
因此可以将css和html融合在一起展示
pytest --html=report.html --self-contained-html

4.2 设置测试报告标题
在conftest.py中新增设置测试报告的title
# def pytest_html_report_title(report):
#     report.title = "390版本测试报告"

4.3 设置extra content
这里引用pytest-html中的例子
import pytest
def pytest_html_report_title(report):
    report.title = "390版本测试报告"
#
@pytest.hookimpl(hookwrapper=True)
def pytest_runtest_makereport(item, call):
    pytest_html = item.config.pluginmanager.getplugin("html")
    outcome = yield
    report = outcome.get_result()
    extra = getattr(report, "extra", [])
    # 只获取用例运行时的结果
    if report.when == "call":
        # always add url to report
        extra.append(pytest_html.extras.url("https://www.baidu.com/"))
        # 用例失败
        xfail = hasattr(report, "wasxfail")
        if (report.skipped and xfail) or (report.failed and not xfail):
            # only add additional html on failure
            extra.append(pytest_html.extras.html("<div>Additional HTML</div>"))
        report.extra = extra
输出测试报告如下:
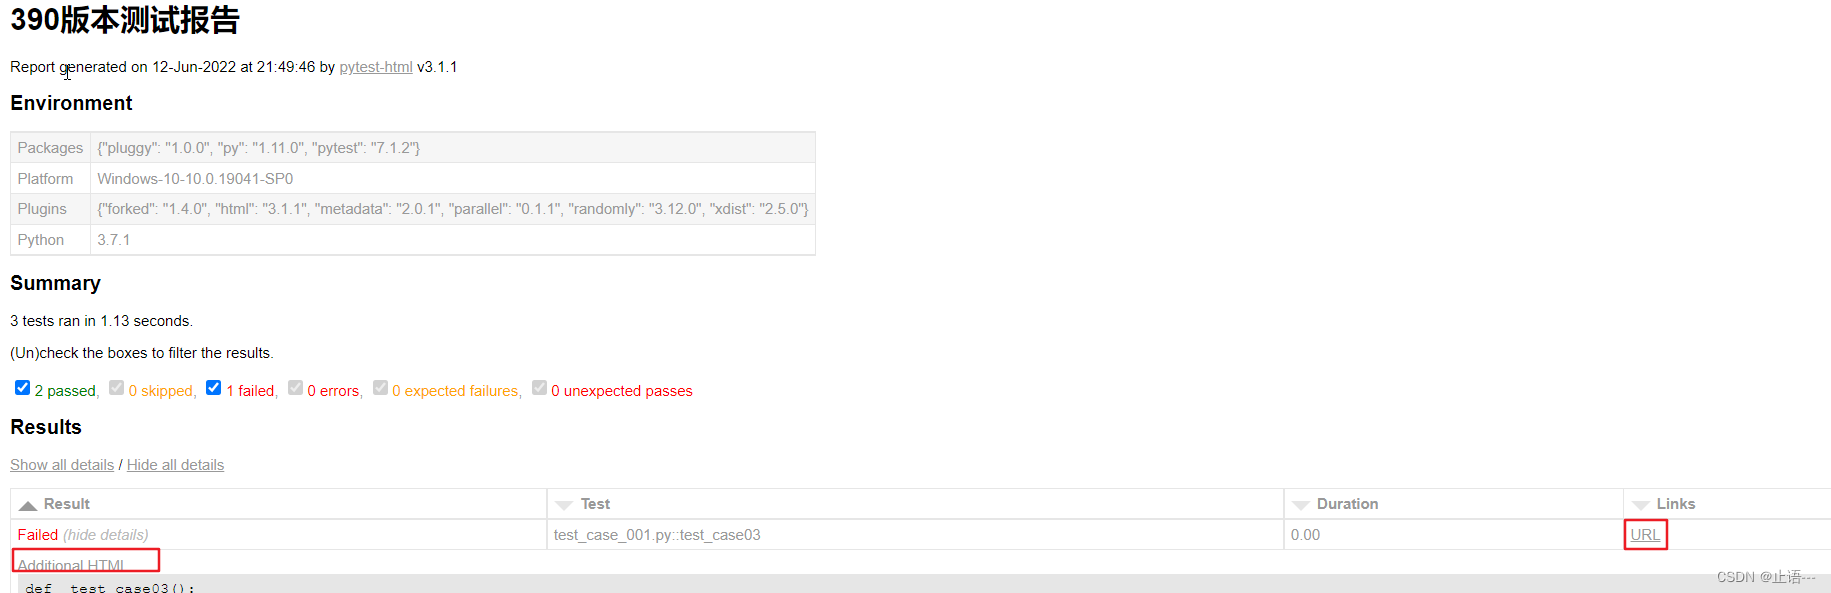
这里的url比如可以链接到测试管理平台缺陷创建的位置
有了上面的经验,这里介绍一下如何错误截图插入到测试报告中呢.还是重新 pytest_runtest_makereport函数,对应的源码如下:
pytest_runtest_makereport(item, call)[source]
Called to create a TestReport for each of the setup, call and teardown runtest phases of a test item.
See pytest_runtest_protocol for a description of the runtest protocol.

Parameters
 - call (CallInfo[None]) – The CallInfo for the phase.
 - item (Item) –

Return type:Optional[TestReport]
Stops at first non-None result, see firstresult: stop at first non-None result.
这里返回的是TestReport对象,TestReport对象中有nodeid对象。所谓的nodeid就是如下所示,可以理解为资源定位符

这里可以参考:错误截图


 5893
5893


 被折叠的 条评论
为什么被折叠?
被折叠的 条评论
为什么被折叠?
 到【灌水乐园】发言


