


因某些原因,本博客以后将在以下网址更新~
Updating...
目录
5.安装Nvidia驱动(有可能会损坏系统,如果损坏可以重装并看看网上的其他教程,除了这种安装方法还有其他安装方法,自行上网了解)
9.安装opencv-3.4.16和opencv_contrib-3.4.16(Ubuntu18.04),Ubuntu20.04请装opencv-4.2.0及其扩展模块:
17.安装darknet版yolov3及darknet-ros工作空间
18.Azure Kinect SDK-v1.4.0的安装(Ubuntu18.04)
26.安装CarlaUE4(必须是Carla的UE仓库里的carla分支才可以通过安装Carla时的编译)
27.安装Carla0.9.13(添加fisheye sensor模块)
本文所有用到的文件打包供大家下载(不含代码){
Updating}:
链接:
https://pan.baidu.com/s/1PgmWHKl8oyX_cWYx_uZJrg?pwd=zwz4
提取码:
zwz4
--来自百度网盘超级会员v4的分享
1.注意
刚进入系统一段时间,系统会通知更新到新版本系统(Ubuntu18.04),选择否,之后会询问是否更新系统组件(大概400mb),选择是。
阻止软件更新弹窗:
打开终端输入:
sudo chmod a-x /usr/bin/update-notifier将关机时间从90秒换为5秒:
打开终端输入:
sudo gedit /etc/systemd/system.conf
将:
#DefaultTimeoutStopSec=90s改为:
DefaultTimeoutStopSec=5s 保存退出,打开终端输入:
sudo systemctl daemon-reload打开终端输入:
sudo gedit ~/.bashrc# 找到以下代码段,修改如下:
if [ "$color_prompt" = yes ]; then
#PS1='${debian_chroot:+($debian_chroot)}\[\033[01;32m\]\u@\h\[\033[00m\]:\[\033[01;34m\]\w\[\033[00m\]\$ '
PS1='${debian_chroot:+($debian_chroot)}\[\033[01;32m\]\u@\h\[\033[00m\]:\[\033[01;34m\]\w$(git_branch)\[\033[00m\]\$ '
else
#PS1='${debian_chroot:+($debian_chroot)}\u@\h:\w\$ '
PS1='${debian_chroot:+($debian_chroot)}\u@\h:\W$(git_branch)\$ '
fi
# 在最后加入如下代码段:
git_branch()
{
branch=`git rev-parse --abbrev-ref HEAD 2>/dev/null`
if [ "${branch}" != "" ]
then
if [ "${branch}" = "(no branch)" ]
then
branch="(`git rev-parse --short HEAD`...)"
fi
#echo -e " \033[01;36m[$branch]\033[0m " # 天蓝色字体
#echo -e " \033[46;37m[$branch]\033[0m " # 天蓝色背景,白色字体
echo -e " \033[1;43;37m[$branch]\033[0m " # 黄色背景,白色字体
fi
}之后保存退出
source ~/.bashrc 这样就可以更清晰的显示git分支~
2.更换国内源
sudo gedit /etc/apt/sources.list 将原本的注释掉,在最下方加入:
# 中科大源(Ubuntu 18.04)
deb https://mirrors.ustc.edu.cn/ubuntu/ bionic main restricted universe multiverse
deb-src https://mirrors.ustc.edu.cn/ubuntu/ bionic main restricted universe multiverse
deb https://mirrors.ustc.edu.cn/ubuntu/ bionic-security main restricted universe multiverse
deb-src https://mirrors.ustc.edu.cn/ubuntu/ bionic-security main restricted universe multiverse
deb https://mirrors.ustc.edu.cn/ubuntu/ bionic-updates main restricted universe multiverse
deb-src https://mirrors.ustc.edu.cn/ubuntu/ bionic-updates main restricted universe multiverse
deb https://mirrors.ustc.edu.cn/ubuntu/ bionic-backports main restricted universe multiverse
deb-src https://mirrors.ustc.edu.cn/ubuntu/ bionic-backports main restricted universe multiverse
## Not recommended
# deb https://mirrors.ustc.edu.cn/ubuntu/ bionic-proposed main restricted universe multiverse
# deb-src https://mirrors.ustc.edu.cn/ubuntu/ bionic-proposed main restricted universe multiverse
# 中科大源(Ubuntu 20.04)
deb https://mirrors.ustc.edu.cn/ubuntu/ focal main restricted universe multiverse
deb-src https://mirrors.ustc.edu.cn/ubuntu/ focal main restricted universe multiverse
deb https://mirrors.ustc.edu.cn/ubuntu/ focal-security main restricted universe multiverse
deb-src https://mirrors.ustc.edu.cn/ubuntu/ focal-security main restricted universe multiverse
deb https://mirrors.ustc.edu.cn/ubuntu/ focal-updates main restricted universe multiverse
deb-src https://mirrors.ustc.edu.cn/ubuntu/ focal-updates main restricted universe multiverse
deb https://mirrors.ustc.edu.cn/ubuntu/ focal-backports main restricted universe multiverse
deb-src https://mirrors.ustc.edu.cn/ubuntu/ focal-backports main restricted universe multiverse
## Not recommended
# deb https://mirrors.ustc.edu.cn/ubuntu/ focal-proposed main restricted universe multiverse
# deb-src https://mirrors.ustc.edu.cn/ubuntu/ focal-proposed main restricted universe multiverse
或(寻找属于自己的发行版):
https://mirrors.ustc.edu.cn/repogen/![]() https://mirrors.ustc.edu.cn/repogen/
https://mirrors.ustc.edu.cn/repogen/
sudo apt-get update anaconda镜像源(~/.condarc):
channels:
- defaults
show_channel_urls: true
default_channels:
- https://mirrors.tuna.tsinghua.edu.cn/anaconda/pkgs/main
- https://mirrors.tuna.tsinghua.edu.cn/anaconda/pkgs/r
- https://mirrors.tuna.tsinghua.edu.cn/anaconda/pkgs/msys2
custom_channels:
conda-forge: https://mirrors.tuna.tsinghua.edu.cn/anaconda/cloud
msys2: https://mirrors.tuna.tsinghua.edu.cn/anaconda/cloud
bioconda: https://mirrors.tuna.tsinghua.edu.cn/anaconda/cloud
menpo: https://mirrors.tuna.tsinghua.edu.cn/anaconda/cloud
pytorch: https://mirrors.tuna.tsinghua.edu.cn/anaconda/cloud
pytorch-lts: https://mirrors.tuna.tsinghua.edu.cn/anaconda/cloud
simpleitk: https://mirrors.tuna.tsinghua.edu.cn/anaconda/cloud
deepmodeling: https://mirrors.tuna.tsinghua.edu.cn/anaconda/cloud/
nvidia: https://mirrors.cernet.edu.cn/anaconda-extra/cloud/
envs_dirs:
- /home/m0rtzz/Program_Files/anaconda3/envs
3.设置/home文件夹下为英文
export LANG=en_USxdg-user-dirs-gtk-update编辑选择右边的Update Names
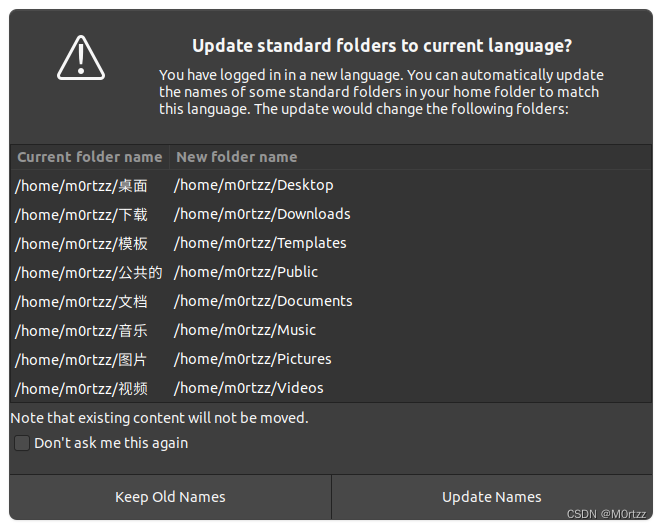
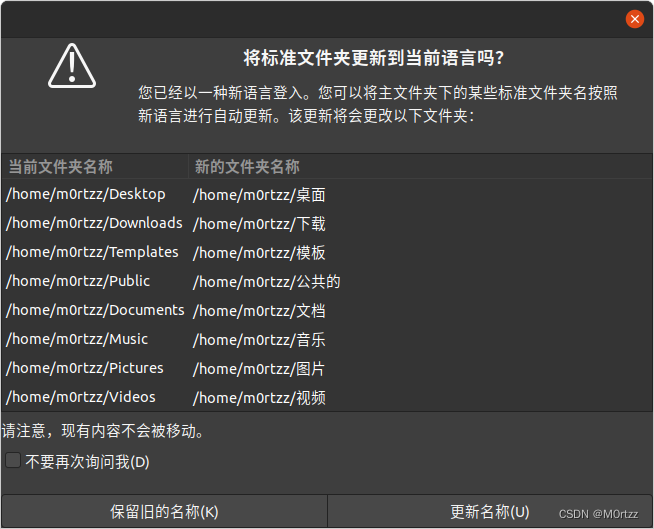
之后执行以下语句:
export LANG=zh_CNreboot勾选不要在次询问我,并选择保留旧的名称
4.禁用Nouveau驱动
sudo gedit /etc/modprobe.d/blacklist.conf输入
blacklist nouveau
options nouveau modeset=0
保存后关闭,打开终端,输入:
sudo update-initramfs -ureboot5.安装Nvidia驱动(有可能会损坏系统,如果损坏可以重装并看看网上的其他教程,除了这种安装方法还有其他安装方法,自行上网了解)
打开终端,输入:
sudo apt-get install gcc g++ makesudo ubuntu-drivers devices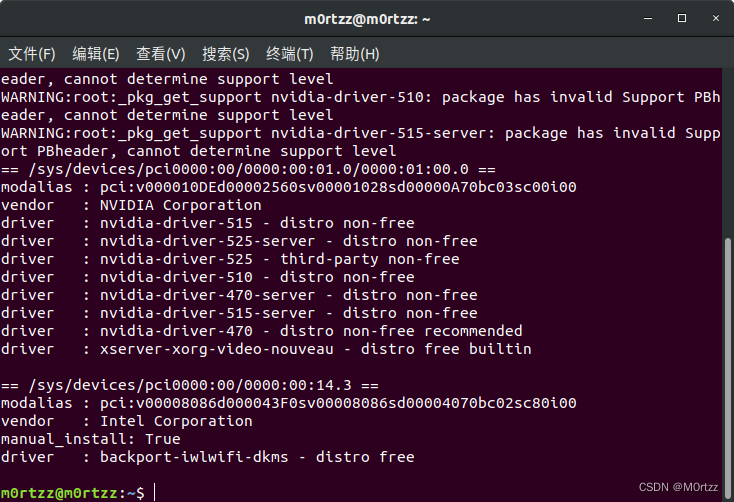
寻找带有recommended的版本,输入
sudo apt-get install nvidia-driver-* nvidia-settings nvidia-prime(*是你的版本号)
sudo apt-get updatesudo apt-get upgradereboot 验证版本
nvidia-smi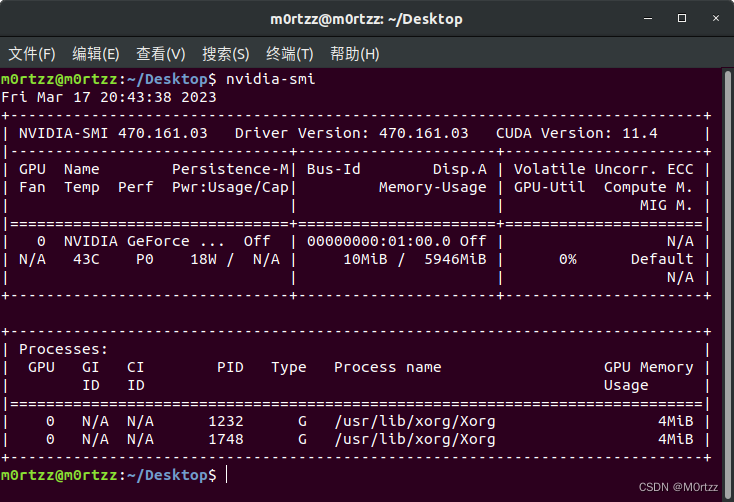
6.cuda安装:
https://developer.nvidia.com/cuda-toolkit-archive![]() https://developer.nvidia.com/cuda-toolkit-archive
https://developer.nvidia.com/cuda-toolkit-archive
选择和上一步nvidia-smi显示的cuda版本对应的进行安装,官方有教程
安装好之后打开终端输入
sudo gedit ~/.bashrc 在最后输入
#cuda
export LD_LIBRARY_PATH=$LD_LIBRARY_PATH:/usr/local/cuda/lib64
export PATH=$PATH:/usr/local/cuda/bin
export CUDA_HOME=/usr/local/cuda  #cuda的软连接库,可以设置多版本共存指向
保存后关闭,打开终端,输入:
source ~/.bashrcsudo gedit /etc/profile 在最后加入
#cuda
export PATH=/usr/local/cuda/bin:$PATH
export PATH=/usr/local/cuda/bin:$PATH
保存后关闭,打开终端,输入:
source /etc/profile 验证cuda版本
nvcc -V 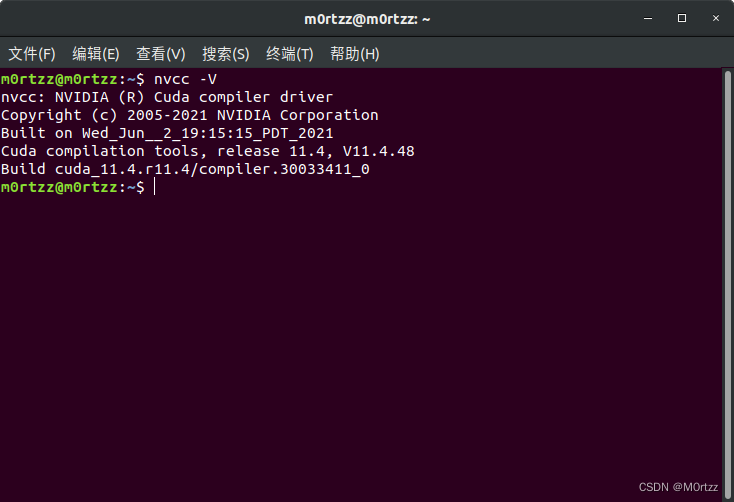
安装成功!
7.cudnn安装:
同样需要选择与刚才安装cuda对应的版本下载,下载好后进入文件所在目录打开终端
tar -xvf cudnn-*-linux-x64-*.tgz 打开终端:
sudo cp -r cuda/include/* /usr/local/cuda/include/
sudo cp cuda/lib64/libcudnn* /usr/local/cuda/lib64/
sudo chmod a+r /usr/local/cuda/include/cudnn.h
sudo chmod a+r /usr/local/cuda/lib64/libcudnn*
sudo ln -sf /usr/local/cuda-11.4/targets/x86_64-linux/lib/libcudnn_adv_train.so.8.0.1 /usr/local/cuda-11.4/targets/x86_64-linux/lib/libcudnn_adv_train.so.8
sudo ln -sf /usr/local/cuda-11.4/targets/x86_64-linux/lib/libcudnn_ops_infer.so.8.0.1 /usr/local/cuda-11.4/targets/x86_64-linux/lib/libcudnn_ops_infer.so.8
sudo ln -sf /usr/local/cuda-11.4/targets/x86_64-linux/lib/libcudnn_cnn_train.so.8.0.1 /usr/local/cuda-11.4/targets/x86_64-linux/lib/libcudnn_cnn_train.so.8
sudo ln -sf /usr/local/cuda-11.4/targets/x86_64-linux/lib/libcudnn_adv_infer.so.8.0.1 /usr/local/cuda-11.4/targets/x86_64-linux/lib/libcudnn_adv_infer.so.8
sudo ln -sf /usr/local/cuda-11.4/targets/x86_64-linux/lib/libcudnn_ops_train.so.8.0.1 /usr/local/cuda-11.4/targets/x86_64-linux/lib/libcudnn_ops_train.so.8
sudo ln -sf /usr/local/cuda-11.4/targets/x86_64-linux/lib/libcudnn_cnn_infer.so.8.0.1 /usr/local/cuda-11.4/targets/x86_64-linux/lib/libcudnn_cnn_infer.so.8
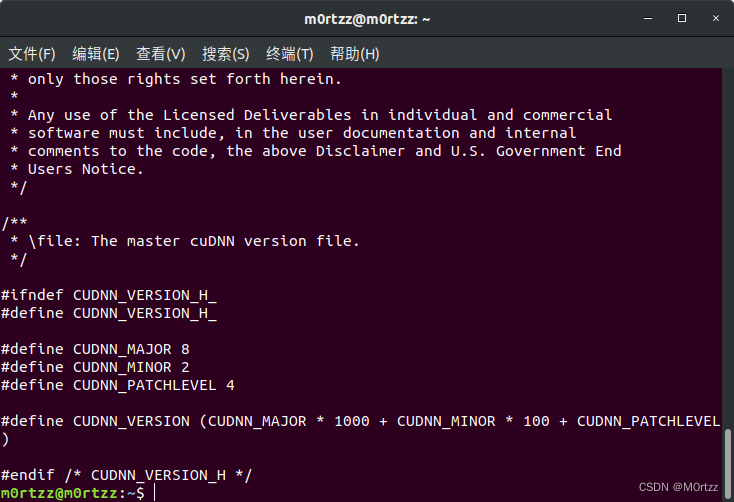
sudo ln -sf /usr/local/cuda-11.4/lib64/libcudnn.so.8 /usr/local/cuda-11.4/lib64/libcudnn.so.8.2.2 验证是否安装成功
cat /usr/local/cuda/include/cudnn_version.h
8.安装ROS(有些图忘记截了)
设置中科大源
sudo sh -c '. /etc/lsb-release && echo "deb http://mirrors.ustc.edu.cn/ros/ubuntu/ `lsb_release -cs` main" > /etc/apt/sources.list.d/ros-latest.list'
设置公钥
sudo apt-key adv --keyserver 'hkp://keyserver.ubuntu.com:80' --recv-key C1CF6E31E6BADE8868B172B4F42ED6FBAB17C654
sudo apt update
sudo apt install ros-melodic-desktop-full
echo "source /opt/ros/melodic/setup.bash" >> ~/.bashrc
source ~/.bashrc
sudo apt install python-rosdep python-rosinstall python-rosinstall-generator python-wstool build-essential
sudo apt-get install python3-pip
使用阿里镜像源加速pip下载:
sudo pip3 install rosdepc -i https://mirrors.aliyun.com/pypi/simple/sudo rosdepc init
rosdepc updatesudo chmod 777 -R ~/.ros/ roscore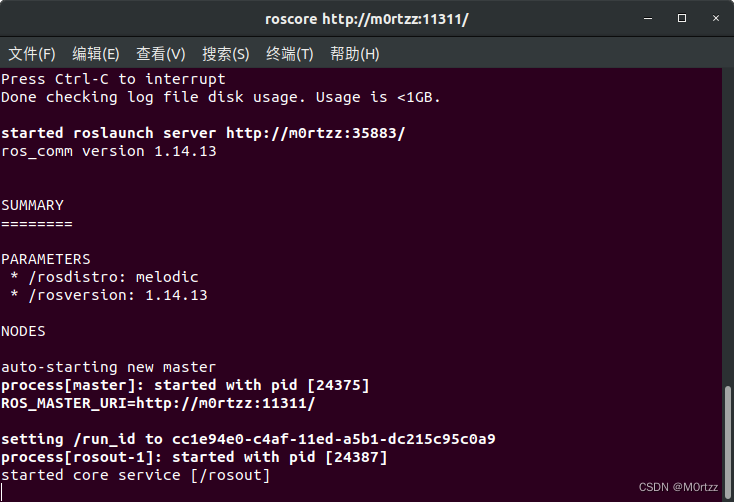
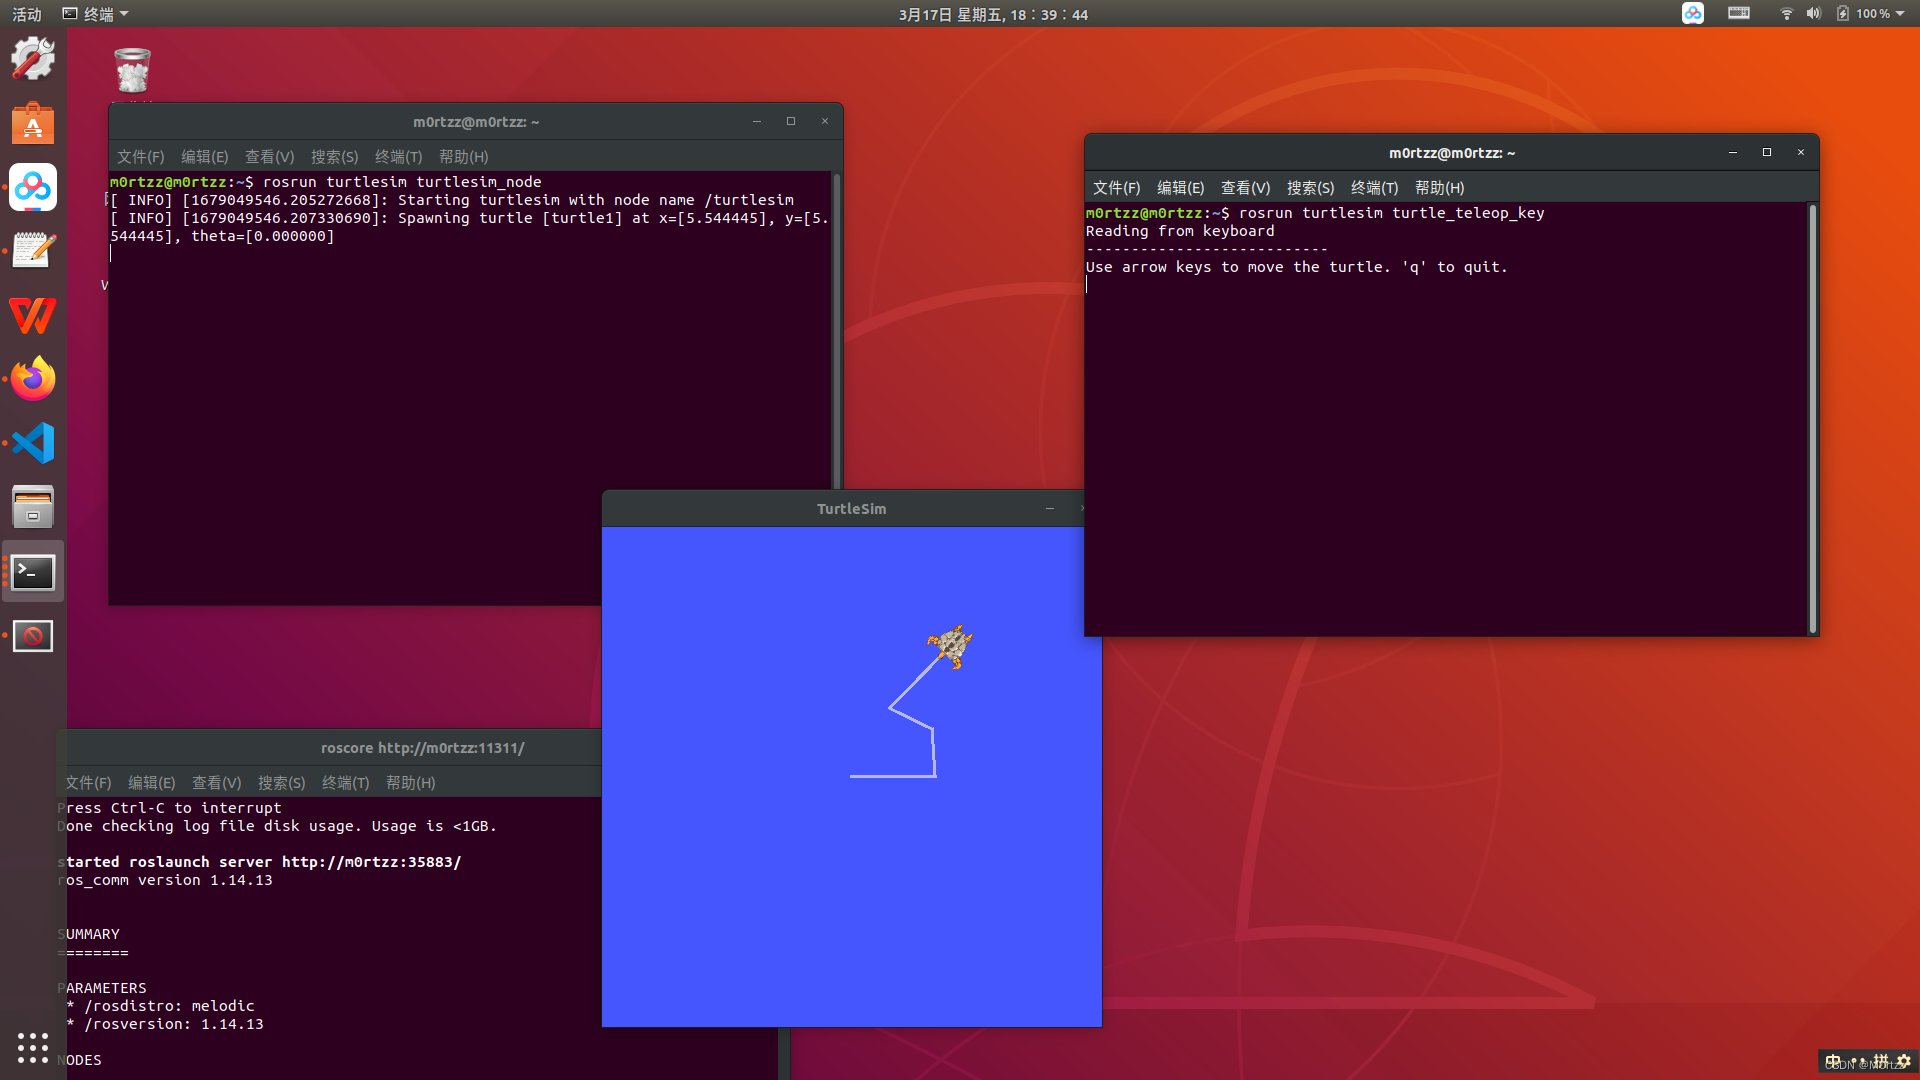
再新建两个终端,分别输入
rosrun turtlesim turtlesim_noderosrun turtlesim turtle_teleop_key 在rosrun turtlesim turtle_teleop_key所在终端点击一下任意位置,然后使用↕↔小键盘控制,看小海龟会不会动,如果会动则安装成功
9.安装opencv-3.4.16和opencv_contrib-3.4.16(Ubuntu18.04),Ubuntu20.04请装opencv-4.2.0及其扩展模块:
虽然使用cv_bridge时某些shared object有可能和ROS自带的opencv-3.2.0版本冲突,但实测安装3.2.0对cuda的兼容性太差导致无法使用深度相机,所以安装官网最近更新过的OpenCV3.4.16
经尝试多版本Ubuntu和OpenCV,装Ubuntu20.04,ROS noetic和OpenCV4.2.0及其扩展模块才能解决将彩色图像转换为网络所需的输入Blob后前馈时抛出的(raised OpenCV exception,error: (-215:Assertion failed)等等)。
git clone -b 3.4.16 https://gitee.com/KylenWrt/opencv.git opencv-3.4.16
cd opencv-3.4.16git clone -b 3.4.16 https://gitee.com/zsy26226/opencv_contrib.git opencv_contrib-3.4.16 安装所需依赖库,打开终端,输入:
sudo add-apt-repository "deb http://security.ubuntu.com/ubuntu xenial-security main"
sudo apt update
sudo apt install libjasper1 libjasper-dev
sudo apt-get install build-essential cmake git libgtk2.0-dev pkg-config libavcodec-dev libavformat-dev libswscale-dev python-dev python-numpy libtbb2 libtbb-dev libjpeg-dev libpng-dev libtiff-dev libdc1394-22-dev liblapacke-dev checkinstallsudo apt-get install liblapacke-dev checkinstall进入opencv-3.4.16文件夹,打开终端,输入:
mkdir buildcd build 接下来编译安装,注意此命令的OPENCV_EXTRA_MODULES_PATH=后边的路径是你电脑下的绝对路径,请自行修改
cmake -D CMAKE_BUILD_TYPE=RELEASE -D WITH_GTK_2_X=ON -D OPENCV_ENABLE_NONFREE=ON -D OPENCV_GENERATE_PKGCONFIG=YES -D OPENCV_EXTRA_MODULES_PATH=/home/m0rtzz/Program_Files/opencv-3.4.16/opencv_contrib-3.4.16/modules -D WITH_CUDA=ON -D WITH_CUDNN=ON -D WITH_FFMPEG=ON -D WITH_OPENGL=ON -D WITH_NVCUVID=ON -D -DENABLE_PRECOMPILED_HEADERS=OFF -D CMAKE_EXE_LINKER_FLAGS=-lcblas -DWITH_LAPACK=OFF -j16 ..过程中会出现IPPICV: Download: ippicv_2020_lnx_intel64_20191018_general.tgz
解决方法:
cd ../ && mkdir downloads cd downloads && pwd
复制绝对路径后:
打开这个ippicv.cmake
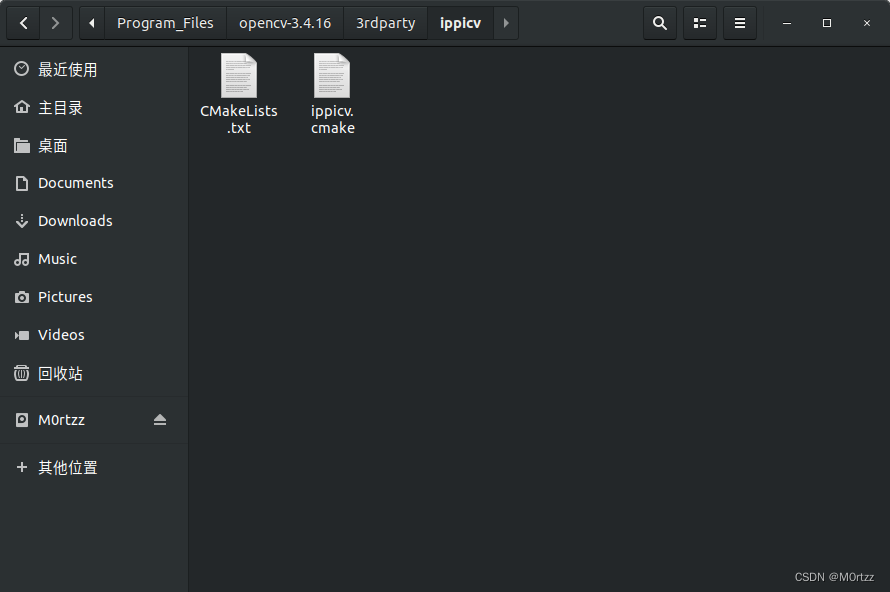
把绝对路径复制进去: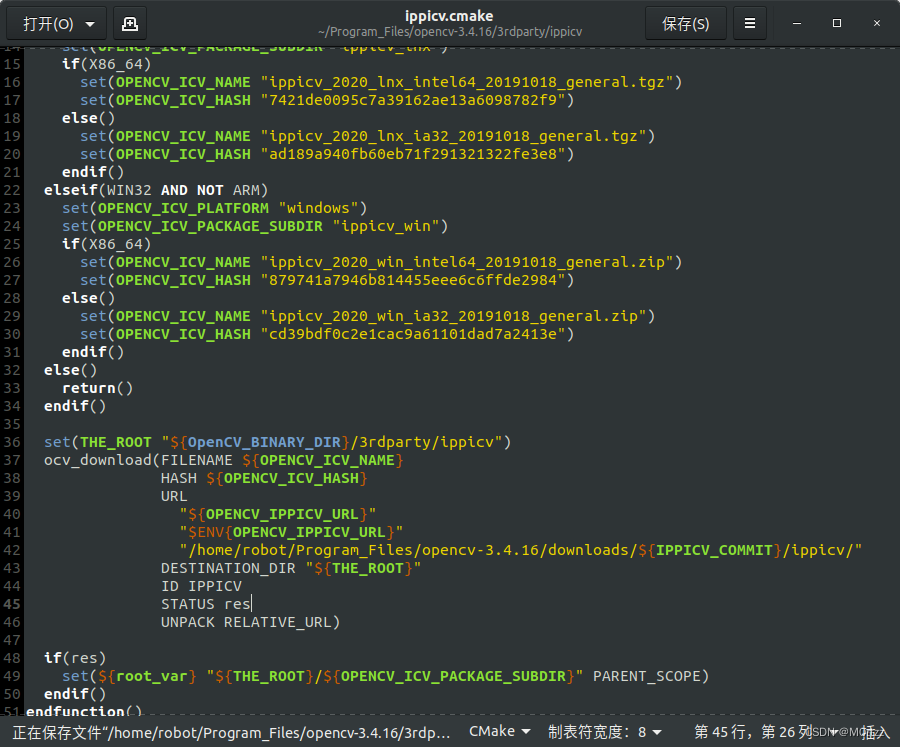
然后把下面网址下载的文件cp进去就行了(或者开头百度云分享链接中自取~)
cmake -D CMAKE_BUILD_TYPE=RELEASE -D WITH_GTK_2_X=ON -D OPENCV_ENABLE_NONFREE=ON -D OPENCV_GENERATE_PKGCONFIG=YES -D OPENCV_EXTRA_MODULES_PATH=/home/m0rtzz/Program_Files/opencv-3.4.16/opencv_contrib-3.4.16/modules -D WITH_CUDA=ON -D WITH_CUDNN=ON -D WITH_FFMPEG=ON -D WITH_OPENGL=ON -D WITH_NVCUVID=ON -D -DENABLE_PRECOMPILED_HEADERS=OFF -D CMAKE_EXE_LINKER_FLAGS=-lcblas -DWITH_LAPACK=OFF -j16 ..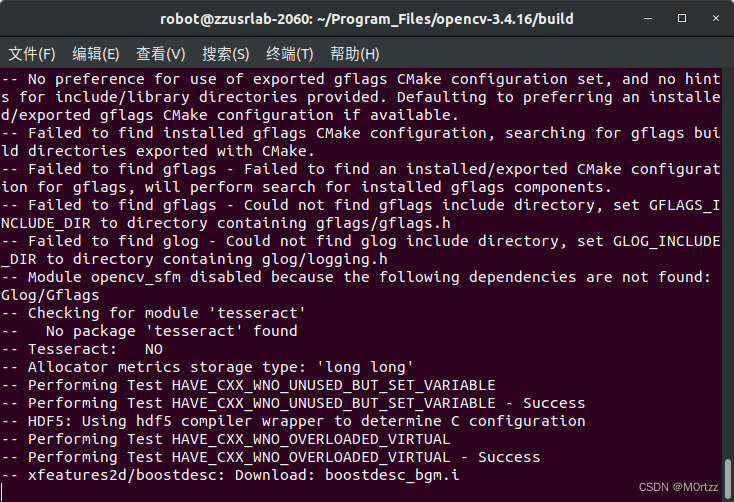 这些.i文件需要在国外下载,网上说下载好文件直接把他们放进相对应的目录下就行,实测不行(建议科学的上网,想试试网上说法的:
cmake -D CMAKE_BUILD_TYPE=RELEASE -D WITH_GTK_2_X=ON -D OPENCV_ENABLE_NONFREE=ON -D OPENCV_GENERATE_PKGCONFIG=YES -D OPENCV_EXTRA_MODULES_PATH=/home/m0rtzz/Program_Files/opencv-3.4.16/opencv_contrib-3.4.16/modules -D WITH_CUDA=ON -D WITH_CUDNN=ON -D WITH_FFMPEG=ON -D WITH_OPENGL=ON -D WITH_NVCUVID=ON -D -DENABLE_PRECOMPILED_HEADERS=OFF -D CMAKE_EXE_LINKER_FLAGS=-lcblas -DWITH_LAPACK=OFF -j16 ..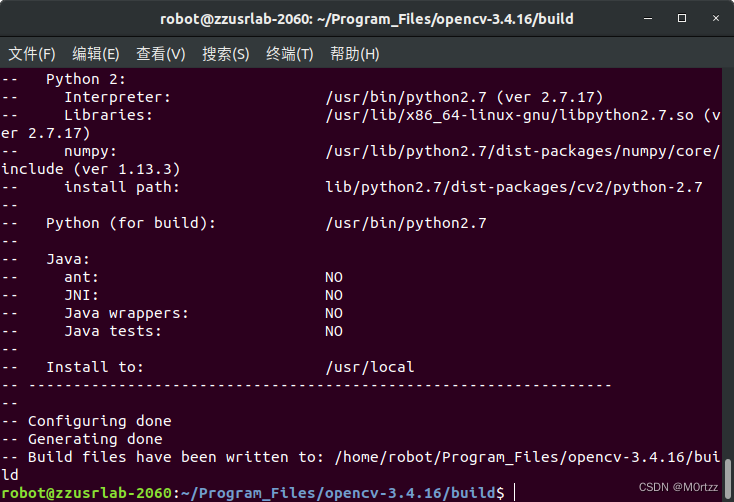
sudo make -j16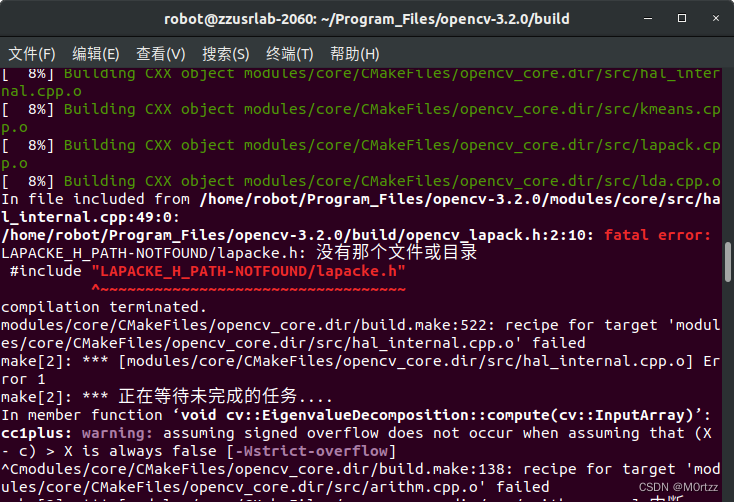 打开那个头文件,把报错所在行改为:
#include "lapacke.h"sudo make -j16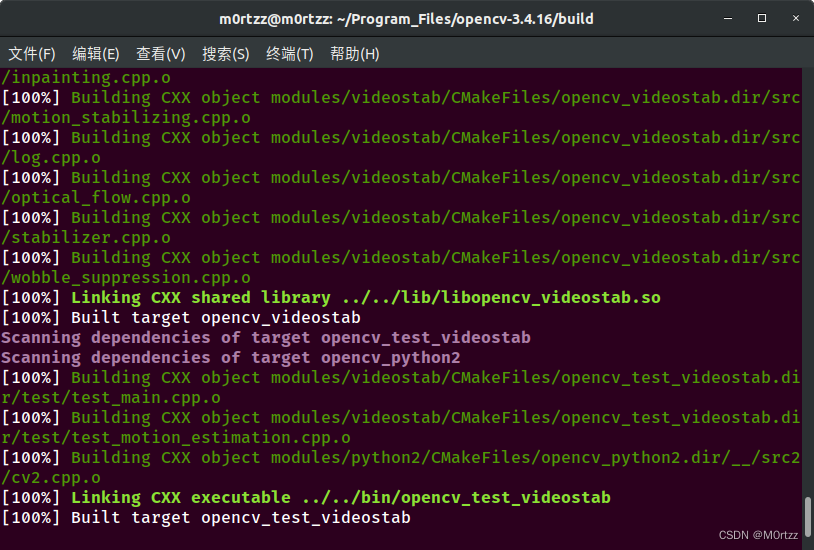
sudo make install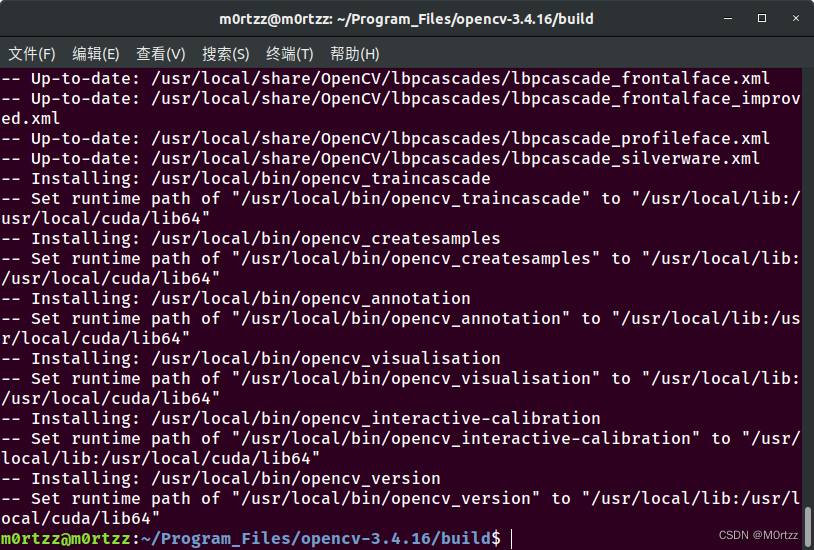
sudo gedit /etc/ld.so.conf.d/opencv.conf
加入
/usr/local/lib
保存后关闭,打开终端,输入:
sudo ldconfig
sudo gedit /etc/bash.bashrc
加入
PKG_CONFIG_PATH=$PKG_CONFIG_PATH:/usr/local/lib/pkgconfig
export PKG_CONFIG_PATH
保存后关闭,打开终端,输入:
source /etc/bash.bashrc
测试
cd ../samples/cpp/example_cmake
cmake -j8 .
sudo make -j8
./opencv_example
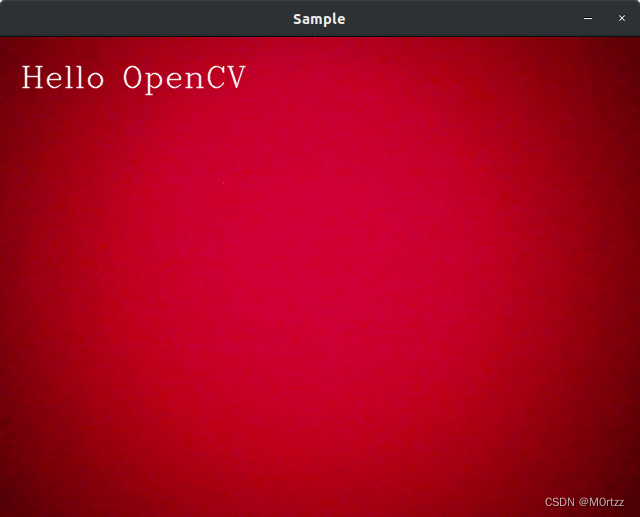
安装成功!
设置cv_bridge的版本:
sudo gedit /opt/ros/melodic/share/cv_bridge/cmake/cv_bridgeConfig.cmake# generated from catkin/cmake/template/pkgConfig.cmake.in
# append elements to a list and remove existing duplicates from the list
# copied from catkin/cmake/list_append_deduplicate.cmake to keep pkgConfig
# self contained
macro(_list_append_deduplicate listname)
if(NOT "${ARGN}" STREQUAL "")
if(${listname})
list(REMOVE_ITEM ${listname} ${ARGN})
endif()
list(APPEND ${listname} ${ARGN})
endif()
endmacro()
# append elements to a list if they are not already in the list
# copied from catkin/cmake/list_append_unique.cmake to keep pkgConfig
# self contained
macro(_list_append_unique listname)
foreach(_item ${ARGN})
list(FIND ${listname} ${_item} _index)
if(_index EQUAL -1)
list(APPEND ${listname} ${_item})
endif()
endforeach()
endmacro()
# pack a list of libraries with optional build configuration keywords
# copied from catkin/cmake/catkin_libraries.cmake to keep pkgConfig
# self contained
macro(_pack_libraries_with_build_configuration VAR)
set(${VAR} "")
set(_argn ${ARGN})
list(LENGTH _argn _count)
set(_index 0)
while(${_index} LESS ${_count})
list(GET _argn ${_index} lib)
if("${lib}" MATCHES "^(debug|optimized|general)$")
math(EXPR _index "${_index} + 1")
if(${_index} EQUAL ${_count})
message(FATAL_ERROR "_pack_libraries_with_build_configuration() the list of libraries '${ARGN}' ends with '${lib}' which is a build configuration keyword and must be followed by a library")
endif()
list(GET _argn ${_index} library)
list(APPEND ${VAR} "${lib}${CATKIN_BUILD_CONFIGURATION_KEYWORD_SEPARATOR}${library}")
else()
list(APPEND ${VAR} "${lib}")
endif()
math(EXPR _index "${_index} + 1")
endwhile()
endmacro()
# unpack a list of libraries with optional build configuration keyword prefixes
# copied from catkin/cmake/catkin_libraries.cmake to keep pkgConfig
# self contained
macro(_unpack_libraries_with_build_configuration VAR)
set(${VAR} "")
foreach(lib ${ARGN})
string(REGEX REPLACE "^(debug|optimized|general)${CATKIN_BUILD_CONFIGURATION_KEYWORD_SEPARATOR}(.+)$" "\\1;\\2" lib "${lib}")
list(APPEND ${VAR} "${lib}")
endforeach()
endmacro()
if(cv_bridge_CONFIG_INCLUDED)
return()
endif()
set(cv_bridge_CONFIG_INCLUDED TRUE)
# set variables for source/devel/install prefixes
if("FALSE" STREQUAL "TRUE")
set(cv_bridge_SOURCE_PREFIX /tmp/binarydeb/ros-melodic-cv-bridge-1.13.1)
set(cv_bridge_DEVEL_PREFIX /tmp/binarydeb/ros-melodic-cv-bridge-1.13.1/.obj-x86_64-linux-gnu/devel)
set(cv_bridge_INSTALL_PREFIX "")
set(cv_bridge_PREFIX ${cv_bridge_DEVEL_PREFIX})
else()
set(cv_bridge_SOURCE_PREFIX "")
set(cv_bridge_DEVEL_PREFIX "")
set(cv_bridge_INSTALL_PREFIX /opt/ros/melodic)
set(cv_bridge_PREFIX ${cv_bridge_INSTALL_PREFIX})
endif()
# warn when using a deprecated package
if(NOT "" STREQUAL "")
set(_msg "WARNING: package 'cv_bridge' is deprecated")
# append custom deprecation text if available
if(NOT "" STREQUAL "TRUE")
set(_msg "${_msg} ()")
endif()
message("${_msg}")
endif()
# flag project as catkin-based to distinguish if a find_package()-ed project is a catkin project
set(cv_bridge_FOUND_CATKIN_PROJECT TRUE)
# if(NOT "include;/usr/include;/usr/include/opencv " STREQUAL " ")
# set(cv_bridge_INCLUDE_DIRS "")
# set(_include_dirs "include;/usr/include;/usr/include/opencv")
if(NOT "include;/usr/local/include/opencv;/usr/local/include/opencv2 " STREQUAL " ")
set(cv_bridge_INCLUDE_DIRS "")
set(_include_dirs "include;/usr/local/include/opencv;/usr/local/include/opencv;/usr/local/include/;/usr/include")
if(NOT "https://github.com/ros-perception/vision_opencv/issues " STREQUAL " ")
set(_report "Check the issue tracker 'https://github.com/ros-perception/vision_opencv/issues' and consider creating a ticket if the problem has not been reported yet.")
elseif(NOT "http://www.ros.org/wiki/cv_bridge " STREQUAL " ")
set(_report "Check the website 'http://www.ros.org/wiki/cv_bridge' for information and consider reporting the problem.")
else()
set(_report "Report the problem to the maintainer 'Vincent Rabaud <vincent.rabaud@gmail.com>' and request to fix the problem.")
endif()
foreach(idir ${_include_dirs})
if(IS_ABSOLUTE ${idir} AND IS_DIRECTORY ${idir})
set(include ${idir})
elseif("${idir} " STREQUAL "include ")
get_filename_component(include "${cv_bridge_DIR}/../../../include" ABSOLUTE)
if(NOT IS_DIRECTORY ${include})
message(FATAL_ERROR "Project 'cv_bridge' specifies '${idir}' as an include dir, which is not found. It does not exist in '${include}'. ${_report}")
endif()
else()
message(FATAL_ERROR "Project 'cv_bridge' specifies '${idir}' as an include dir, which is not found. It does neither exist as an absolute directory nor in '\${prefix}/${idir}'. ${_report}")
endif()
_list_append_unique(cv_bridge_INCLUDE_DIRS ${include})
endforeach()
endif()
# set(libraries "cv_bridge;/usr/lib/x86_64-linux-gnu/libopencv_core.so.3.2.0;/usr/lib/x86_64-linux-gnu/libopencv_imgproc.so.3.2.0;/usr/lib/x86_64-linux-gnu/libopencv_imgcodecs.so.3.2.0")
set(libraries "cv_bridge;/usr/local/lib/libopencv_core.so.3.4.16;/usr/local/lib/libopencv_imgproc.so.3.4.16;/usr/local/lib/libopencv_imgcodecs.so.3.4.16")
foreach(library ${libraries})
# keep build configuration keywords, target names and absolute libraries as-is
if("${library}" MATCHES "^(debug|optimized|general)$")
list(APPEND cv_bridge_LIBRARIES ${library})
elseif(${library} MATCHES "^-l")
list(APPEND cv_bridge_LIBRARIES ${library})
elseif(${library} MATCHES "^-")
# This is a linker flag/option (like -pthread)
# There's no standard variable for these, so create an interface library to hold it
if(NOT cv_bridge_NUM_DUMMY_TARGETS)
set(cv_bridge_NUM_DUMMY_TARGETS 0)
endif()
# Make sure the target name is unique
set(interface_target_name "catkin::cv_bridge::wrapped-linker-option${cv_bridge_NUM_DUMMY_TARGETS}")
while(TARGET "${interface_target_name}")
math(EXPR cv_bridge_NUM_DUMMY_TARGETS "${cv_bridge_NUM_DUMMY_TARGETS}+1")
set(interface_target_name "catkin::cv_bridge::wrapped-linker-option${cv_bridge_NUM_DUMMY_TARGETS}")
endwhile()
add_library("${interface_target_name}" INTERFACE IMPORTED)
if("${CMAKE_VERSION}" VERSION_LESS "3.13.0")
set_property(
TARGET
"${interface_target_name}"
APPEND PROPERTY
INTERFACE_LINK_LIBRARIES "${library}")
else()
target_link_options("${interface_target_name}" INTERFACE "${library}")
endif()
list(APPEND cv_bridge_LIBRARIES "${interface_target_name}")
elseif(TARGET ${library})
list(APPEND cv_bridge_LIBRARIES ${library})
elseif(IS_ABSOLUTE ${library})
list(APPEND cv_bridge_LIBRARIES ${library})
else()
set(lib_path "")
set(lib "${library}-NOTFOUND")
# since the path where the library is found is returned we have to iterate over the paths manually
foreach(path /opt/ros/melodic/lib;/opt/ros/melodic/lib)
find_library(lib ${library}
PATHS ${path}
NO_DEFAULT_PATH NO_CMAKE_FIND_ROOT_PATH)
if(lib)
set(lib_path ${path})
break()
endif()
endforeach()
if(lib)
_list_append_unique(cv_bridge_LIBRARY_DIRS ${lib_path})
list(APPEND cv_bridge_LIBRARIES ${lib})
else()
# as a fall back for non-catkin libraries try to search globally
find_library(lib ${library})
if(NOT lib)
message(FATAL_ERROR "Project '${PROJECT_NAME}' tried to find library '${library}'. The library is neither a target nor built/installed properly. Did you compile project 'cv_bridge'? Did you find_package() it before the subdirectory containing its code is included?")
endif()
list(APPEND cv_bridge_LIBRARIES ${lib})
endif()
endif()
endforeach()
set(cv_bridge_EXPORTED_TARGETS "")
# create dummy targets for exported code generation targets to make life of users easier
foreach(t ${cv_bridge_EXPORTED_TARGETS})
if(NOT TARGET ${t})
add_custom_target(${t})
endif()
endforeach()
set(depends "rosconsole;sensor_msgs")
foreach(depend ${depends})
string(REPLACE " " ";" depend_list ${depend})
# the package name of the dependency must be kept in a unique variable so that it is not overwritten in recursive calls
list(GET depend_list 0 cv_bridge_dep)
list(LENGTH depend_list count)
if(${count} EQUAL 1)
# simple dependencies must only be find_package()-ed once
if(NOT ${cv_bridge_dep}_FOUND)
find_package(${cv_bridge_dep} REQUIRED NO_MODULE)
endif()
else()
# dependencies with components must be find_package()-ed again
list(REMOVE_AT depend_list 0)
find_package(${cv_bridge_dep} REQUIRED NO_MODULE ${depend_list})
endif()
_list_append_unique(cv_bridge_INCLUDE_DIRS ${${cv_bridge_dep}_INCLUDE_DIRS})
# merge build configuration keywords with library names to correctly deduplicate
_pack_libraries_with_build_configuration(cv_bridge_LIBRARIES ${cv_bridge_LIBRARIES})
_pack_libraries_with_build_configuration(_libraries ${${cv_bridge_dep}_LIBRARIES})
_list_append_deduplicate(cv_bridge_LIBRARIES ${_libraries})
# undo build configuration keyword merging after deduplication
_unpack_libraries_with_build_configuration(cv_bridge_LIBRARIES ${cv_bridge_LIBRARIES})
_list_append_unique(cv_bridge_LIBRARY_DIRS ${${cv_bridge_dep}_LIBRARY_DIRS})
list(APPEND cv_bridge_EXPORTED_TARGETS ${${cv_bridge_dep}_EXPORTED_TARGETS})
endforeach()
set(pkg_cfg_extras "cv_bridge-extras.cmake")
foreach(extra ${pkg_cfg_extras})
if(NOT IS_ABSOLUTE ${extra})
set(extra ${cv_bridge_DIR}/${extra})
endif()
include(${extra})
endforeach()
opencv-3.4.4cmake命令:
cmake -D CMAKE_BUILD_TYPE=BUILD -D CMAKE_INSTALL_PREFIX=/usr/local -D WITH_GTK_2_X=ON -D OPENCV_ENABLE_NONFREE=ON -D OPENCV_GENERATE_PKGCONFIG=YES -D OPENCV_EXTRA_MODULES_PATH=/home/m0rtzz/Program_Files/opencv-3.4.4/opencv_contrib-3.4.4/modules -D WITH_CUDA=ON -D WITH_CUDNN=ON -D WITH_FFMPEG=ON -D WITH_OPENGL=ON -D WITH_NVCUVID=ON -D -DENABLE_PRECOMPILED_HEADERS=OFF -D CMAKE_EXE_LINKER_FLAGS=-lcblas -DWITH_LAPACK=OFF -D WITH_OPENMP=ON -D BUILD_TESTS=OFF -D WITH_OPENGL=ON -D BUILD_opencv_xfeatures2d=ON -D CUDA_nppicom_LIBRARY=stdc++ -DENABLE_PRECOMPILED_HEADERS=OFF -DENABLE_PRECOMPILED_HEADERS=OFF -D CUDA_ARCH_BIN=8.6 -D CUDA_nppicom_LIBRARY=stdc++ -D CUDA_GENERATION=Auto -D CUDA_HOST_COMPILER:FILEPATH=/usr/bin/gcc-7 -j16 ..
opencv-4.2.0cmake命令(Ubuntu20.04装这个):
cmake -D CMAKE_BUILD_TYPE=RELEASE -D OPENCV_GENERATE_PKGCONFIG=ON -D INSTALL_PYTHON_EXAMPLES=ON -D INSTALL_C_EXAMPLES=ON -D OPENCV_EXTRA_MODULES_PATH=/home/m0rtzz/Program_Files/opencv-4.2.0/opencv_contrib-4.2.0/modules -D WITH_V4L=ON -D WITH_QT=ON -D WITH_GTK= 最低0.47元/天 解锁文章


 9万+
9万+


 被折叠的 条评论
为什么被折叠?
被折叠的 条评论
为什么被折叠?
 到【灌水乐园】发言


