


目录
在 上一篇文章 中讲了 微服务的使用场景和架构设计方案的理论知识,并且讲了consul的一些特点。本篇就来实际操作一下consul微服务组建的搭建,以及在PHP中如何实现一个简单的微服务的注册发现和配置中心。
【安装和启动consul】
首先,下载安装consul,下载地址:https://developer.hashicorp.com/consul/downloads
这里,我用macOS演示,因此下载的是mac安装包。下载完成后解压直接就是一个二进制文件,放到一个自定义的目录中,然后加入系统环境变量。
比如我放到 /Users/renxing/soft/bin 目录中,然后编辑 ~/.bash_profile文件:
export PATH=/Users/renxing/soft/bin:$PATH;
然后 source ~/.bash_profile 即可。
也可以使用brew安装:
brew tap hashicorp/tap
brew install hashicorp/tap/consul
安装完成后,使用 consul agent -dev 命令即可启动。
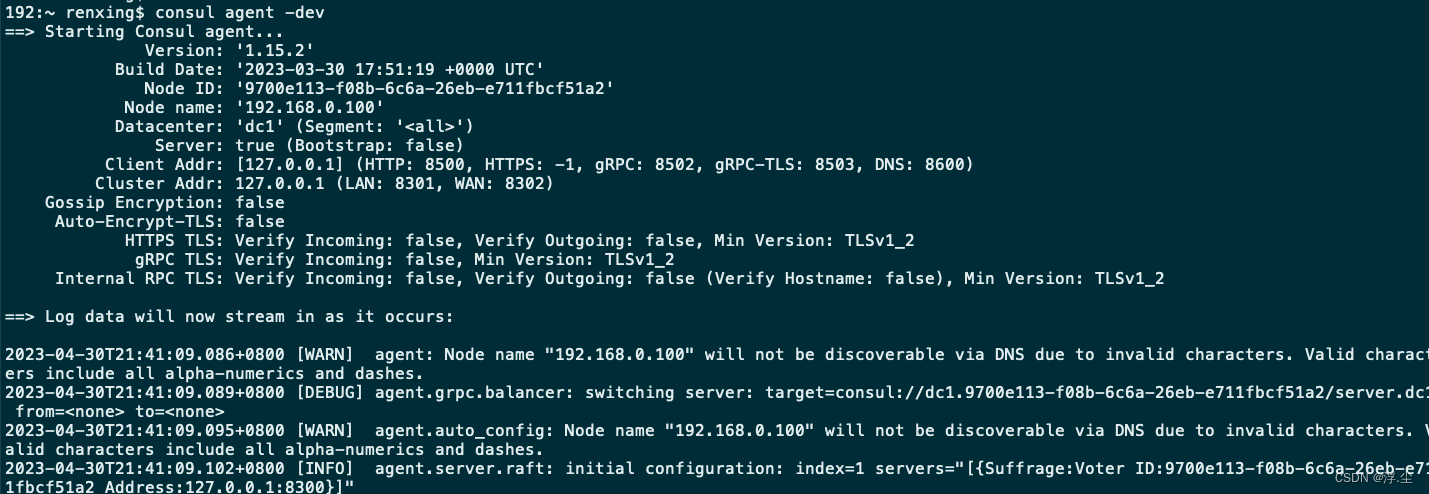
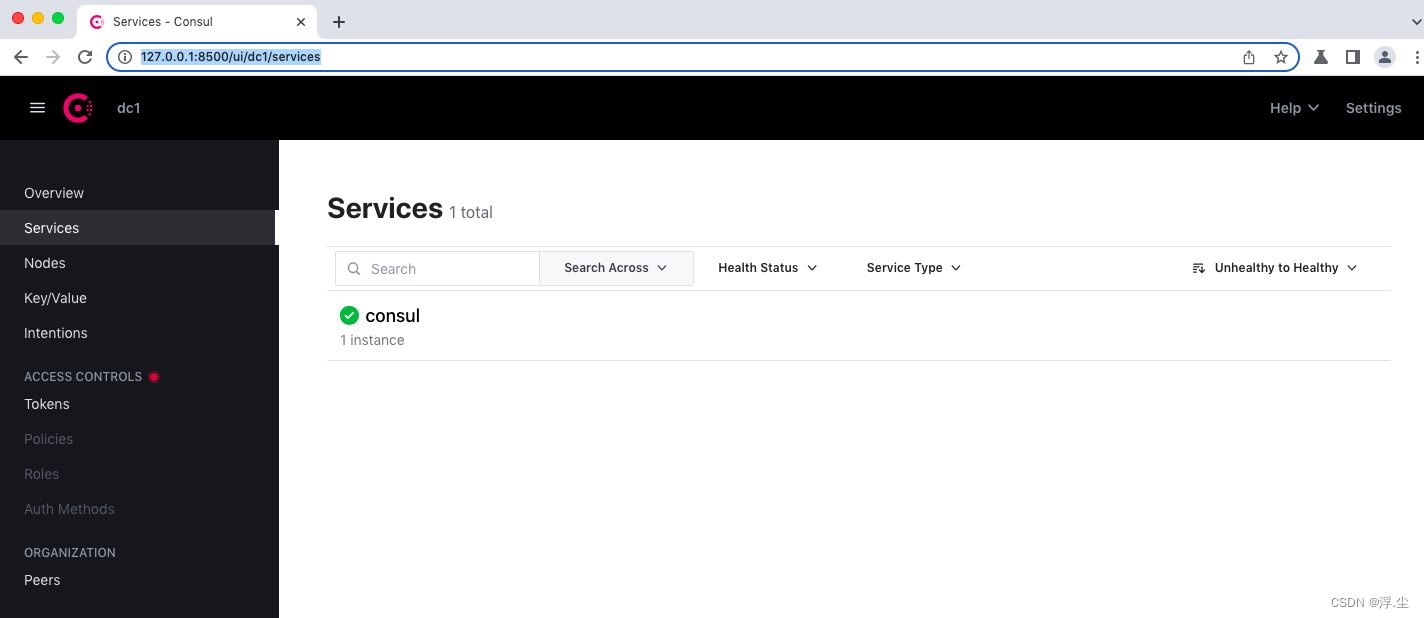
打开浏览器,输入:http://127.0.0.1:8500/ui/
打开管理页面,如下图所示:
【consul配置中心】
consul 作为专门的配置中心使用,内置了 Key/Value 存储,用起来很简单。如果使用了consul 作为服务注册,并且不想再引入额外的中间件的情况下,可以将一些公共的配置信息配置到 consul 中,然后通过 consul 提供的API来获取对应的Key的Value,这样就实现了配置中心的功能。但是它也有缺点,比如说因为consul 遵循的是CP原则(一致性+分离容忍),它保证数据的强一致性,所以当数据在同步时(或者领导者挂掉之后),Server 再重新选举的时候是不可用的。还有一个缺点是 consul 不支持配置信息历史版本的管理。
假如要创建一个如下结构的配置信息,表示分别在dev环境和prod环境配置两个数据库的信息。
[dev环境]
    [db1数据库]
        host:127.0.0.1
        port:3306
        user:root
        pwd:123456
        database:test1
    [db2数据库]
        host:127.0.0.1
        port:3306
        user:root
        pwd:123456
        database:test2

[prod环境]
    [db1数据库]
        host:192.168.0.1
        port:3306
        user:root
        pwd:123456
        database:test1
    [db2数据库]
        host:192.168.0.2
        port:3306
        user:root
        pwd:123456
        database:test2
现在直接在consul中给上面的 rxService创建一个数据库的配置,先创建目录 rxService,再分别创建环境dev和prod两个环境,操作如下:
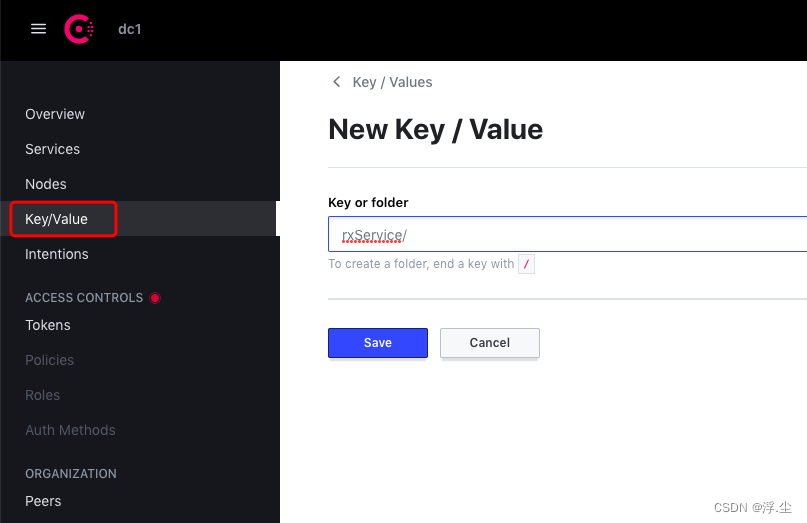
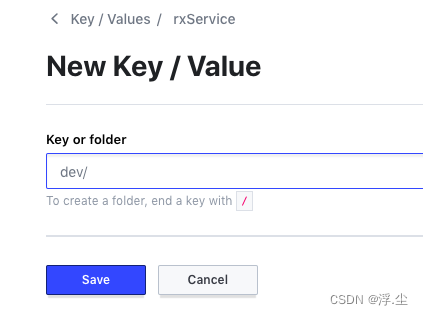
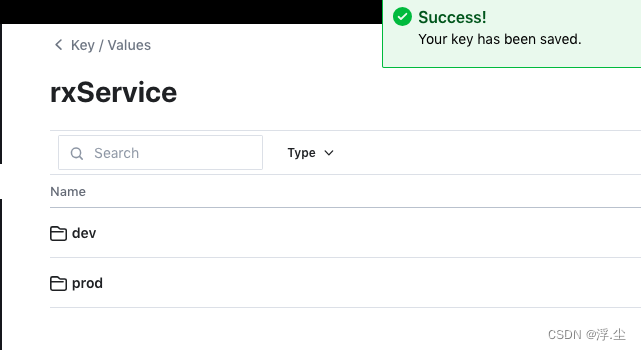
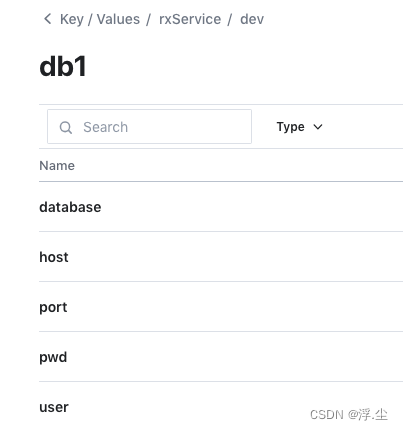
由于项目中可能会连接多个数据库,因此在dev环境中先创建 db1目录,然后创建对应的配置信息。
可以创建一个单个配置信息,操作如下:

创建完成后的效果:
也可以直接创建一个json 格式的配置信息:

prod环境的配置和这个一样,不再演示。
【在ThinkPHP6.0框架中配置使用consul】
接下来在 ThinkPHP6.0 框架中配置使用consul(为啥用tp6? 因为用框架相比原生PHP避免了很多功能重复造轮子,还有,现在tp6挺火的,纯粹就是感兴趣,刚好拿来用用,熟悉熟悉😊),tp6的官方文档:ThinkPHP6.0完全开发手册 · 看云
安装ThinkPHP6,composer一条命令搞定(如果你的电脑还没有安装composer,那就先研究研究安装一下吧,不是很难)
composer create-project topthink/think thinkphp-demo-2023然后创建 config/common.php 文件,加入以下内容
return [
    'consul' => [
        'host' => 'localhost',
        'port' => '8500'
    ]
];
创建 app/service/Consul.php 文件,核心内容如下:
<?php
namespace app\service;
use think\facade\Config;

class Consul
{
    private $httpUrl;
    public function __construct(){
        $consulConfig = Config::get('common.consul');
        $this->httpUrl = 'http://' . $consulConfig['host'] . ':' . $consulConfig['port'] . '/';
    }
    //服务注册
    //agent/service/register
    public function registerService($data){
        $url = $this->httpUrl . 'v1/agent/service/register';
        return $this->curlPUT($url, $data);
    }
    //服务信息
    public function serviceInfo($serviceId){
        $url = $this->httpUrl . 'v1/health/service/' . $serviceId;
        return $this->curlGET($url, null);
    }
    //配置信息
    public function configInfo($key){
        $url = $this->httpUrl . 'v1/kv/' . $key;
        return $this->curlGET($url, null);
    }

    public function curlPUT($httpUrl, $data){
        //...
    }
    public function curlGET($httpUrl){
        //...
    }
}
创建 controller/ConsulDemo.php 文件,内容如下:
<?php

namespace app\controller;

use app\BaseController;
use app\service\Consul;

class ConsulDemo extends BaseController {
    private $serviceId = 'rxService';

    //注册服务
    public function registerDemo() {
        $data = [
            'ID' => $this->serviceId, //服务的id
            'Name' => 'rxService', //服务的名称
            'Tags' => ['core.rx'],
            // 'Address' => '127.0.0.1', //访问的地址
            'Port' => 8087,
            'Check' => [
                'HTTP' => 'http://test-service1.cc:80',
                'Interval' => '5s', //回调时间间隔
            ]
        ];
        $consul = new Consul();
        $rs = $consul->registerService($data);
        var_dump($rs);
    }

    //服务发现
    public function serviceInfo() {
        $consul = new Consul();
        $rs = $consul->serviceInfo($this->serviceId);
        echo $rs;
    }

    //配置信息
    public function configInfo() {
        $consul = new Consul();
        $rs = $consul->configInfo($this->serviceId . '/dev/db1');
        echo $rs;
    }
}
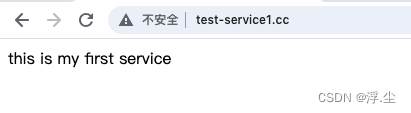
注:上面的 http://test-service1.cc 是我在本地简单搭建了一个虚拟主机,输出一段文本 “this is my first service”
配置路由,在 route/app.php 中添加:
//consul
Route::get('consul/register/demo', 'ConsulDemo/registerDemo');
Route::get('consul/service/info', 'ConsulDemo/serviceInfo');
Route::get('consul/config/info', 'ConsulDemo/configInfo');
然后打开终端,执行命令:
php think run -p8087
打开浏览器,输入 http://127.0.0.1:8087/consul/register/demo 然后再去看consul的控制面板就会发现多了一个刚才注册的 rxService
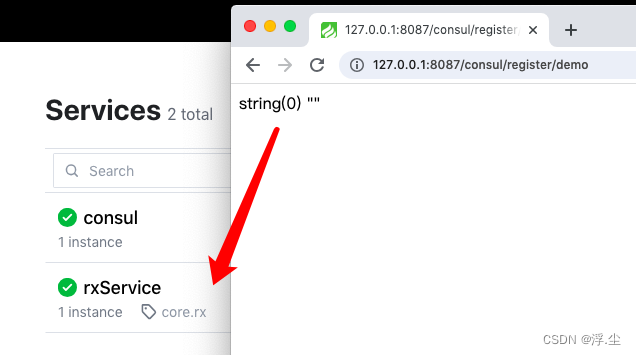
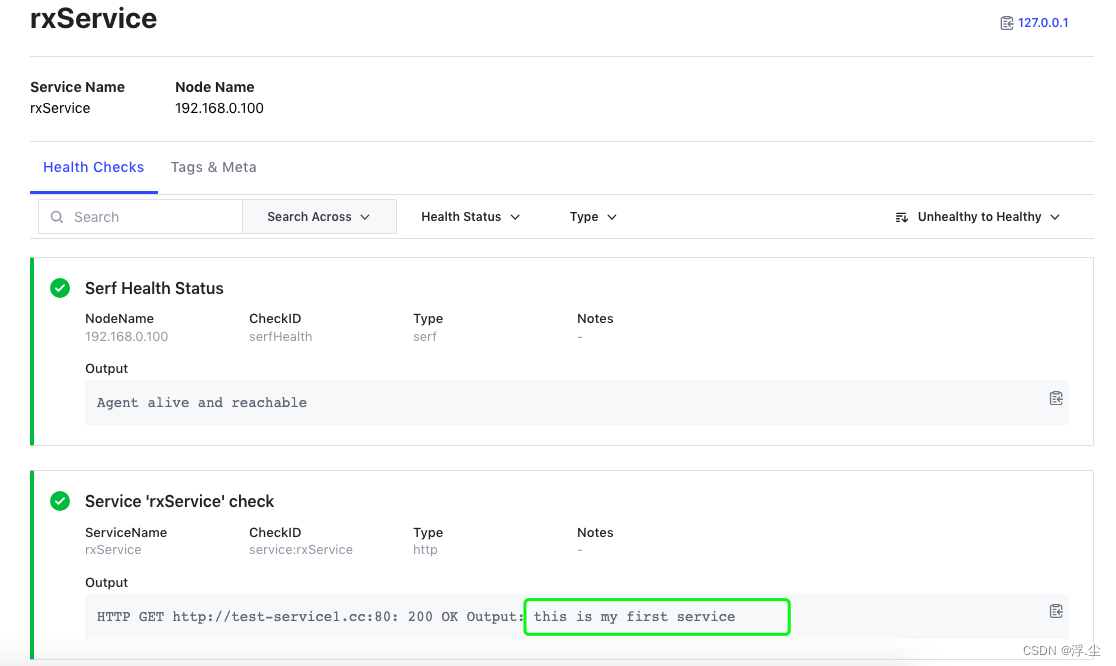 可以看到,在 Service check 部分,输出的内容正是我上面虚拟主机中输出的内容,说明服务已经注册成功。
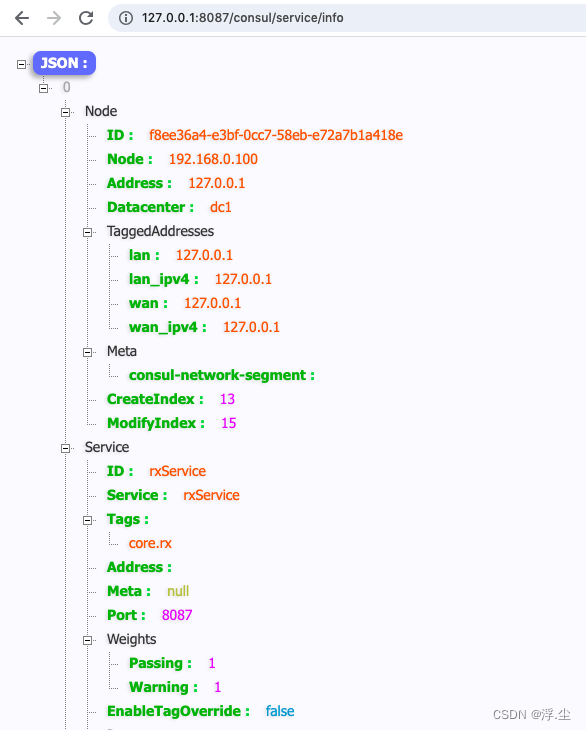
接下来获取信息,访问 http://127.0.0.1:8087/consul/service/info
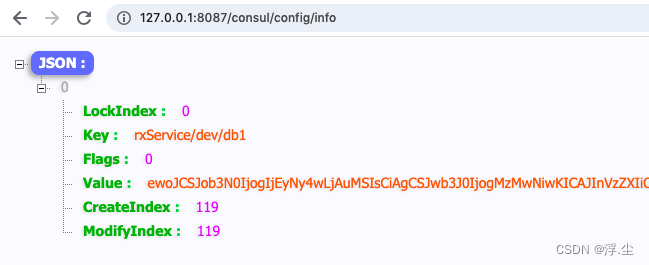
获取配置信息,访问 http://127.0.0.1:8087/consul/config/info
本篇先简单演示了PHP中介入consul的简单用法,后面还将在 swoft 框架中介入consul,实现更多微服务的功能。敬请期待吧!


 42
42


 被折叠的 条评论
为什么被折叠?
被折叠的 条评论
为什么被折叠?
 到【灌水乐园】发言


