创建一个根视图控制器
@implementation RootViewController

#warning 在继承和使用父类的方法的时候,一般会先用super去调用父类相应的方法,目的是为了保证方法的原功能不变,在此基础上再添加我们自己的功能.

(一).触摸
1.触摸开始.
- (void)touchesBegan:(NSSet *)touches withEvent:(UIEvent *)event {
    [super touchesBegan:touches withEvent:event];
    NSLog(@"触摸开始");
}

2.触摸移动.
- (void)touchesMoved:(NSSet *)touches withEvent:(UIEvent *)event {
    [super touchesMoved:touches withEvent:event];
    NSLog(@"触摸移动");
}

3.触摸结束.
- (void)touchesEnded:(NSSet *)touches withEvent:(UIEvent *)event {
    [super touchesEnded:touches withEvent:event];
    NSLog(@"触摸结束");
}

4.触摸取消(当来电话时,触摸自动取消).
- (void)touchesCancelled:(NSSet *)touches withEvent:(UIEvent *)event {
    [super touchesCancelled:touches withEvent:event];
    NSLog(@"触摸取消");
}

(二).摇一摇
1.晃动开始.
- (void)motionBegan:(UIEventSubtype)motion withEvent:(UIEvent *)event {
[super motionBegan:motion withEvent:event];
NSLog(@"晃动开始!~");
// 设置随机背景颜色.(模拟器 -> Hardware -> Shake),模拟摇一摇改变背景颜色.
self.view.backgroundColor = [UIColor colorWithRed:arc4random()
}
2.晃动结束.
- (void)motionEnded:(UIEventSubtype)motion withEvent:(UIEvent *)event {
[super motionEnded:motion withEvent:event];
NSLog(@"晃动结束!~");
}
3.晃动取消.
- (void)motionCancelled:(UIEventSubtype)motion withEvent:(UIEvent *)event {
[super motionCancelled:motion withEvent:event];
NSLog(@"晃动取消!~");
}

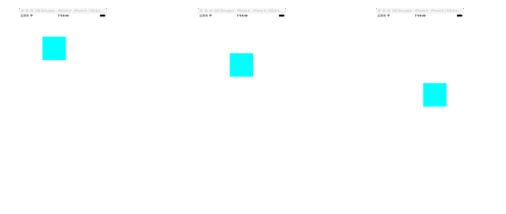
(三).在根视图控制器上移动视图.
新建MyView类,继承于UIView
MyView.m
#import "MyView.h"
@interface MyView ()
1.创建一个属性,记录起点.
@property(nonatomic, assign)CGPoint startPoint;
@end
@implementation MyView
- (void)touchesBegan:(NSSet *)touches withEvent:(UIEvent *)event {
[super touchesBegan:touches withEvent:event];
2.获取触摸对象.
UITouch *touch = [touches anyObject];
3.根据触摸对象,获取开始的坐标位置.
self.startPoint = [touch locationInView:self];
}
- (void)touchesMoved:(NSSet *)touches withEvent:(UIEvent *)event {
[super touchesMoved:touches withEvent:event];
4.获取触摸对象.
UITouch *touch = [touches anyObject];
5.获取移动的坐标位置.
CGPoint newPoint = [touch locationInView:self];
6.计算两个坐标产生的变化.
CGFloat dx = newPoint.x - self.startPoint.x;
CGFloat dy = newPoint.y - self.startPoint.y;
7.改变自身变化.
self.center = CGPointMake(self.center.x + dx, self.center.y + dy);
}
- (void)touchesEnded:(NSSet *)touches withEvent:(UIEvent *)event {
[super touchesEnded:touches withEvent:event];
}
RootViewController.m
- (void)viewDidLoad {
MyView *firstView = [[MyView alloc] initWithFrame:CGRectMake(100, 100, 100, 100)];
firstView.backgroundColor = [UIColor cyanColor];
[self.view addSubview:firstView];
[firstView release];
}
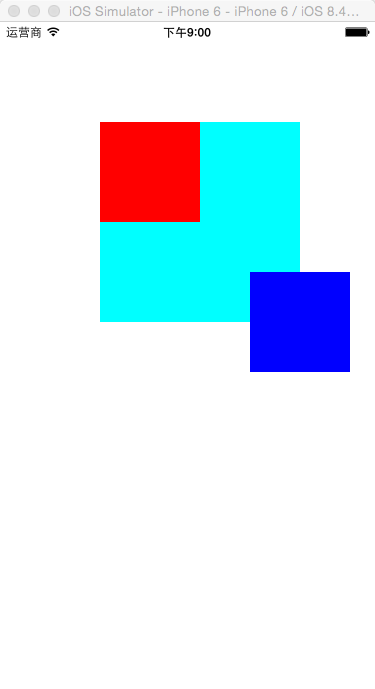
(四).响应链问题
在根视图控制器中创建一个UIView和两个UIButton
RootViewController.m
- (void)viewDidLoad {
    1.创建一个视图.
    UIView *firstView = [[UIView alloc] initWithFrame:CGRectMake(100, 100, 200, 200)];
    firstView.backgroundColor = [UIColor cyanColor];
    [self.view addSubview:firstView];
    [firstView release];

    2.创建第一个按钮.
    UIButton *firstButton = [UIButton buttonWithType:UIButtonTypeSystem];
    firstButton.frame = CGRectMake(0, 0, 100, 100);
    firstButton.backgroundColor = [UIColor redColor];
    [firstView addSubview:firstButton];
    [firstButton addTarget:self action:@selector(click:) forControlEvents:UIControlEventTouchUpInside];

    3.创建第二个按钮.
    UIButton *secondButton = [UIButton buttonWithType:UIButtonTypeSystem];
    secondButton.frame = CGRectMake(150, 150, 100, 100);
    secondButton.backgroundColor = [UIColor blueColor];
    [firstView addSubview:secondButton];
    [secondButton addTarget:self action:@selector(click:) forControlEvents:UIControlEventTouchUpInside];
}

4.使这两个按钮同时绑定同一个方法.
- (void)click:(UIButton *)button {
    NSLog(@"****************");
}

我们可以发现当鼠标点击按钮与视图的重合区域时,会触发click方法,其他不会触发,这就是响应链的问题.


 1765
1765


 被折叠的 条评论
为什么被折叠?
被折叠的 条评论
为什么被折叠?
 到【灌水乐园】发言


