


——- android培训、java培训、期待与您交流! ———-
1.1 字节流体系
JDKAPI介绍如下:
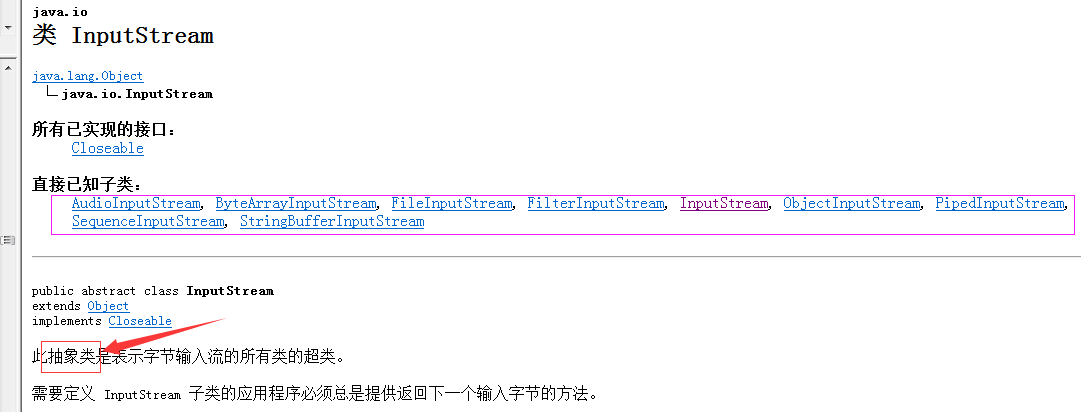
注:看红色箭头指向说明该类为抽象类,所以该类不能被实例化,实例化时要参看紫色框里面的子类。下面会详细介绍各个子类的使用
1.2 字节流的使用
1.2.1 FileInputStream
package com.test.blog2;
import java.io.File;
import java.io.FileInputStream;
import java.io.FileNotFoundException;
import java.io.FileOutputStream;
import java.io.IOException;
/*
* 字节流的演示Demo
*
* */
public class TestInputStream {
public static void main(String[] args) throws FileNotFoundException {
// 定义读取文件的路径
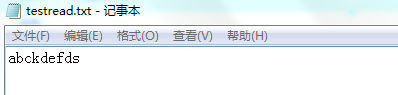
String filePath = "d:" + File.separator + "testread.txt";
// 定义输出文件的路径
String filePathw = "d:" + File.separator + "testwrite.txt";
readMethod1(filePath);
System.out.println();
readMethod2(filePath);
writeMethod(filePathw);
}
/*
* 将硬盘上的txt文件中的内同写入到程序中 方法一:一次读取一个字节
*/
public static void readMethod1(String filePath) {
FileInputStream is = null;
try {
is = new FileInputStream(filePath);
int ch = 0;
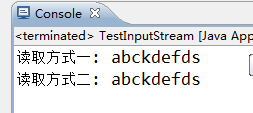
System.out.print("读取方式一: ");
while ((ch = is.read()) != -1) {
System.out.print((char) ch);
}
} catch (FileNotFoundException e) {
System.out.println("文件不存在,请检查文件路径是否正确 : " + filePath);
} catch (IOException e) {
System.out.println("读取文件错误: " + e.getMessage());
} finally {
if (null != is) {
try {
is.close();
} catch (IOException e) {
System.out.println("is流关闭失败:" + e.getMessage());
}
}
}
}
/*
* 将硬盘上的txt文件中的内同写入到程序中 方法二:按照数组大小来读取
*/
public static void readMethod2(String filePath) {
FileInputStream is = null;
try {
is = new FileInputStream(filePath);
// 定义读取量大小的数组
byte[] buf = new byte[1024];
int len = 0;
while ((len = is.read(buf)) != -1) {
// 因为最后的情况可能不足1024个字节,所以在创建string的时候截取到len大小
System.out.print("读取方式二: "+new String(buf, 0, len));
}
} catch (FileNotFoundException e) {
System.out.println("文件不存在,请检查文件路径是否正确 : " + filePath);
} catch (IOException e) {
System.out.println("读取文件错误: " + e.getMessage());
} finally {
if (null != is) {
try {
is.close();
} catch (IOException e) {
System.out.println("is流关闭失败:" + e.getMessage());
}
}
}
}
}
运行结果:
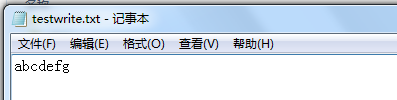
1.2.2 FileOutputStream
/*
     * 将程序中的字符串输出到硬盘上的文件中
     */
    public static void writeMethod(String filePath) {
        FileOutputStream os = null;
        try {
            os = new FileOutputStream(filePath);
            os.write("abcdefg".getBytes());
        } catch (FileNotFoundException e) {
            System.out.println("文件不存在,请检查文件路径是否正确 : " + filePath);
        } catch (IOException e) {
            System.out.println("读取文件错误: " + e.getMessage());
        } finally {
            if (null != os) {
                try {
                    os.close();
                } catch (IOException e) {
                    System.out.println("is流关闭失败:" + e.getMessage());
                }
            }
        }
    }
运行结果:
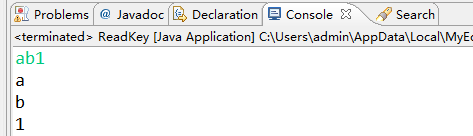
1.2.3 键盘输入流 System.in
package com.test.blog2;

import java.io.IOException;
import java.io.InputStream;

/*
 * 获取从键盘输入的数据并打印出来
 * */
public class ReadKey {

    public static void main(String[] args) {
        readKey();
    }

    public static void readKey() {
        InputStream in = System.in;
        int ch;
        try {
            ch = in.read();// 阻塞式方法
            System.out.println((char)ch);
            ch = in.read(); // 阻塞式方法
            System.out.println((char)ch);
            ch = in.read(); // 阻塞式方法
            System.out.println((char)ch);
        } catch (IOException e) {
            e.printStackTrace();
        } finally {
            if (null != in) {
                try {
                    in.close();
                } catch (IOException e) {
                    System.out.println("in 关闭失败:" + e.getMessage());
                }
            }
        }
    }
}
运行结果:
1.2.4 对象化序列流
 ObjectInputStream与ObjectOutputStream
 P.S.
 被操作的对象需要实现序列化。实现序列化就是要实现java.io.Serializable接口.
例子: 定义一个Person类,包含名字和年龄属性,实现序列化
package com.test.blog3;

import java.io.Serializable;

/*
 * 人员类
 * 有名字和年龄属性
 * 实现序列化
 * */
public class Person implements Serializable {

    private static final long serialVersionUID = 1L;
    private String name;// 名字
    private int age;// 年龄

    public Person(String name, int age) {
        this.name = name;
        this.age = age;

    }

    public String getName() {
        return name;
    }

    public void setName(String name) {
        this.name = name;
    }

    public int getAge() {
        return age;
    }

    public void setAge(int age) {
        this.age = age;
    }

}
测试对象读写:
package com.test.blog3;
import java.io.FileInputStream;
import java.io.FileNotFoundException;
import java.io.FileOutputStream;
import java.io.IOException;
import java.io.ObjectInputStream;
import java.io.ObjectOutputStream;
/*
* 对象序列化流的读和写演示
*/
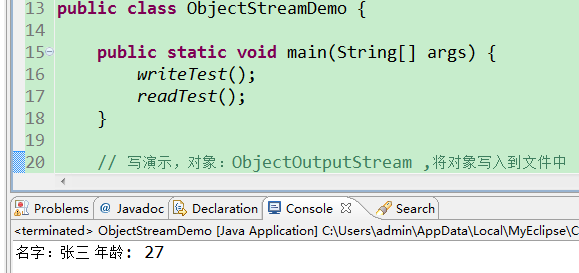
public class ObjectStreamDemo {
public static void main(String[] args) {
writeTest();
readTest();
}
// 写演示,对象:ObjectOutputStream ,将对象写入到文件中
public static void writeTest() {
Person p = new Person("张三", 27);
ObjectOutputStream oos = null;
try {
oos = new ObjectOutputStream(new FileOutputStream("d:\\obj.object"));
oos.writeObject(p);// 将整个对象写入
} catch (FileNotFoundException e) {
e.printStackTrace();
} catch (IOException e) {
e.printStackTrace();
} finally {
if (null != oos) {
try {
oos.close();
} catch (IOException e) {
e.printStackTrace();
}
}
}
}
// 读演示,对象:ObjectInputStream,从文件中读取对象信息
public static void readTest() {
ObjectInputStream oos = null;
try {
oos = new ObjectInputStream(new FileInputStream("d:\\obj.object"));
Person p = (Person) oos.readObject();// 读取整个对象信息
System.out.println("名字:" + p.getName() + " 年龄: " + p.getAge());
} catch (FileNotFoundException e) {
e.printStackTrace();
} catch (IOException e) {
e.printStackTrace();
} catch (ClassNotFoundException e) {
e.printStackTrace();
} finally {
if (null != oos) {
try {
oos.close();
} catch (IOException e) {
e.printStackTrace();
}
}
}
}
}
运行结果: 看到生成obj.object文件

运行readTest()方法后的结果:可以正常读取存入信息
P.S. 如果序列化类中没有 private static final long serialVersionUID = 1L;这句话那么属性被 public修饰会报错。因为Serializable:用于给被序列化的类加入ID号,用于判断类和对象是否是同一个版本。

总结:一般给实现序列化接口的类定义序列化ID,并要保证这个ID的唯一性
1. 2.5 数组字节流
ByteArrayInputStream与ByteArrayOutputStream
例子:
package com.test.blog3;
import java.io.ByteArrayInputStream;
import java.io.ByteArrayOutputStream;
public class ByteArrayStreamDemo {
/**
* @Description: 字节数据流的读写演示
* @param @param null
* @return void null
* @throws
*/
public static void main(String[] args) {
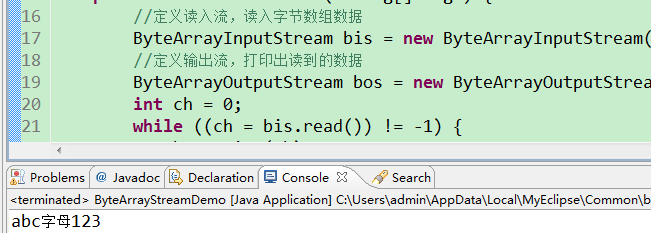
//定义读入流,读入字节数组数据
ByteArrayInputStream bis = new ByteArrayInputStream("abc字母123".getBytes());
//定义输出流,打印出读到的数据
ByteArrayOutputStream bos = new ByteArrayOutputStream();
int ch = 0;
while ((ch = bis.read()) != -1) {
bos.write(ch);
}
System.out.println(bos.toString());
}
}
运行结果:
1.2.6 管道流
PipedInputStream和PipedOutputStream,通常用于多线程中
P.S. 两个线程并发执行,在这个过程中,线程之间需要进行数据通信,需要使用管道流,两方都连接到这个管道,一方写入数据另一个方就可以得到数据了
例子:
package com.test.blog3;

import java.io.IOException;
import java.io.PipedInputStream;
import java.io.PipedOutputStream;

public class PipedStream {

    /**
     * @Description: 两个线程之间数据通信,管道流的演示
     * @param @param null
     * @return void null
     * @throws
     */

    public static void main(String[] args) {
        PipedInputStream pis = new PipedInputStream();
        PipedOutputStream pos = new PipedOutputStream();
        try {
            // 重要的步骤,将两个管道流连接起来
            pis.connect(pos);
        } catch (IOException e) {
            e.printStackTrace();
        }
        // 启动两个线程,一个写数据,一个读出数据
        new Thread(new PipedInStream(pis)).start();
        new Thread(new PipedOutStream(pos)).start();

    }
}

/*
 * 用于写出数据的管道流
 */
class PipedOutStream implements Runnable {
    private PipedOutputStream pos;

    public PipedOutStream(PipedOutputStream pos) {
        this.pos = pos;
    }

    @Override
    public void run() {
        try {
            // 写出数据
            pos.write((Thread.currentThread().getName() + "管道流的输出数据测试")
                    .getBytes());
        } catch (IOException e) {
            e.printStackTrace();
        } finally {
            // 关闭流
            if (null != pos) {
                try {
                    pos.close();
                } catch (IOException e) {
                    e.printStackTrace();
                }
            }
        }

    }
}

/*
 * 用于读入数据的管道流
 */
class PipedInStream implements Runnable {
    private PipedInputStream pis;

    public PipedInStream(PipedInputStream pis) {
        this.pis = pis;
    }

    @Override
    public void run() {
        try {
            // 读数据
            byte[] buf = new byte[1024];
            int len = 0;
            while ((len = pis.read(buf)) != -1) {
                System.out.println(Thread.currentThread().getName()
                        + "管道流读入到的数据: " + new String(buf, 0, len));

            }
        } catch (IOException e) {
            e.printStackTrace();
        } finally {
            // 关闭流
            if (null != pis) {
                try {
                    pis.close();
                } catch (IOException e) {
                    e.printStackTrace();
                }
            }
        }

    }
}
运行结果:
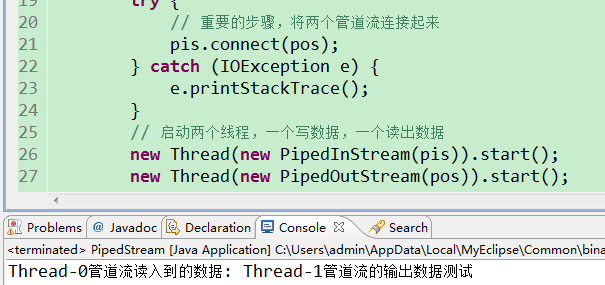
可以看到 线程名称为Thread-0的读到的线程名称为Thread-1 的线程写入的数据信息
1.3 注意
- 流的关闭 建议放到finally代码块中,保证流关闭操作的执行
- 读数据的时候定义字节数组缓冲区 这样可以提高效率,但是缓冲区的大小不宜过大,否则容易造成内存溢出
- 序列化的对象类定义序列化ID,并且唯一


 1178
1178

 被折叠的 条评论
为什么被折叠?
被折叠的 条评论
为什么被折叠?
 到【灌水乐园】发言


