


 该文详细描述了安装OpenCL运行时驱动,包括IntelCPUOpenCL运行时和TBB库,以及通过Anaconda创建环境并安装pyopencl的过程。在安装CellModeller时遇到因非git仓库导致的错误,通过创建version.py文件解决了问题。最后成功运行CellModeller的GUI程序。
Step 1.
Download and install Microsoft Visual C++ build tools (Admin permissions required)
https://visualstudio.microsoft.com/visual-cpp-build-tools
Step 2.
download openCL runtime drivers
for intel CPU OpenCL runtime:
https://github.com/intel/llvm/releases/download/2021-WW40/win-oclcpuexp-2021.12.9.0.24_rel.zip
https://github.com/oneapi-src/oneTBB/releases/download/v2021.3.0/oneapi-tbb-2021.3.0-win.zip
for other versions / GPU runtime components see:
https://software.intel.com/en-us/articles/opencl-drivers
unzip - take note of location (example assumes unzipped to c:)
- 下载了两包东西,是显卡对opencl的支持,这两个压缩包不要去修改文件夹的名字了,内部似乎具有一定的耦合性;
Step 3. Run command prompt as administrator
execute:
C:\win-oclcpuexp-2021.12.9.0.24_rel\install.bat C:\oneapi-tbb-2021.3.0\redist\intel64\vc14
install.bat里有5步:
- 备份C:\Windows\System32\OpenCL.dll
- 拷贝C:\Windows\System32\OpenCL.dll
- 第3步里有设置一个系统级环境变量:Set the environment variable OCL_ICD_FILENAMES to C:\win-oclcpuexp-2021.12.9.0.24_rel\intelocl64.dll;
- 第4步创建符号链接:4. Create symbolink links to TBB files in C:\win-oclcpuexp-2021.12.9.0.24_rel\tbb
为 C:\win-oclcpuexp-2021.12.9.0.24_rel\tbb\tbbmalloc.dll <<===>> C:\oneapi-tbb-2021.3.0\redist\intel64\vc14\tbbmalloc.dll 创建的符号链接
为 C:\win-oclcpuexp-2021.12.9.0.24_rel\tbb\tbb12.dll <<===>> C:\oneapi-tbb-2021.3.0\redist\intel64\vc14\tbb12.dll 创建的符号链接 - Set the environment variable PATH to C:\win-oclcpuexp-2021.12.9.0.24_rel\tbb
Step 4. install Anaconda
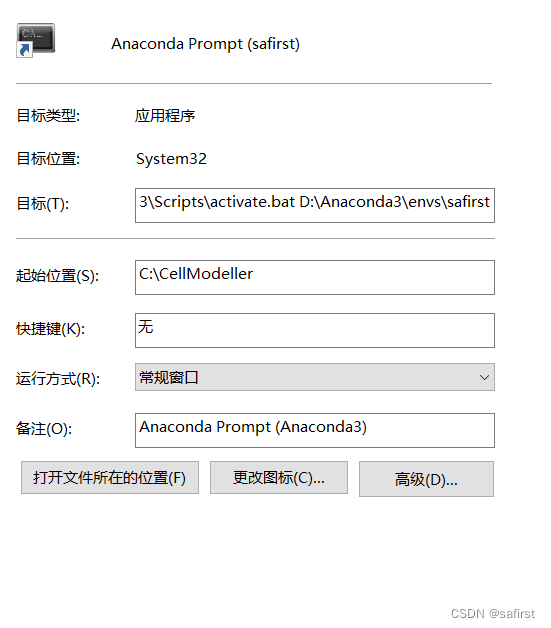
安装后可以修改进入命令行的快捷方式,一是直接activate指定环境,二是指定起始目录。
Step 5. download CellModeller
git clone https://github.com/cellmodeller/CellModeller.git
Step 6. download pyopencl from https://www.lfd.uci.edu/~gohlke/pythonlibs/#pyopencl.
Ensure that version matches the python version and architecture
e.g. pyopencl-2021.2.8+cl12-cp38-cp38-win_amd64.whl
Step 7. open anaconda prompt and make an environment and activate. (example name CelMod)
conda create --name CelMod python=3.8(可以先查看一下python版本)
conda activate CelMod
Step 8. install pyopencl
python -m pip install pyopencl-2021.2.8+cl12-cp38-cp38-win_amd64.whl
(可以用conda list查看已安装的包)
Step 9. install CellModeller
cd CellModeller
pip install -e .
cd ..
- 进入到CellModeller的根目录下进行安装当前目录,目录中有setup.py和README.md文件的那个
(safirst) C:\CellModeller>pip install -e .
Obtaining file:///C:/CellModeller
  Preparing metadata (setup.py) ... error
  error: subprocess-exited-with-error

  × python setup.py egg_info did not run successfully.
  │ exit code: 1
  ╰─> [18 lines of output]
      fatal: not a git repository (or any of the parent directories): .git
      Traceback (most recent call last):
        File "C:\CellModeller\setup.py", line 14, in <module>
          version_git = subprocess.check_output(["git", "describe"]).rstrip()
        File "D:\Anaconda3\envs\safirst\lib\subprocess.py", line 424, in check_output
          return run(*popenargs, stdout=PIPE, timeout=timeout, check=True,
        File "D:\Anaconda3\envs\safirst\lib\subprocess.py", line 528, in run
          raise CalledProcessError(retcode, process.args,
      subprocess.CalledProcessError: Command '['git', 'describe']' returned non-zero exit status 128.

      During handling of the above exception, another exception occurred:

      Traceback (most recent call last):
        File "<string>", line 2, in <module>
        File "<pip-setuptools-caller>", line 34, in <module>
        File "C:\CellModeller\setup.py", line 16, in <module>
          with open(version_py, 'r') as fh:
      FileNotFoundError: [Errno 2] No such file or directory: 'C:\\CellModeller\\CellModeller/version.py'
      [end of output]
出现这个错误,是因为目标目录并非git仓库所致,所以最好要用git clone命令来下载为宜。
实测,在卸载windows git的情况下,程序运行不受影响。
以下是正常安装截图
(safirst) C:\CellModeller>pip install -e .
Obtaining file:///C:/CellModeller
  Preparing metadata (setup.py) ... done
Requirement already satisfied: numpy in d:\anaconda3\envs\safirst\lib\site-packages (from CellModeller===b-v4.3-42-g96ab099-) (1.24.2)
Collecting scipy
  Using cached scipy-1.10.1-cp39-cp39-win_amd64.whl (42.5 MB)
Collecting pyopengl
  Using cached PyOpenGL-3.1.6-py3-none-any.whl (2.4 MB)
Collecting mako
  Using cached Mako-1.2.4-py3-none-any.whl (78 kB)
Collecting pyqt5
  Using cached PyQt5-5.15.9-cp37-abi3-win_amd64.whl (6.8 MB)
Requirement already satisfied: pyopencl in d:\anaconda3\envs\safirst\lib\site-packages (from CellModeller===b-v4.3-42-g96ab099-) (2021.2.9+cl12)
Collecting reportlab
  Using cached reportlab-3.6.12-cp39-cp39-win_amd64.whl (2.3 MB)
Collecting matplotlib
  Using cached matplotlib-3.7.1-cp39-cp39-win_amd64.whl (7.6 MB)
Collecting MarkupSafe>=0.9.2
  Using cached MarkupSafe-2.1.2-cp39-cp39-win_amd64.whl (16 kB)
Collecting fonttools>=4.22.0
  Using cached fonttools-4.38.0-py3-none-any.whl (965 kB)
Collecting pyparsing>=2.3.1
  Using cached pyparsing-3.0.9-py3-none-any.whl (98 kB)
Collecting cycler>=0.10
  Using cached cycler-0.11.0-py3-none-any.whl (6.4 kB)
Collecting contourpy>=1.0.1
  Using cached contourpy-1.0.7-cp39-cp39-win_amd64.whl (160 kB)
Collecting kiwisolver>=1.0.1
  Using cached kiwisolver-1.4.4-cp39-cp39-win_amd64.whl (55 kB)
Collecting packaging>=20.0
  Using cached packaging-23.0-py3-none-any.whl (42 kB)
Collecting python-dateutil>=2.7
  Using cached python_dateutil-2.8.2-py2.py3-none-any.whl (247 kB)
Collecting importlib-resources>=3.2.0
  Using cached importlib_resources-5.12.0-py3-none-any.whl (36 kB)
Collecting pillow>=6.2.0
  Using cached Pillow-9.4.0-cp39-cp39-win_amd64.whl (2.5 MB)
Requirement already satisfied: appdirs>=1.4.0 in d:\anaconda3\envs\safirst\lib\site-packages (from pyopencl->CellModeller===b-v4.3-42-g96ab099-) (1.4.4)
Requirement already satisfied: pytools>=2021.2.7 in d:\anaconda3\envs\safirst\lib\site-packages (from pyopencl->CellModeller===b-v4.3-42-g96ab099-) (2022.1.14)
Collecting PyQt5-Qt5>=5.15.2
  Using cached PyQt5_Qt5-5.15.2-py3-none-win_amd64.whl (50.1 MB)
Collecting PyQt5-sip<13,>=12.11
  Using cached PyQt5_sip-12.11.1-cp39-cp39-win_amd64.whl (78 kB)
Collecting zipp>=3.1.0
  Using cached zipp-3.15.0-py3-none-any.whl (6.8 kB)
Collecting six>=1.5
  Using cached six-1.16.0-py2.py3-none-any.whl (11 kB)
Requirement already satisfied: typing-extensions>=4.0 in d:\anaconda3\envs\safirst\lib\site-packages (from pytools>=2021.2.7->pyopencl->CellModeller===b-v4.3-42-g96ab099-) (4.5.0)
Requirement already satisfied: platformdirs>=2.2.0 in d:\anaconda3\envs\safirst\lib\site-packages (from pytools>=2021.2.7->pyopencl->CellModeller===b-v4.3-42-g96ab099-) (3.1.0)
Installing collected packages: PyQt5-Qt5, pyopengl, zipp, six, scipy, PyQt5-sip, pyparsing, pillow, packaging, MarkupSafe, kiwisolver, fonttools, cycler, contourpy, reportlab, python-dateutil, pyqt5, mako, importlib-resources, matplotlib, CellModeller
  Running setup.py develop for CellModeller
Successfully installed CellModeller-b-v4.3-42-g96ab099- MarkupSafe-2.1.2 PyQt5-Qt5-5.15.2 PyQt5-sip-12.11.1 contourpy-1.0.7 cycler-0.11.0 fonttools-4.38.0 importlib-resources-5.12.0 kiwisolver-1.4.4 mako-1.2.4 matplotlib-3.7.1 packaging-23.0 pillow-9.4.0 pyopengl-3.1.6 pyparsing-3.0.9 pyqt5-5.15.9 python-dateutil-2.8.2 reportlab-3.6.12 scipy-1.10.1 six-1.16.0 zipp-3.15.0

(safirst) C:\CellModeller>-
setup.py里的代码错误经常就是因为git而起,起因为开发者是想利用git describe命令来获取CM的版本号,但又没有设置tag,导致取不到——异常;结果异常这边呢,本来计划读取本地的version.py文件,结果又没有~~~不知道他是怎么想的。彻底分析setup.py源代码后,结论如下,新建一个文件在这里:CellModeller(第二层目录)\version.py,内容为:
# Do not edit this file, pipeline versioning is governed by git tags
__version__=“1.0”
第一行还是注释,要不要无所谓,第二行版本号随意。读取参考代码为:
version_git = open(version_py).read().strip().split('=')[-1].replace('"','')
Step 10. launch CellModeller
python CellModeller/Scripts/CellModellerGUI.py
Further instructions on the CellModeller wiki
Home · cellmodeller/CellModeller Wiki · GitHub
———————————————————————————————————————————
1、CDKModule版本的一些问题(2023年5月7日)
git clone https://github.com/WilliamPJSmith/CellModeller.git
这一次我倒是研究深入进去了一步,不然也搞不定这些问题。
-
CellModeller的内层仍然有个CellModeller目录,那里才是放至主程序的地方,外层的这个CellModeller只能算是项目文件夹,或者说是git项目称作CellModeller
-
程序运行是通过scripts目录中的驱动程序CellModellerGUI.py来调用的,它首先from CellModeller import Simulator,以此来调用仿真器
-
错误就发生在Simulator中,参考以下3行代码
from .CellState import CellState
import CellModeller.CDK_Module_V2 as cdk
import CellModeller.EPS_Module as eps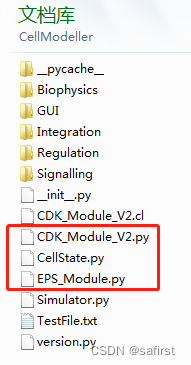
-
这三个文件是在一起的,本来调用方式应该是一样的,但是由于源代码后面对cdk和eps的调用方式(写法问题),导致了2、3行如果仿照第一行写是找不到相关模块的。
-
遂经研究,整个程序的“工作目录(os.getcwd())”仍然是C:\CellModeller,故import时附加上第二层的CellModeller目录指定。这才完成这个大绕绕。


 被折叠的 条评论
为什么被折叠?
被折叠的 条评论
为什么被折叠?
 到【灌水乐园】发言


