


1、序
由于业务(毕设)需要……客户端和服务端需要进行数据通信,而数据通信的话,一般常用的就是JSON格式。基本原理就是,服务端将后台数据库中的数据读取,并通过相关的工具类,将其转换为JSON格式。客户端再将JSON格式的数据解析出来,从而实现了服务器(SSH)和客户端(Android)之间的通信。
2、IDE
开发环境 jdk+mysql+myeclipse+tomcat
3、过程
-
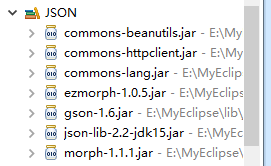
步骤一 、新建一个User library,包含JSON所需要的jar
- (1) 打开myeclipse,点击上方菜单栏处【Window】,在弹出的子菜单中点击【Preferences】
- (2) 进入preferences界面, 点击左侧列表中java
- (3) 在弹出的菜单栏中点击【Bulid path】,然后打开【User library】
- (4) 进入User library界面,可以看到当前我们已经创建的jar包,点击右上方【new】
- (5) 在弹出的对话框输入 当前jar包名称 “ JSON“,建议直接以jar命名方便查看
-
(6) 创建user library完成,点击选中该jar目录,然后点击右侧【Add external jar】将我上传的json包里的jar导入即可。
PS:
- 详情请见 myeclipse2014如何创建user library
- 下载所需jar,链接 JSON打包下载
- 注意其中的gson除了加入Build path以外,还要复制到WEB-INF/lib/,否则会出错。
步骤二、新建一个ResUtil.java文件,作为工具类,使用GSON将数据转换成JSON字符串:
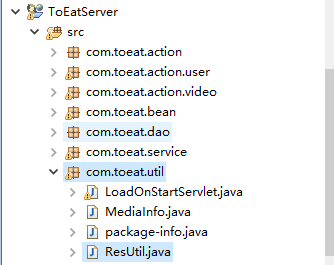
package com.toeat.util;

import java.io.IOException;
import java.io.PrintWriter;

import javax.servlet.http.HttpServletResponse;

import com.google.gson.Gson;

public class ResUtil {

    public static void toJson(HttpServletResponse response, Object data)
        throws IOException {

        Gson gson = new Gson();
        String result = gson.toJson(data);
        response.setContentType("text/json; charset=utf-8");
        response.setHeader("Cache-Control", "no-cache");
        PrintWriter out = response.getWriter();
        out.print(result);
        out.flush();
        out.close();

    }

}步骤三、新建QueryUsersAction.java文件,用于封装并返回所有用户信息,访问http://localhost:8080/ToEatServer/QueryUsers.action 即可看到及经过封装过的JSON格式的数据

https://img-blog.csdn.net/20160517155144617
/**
 * author : sagewang
 * date : 下午4:42:48
 */
package com.toeat.action.user;

/**
 *
 * 项目名称:ToEatServer
 * 类名称:QueryUsersAction
 * 类描述:
 * 创建人:wsqali
 * 创建时间:2016年5月12日 下午4:42:48
 * 修改人:wsqali
 * 修改时间:2016年5月12日 下午4:42:48
 * 修改备注:
 * @version
 *
 */
import java.io.IOException;
import java.util.HashMap;
import java.util.List;
import java.util.Map;

import org.apache.struts2.ServletActionContext;

import net.sf.json.JSONArray;

import com.toeat.bean.User;
import com.toeat.service.BaseService;
import com.toeat.util.ResUtil;
import com.opensymphony.xwork2.ActionSupport;
@SuppressWarnings("serial")
public class QueryUsersAction {
    private BaseService baseService;
    public BaseService getBaseService() {
        return baseService;
    }
    public void setBaseService(BaseService baseService) {
        this.baseService = baseService;
    }

    private User user;
    // 封装并返回所有用户信息
    public String execute(){
        Map<String, Object> map = new HashMap<String, Object>();
        List<User> userlist = baseService.ReadAll("User");
        try{
            map.put("Users", userlist);
            ResUtil.toJson(ServletActionContext.getResponse(), map);
        }catch (IOException e){
            e.printStackTrace();
        }
        return null;
    }
}
相关配置:
struts-user.xml
<package name="login" namespace="/" extends="struts-default">
    <!-- 查询所有用户信息 -->
    <action name="QueryUsers" class="QueryUsersAction"></action>
</package>
appliacation-user.xml
<?xml version="1.0" encoding="UTF-8"?>
<beans xmlns="http://www.springframework.org/schema/beans"
xmlns:xsi="http://www.w3.org/2001/XMLSchema-instance"
xmlns:p="http://www.springframework.org/schema/p"
  xmlns:aop="http://www.springframework.org/schema/aop"
  xmlns:tx="http://www.springframework.org/schema/tx"
  xmlns:context="http://www.springframework.org/schema/context"
xsi:schemaLocation="http://www.springframework.org/schema/beans
http://www.springframework.org/schema/beans/spring-beans-3.0.xsd
http://www.springframework.org/schema/aop
        http://www.springframework.org/schema/aop/spring-aop-3.0.xsd
        http://www.springframework.org/schema/tx
        http://www.springframework.org/schema/tx/spring-tx-3.0.xsd
        http://www.springframework.org/schema/context
        http://www.springframework.org/schema/context/spring-context-3.0.xsd">

<!-- 查询所有用户信息 -->
    <bean id="QueryUsersAction" class="com.toeat.action.user.QueryUsersAction">
        <property name="baseService" ref="BaseService"></property>
    </bean>
</beans>


 被折叠的 条评论
为什么被折叠?
被折叠的 条评论
为什么被折叠?
 到【灌水乐园】发言


