


1.v-model在自定义组件上的使用
滑动验证页面![]() https://segmentfault.com/a/1190000019917624
https://segmentfault.com/a/1190000019917624
//1.mixin

import { Vue, Component, Prop } from 'vue-property-decorator'

@Component
export default class TwoWay extends Vue {
    @Prop()
    value!: any;

    get currentValue() {
        return this.value;
    }

    set currentValue(newVal: any) {
        this.$emit('input', newVal)
    }
}

//2.my-child-compnent.vue

<template>
    <input v-model="currentValue" />
</template>

<script lang="ts">
import { Vue, Component, Mixins } from "vue-property-decorator";
import TwoWay from "path/to/two-way";

@Component
export default class MyChildComponent extends Mixins(TwoWay) {
    mounted() {
        this.currentValue = 2;
    }
}
</script>


//3.parent-component.vue
<template>
    <children-component v-model="foo"></children-component>
</template>

<script lang="ts">
import { Vue, Component } from "vue-property-decorator";

@Component
export default class ParentComponent extends Vue {
    foo = 1;
}
</script>

上述代码实现了:子组件中input中的值修改时,父组件的foo属性会同步修改。

当在子组件中修改currentValue的值(mounted中js操作,或与<input>双向绑定)时,触发currentValue的set()函数,在set()中我们不直接修改任何值,而是$emit事件,由父组件修改原始绑定数据(父组件中的v-model实现),从而触发子组件中currentValue的get(),实现数据同步,完成双向绑定的一个循环。
2.伪元素图标与文字居中
  <div class="fmgk-total-title">风貌评审项目总数</div>

 .fmgk-total-title {
        vertical-align: center;
        &::before {
          display: inline-block;
          content: '';
          width: 24px;
          height: 24px;
          background: url(~@/assets/layout/right/fmgk/fmgk-tilte-icon.png) no-repeat;
          background-size: cover;
          vertical-align: middle;//主要靠这句话
        }
      }
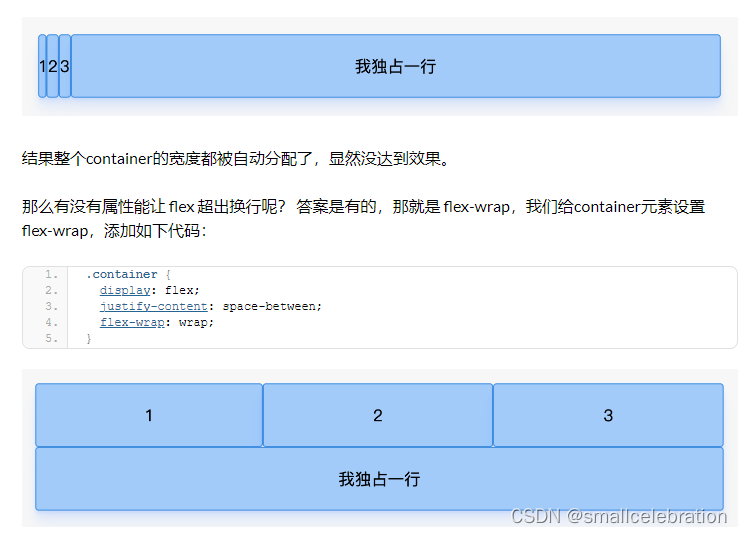
在给伪元素设置background:url(…)后,需要设置background-size才能显示图片。3.flex布局最后一盒子独占一行
flex布局中如何使最后一个元素独占一行? – Yuuk的博客![]() https://www.430115.com/article/816
https://www.430115.com/article/816
<div class="container">
  <div class="item">1</div>
  <div class="item">2</div>
  <div class="item">3</div>
  <div class="item">我独占一行</div>
</div>


.container {
  display: flex;
  justify-content: space-between; /* 两端对齐 */
}

.item {
  flex-grow: 1; /* 元素自动分配宽度 */
  border-radius: 3px;
  background-color: #A2CBFA;
  border: 1px solid #4390E1;
  height: 60px;
  line-height: 60px;
}

.item:nth-last-child(1){
  flex-basis: 100%;
}
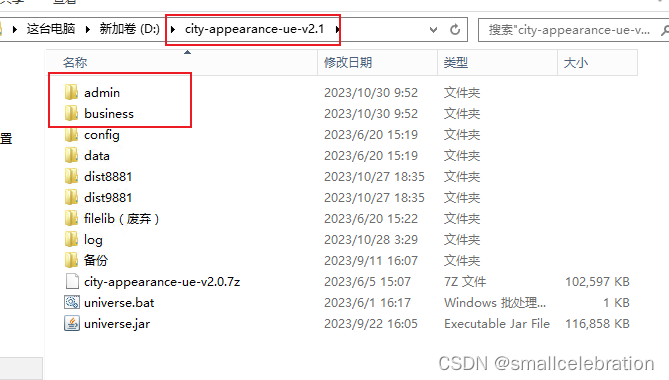
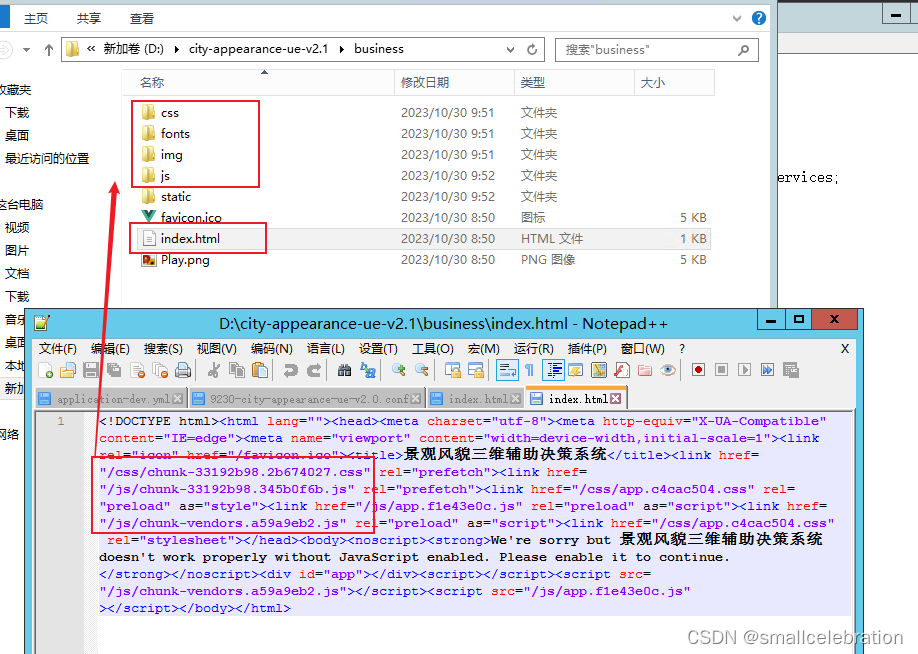
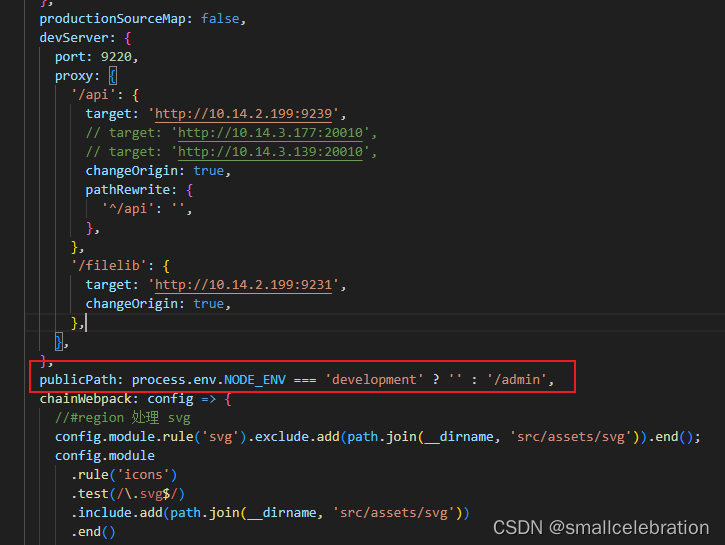
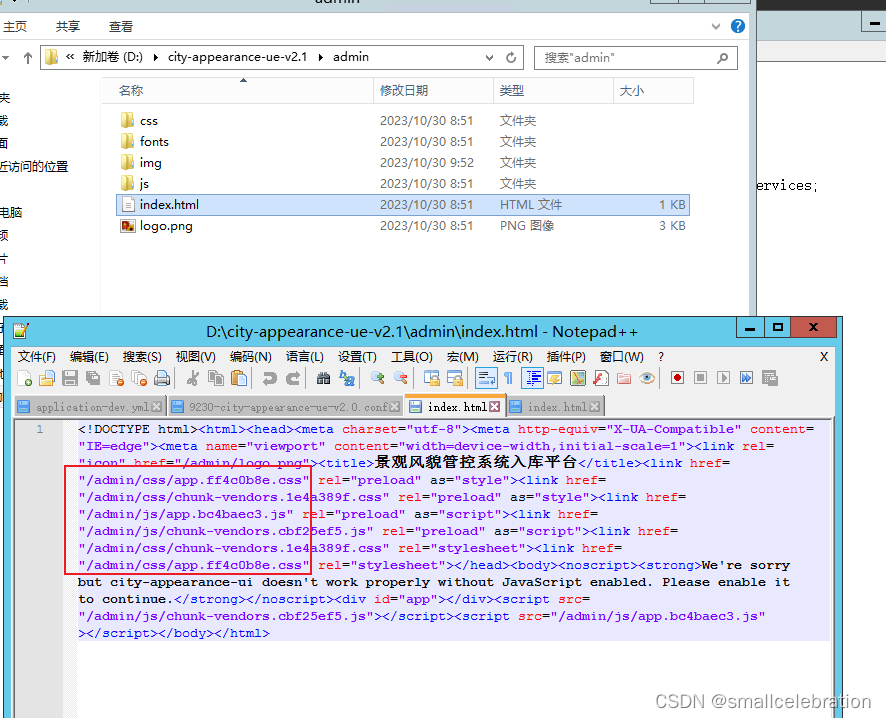
4.nignx配置及vue配置publicPath
server {
        listen  9260;

		location /api/ {
			proxy_pass    http://10.14.2.199:9239/;
		}
		location /gisApi {
			proxy_pass    http://10.14.2.168:6080/arcgis/rest/services;
		}
		location /filelib {
			root D:/city-appearance-ue-v2.1/data;
			autoindex on;
		}
		location /bmcs {
			proxy_pass    http://10.14.2.168:8128/;
		}
		location /skyline/ {
			proxy_pass    http://10.14.3.140:9999/;
		}
		location /fileView {
			root D:/sixSpecial/attachment/720;
		}
		location / {
			root D:/city-appearance-ue-v2.1/business;
			try_files $uri $uri/ /index.html;
	    }
		location /admin {
			root D:/city-appearance-ue-v2.1;
			try_files $uri $uri/ /admin/index.html;
		}
    }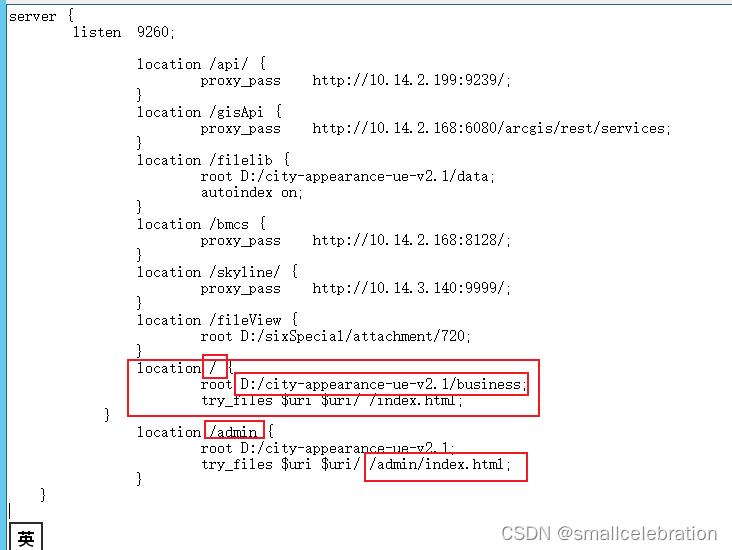
为什么像上面这么配置?
首先 location 后面的路径,是指请求时拦截的路径,比如199:9260/ 会拦截至/business文件夹下面, 199:9260/admin 会拦截至 root下面
当admin设置了publicPath,如下图,会给public打包的文件添加/admin前缀
5.div禁止选中文字
1. 禁止选中整个<div>元素的内容:
div {
-webkit-user-select: none; /* Chrome/Safari/Opera */
-moz-user-select: none; /* Firefox */
-ms-user-select: none; /* IE/Edge */
user-select: none; /* 默认的用户选择 */
}

2. 禁止选中<div>元素中的部分文字:
div::selection {
background-color: transparent;
}

上述代码中,我们使用CSS的::selection伪元素来修改选中文本的背景颜色为透明。这样一来,用户在选中<div>元素的内容时,只会看到选中文本的边框,无法看到实际选中部分的背景。

3. 在移动设备中禁止选中<div>元素的内容:

div {
-webkit-touch-callout: none; /* 禁止长按手势弹出菜单 */
-webkit-user-select: none; /* 禁止用户选择文本 */
-khtml-user-select: none; /* Konqueror */
-moz-user-select: none; /* Firefox */
-ms-user-select: none; /* IE/Edge */
user-select: none; /* 默认的用户选择 */
}

上述代码中,我们使用了一系列的CSS属性来禁止在移动设备上选择<div>元素的内容。其中,-webkit-touch-callout属性用于禁止长按手势弹出菜单,-webkit-user-select、-khtml-user-select、-moz-user-select和-ms-user-select属性用于禁止用户选择文本。


 5223
5223


 被折叠的 条评论
为什么被折叠?
被折叠的 条评论
为什么被折叠?
 到【灌水乐园】发言


