


 本文介绍使用Apache POI库在Java中设置Excel单元格样式的方法,特别是如何仅更改部分单元格的字体颜色而不影响其他样式属性。通过示例代码演示如何正确地克隆样式和字体以实现精确的样式定制。
问题描述
最近项目使用POI按模板导出Excel,需要设置单元格的字体为红色,但只设置一部分或者某一个. 这里遇到一个容易踩坑的点,所以记录一下,希望能让更多的人少走弯路.
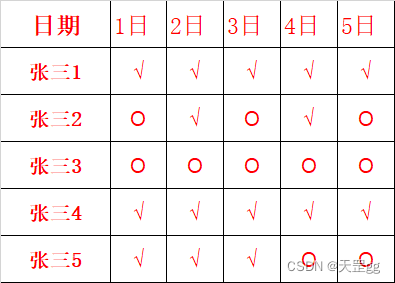
场景很常见:我只想修改一部分单元格字体为红色。按照正常逻辑,心想这还不简单吗?得到Cell.CellStyle, 并对其Font设置color,看起来是那么湿滑,红色是生效了,但。。。没想到全红了。Why?
- 我期望的效果:

- 实际的效果:
- 问题的代码是这样写的: 我相信这应该是
99%的人的逻辑:- 获取要修改的cell.CellStyle和Font
- 设置cell.Font颜色为红色:IndexedColors.RED.getIndex()
- 将修改设置回cell.Font和CellStyle
for (Cell cell : redColorCellList) {
    CellStyle cellStyle = cell.getCellStyle();
    Font font = workbook.getFontAt(cellStyle.getFontIndexAsInt());
    font.setColor(IndexedColors.RED.getIndex());
    cellStyle.setFont(font);
    cell.setCellStyle(cellStyle);
}
必备基础:设置新创建的单元格样式
在解决这个问题之前,我们有必要先学习一下新创建的单元格是如何设置样式的.
- 新建 excel 和 sheet
// 新建 excel
Workbook workbook = new XSSFWorkbook();
// 新建一个 sheet
Sheet sheet = workbook.createSheet();
- 创建单元格样式:
CellStyle cellStyle = workbook.createCellStyle();
- 设置样式的背景填充
// 背景色: 浅黄色
cellStyle.setFillForegroundColor(IndexedColors.LIGHT_YELLOW.getIndex());
// 背景色填充样式:单色填充
cellStyle.setFillPattern(FillPatternType.SOLID_FOREGROUND);
- 设置样式的布局
// 水平布局:居中
cellStyle.setAlignment(HorizontalAlignment.CENTER);
// 垂直布局:居中
cellStyle.setVerticalAlignment(VerticalAlignment.CENTER);
- 设置样式的边框
// 上薄边框
cellStyle.setBorderTop(BorderStyle.THIN);
// 下厚边框
cellStyle.setBorderBottom(BorderStyle.DOUBLE);
// 左薄边框
cellStyle.setBorderLeft(BorderStyle.THIN);
// 右厚边框
cellStyle.setBorderRight(BorderStyle.DOUBLE);

// 下边框:白色
cellStyle.setBottomBorderColor(IndexedColors.WHITE.getIndex());
// 右边框:绿色
cellStyle.setRightBorderColor(IndexedColors.GREEN.getIndex());
- 设置文本自动换行
// 文本自动换行
cellStyle.setWrapText(true);
- 设置字体,
设置字体颜色的关键代码:font.setColor(IndexedColors.BLACK.getIndex());
IndexedColors里常用颜色都有,很多颜色随意挑选…
Font font = workbook.createFont();
// 加粗
font.setBold(false);
// 字体
font.setFontName("微软雅黑");
// 字体高度
font.setFontHeightInPoints((short) 14);
// 字体颜色:黑色
font.setColor(IndexedColors.BLACK.getIndex());
cellStyle.setFont(font);
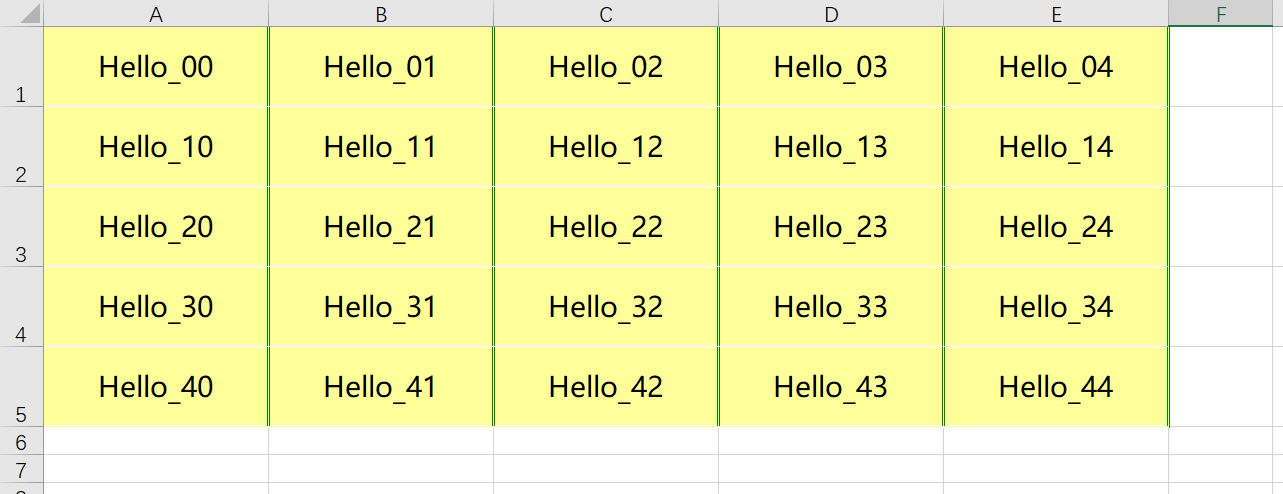
- demo创建一个5行5列的表格:
for (int i = 0; i < 5 ; i++) {
    // 设置列宽
    sheet.setColumnWidth(i, 30 * 160);
    // 新增一行 row
    Row row = sheet.createRow(i);
    row.setHeightInPoints(40);
    for (int j = 0; j < 5; j++) {
        // 新增一个单元格 cell
        Cell cell = row.createCell(j);
        cell.setCellValue("Hello_" + i + j);
        cell.setCellStyle(cellStyle);
    }
}
- 保存excel文件
FileOutputStream outputStream = new FileOutputStream("D:\\poi-excel-style-demo.xlsx");
workbook.write(outputStream);
outputStream.flush();
outputStream.close();
workbook.close();
- 新创建的单元格样式效果:
解决方案:修改单元格颜色
基于上面我们知道:如果是设置新创建的cell的样式,我们直接新建cellStyle并设置 cell.setCellStyle(cellStyle); 即可,
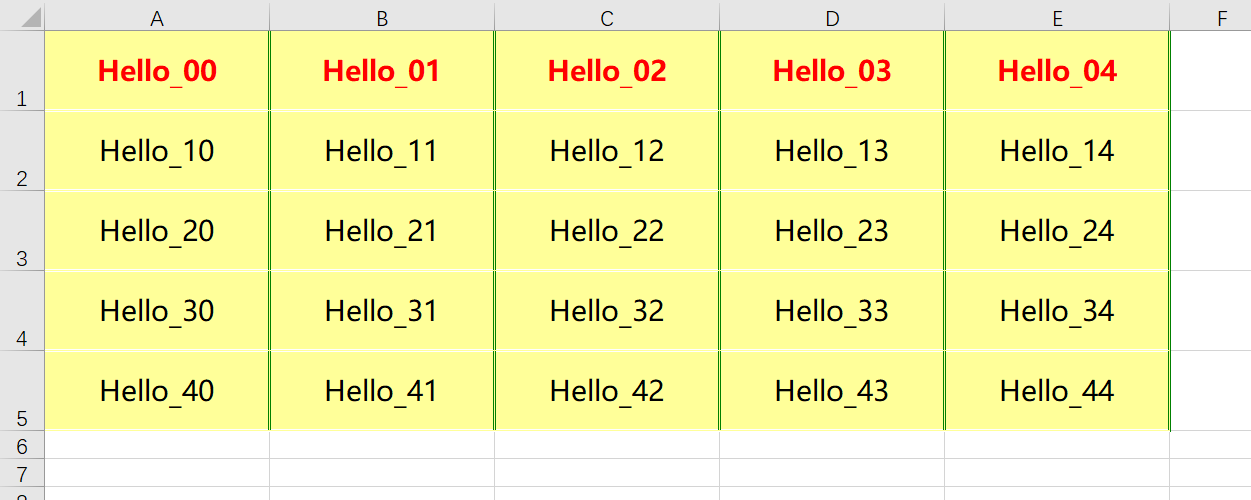
回到我遇到的问题,因为我们的项目需求是按模板导出,原有的样式不能改,只是将单元格的字体颜色修改一下,那么我们该如何做呢?
还是基于上面的代码,我们只修改第一行 为 红色字体,并加粗,其它样式不变,先上效果:
这里关键点有两步,也是容易踩坑的点:
- 克隆Style:新建的redCellStyle要从现有的cell拷贝cellStyle:redCellStyle.cloneStyleFrom(cell.getCellStyle());
- 克隆Font:新建的redFont要从现有的cellStyle拷贝font:这个POI没有封装,只能手动拷贝。。。
实现代码如下:
// 设置第一行为红色,并加粗
CellStyle redCellStyle = null;
for (int m = 0; m < 5; m++) {
    Cell cell = sheet.getRow(0).getCell(m);
    if (redCellStyle == null) {
        redCellStyle = workbook.createCellStyle();
        // 重点:从现有样式克隆style,只修改Font,其它style不变
        redCellStyle.cloneStyleFrom(cell.getCellStyle());
        // 获取原有字体
        Font oldFont = workbook.getFontAt(redCellStyle.getFontIndexAsInt());
        // 创建新字体
        Font redFont = workbook.createFont();
        // 重点:保留原字体样式
        redFont.setFontName(oldFont.getFontName()); // 保留原字体
        redFont.setFontHeightInPoints(oldFont.getFontHeightInPoints()); // 保留原字体高度
        redFont.setBold(true); // 加粗
        redFont.setColor(IndexedColors.RED.getIndex());  // 字体颜色:红色
        // 设置红色字体
        redCellStyle.setFont(redFont);
    }
    // 设置样式
    cell.setCellStyle(redCellStyle);
}
那么我也做了相应的封装,让修改Font方法变得更通用。如果对你有帮助,请点赞+收藏+关注,你的支持是我持续分享的动力~
public static void setCellFont(List<Cell> cellList, FontParam fontParam) {
        if (CollectionUtils.isEmpty(cellList) || fontParam == null) {
            return;
        }
        CellStyle cellStyle = null;
        for (Cell cell : cellList) {
            if (cellStyle == null) {
                Workbook workbook = cell.getSheet().getWorkbook();
                cellStyle = workbook.createCellStyle();
                // 从现有样式克隆style,只修改Font,其它style不变
                cellStyle.cloneStyleFrom(cell.getCellStyle());
                // 获取原有字体
                Font oldFont = workbook.getFontAt(cellStyle.getFontIndexAsInt());
                // 创建新字体
                Font newFont = workbook.createFont();
                newFont.setFontName(fontParam.getFontName() == null? oldFont.getFontName(): fontParam.getFontName());
                newFont.setFontHeightInPoints(fontParam.getFontHeightInPoints() == null? oldFont.getFontHeightInPoints(): fontParam.getFontHeightInPoints());
                newFont.setBold(fontParam.getBold() == null? oldFont.getBold(): fontParam.getBold());
                newFont.setItalic(fontParam.getItalic() == null? oldFont.getItalic(): fontParam.getItalic());
                newFont.setStrikeout(fontParam.getStrikeout() == null? oldFont.getStrikeout(): fontParam.getStrikeout());
                newFont.setUnderline(fontParam.getUnderline() == null? oldFont.getUnderline(): fontParam.getUnderline());
                newFont.setColor(fontParam.getColor() == null? oldFont.getColor(): fontParam.getColor());
                // 设置字体
                cellStyle.setFont(newFont);
            }
            // 设置样式
            cell.setCellStyle(cellStyle);
        }
    }

    /**
     * 字体参数类,为null代表不设置
     */
    @Data
    @Builder
    @NoArgsConstructor
    @AllArgsConstructor
    public static class FontParam {

        /**
         * 字体名
         */
        private String fontName;
        /**
         * 字体像素高度
         */
        private Short fontHeightInPoints;
        /**
         * 是否加粗
         */
        private Boolean bold;
        /**
         * 是否斜体
         */
        private Boolean italic;
        /**
         * 是否删除线
         */
        private Boolean strikeout;
        /**
         * 下划线类型
         * @see #U_NONE
         * @see #U_SINGLE
         * @see #U_DOUBLE
         * @see #U_SINGLE_ACCOUNTING
         * @see #U_DOUBLE_ACCOUNTING
         */
        private Byte underline;
        /**
         * 字体颜色
         */
        private Short color;

        /**
         * not underlined
         */
        public final static byte U_NONE = 0;

        /**
         * single (normal) underline
         */
        public final static byte U_SINGLE = 1;

        /**
         * double underlined
         */
        public final static byte U_DOUBLE = 2;

        /**
         * accounting style single underline
         */
        public final static byte U_SINGLE_ACCOUNTING = 0x21;

        /**
         * accounting style double underline
         */
        public final static byte U_DOUBLE_ACCOUNTING = 0x22;
    }


 7550
7550

 被折叠的 条评论
为什么被折叠?
被折叠的 条评论
为什么被折叠?
 到【灌水乐园】发言


