


前言
在一些特殊的场景中(比如低代码、减少小程序包体积、类似于APP的热更新),我们需要从服务端动态加载.vue文件,然后将动态加载的远程vue组件渲染到我们的项目中。今天这篇文章我将带你学会,在vue3中如何去动态加载远程组件。
defineAsyncComponent异步组件
想必聪明的你第一时间就想到了defineAsyncComponent方法。我们先来看看官方对defineAsyncComponent方法的解释:
定义一个异步组件,它在运行时是懒加载的。参数可以是一个异步加载函数,或是对加载行为进行更具体定制的一个选项对象。
defineAsyncComponent方法的返回值是一个异步组件,我们可以像普通组件一样直接在template中使用。和普通组件的区别是,只有当渲染到异步组件时才会调用加载内部实际组件的函数。
我们先来简单看看使用defineAsyncComponent方法的例子,代码如下:
import { defineAsyncComponent } from 'vue'

const AsyncComp = defineAsyncComponent(() => {
  return new Promise((resolve, reject) => {
    // ...从服务器获取组件
    resolve(/* 获取到的组件 */)
  })
})
// ... 像使用其他一般组件一样使用 `AsyncComp`defineAsyncComponent方法接收一个返回 Promise 的回调函数,在Promise中我们可以从服务端获取vue组件的code代码字符串。然后使用resolve(/* 获取到的组件 */)将拿到的组件传给defineAsyncComponent方法内部处理,最后和普通组件一样在template中使用AsyncComp组件。
从服务端获取远程组件
有了defineAsyncComponent方法后事情从表面上看着就很简单了,我们只需要写个方法从服务端拿到vue文件的code代码字符串,然后在defineAsyncComponent方法中使用resolve拿到的vue组件。
第一步就是本地起一个服务器,使用服务器返回我们的vue组件。这里我使用的是http-server,安装也很简单:
npm install http-server -g使用上面的命令就可以全局安装一个http服务器了。
接着我在项目的public目录下新建一个名为remote-component.vue的文件,这个vue文件就是我们想从服务端加载的远程组件。remote-component.vue文件中的代码如下:
<template>
  <p>我是远程组件</p>
  <p>
    当前远程组件count值为:<span class="count">{{ count }}</span>
  </p>
  <button @click="count++">点击增加远程组件count</button>
</template>

<script setup>
import { ref } from "vue";
const count = ref(0);
</script>

<style>
.count {
  color: red;
}
</style>从上面的代码可以看到远程vue组件和我们平时写的vue代码没什么区别,有template、ref响应式变量、style样式。
接着就是在终端执行http-server ./public --cors命令启动一个本地服务器,服务器默认端口为8080。但是由于我们本地起的vite项目默认端口为5173,所以为了避免跨域这里需要加--cors。./public的意思是指定当前目录的public文件夹。
启动了一个本地服务器后,我们就可以使用 http://localhost:8080/remote-component.vue链接从服务端访问远程组件啦,如下图:
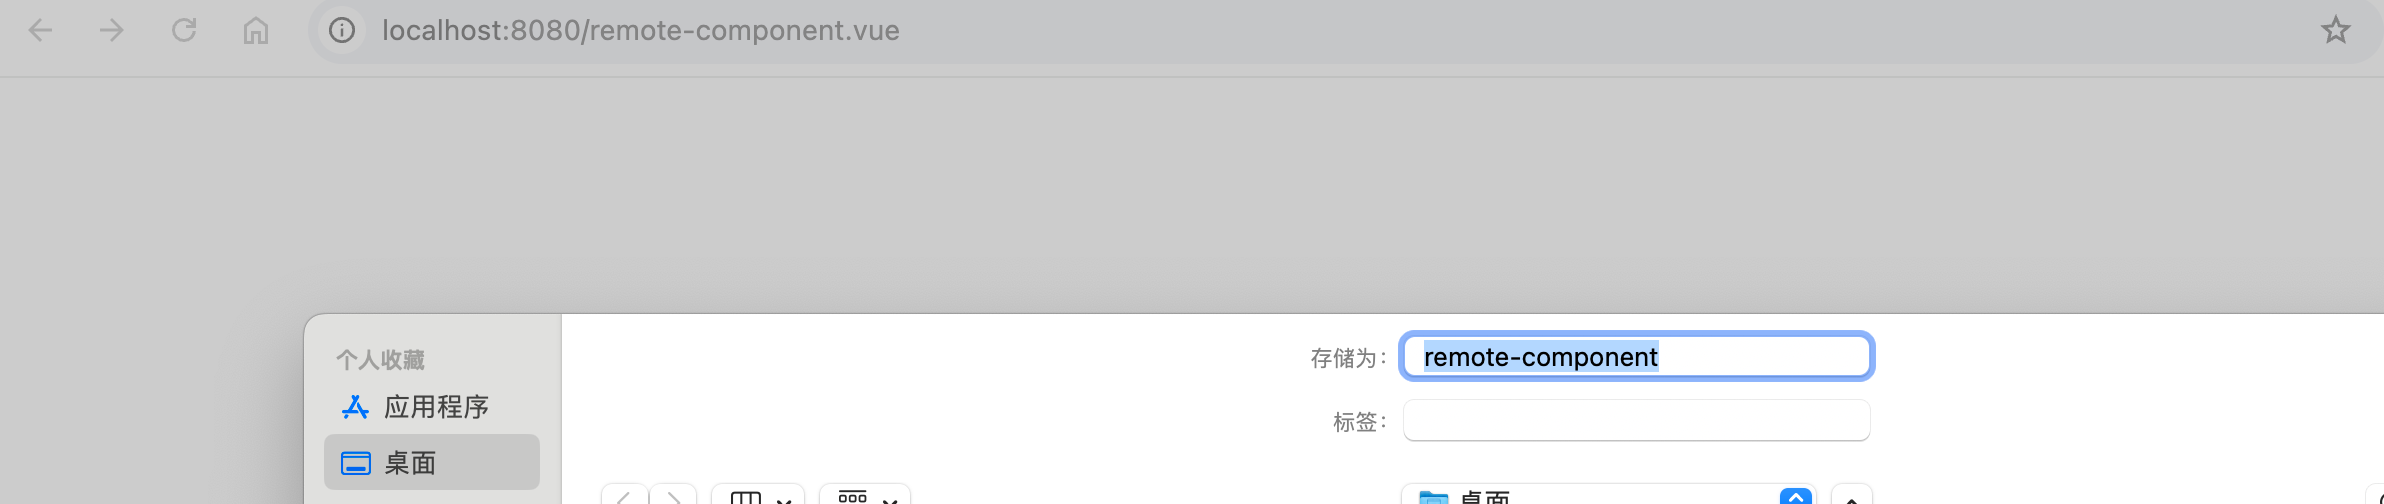
从上图中可以看到在浏览器中访问这个链接时触发了下载远程vue组件的操作。
defineAsyncComponent加载远程组件
const RemoteChild = defineAsyncComponent(async () => {
  return new Promise(async (resolve) => {
    const res = await fetch("http://localhost:8080/remote-component.vue");
    const code = await res.text();
    console.log("code", code);
    resolve(code);
  });
});接下来我们就是在defineAsyncComponent方法接收的 Promise 的回调函数中使用fetch从服务端拿到远程组件的code代码字符串应该就行啦,代码如下:
同时使用console.log("code", code)打个日志看一下从服务端过来的vue代码。
上面的代码看着已经完美实现动态加载远程组件了,结果不出意外在浏览器中运行时报错了。如下图:
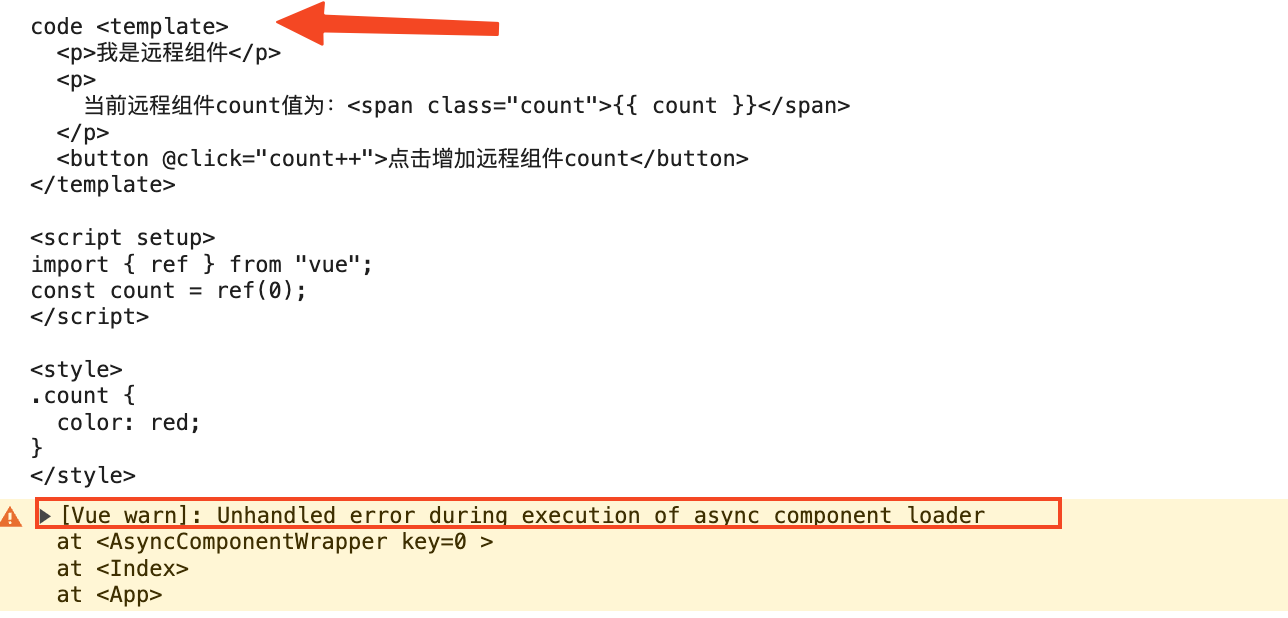
在上图中可以看到从服务端拿到的远程组件的代码和我们的remote-component.vue的源代码是一样的,但是为什么会报错呢?
这里的报错信息显示加载异步组件报错,还记得我们前面说过的defineAsyncComponent方法是在回调中resolve(/* 获取到的组件 */)。而我们这里拿到的code是一个组件吗?
我们这里拿到的code只是组件的源代码,也就是常见的单文件组件SFC。而defineAsyncComponent中需要的是由源代码编译后拿的的vue组件对象,我们将组件源代码丢给defineAsyncComponent当然会报错了。
看到这里有的小伙伴有疑问了,我们平时在父组件中import子组件不是也一样在template就直接使用了吗?
子组件local-child.vue代码:
<template>
  <p>我是本地组件</p>
  <p>
    当前本地组件count值为:<span class="count">{{ count }}</span>
  </p>
  <button @click="count++">点击增加本地组件count</button>
</template>

<script setup>
import { ref } from "vue";
const count = ref(0);
</script>

<style>
.count {
  color: red;
}
</style>
父组件代码:
<template>
  <LocalChild />
</template>

<script setup lang="ts">
import LocalChild from "./local-child.vue";
console.log("LocalChild", LocalChild);
</script>
上面的import导入子组件的代码写了这么多年你不觉得怪怪的吗?
按照常理来说要import导入子组件,那么在子组件里面肯定要写export才可以,但是在子组件local-child.vue中我们没有写任何关于export的代码。
答案是在父组件import导入子组件触发了vue-loader或者@vitejs/plugin-vue插件的钩子函数,在钩子函数中会将我们的源代码单文件组件SFC编译成一个普通的js文件,在js文件中export default导出编译后的vue组件对象。
这里使用console.log("LocalChild", LocalChild)来看看经过编译后的vue组件对象是什么样的,如下图:

从上图可以看到经过编译后的vue组件是一个对象,对象中有render、setup等方法。
defineAsyncComponent方法接收的组件就是这样的vue组件对象,但是我们前面却是将vue组件源码丢给他,当然会报错了。
最终解决方案vue3-sfc-loader
从服务端拿到远程vue组件源码后,我们需要一个工具将拿到的vue组件源码编译成vue组件对象。幸运的是优秀的vue不光暴露出一些常见的API,而且还将一些底层API给暴露了出来。比如在@vue/compiler-sfc包中就暴露出来了compileTemplate、compileScript、compileStyleAsync等方法。
如果你看过我写的 vue3编译原理揭秘 开源电子书,你应该对这几个方法觉得很熟悉。
-
compileTemplate方法:用于处理单文件组件SFC中的template模块。 -
compileScript方法:用于处理单文件组件SFC中的script模块。 -
compileStyleAsync方法:用于处理单文件组件SFC中的style模块。
而vue3-sfc-loader包的核心代码就是调用@vue/compiler-sfc包的这些方法,将我们的vue组件源码编译为想要的vue组件对象。下面这个是改为使用vue3-sfc-loader包后的代码,如下:
import * as Vue from "vue";
import { loadModule } from "vue3-sfc-loader";

const options = {
  moduleCache: {
    vue: Vue,
  },
  async getFile(url) {
    const res = await fetch(url);
    const code = await res.text();
    return code;
  },
  addStyle(textContent) {
    const style = Object.assign(document.createElement("style"), {
      textContent,
    });
    const ref = document.head.getElementsByTagName("style")[0] || null;
    document.head.insertBefore(style, ref);
  },
};

const RemoteChild = defineAsyncComponent(async () => {
  const res = await loadModule(
    "http://localhost:8080/remote-component.vue",
    options
  );
  console.log("res", res);
  return res;
});loadModule函数接收的第一个参数为远程组件的URL,第二个参数为options。在options中有个getFile方法,获取远程组件的code代码字符串就是在这里去实现的。
我们在终端来看看经过loadModule函数处理后拿到的vue组件对象是什么样的,如下图:
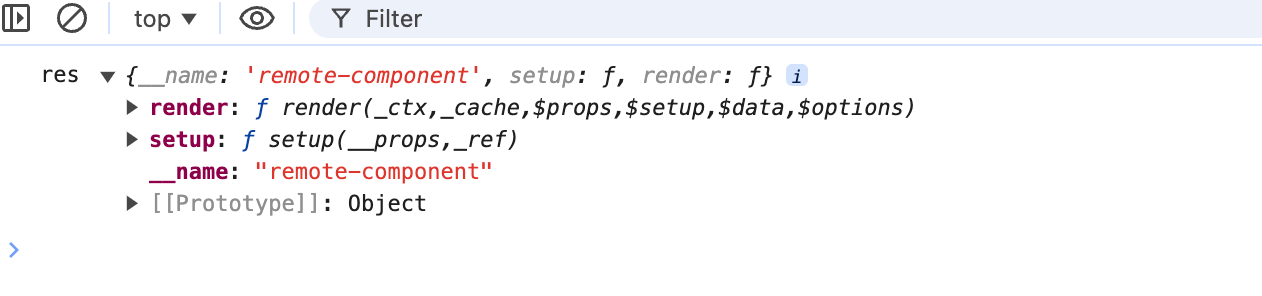
从上图中可以看到经过loadModule函数的处理后就拿到来vue组件对象啦,并且这个组件对象上面也有熟悉的render函数和setup函数。其中render函数是由远程组件的template模块编译而来的,setup函数是由远程组件的script模块编译而来的。
看到这里你可能有疑问,远程组件的style模块怎么没有在生成的vue组件对象上面有提现呢?
答案是style模块编译成的css不会塞到vue组件对象上面去,而是单独通过options上面的addStyle方法传回给我们了。addStyle方法接收的参数textContent的值就是style模块编译而来css字符串,在addStyle方法中我们是创建了一个style标签,然后将得到的css字符串插入到页面中。
完整父组件代码如下:
<template>
  <LocalChild />
  <div class="divider" />
  <button @click="showRemoteChild = true">加载远程组件</button>
  <RemoteChild v-if="showRemoteChild" />
</template>

<script setup lang="ts">
import { defineAsyncComponent, ref, onMounted } from "vue";
import * as Vue from "vue";
import { loadModule } from "vue3-sfc-loader";
import LocalChild from "./local-child.vue";

const showRemoteChild = ref(false);

const options = {
  moduleCache: {
    vue: Vue,
  },
  async getFile(url) {
    const res = await fetch(url);
    const code = await res.text();
    return code;
  },
  addStyle(textContent) {
    const style = Object.assign(document.createElement("style"), {
      textContent,
    });
    const ref = document.head.getElementsByTagName("style")[0] || null;
    document.head.insertBefore(style, ref);
  },
};

const RemoteChild = defineAsyncComponent(async () => {
  const res = await loadModule(
    "http://localhost:8080/remote-component.vue",
    options
  );
  console.log("res", res);
  return res;
});
</script>

<style scoped>
.divider {
  background-color: red;
  width: 100vw;
  height: 1px;
  margin: 20px 0;
}
</style>在上面的完整例子中,首先渲染了本地组件LocalChild。然后当点击“加载远程组件”按钮后再去渲染远程组件RemoteChild。我们来看看执行效果,如下图:
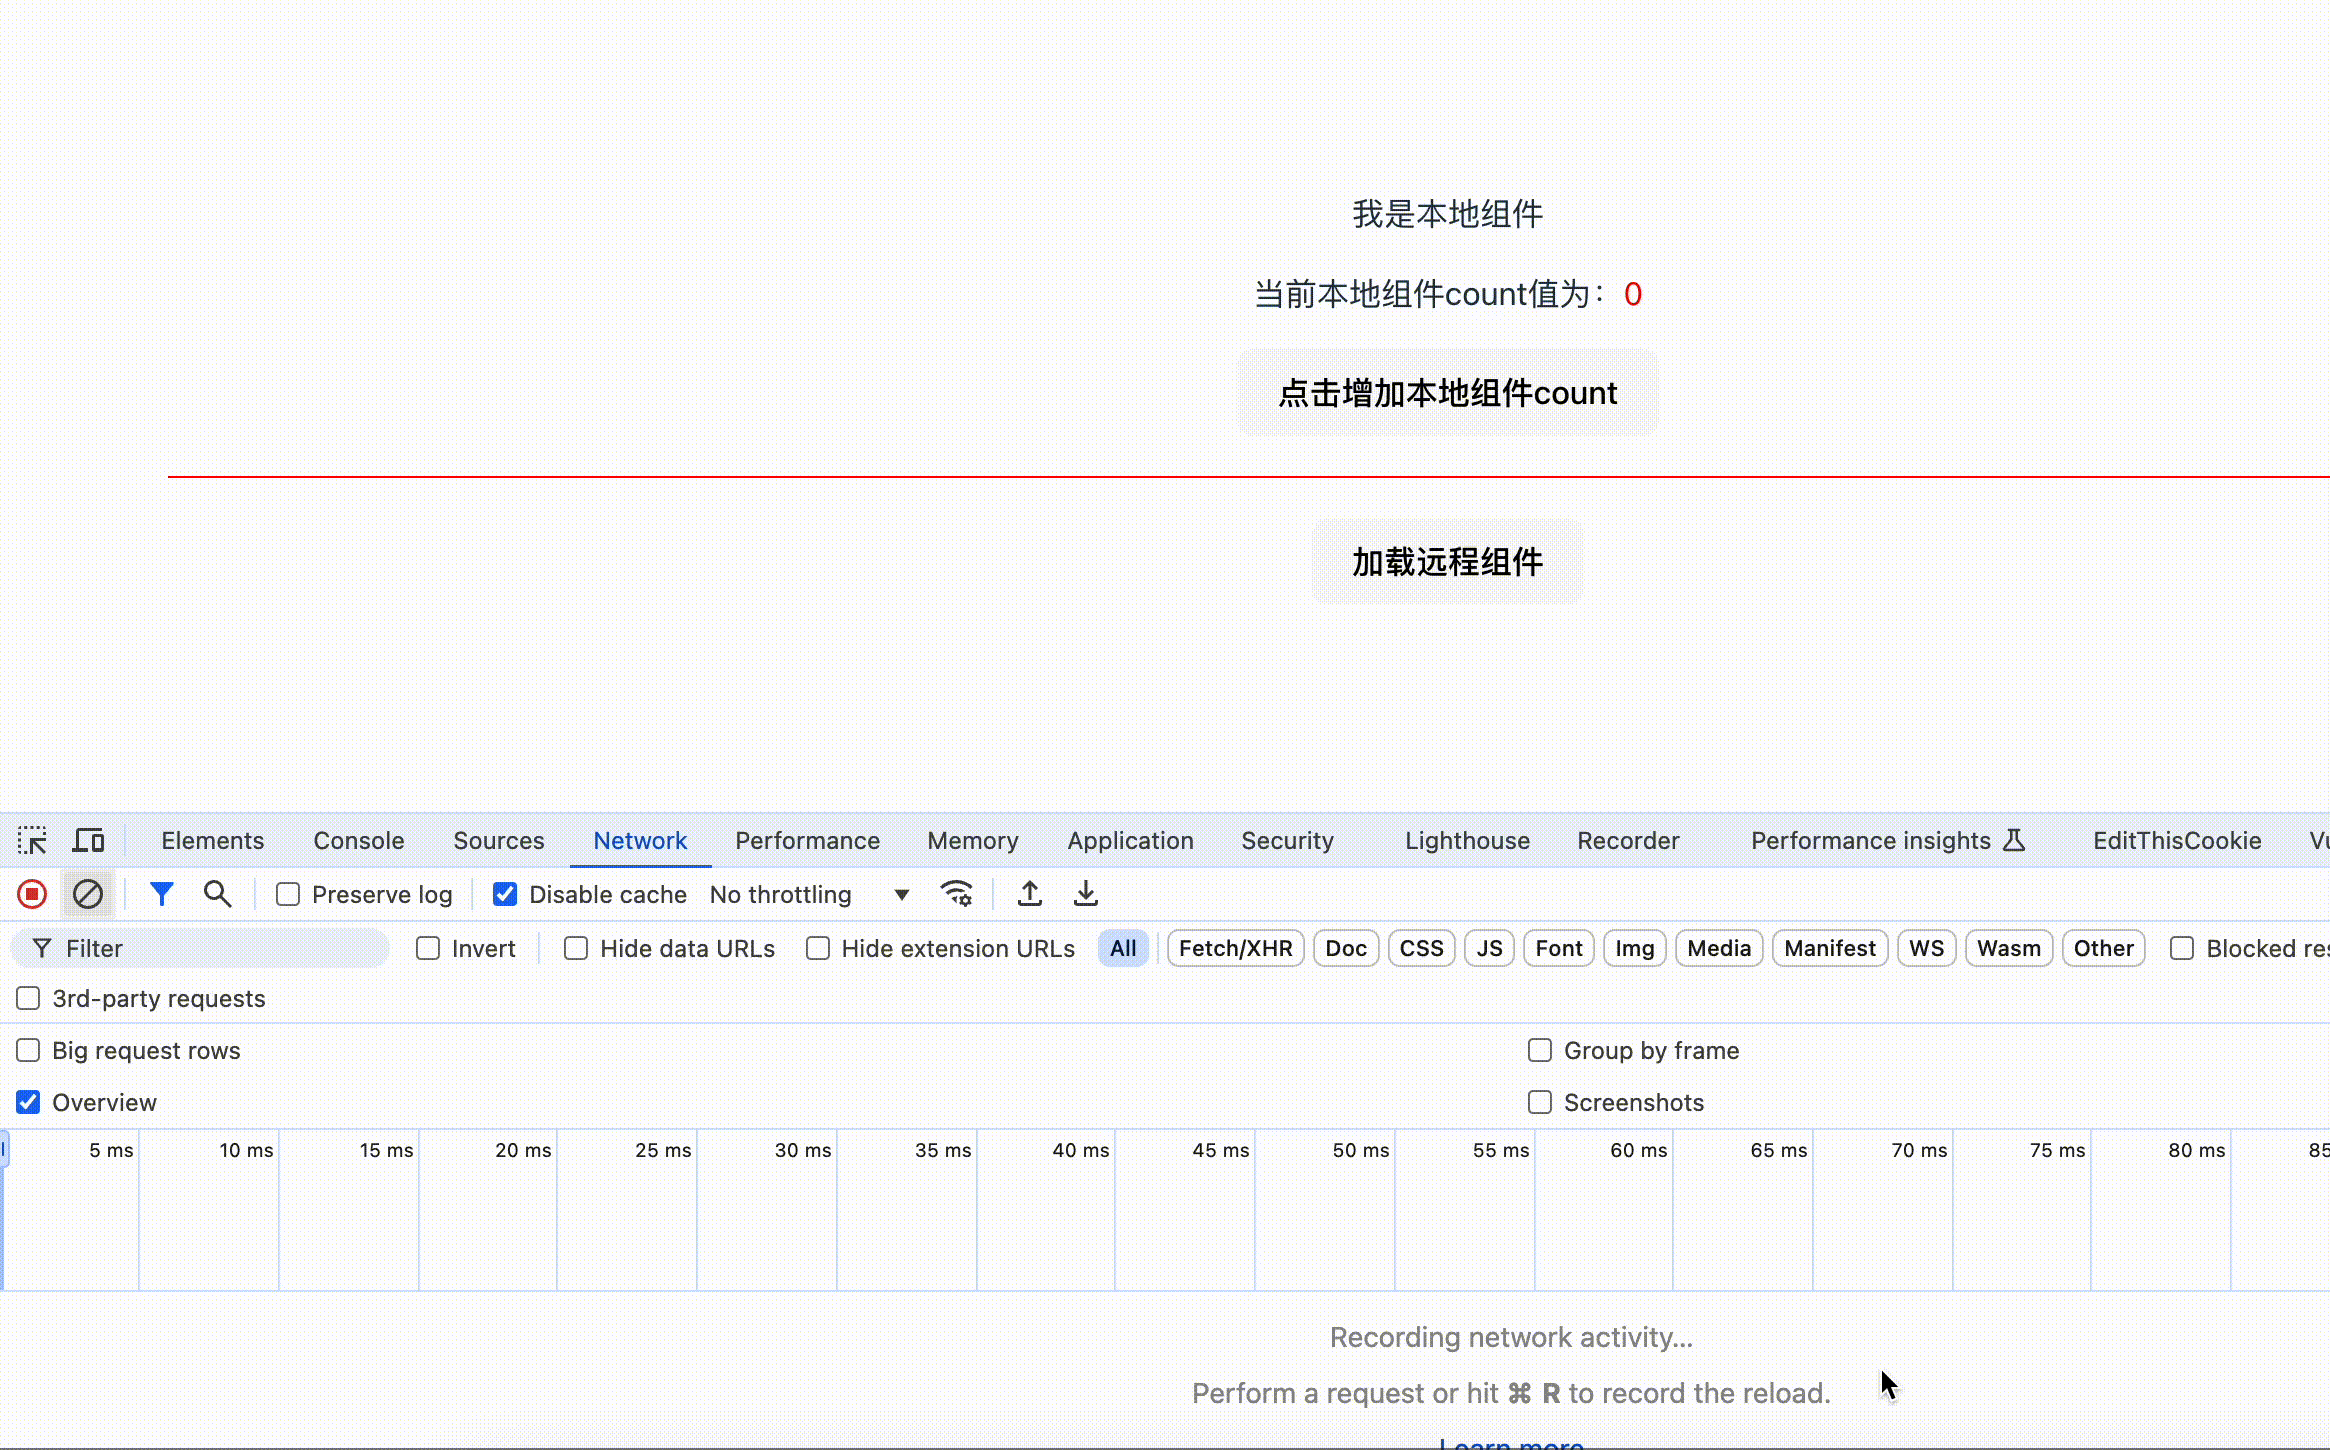
从上面的gif图中可以看到,当我们点击“加载远程组件”按钮后,在network中才去加载了远程组件remote-component.vue。并且将远程组件渲染到了页面上后,通过按钮的点击事件可以看到远程组件的响应式依然有效。
vue3-sfc-loader同时也支持在远程组件中去引用子组件,你只需在options额外配置一个pathResolve就行啦。pathResolve方法配置如下:
const options = {
  pathResolve({ refPath, relPath }, options) {
    if (relPath === ".")
      // self
      return refPath;

    // relPath is a module name ?
    if (relPath[0] !== "." && relPath[0] !== "/") return relPath;

    return String(
      new URL(relPath, refPath === undefined ? window.location : refPath)
    );
  },
  // getFile方法
  // addStyle方法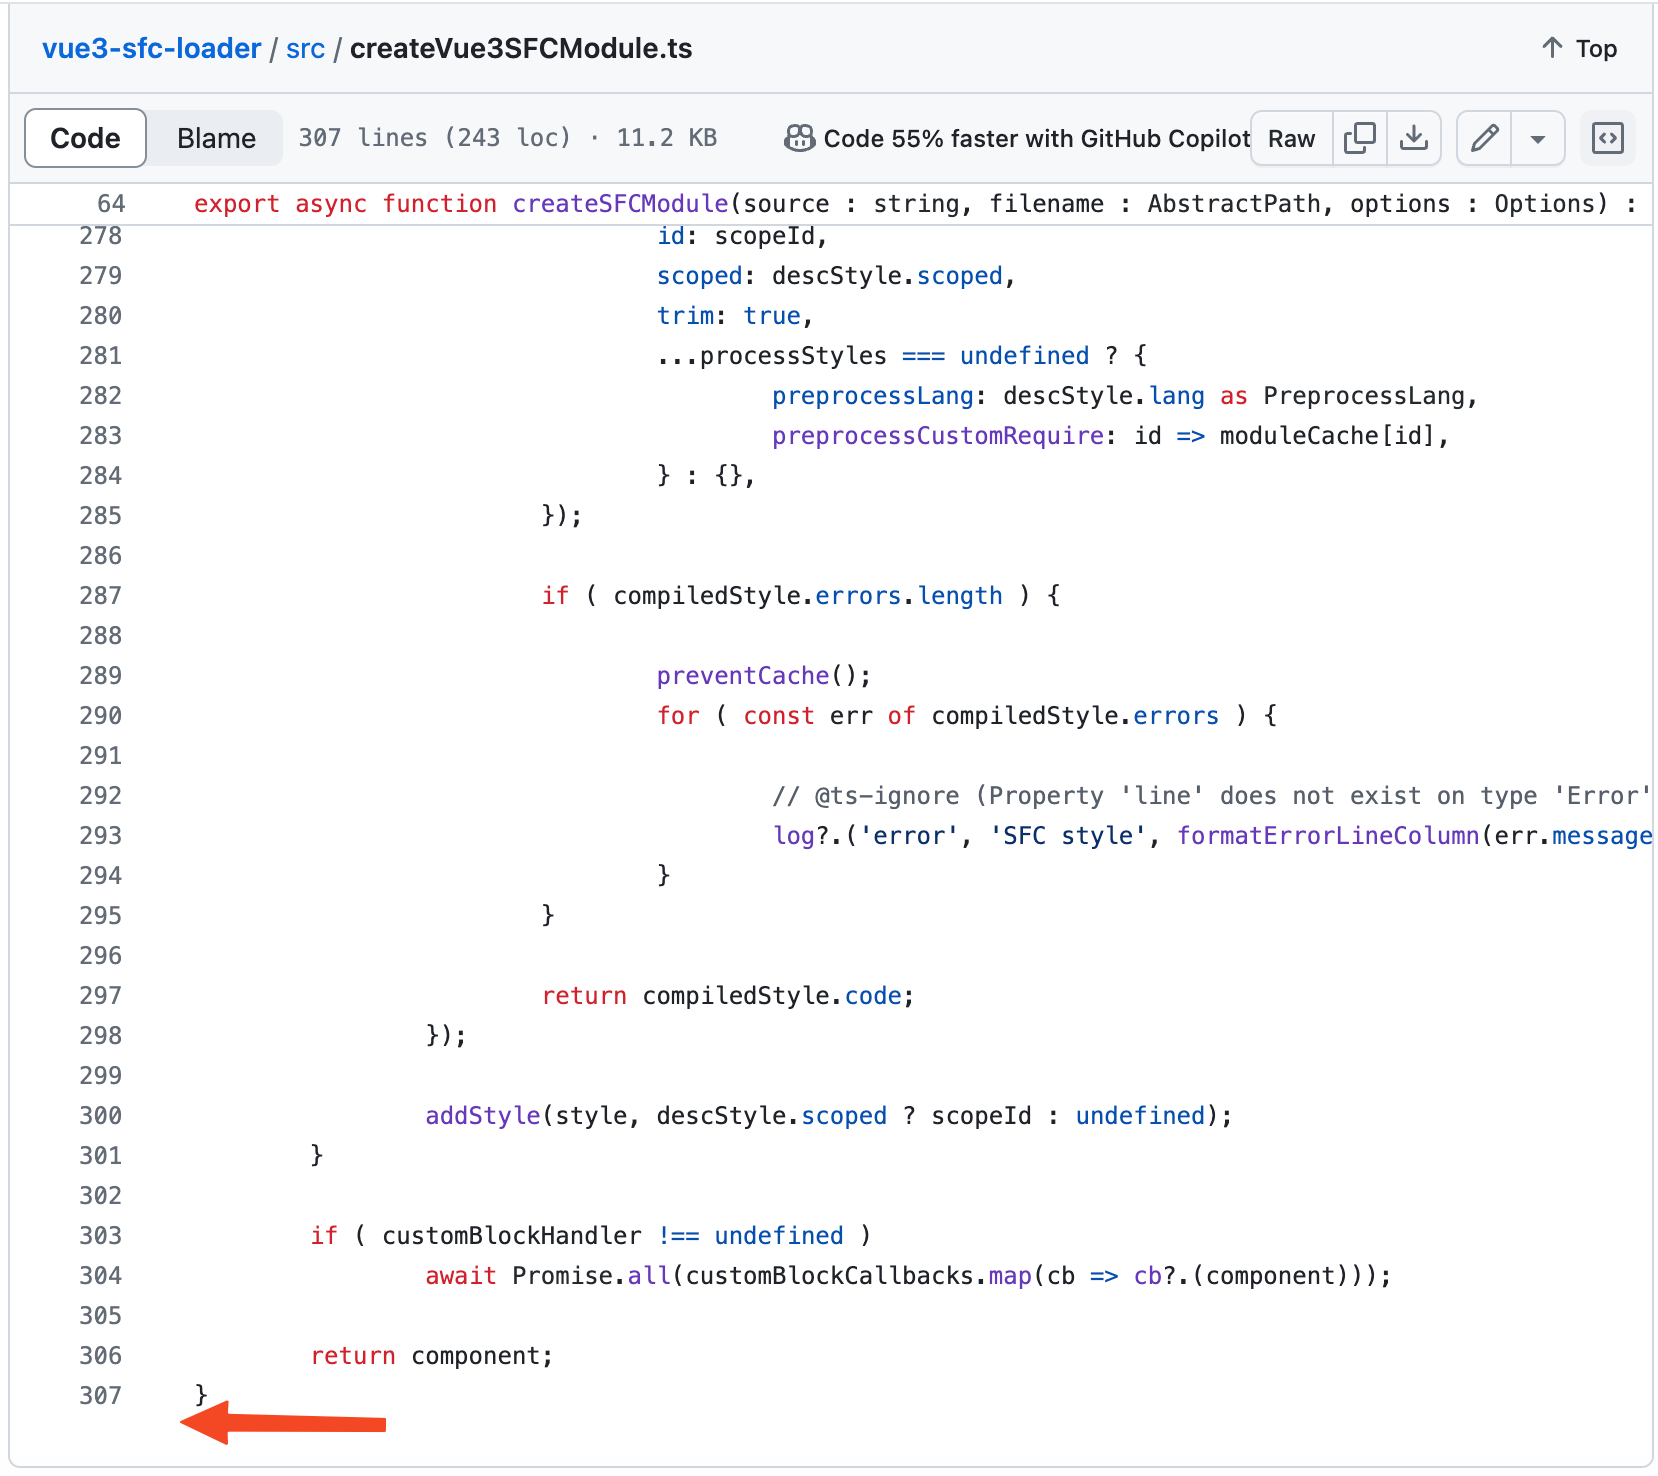
}其实vue3-sfc-loader包的核心代码就300行左右,主要就是调用vue暴露出来的一些底层API。如下图:
总结
这篇文章讲了在vue3中如何从服务端加载远程组件,首先我们需要使用defineAsyncComponent方法定义一个异步组件,这个异步组件是可以直接在template中像普通组件一样使用。
但是由于defineAsyncComponent接收的组件必须是编译后的vue组件对象,而我们从服务端拿到的远程组件就是一个普通的vue文件,所以这时我们引入了vue3-sfc-loader包。vue3-sfc-loader包的作用就是在运行时将一个vue文件编译成vue组件对象,这样我们就可以实现从服务端加载远程组件了。
文章转载自:前端欧阳


 486
486

 被折叠的 条评论
为什么被折叠?
被折叠的 条评论
为什么被折叠?
 到【灌水乐园】发言


