


图例标记由图标和标签组成。QChart中QLegendMarker类可用于访问图例中的标记,因此可以对图例标记进行交互和控制。
QLegendMarker
QLegendMarker类是一个抽象对象,可用于访问图例中的标记。图例标记由图标和标签组成。图标颜色对应于用于绘制系列的颜色,标签显示系列的名称(或饼图系列的切片标签或柱状系列的条形标签)。图例标记始终与一个系列,切片或柱状系列集相关。
QLegendMarker常用函数:
- setBrush(self, brush):将用于填充图标的画刷设置为brush。
- setFont(self, font):将标签的字体设置为font。
- setLabel(self, label):将标记的标签设置为label。
- setLabelBrush(self, brush):将用于绘制标签的画刷设置为brush。
- setPen(self, pen):将用于绘制图标轮廓的画笔设置为pen。
- setShape(self, shape):设置图例标记的图形形状,shape参数可取值为枚举量QLegend. LegendMarkerType中的值。
- setVisible(self, visible): 设置图例标记是否可见。
枚举量QLegend. LegendMarkerType控制不同图表序列的标记样式:
- QLegendMarker.LegendMarkerTypeArea(0): 面积系列的图例标记。
- QLegendMarker.LegendMarkerTypeBar (1): 柱状图集的图例标记。
- QLegendMarker.LegendMarkerTypePie (2): 饼图的图例标记。
- QLegendMarker.LegendMarkerTypeXY (3): 线,样条曲线或散点图系列的图例标记。
- QLegendMarker.LegendMarkerTypeBoxPlot (4): 箱形图系列的图例标记。
- QLegendMarker.LegendMarkerTypeCandlestick (5): 烛台图系列的图例标记。
QLegendMarker常用信号:
- brushChanged(self):图例标记的画刷已更改时,将发出此信号。
- fontChanged(self): 图例标记的(标签)字体已更改时,将发出此信号。
- labelBrushChanged(self): 图例标记的标签画刷已更改时,将发出此信号。
- labelChanged(self):图例标记的标签已更改时,将发出此信号。
- penChanged(self):图例标记的画笔已更改时,将发出此信号。
- shapeChanged(self):图例标记的形状已更改时,将发出此信号。
- clicked(self):单击图例标记时,将发出此信号。
- hovered(self, status):当鼠标悬停在图例标记上时,将发出此信号。当鼠标移到标记上时,state将变为True,而当鼠标再次移开时,state将变为False。
- visibleChanged(self):图例标记的可见性已更改时,将发出此信号。
图例标记示例
在此示例中,我们创建一个使用QLegendMarker单击信号显示/隐藏图表中相应序列的应用程序。完整代码如下:
import sys,math
from PyQt5.QtCore import Qt, QPointF, pyqtSignal
from PyQt5.QtGui import QPainter, QBrush, QColor, QPen
from PyQt5.QtWidgets import (QApplication, QMainWindow)
from PyQt5.QtChart import QChart, QChartView, QLineSeries, QLegendMarker

class DemoLegendMarker(QMainWindow):
    def __init__(self, parent=None):
        super(DemoLegendMarker, self).__init__(parent)

         # 设置窗口标题
        self.setWindowTitle('实战 Qt for Python: QChart图例标记演示')
        # 设置窗口大小
        self.resize(720, 480)

        self.initUi()

    def initUi(self):
        #创建图表和图标视图
        self.chart = QChart()
        chartView = QChartView(self.chart)

        self.series = []

        #添加一些曲线
        self.addSeries()
        self.addSeries()
        self.addSeries()
        self.addSeries()

        self.connectMarkers()

        #设置标题和显示图例
        self.chart.setTitle('图例标记示例(点击图例)')
        self.chart.legend().setVisible(True)
        self.chart.legend().setAlignment(Qt.AlignBottom)

        chartView.setRenderHint(QPainter.Antialiasing)
        self.setCentralWidget(chartView)

    def addSeries(self):
        line = QLineSeries()
        self.series.append(line)

        line.setName('line' + str(len(self.series)))

        #构建一些正弦波数据
        data = []
        offset = len(self.chart.series())
        for i in range(360):
            x = offset * 20 + i
            data.append(QPointF(i, math.sin(x * math.pi / 180)))

        line.append(data)
        self.chart.addSeries(line)

        if len(self.series) == 1:
            self.chart.createDefaultAxes()

    '''
    def removeSeries(self):
        #从图表中移除最后一条曲线
        if len(self.series) > 0 :
            line = self.series[-1]
            self.chart.removeSeries(line)
            self.series.remove(line)
            del line
    '''

    def connectMarkers(self):
        #连接所有标记到控制句柄
        markers = self.chart.legend().markers()
        for marker in markers:
            #断开可能的现有连接,以避免多个连接????
            #marker.clicked.disconnect(self.handleMarkerClicked)
            marker.clicked.connect(self.handleMarkerClicked)
            pass

    def handleMarkerClicked(self):
        marker = self.sender()
        if marker.type() == QLegendMarker.LegendMarkerTypeXY:
            #切换曲线的可见属性
            marker.series().setVisible(not marker.series().isVisible())
            #把图例标记设置为可见,因为隐藏曲线时同时也会隐藏图例标记,但这里我们希望显示出来。
            marker.setVisible(True)

            #=== 半透明设置 ===#
            alpha = 1.0

            #如果曲线不可见,则需要定义标记的尺寸大小
            if not marker.series().isVisible():
                alpha = 0.5

            brush = marker.labelBrush()
            color = brush.color()
            color.setAlphaF(alpha)
            brush.setColor(color)
            marker.setLabelBrush(brush)

            brush = marker.brush()
            color = brush.color()
            color.setAlphaF(alpha)
            brush.setColor(color)
            marker.setBrush(brush)

            pen = marker.pen()
            color = pen.color()
            color.setAlphaF(alpha)
            pen.setColor(color)
            marker.setPen(pen)


if __name__ == '__main__':
    app = QApplication(sys.argv)
    window = DemoLegendMarker()
    window.show()
    sys.exit(app.exec())
运行结果如下图:
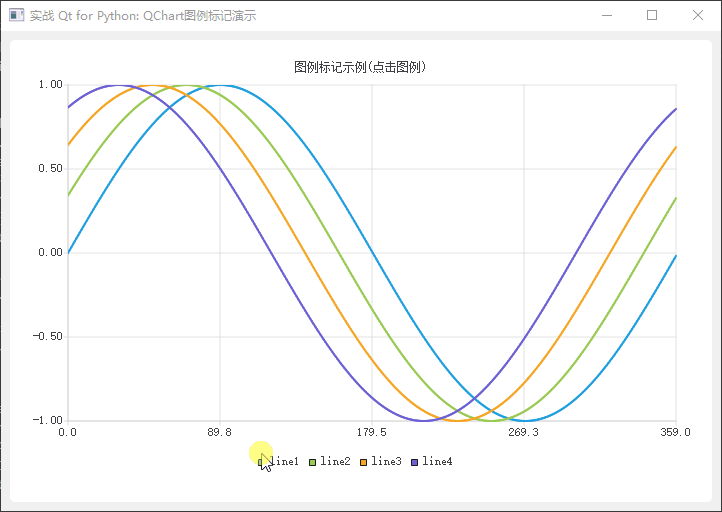
QChart图例标记演示
本文知识点
- 使用图例标记类QLegendMarker实例不能直接创建,需要通过访问图表的legend()方法来获得。
- 不同类型的图表序列所使用的图例标记形状是不一样的。
- 使用过图例标记控制显示和隐藏图表序列。


 1397
1397


 被折叠的 条评论
为什么被折叠?
被折叠的 条评论
为什么被折叠?
 到【灌水乐园】发言


