


自从引入ESB后,系统之间不再直接依赖,我负责的这块,主要是解决Webservice的问题,使系统A不再直接依赖系统B的Webservice。

我们选择的产品是Mule ESB,所以自然要使用Mule 创建一个Webservice代理,即系统A请求到ESB,ESB请求系统B。
准备工作:
通过我的博客
《Mule ESB-Basic Studio Tutorial
》了解Mule ESB的基本操作,并准备开发环境。
环境:
windows 8
jdk 1.6
mule-standalone-3.5.0-M4
MuleStudio-for-win-32bit-3.5.0-201312091746
主要步骤:
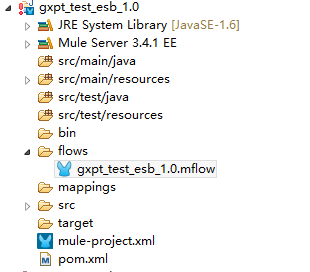
1、新建一个Mule Project
2、创建一个流程
这两步很简单,不再赘述,操作结果:
3、编辑流程
(1)新建一个flow
打开gxpt_test_esb_1.0.mflow,拖一个flow scope 进去,命名为HttpProxyService。
(2)添加HTTP Endpoint
添加HTTP Endpoint,并且右击转换为outbound endpoint,打开属性窗口,输入address,即Webservice的endpoint。
如
http://192.168.24.46:8080/test_server_webservice/UserManagerBean
(3)为这个Webservice创建一个客户端
添加一个SOAP Component到http endpoint的前面,编辑它的属性,设置operation为proxy client
(4)创建一个真正的代理服务
添加另一个
SOAP Component到
proxy client SOAP的前面,设置operation为proxy service,设置
Namespace 和 Service,必须和你要代理的Webservice的wsdl相符。在
WSDL Location中填上wsdl的地址,
如
http://192.168.24.46:8080/test_server_webservice/UserManagerBean?wsdl
也可以将该文件放在项目的文件夹中,如src/
(5)添加一个 HTTP inbound endpoint,设置address,如
http://192.168.24.12:8888/UserManager
最后,完整的flow应该是下面这个样子:
<?xml version="1.0" encoding="UTF-8"?>
<mule xmlns:tracking="http://www.mulesoft.org/schema/mule/ee/tracking" xmlns:cxf="http://www.mulesoft.org/schema/mule/cxf" xmlns:http="http://www.mulesoft.org/schema/mule/http" xmlns="http://www.mulesoft.org/schema/mule/core"
    xmlns:doc="http://www.mulesoft.org/schema/mule/documentation"
    xmlns:spring="http://www.springframework.org/schema/beans" version="EE-3.4.1"
    xmlns:xsi="http://www.w3.org/2001/XMLSchema-instance"
    xsi:schemaLocation="http://www.mulesoft.org/schema/mule/http http://www.mulesoft.org/schema/mule/http/current/mule-http.xsd
http://www.springframework.org/schema/beans http://www.springframework.org/schema/beans/spring-beans-current.xsd
http://www.mulesoft.org/schema/mule/core http://www.mulesoft.org/schema/mule/core/current/mule.xsd
http://www.mulesoft.org/schema/mule/cxf http://www.mulesoft.org/schema/mule/cxf/current/mule-cxf.xsd
http://www.mulesoft.org/schema/mule/ee/tracking http://www.mulesoft.org/schema/mule/ee/tracking/current/mule-tracking-ee.xsd">
    <flow name="HttpProxyService" doc:name="HttpProxyService">
        <http:inbound-endpoint exchange-pattern="request-response" address="http://192.168.24.12:8888/UserManager" doc:name="HTTP"/>
        <!-- wsdlLocation="service/UserManagerBean.wsdl" 也可以使用该属性替换掉url-->
        <cxf:proxy-service namespace="http://ejb.jialin.com/" service="UserManagerBean" payload="body"  wsdlLocation="http://192.168.24.46:8080/test_server_webservice/UserManagerBean?wsdl" doc:name="SOAP"/>
        <cxf:proxy-client payload="body" enableMuleSoapHeaders="true" doc:name="SOAP"/>
        <http:outbound-endpoint exchange-pattern="request-response" method="POST" address="http://192.168.24.46:8080/test_server_webservice/UserManagerBean" doc:name="HTTP"/>
    </flow>
    <flow name="gxpt_test_esb_1.0Flow1" doc:name="gxpt_test_esb_1.0Flow1"/>
</mule>
OK,接下你可以run mule server,在浏览器中输入wsdl地址,看一下结果啦。
如果输入代理地址和直接输入目标地址,显示的wsdl一样,说明配置正确。
小结:
在这篇文章中,我介绍了如何使用mule创建一个Webservice代理,不需要使用任何转换器,也不需要写一行代码,完全是配置完成的。
在后续文章中将继续聊Mule ESB,敬请关注。


 381
381


 被折叠的 条评论
为什么被折叠?
被折叠的 条评论
为什么被折叠?
 到【灌水乐园】发言


