


近日Google发布了Android5.0 SDK,随之android L的部分预览功能也发布了正式版本。本文将介绍RecyclerView。
RecylerView简介
The RecyclerView widget is a more advanced and flexible version of ListView. This widget is a container for displaying large data sets that can be scrolled very efficiently by maintaining a limited number of views. Use the RecyclerView widget when you have data collections whose elements change at runtime based on user action or network events.
大意是RecylerView是一个高级的ListView。可以很好的维护大数据集的滚动和显示。详细的解释参考这里。本文的内容也是基于此而写。
RecylerView在那里
- 包名:
android.support.v7.widget.RecyclerView - 文件地址有两个
- 1:
android-sdk/extras/android/m2repository/com/android/support/recyclerview-v7 - 2:
android-sdk/extras/android/support/v7/recyclerview
- 1:
RecylerView怎么引用
Android Studio
<code class="hljs nginx" style="font-family: Menlo, Monaco, Consolas, 'Courier New', monospace; padding: 0.5em; display: block; background-color: rgb(246, 246, 246); margin-top: 0px !important; background-position: initial initial; background-repeat: initial initial;"><span class="hljs-title" style="font-weight: 700; margin-top: 0px !important;">dependencies</span> {
    <span class="hljs-title" style="font-weight: 700;">compile</span> <span class="hljs-string" style="color: rgb(221, 17, 68);">'com.android.support:recyclerview-v7:21.0.0'</span>
}
</code>
在此推荐使用Android Studio开发Android项目
Eclipse
以下猜测可以使用,没有经过测试。
- 在
android-sdk/extras/android/support/v7/recyclerview目录下面有libs,里面有jar包,引用此jar包。 - 在
android-sdk/extras/android/m2repository/com/android/support/recyclerview-v7目录下根据版本号21.0.0目录可以找到一个名为recyclerview-v7-21.0.0.aar的文件。解压此文件里面有classes.jar,引用此jar包。
找不到目录
针对找不到目录的同学,打开Android SDK Manager把最新的资源更新下来即可。
RecylerView新类介绍
说说几个新类,Adapter(android.support.v7.widget.RecyclerView.Adapter)、ViewHolder(android.support.v7.widget.RecyclerView.ViewHolder)、LayoutManager(android.support.v7.widget.RecyclerView.LayoutManager)
Adapter
适配器,和以前的Adapter不一样,此Adapter为RecylerView特有。作为一个抽象类,有以下几个抽象方法。
<code class="hljs cs" style="font-family: Menlo, Monaco, Consolas, 'Courier New', monospace; padding: 0.5em; display: block; background-color: rgb(246, 246, 246); margin-top: 0px !important; background-position: initial initial; background-repeat: initial initial;"><span class="hljs-keyword" style="font-weight: 700; margin-top: 0px !important;">public</span> <span class="hljs-keyword" style="font-weight: 700;">static</span> <span class="hljs-keyword" style="font-weight: 700;">abstract</span> <span class="hljs-keyword" style="font-weight: 700;">class</span> Adapter<VH extends ViewHolder>{}{
    ...
    <span class="hljs-keyword" style="font-weight: 700;">public</span> <span class="hljs-keyword" style="font-weight: 700;">abstract</span> VH <span class="hljs-title" style="color: rgb(153, 0, 0); font-weight: 700;">onCreateViewHolder</span>(ViewGroup parent, <span class="hljs-keyword" style="font-weight: 700;">int</span> viewType);
    <span class="hljs-keyword" style="font-weight: 700;">public</span> <span class="hljs-keyword" style="font-weight: 700;">abstract</span> <span class="hljs-keyword" style="font-weight: 700;">void</span> <span class="hljs-title" style="color: rgb(153, 0, 0); font-weight: 700;">onBindViewHolder</span>(VH holder, <span class="hljs-keyword" style="font-weight: 700;">int</span> position);
    <span class="hljs-keyword" style="font-weight: 700;">public</span> <span class="hljs-keyword" style="font-weight: 700;">abstract</span> <span class="hljs-keyword" style="font-weight: 700;">int</span> <span class="hljs-title" style="color: rgb(153, 0, 0); font-weight: 700;">getItemCount</span>();
    ...
}
</code>
方法onCreateViewHolder
直接创建一种可复用的VH或者根据viewType创建多种VH。
方法onBindViewHolder
数据和VH通过位置position绑定
方法getItemCount
返回有多少条数据
ViewHolder
同样是一个抽象类,我们通过继承此类实现view的封装。
LayoutManager
布局管理器,RecylerView中数据显示布局方式。目前v7包种提供了三种模式,分别是LinearLayoutManager、GridLayoutManager、StaggeredGridLayoutManager。
LinearLayoutManager
线性布局,通过方向VERTICAL和HORIZONTAL可以实现垂直和水平的效果。默认为VERTICAL垂直方向。
通过此布局可以实现ListView的效果。垂直方向为普通的ListView显示效果,水平方向即是水平滑动的ListView。
GridLayoutManager
网格布局,继承于LinearLayoutManager,可以指定有几行和方向。
通过此布局可以实现GridView的效果,同样有垂直方向和水平方向。
StaggeredGridLayoutManager
交错网格布局,类似于网格布局,但每个格子的高度或者长度可以不一样。
俗称的瀑布流效果,同样有垂直方向和水平方向。
实例代码
实例代码会列出一个完整的通过RecylerView、LinearLayoutManager、Adapter、ViewHolder实现一个普通的ListView数据显示效果,之后修改部分代码实现不同的效果。
ListView
引入的包
<code class="hljs nginx" style="font-family: Menlo, Monaco, Consolas, 'Courier New', monospace; padding: 0.5em; display: block; background-color: rgb(246, 246, 246); margin-top: 0px !important; background-position: initial initial; background-repeat: initial initial;"><span class="hljs-title" style="font-weight: 700; margin-top: 0px !important;">dependencies</span> {
    <span class="hljs-title" style="font-weight: 700;">compile</span> fileTree(dir: <span class="hljs-string" style="color: rgb(221, 17, 68);">'libs'</span>, include: [<span class="hljs-string" style="color: rgb(221, 17, 68);">'*.jar'</span>])
    compile <span class="hljs-string" style="color: rgb(221, 17, 68);">'com.android.support:appcompat-v7:21.0.0'</span>
    compile <span class="hljs-string" style="color: rgb(221, 17, 68);">'com.nostra13.universalimageloader:universal-image-loader:1.9.3'</span>
    compile <span class="hljs-string" style="color: rgb(221, 17, 68);">'com.android.support:recyclerview-v7:21.0.0'</span>
    compile <span class="hljs-string" style="color: rgb(221, 17, 68);">'org.roboguice:roboguice:2.0'</span>
    compile <span class="hljs-string" style="color: rgb(221, 17, 68);">'com.android.support:palette-v7:21.0.0'</span>
}
</code>
Activity
<code class="hljs java" style="font-family: Menlo, Monaco, Consolas, 'Courier New', monospace; padding: 0.5em; display: block; background-color: rgb(246, 246, 246); margin-top: 0px !important; background-position: initial initial; background-repeat: initial initial;"><span class="hljs-keyword" style="font-weight: 700; margin-top: 0px !important;">package</span> com.lizheng.recylerviewdemo;

<span class="hljs-keyword" style="font-weight: 700;">import</span> android.os.Bundle;
<span class="hljs-keyword" style="font-weight: 700;">import</span> android.os.Handler;
<span class="hljs-keyword" style="font-weight: 700;">import</span> android.support.v4.widget.SwipeRefreshLayout;
<span class="hljs-keyword" style="font-weight: 700;">import</span> android.support.v7.widget.GridLayoutManager;
<span class="hljs-keyword" style="font-weight: 700;">import</span> android.support.v7.widget.LinearLayoutManager;
<span class="hljs-keyword" style="font-weight: 700;">import</span> android.support.v7.widget.RecyclerView;
<span class="hljs-keyword" style="font-weight: 700;">import</span> android.support.v7.widget.StaggeredGridLayoutManager;

<span class="hljs-keyword" style="font-weight: 700;">import</span> roboguice.activity.RoboFragmentActivity;
<span class="hljs-keyword" style="font-weight: 700;">import</span> roboguice.inject.InjectView;


<span class="hljs-keyword" style="font-weight: 700;">public</span> <span class="hljs-class"><span class="hljs-keyword" style="font-weight: 700; margin-top: 0px !important;">class</span> <span class="hljs-title" style="color: rgb(68, 85, 136); font-weight: 700;">MainActivity</span> <span class="hljs-keyword" style="font-weight: 700;">extends</span> <span class="hljs-title" style="color: rgb(68, 85, 136); font-weight: 700;">RoboFragmentActivity</span> </span>{

    <span class="hljs-annotation">@InjectView</span>(R.id.recyclerView)
    <span class="hljs-keyword" style="font-weight: 700;">private</span> RecyclerView recyclerView;

    <span class="hljs-annotation">@InjectView</span>(R.id.swipeLayout)
    <span class="hljs-keyword" style="font-weight: 700;">private</span> SwipeRefreshLayout swipeLayout;

    <span class="hljs-keyword" style="font-weight: 700;">private</span> DemoAdapter adapter;

    <span class="hljs-annotation">@Override</span>
    <span class="hljs-keyword" style="font-weight: 700;">protected</span> <span class="hljs-keyword" style="font-weight: 700;">void</span> <span class="hljs-title" style="color: rgb(153, 0, 0); font-weight: 700;">onCreate</span>(Bundle savedInstanceState) {
        <span class="hljs-keyword" style="font-weight: 700;">super</span>.onCreate(savedInstanceState);
        setContentView(R.layout.ac_main);

        adapter = <span class="hljs-keyword" style="font-weight: 700;">new</span> DemoAdapter(C.picUrls);

        <span class="hljs-comment" style="color: rgb(153, 153, 136); font-style: italic;">// 线性布局管理器</span>
        LinearLayoutManager linearLayoutManager = <span class="hljs-keyword" style="font-weight: 700;">new</span> LinearLayoutManager(<span class="hljs-keyword" style="font-weight: 700;">this</span>);

        <span class="hljs-comment" style="color: rgb(153, 153, 136); font-style: italic;">// 设置布局管理器</span>
        recyclerView.setLayoutManager(linearLayoutManager);

        recyclerView.setAdapter(adapter);

        <span class="hljs-comment" style="color: rgb(153, 153, 136); font-style: italic;">// 模拟下拉刷新</span>
        swipeLayout.setOnRefreshListener(<span class="hljs-keyword" style="font-weight: 700;">new</span> SwipeRefreshLayout.OnRefreshListener() {
            <span class="hljs-annotation">@Override</span>
            <span class="hljs-keyword" style="font-weight: 700;">public</span> <span class="hljs-keyword" style="font-weight: 700;">void</span> <span class="hljs-title" style="color: rgb(153, 0, 0); font-weight: 700;">onRefresh</span>() {
                <span class="hljs-keyword" style="font-weight: 700;">new</span> Handler().postDelayed(<span class="hljs-keyword" style="font-weight: 700;">new</span> Runnable() {
                    <span class="hljs-annotation">@Override</span>
                    <span class="hljs-keyword" style="font-weight: 700;">public</span> <span class="hljs-keyword" style="font-weight: 700;">void</span> <span class="hljs-title" style="color: rgb(153, 0, 0); font-weight: 700;">run</span>() {
                        swipeLayout.setRefreshing(<span class="hljs-keyword" style="font-weight: 700;">false</span>);
                        adapter.notifyDataSetChanged();
                    }
                }, <span class="hljs-number" style="color: rgb(0, 153, 153);">2000</span>);
            }
        });

    }

}
</code>
Adapter和ViewHolder
<code class="hljs cs" style="font-family: Menlo, Monaco, Consolas, 'Courier New', monospace; padding: 0.5em; display: block; background-color: rgb(246, 246, 246); margin-top: 0px !important; background-position: initial initial; background-repeat: initial initial;">package com.lizheng.recylerviewdemo;

import android.support.v7.widget.RecyclerView;
import android.view.LayoutInflater;
import android.view.View;
import android.view.ViewGroup;
import android.widget.ImageView;
import android.widget.TextView;

import com.nostra13.universalimageloader.core.ImageLoader;

<span class="hljs-comment" style="color: rgb(153, 153, 136); font-style: italic; margin-top: 0px !important;">/**
 * 适配器
 * Created by lizheng on 14/10/19.
 */</span>
<span class="hljs-keyword" style="font-weight: 700;">public</span> <span class="hljs-keyword" style="font-weight: 700;">class</span> DemoAdapter extends RecyclerView.Adapter<DemoAdapter.DemoViewHolder> {
    String[] picUrls;

    <span class="hljs-keyword" style="font-weight: 700;">public</span> <span class="hljs-title" style="color: rgb(153, 0, 0); font-weight: 700;">DemoAdapter</span>(String[] picUrls) {
        <span class="hljs-keyword" style="font-weight: 700;">this</span>.picUrls = picUrls;
    }

    @Override
    <span class="hljs-keyword" style="font-weight: 700;">public</span> DemoViewHolder <span class="hljs-title" style="color: rgb(153, 0, 0); font-weight: 700;">onCreateViewHolder</span>(ViewGroup viewGroup, <span class="hljs-keyword" style="font-weight: 700;">int</span> i) {
        <span class="hljs-comment" style="color: rgb(153, 153, 136); font-style: italic;">// 加载数据item的布局,生成VH返回</span>
        View v = LayoutInflater.<span class="hljs-keyword" style="font-weight: 700;">from</span>(viewGroup.getContext()).inflate(R.layout.item_test, viewGroup, <span class="hljs-keyword" style="font-weight: 700;">false</span>);
        <span class="hljs-keyword" style="font-weight: 700;">return</span> <span class="hljs-keyword" style="font-weight: 700;">new</span> DemoViewHolder(v);
    }

    @Override
    <span class="hljs-keyword" style="font-weight: 700;">public</span> <span class="hljs-keyword" style="font-weight: 700;">void</span> <span class="hljs-title" style="color: rgb(153, 0, 0); font-weight: 700;">onBindViewHolder</span>(DemoViewHolder demoViewHolder, <span class="hljs-keyword" style="font-weight: 700;">int</span> i) {
        <span class="hljs-comment" style="color: rgb(153, 153, 136); font-style: italic;">// 数据绑定</span>
        ImageLoader.getInstance().displayImage(picUrls[i], demoViewHolder.imavPic);
        demoViewHolder.tvUrl.setText(picUrls[i]);
    }

    @Override
    <span class="hljs-keyword" style="font-weight: 700;">public</span> <span class="hljs-keyword" style="font-weight: 700;">int</span> <span class="hljs-title" style="color: rgb(153, 0, 0); font-weight: 700;">getItemCount</span>() {
        <span class="hljs-comment" style="color: rgb(153, 153, 136); font-style: italic;">// 返回数据有多少条</span>
        <span class="hljs-keyword" style="font-weight: 700;">if</span> (<span class="hljs-keyword" style="font-weight: 700;">null</span> == picUrls) {
            <span class="hljs-keyword" style="font-weight: 700;">return</span> <span class="hljs-number" style="color: rgb(0, 153, 153);">0</span>;
        }
        <span class="hljs-keyword" style="font-weight: 700;">return</span> picUrls.length;
    }

    <span class="hljs-comment" style="color: rgb(153, 153, 136); font-style: italic;">// 可复用的VH</span>
    <span class="hljs-keyword" style="font-weight: 700;">public</span> <span class="hljs-keyword" style="font-weight: 700;">static</span> <span class="hljs-keyword" style="font-weight: 700;">class</span> DemoViewHolder extends RecyclerView.ViewHolder {
        <span class="hljs-comment" style="color: rgb(153, 153, 136); font-style: italic;">// 大图</span>
        <span class="hljs-keyword" style="font-weight: 700;">public</span> ImageView imavPic;
        <span class="hljs-comment" style="color: rgb(153, 153, 136); font-style: italic;">// 图片url</span>
        <span class="hljs-keyword" style="font-weight: 700;">public</span> TextView tvUrl;

        <span class="hljs-keyword" style="font-weight: 700;">public</span> <span class="hljs-title" style="color: rgb(153, 0, 0); font-weight: 700;">DemoViewHolder</span>(View itemView) {
            super(itemView);
            imavPic = (ImageView) itemView.findViewById(R.id.imavPic);
            tvUrl = (TextView) itemView.findViewById(R.id.tvUrl);
        }
    }
}
</code>
Activity布局
<code class="hljs xml" style="font-family: Menlo, Monaco, Consolas, 'Courier New', monospace; padding: 0.5em; display: block; background-color: rgb(246, 246, 246); margin-top: 0px !important; background-position: initial initial; background-repeat: initial initial;"><span class="hljs-tag" style="color: navy; margin-top: 0px !important;"><<span class="hljs-title" style="margin-top: 0px !important;">RelativeLayout</span> <span class="hljs-attribute" style="color: teal;">xmlns:android</span>=<span class="hljs-value" style="color: rgb(221, 17, 68);">"http://schemas.android.com/apk/res/android"</span>
    <span class="hljs-attribute" style="color: teal;">xmlns:tools</span>=<span class="hljs-value" style="color: rgb(221, 17, 68);">"http://schemas.android.com/tools"</span>
    <span class="hljs-attribute" style="color: teal;">android:layout_width</span>=<span class="hljs-value" style="color: rgb(221, 17, 68);">"match_parent"</span>
    <span class="hljs-attribute" style="color: teal;">android:layout_height</span>=<span class="hljs-value" style="color: rgb(221, 17, 68);">"match_parent"</span>
    <span class="hljs-attribute" style="color: teal;">tools:context</span>=<span class="hljs-value" style="color: rgb(221, 17, 68);">".MainActivity"</span>></span>

    <span class="hljs-tag" style="color: navy;"><<span class="hljs-title" style="margin-top: 0px !important;">View
</span>        <span class="hljs-attribute" style="color: teal;">android:background</span>=<span class="hljs-value" style="color: rgb(221, 17, 68);">"#FFFFFF"</span>
        <span class="hljs-attribute" style="color: teal;">android:id</span>=<span class="hljs-value" style="color: rgb(221, 17, 68);">"@+id/vTestPalette"</span>
        <span class="hljs-attribute" style="color: teal;">android:layout_width</span>=<span class="hljs-value" style="color: rgb(221, 17, 68);">"match_parent"</span>
        <span class="hljs-attribute" style="color: teal;">android:layout_height</span>=<span class="hljs-value" style="color: rgb(221, 17, 68);">"48dp"</span> /></span>

    <span class="hljs-tag" style="color: navy;"><<span class="hljs-title" style="margin-top: 0px !important;">android.support.v4.widget.SwipeRefreshLayout
</span>        <span class="hljs-attribute" style="color: teal;">android:id</span>=<span class="hljs-value" style="color: rgb(221, 17, 68);">"@+id/swipeLayout"</span>
        <span class="hljs-attribute" style="color: teal;">android:layout_below</span>=<span class="hljs-value" style="color: rgb(221, 17, 68);">"@id/vTestPalette"</span>
        <span class="hljs-attribute" style="color: teal;">android:layout_width</span>=<span class="hljs-value" style="color: rgb(221, 17, 68);">"match_parent"</span>
        <span class="hljs-attribute" style="color: teal;">android:layout_height</span>=<span class="hljs-value" style="color: rgb(221, 17, 68);">"match_parent"</span>></span>

        <span class="hljs-tag" style="color: navy;"><<span class="hljs-title" style="margin-top: 0px !important;">android.support.v7.widget.RecyclerView
</span>            <span class="hljs-attribute" style="color: teal;">android:id</span>=<span class="hljs-value" style="color: rgb(221, 17, 68);">"@+id/recyclerView"</span>
            <span class="hljs-attribute" style="color: teal;">android:layout_width</span>=<span class="hljs-value" style="color: rgb(221, 17, 68);">"match_parent"</span>
            <span class="hljs-attribute" style="color: teal;">android:layout_height</span>=<span class="hljs-value" style="color: rgb(221, 17, 68);">"match_parent"</span>
            <span class="hljs-attribute" style="color: teal;">android:scrollbars</span>=<span class="hljs-value" style="color: rgb(221, 17, 68);">"vertical"</span> /></span>
    <span class="hljs-tag" style="color: navy;"></<span class="hljs-title" style="margin-top: 0px !important;">android.support.v4.widget.SwipeRefreshLayout</span>></span>

<span class="hljs-tag" style="color: navy;"></<span class="hljs-title" style="margin-top: 0px !important;">RelativeLayout</span>></span>
</code>
item布局
<code class="hljs xml" style="font-family: Menlo, Monaco, Consolas, 'Courier New', monospace; padding: 0.5em; display: block; background-color: rgb(246, 246, 246); margin-top: 0px !important; background-position: initial initial; background-repeat: initial initial;"><span class="hljs-pi" style="color: rgb(153, 153, 153); font-weight: 700; margin-top: 0px !important;"><?xml version="1.0" encoding="utf-8"?></span>
<span class="hljs-tag" style="color: navy;"><<span class="hljs-title" style="margin-top: 0px !important;">LinearLayout</span> <span class="hljs-attribute" style="color: teal;">xmlns:android</span>=<span class="hljs-value" style="color: rgb(221, 17, 68);">"http://schemas.android.com/apk/res/android"</span>
    <span class="hljs-attribute" style="color: teal;">android:layout_width</span>=<span class="hljs-value" style="color: rgb(221, 17, 68);">"match_parent"</span>
    <span class="hljs-attribute" style="color: teal;">android:layout_height</span>=<span class="hljs-value" style="color: rgb(221, 17, 68);">"match_parent"</span>
    <span class="hljs-attribute" style="color: teal;">android:layout_margin</span>=<span class="hljs-value" style="color: rgb(221, 17, 68);">"5dp"</span>
    <span class="hljs-attribute" style="color: teal;">android:orientation</span>=<span class="hljs-value" style="color: rgb(221, 17, 68);">"vertical"</span>></span>

    <span class="hljs-tag" style="color: navy;"><<span class="hljs-title" style="margin-top: 0px !important;">ImageView
</span>        <span class="hljs-attribute" style="color: teal;">android:id</span>=<span class="hljs-value" style="color: rgb(221, 17, 68);">"@+id/imavPic"</span>
        <span class="hljs-attribute" style="color: teal;">android:layout_width</span>=<span class="hljs-value" style="color: rgb(221, 17, 68);">"match_parent"</span>
        <span class="hljs-attribute" style="color: teal;">android:layout_height</span>=<span class="hljs-value" style="color: rgb(221, 17, 68);">"150dp"</span>
        <span class="hljs-attribute" style="color: teal;">android:scaleType</span>=<span class="hljs-value" style="color: rgb(221, 17, 68);">"centerCrop"</span> /></span>

    <span class="hljs-tag" style="color: navy;"><<span class="hljs-title" style="margin-top: 0px !important;">TextView
</span>        <span class="hljs-attribute" style="color: teal;">android:id</span>=<span class="hljs-value" style="color: rgb(221, 17, 68);">"@+id/tvUrl"</span>
        <span class="hljs-attribute" style="color: teal;">android:layout_width</span>=<span class="hljs-value" style="color: rgb(221, 17, 68);">"match_parent"</span>
        <span class="hljs-attribute" style="color: teal;">android:layout_height</span>=<span class="hljs-value" style="color: rgb(221, 17, 68);">"wrap_content"</span>
        <span class="hljs-attribute" style="color: teal;">android:lines</span>=<span class="hljs-value" style="color: rgb(221, 17, 68);">"2"</span> /></span>

    <span class="hljs-tag" style="color: navy;"><<span class="hljs-title" style="margin-top: 0px !important;">View
</span>        <span class="hljs-attribute" style="color: teal;">android:layout_width</span>=<span class="hljs-value" style="color: rgb(221, 17, 68);">"match_parent"</span>
        <span class="hljs-attribute" style="color: teal;">android:layout_height</span>=<span class="hljs-value" style="color: rgb(221, 17, 68);">"2dp"</span> /></span>
<span class="hljs-tag" style="color: navy;"></<span class="hljs-title" style="margin-top: 0px !important;">LinearLayout</span>></span>
</code>
效果图

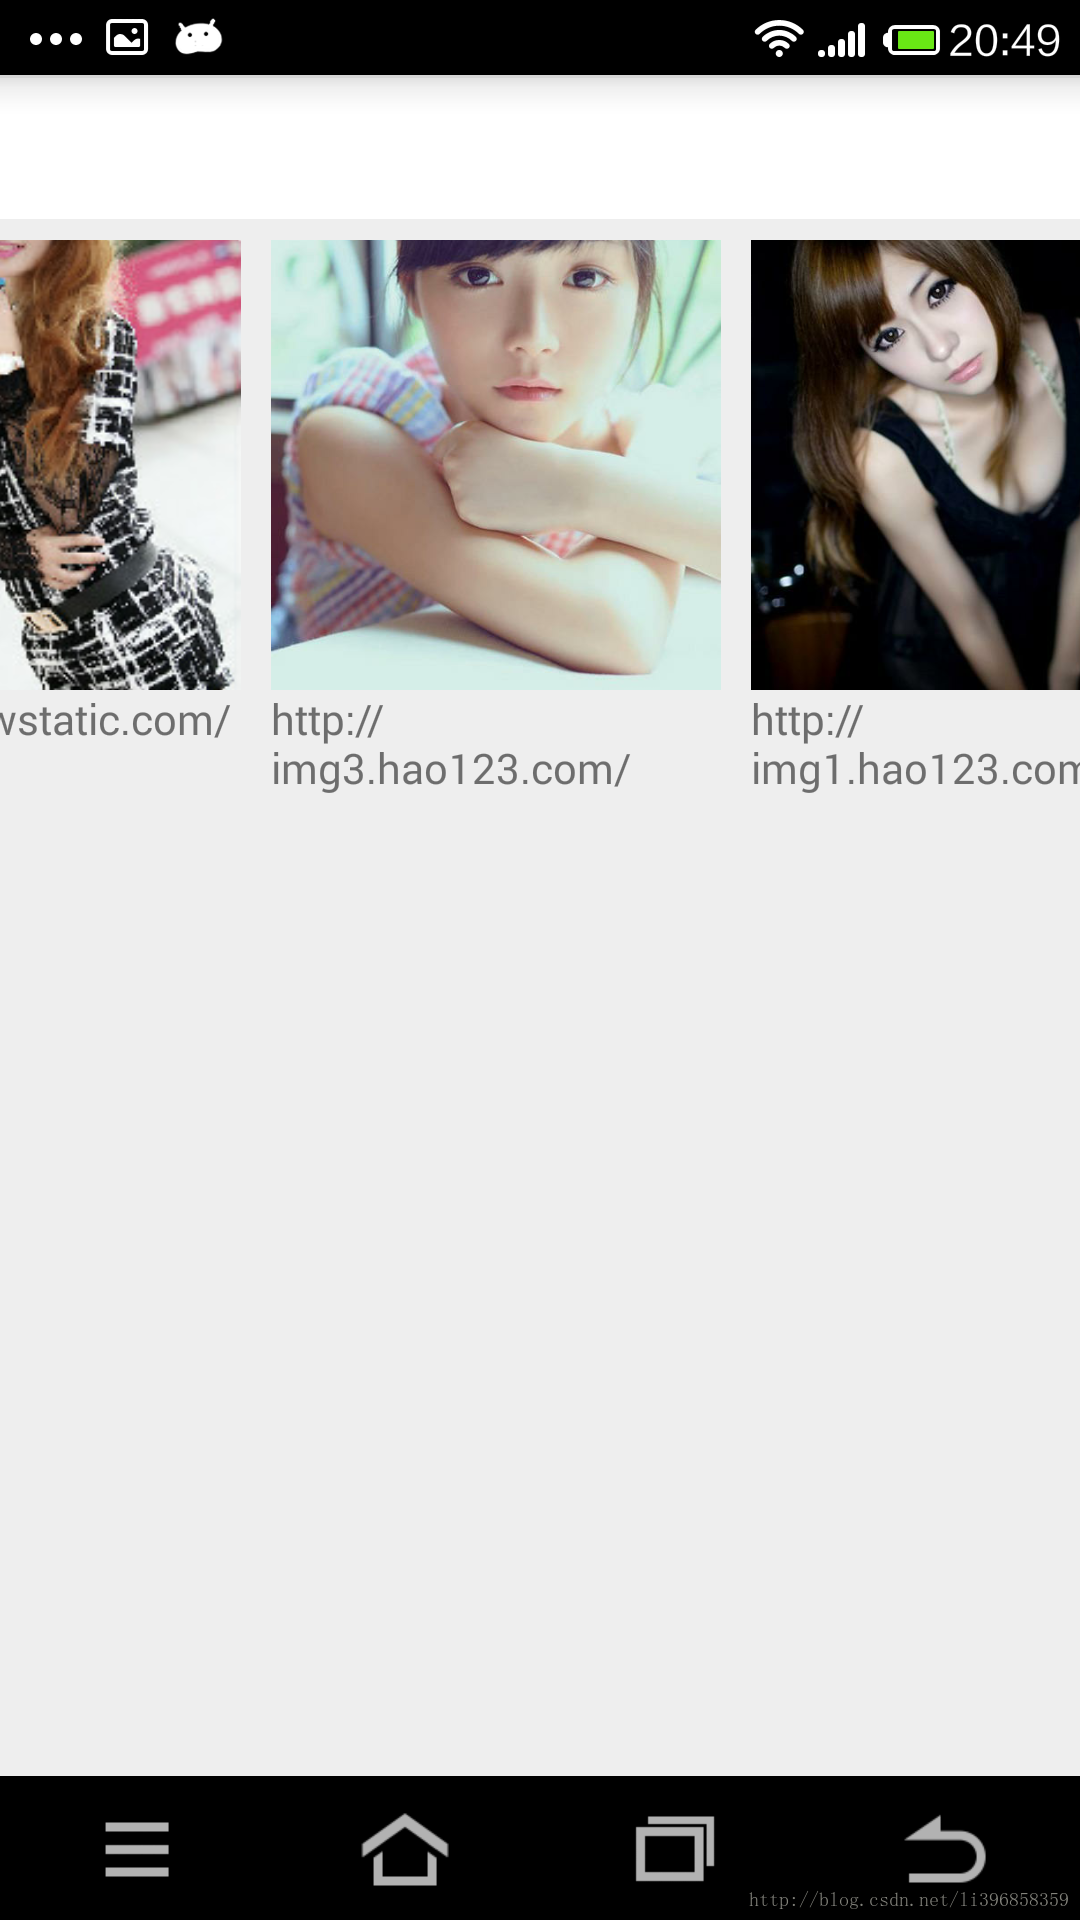
横向的ListView
实现横向的ListView,修改线性布局管理器属性即可。
默认为
<code class="hljs cpp" style="font-family: Menlo, Monaco, Consolas, 'Courier New', monospace; padding: 0.5em; display: block; background-color: rgb(246, 246, 246); margin-top: 0px !important; background-position: initial initial; background-repeat: initial initial;"><span class="hljs-comment" style="color: rgb(153, 153, 136); font-style: italic; margin-top: 0px !important;">// 线性布局管理器</span>
LinearLayoutManager linearLayoutManager = <span class="hljs-keyword" style="font-weight: 700;">new</span> LinearLayoutManager(<span class="hljs-keyword" style="font-weight: 700;">this</span>);
</code>
修改为
<code class="hljs cpp" style="font-family: Menlo, Monaco, Consolas, 'Courier New', monospace; padding: 0.5em; display: block; background-color: rgb(246, 246, 246); margin-top: 0px !important; background-position: initial initial; background-repeat: initial initial;"><span class="hljs-comment" style="color: rgb(153, 153, 136); font-style: italic; margin-top: 0px !important;">// 线性布局管理器</span>
LinearLayoutManager linearLayoutManager = <span class="hljs-keyword" style="font-weight: 700;">new</span> LinearLayoutManager(<span class="hljs-keyword" style="font-weight: 700;">this</span>);
linearLayoutManager.setOrientation(LinearLayoutManager.HORIZONTAL);
</code>
要想横向的效果好一些,需要对item的布局做一些小修改
<code class="hljs objectivec" style="font-family: Menlo, Monaco, Consolas, 'Courier New', monospace; padding: 0.5em; display: block; background-color: rgb(246, 246, 246); margin-top: 0px !important; background-position: initial initial; background-repeat: initial initial;"><ImageView
        android:<span class="hljs-keyword" style="font-weight: 700; margin-top: 0px !important;">id</span>=<span class="hljs-string" style="color: rgb(221, 17, 68);">"@+id/imavPic"</span>
        android:layout_width=<span class="hljs-string" style="color: rgb(221, 17, 68);">"match_parent"</span>
        android:layout_height=<span class="hljs-string" style="color: rgb(221, 17, 68);">"150dp"</span>
        android:scaleType=<span class="hljs-string" style="color: rgb(221, 17, 68);">"centerCrop"</span> />
</code>
改为
<code class="hljs objectivec" style="font-family: Menlo, Monaco, Consolas, 'Courier New', monospace; padding: 0.5em; display: block; background-color: rgb(246, 246, 246); margin-top: 0px !important; background-position: initial initial; background-repeat: initial initial;"><ImageView
        android:<span class="hljs-keyword" style="font-weight: 700; margin-top: 0px !important;">id</span>=<span class="hljs-string" style="color: rgb(221, 17, 68);">"@+id/imavPic"</span>
        android:layout_width=<span class="hljs-string" style="color: rgb(221, 17, 68);">"150dp"</span>
        android:layout_height=<span class="hljs-string" style="color: rgb(221, 17, 68);">"150dp"</span>
        android:scaleType=<span class="hljs-string" style="color: rgb(221, 17, 68);">"centerCrop"</span> />
</code>
效果图
GridView
实现此效果,更改布局管理器即可,并微调item的布局
<code class="hljs cpp" style="font-family: Menlo, Monaco, Consolas, 'Courier New', monospace; padding: 0.5em; display: block; background-color: rgb(246, 246, 246); margin-top: 0px !important; background-position: initial initial; background-repeat: initial initial;"><span class="hljs-comment" style="color: rgb(153, 153, 136); font-style: italic; margin-top: 0px !important;">// 线性布局管理器</span>
LinearLayoutManager linearLayoutManager = <span class="hljs-keyword" style="font-weight: 700;">new</span> LinearLayoutManager(<span class="hljs-keyword" style="font-weight: 700;">this</span>);
linearLayoutManager.setOrientation(LinearLayoutManager.HORIZONTAL);

<span class="hljs-comment" style="color: rgb(153, 153, 136); font-style: italic;">// 设置布局管理器</span>
recyclerView.setLayoutManager(linearLayoutManager);
</code>
改为
<code class="hljs cpp" style="font-family: Menlo, Monaco, Consolas, 'Courier New', monospace; padding: 0.5em; display: block; background-color: rgb(246, 246, 246); margin-top: 0px !important; background-position: initial initial; background-repeat: initial initial;"><span class="hljs-comment" style="color: rgb(153, 153, 136); font-style: italic; margin-top: 0px !important;">// 网格布局管理器</span>
GridLayoutManager gridLayoutManager = <span class="hljs-keyword" style="font-weight: 700;">new</span> GridLayoutManager(<span class="hljs-keyword" style="font-weight: 700;">this</span>, <span class="hljs-number" style="color: rgb(0, 153, 153);">2</span>);
gridLayoutManager.setOrientation(LinearLayoutManager.VERTICAL);
<span class="hljs-comment" style="color: rgb(153, 153, 136); font-style: italic;">// 设置布局管理器</span>
recyclerView.setLayoutManager(gridLayoutManager);
</code>
item布局中
<code class="hljs objectivec" style="font-family: Menlo, Monaco, Consolas, 'Courier New', monospace; padding: 0.5em; display: block; background-color: rgb(246, 246, 246); margin-top: 0px !important; background-position: initial initial; background-repeat: initial initial;"><ImageView
        android:<span class="hljs-keyword" style="font-weight: 700; margin-top: 0px !important;">id</span>=<span class="hljs-string" style="color: rgb(221, 17, 68);">"@+id/imavPic"</span>
        android:layout_width=<span class="hljs-string" style="color: rgb(221, 17, 68);">"150dp"</span>
        android:layout_height=<span class="hljs-string" style="color: rgb(221, 17, 68);">"150dp"</span>
        android:scaleType=<span class="hljs-string" style="color: rgb(221, 17, 68);">"centerCrop"</span> />
</code>
改为
<code class="hljs objectivec" style="font-family: Menlo, Monaco, Consolas, 'Courier New', monospace; padding: 0.5em; display: block; background-color: rgb(246, 246, 246); margin-top: 0px !important; background-position: initial initial; background-repeat: initial initial;"><ImageView
        android:<span class="hljs-keyword" style="font-weight: 700; margin-top: 0px !important;">id</span>=<span class="hljs-string" style="color: rgb(221, 17, 68);">"@+id/imavPic"</span>
        android:layout_width=<span class="hljs-string" style="color: rgb(221, 17, 68);">"match_parent"</span>
        android:layout_height=<span class="hljs-string" style="color: rgb(221, 17, 68);">"150dp"</span>
        android:scaleType=<span class="hljs-string" style="color: rgb(221, 17, 68);">"centerCrop"</span> />
</code>
通过可以修改方向、也可以修改行数。代码自己修改,下面直接显示效果图。注意修改方向要注意图片的宽度要适当,不建议使用match_parent
效果图1

效果图2

效果图3

瀑布流
实现瀑布流,修改布局管理器和item布局即可。
布局管理器
<code class="hljs cpp" style="font-family: Menlo, Monaco, Consolas, 'Courier New', monospace; padding: 0.5em; display: block; background-color: rgb(246, 246, 246); margin-top: 0px !important; background-position: initial initial; background-repeat: initial initial;"><span class="hljs-comment" style="color: rgb(153, 153, 136); font-style: italic; margin-top: 0px !important;">// 网格布局管理器</span>
GridLayoutManager gridLayoutManager = <span class="hljs-keyword" style="font-weight: 700;">new</span> GridLayoutManager(<span class="hljs-keyword" style="font-weight: 700;">this</span>, <span class="hljs-number" style="color: rgb(0, 153, 153);">2</span>);
gridLayoutManager.setOrientation(LinearLayoutManager.VERTICAL);
<span class="hljs-comment" style="color: rgb(153, 153, 136); font-style: italic;">// 设置布局管理器</span>
recyclerView.setLayoutManager(gridLayoutManager);
</code>
改为
<code class="hljs cpp" style="font-family: Menlo, Monaco, Consolas, 'Courier New', monospace; padding: 0.5em; display: block; background-color: rgb(246, 246, 246); margin-top: 0px !important; background-position: initial initial; background-repeat: initial initial;"><span class="hljs-comment" style="color: rgb(153, 153, 136); font-style: italic; margin-top: 0px !important;">// 交错网格布局管理器</span>
StaggeredGridLayoutManager staggeredGridLayoutManager = <span class="hljs-keyword" style="font-weight: 700;">new</span> StaggeredGridLayoutManager(<span class="hljs-number" style="color: rgb(0, 153, 153);">2</span>, LinearLayoutManager.VERTICAL);
<span class="hljs-comment" style="color: rgb(153, 153, 136); font-style: italic;">// 设置布局管理器</span>
recyclerView.setLayoutManager(staggeredGridLayoutManager);
</code>
item布局
改为
<code class="hljs xml" style="font-family: Menlo, Monaco, Consolas, 'Courier New', monospace; padding: 0.5em; display: block; background-color: rgb(246, 246, 246); margin-top: 0px !important; background-position: initial initial; background-repeat: initial initial;"><span class="hljs-pi" style="color: rgb(153, 153, 153); font-weight: 700; margin-top: 0px !important;"><?xml version="1.0" encoding="utf-8"?></span>
<span class="hljs-tag" style="color: navy;"><<span class="hljs-title" style="margin-top: 0px !important;">LinearLayout</span> <span class="hljs-attribute" style="color: teal;">xmlns:android</span>=<span class="hljs-value" style="color: rgb(221, 17, 68);">"http://schemas.android.com/apk/res/android"</span>
    <span class="hljs-attribute" style="color: teal;">android:layout_width</span>=<span class="hljs-value" style="color: rgb(221, 17, 68);">"match_parent"</span>
    <span class="hljs-attribute" style="color: teal;">android:layout_height</span>=<span class="hljs-value" style="color: rgb(221, 17, 68);">"match_parent"</span>
    <span class="hljs-attribute" style="color: teal;">android:layout_margin</span>=<span class="hljs-value" style="color: rgb(221, 17, 68);">"5dp"</span>
    <span class="hljs-attribute" style="color: teal;">android:orientation</span>=<span class="hljs-value" style="color: rgb(221, 17, 68);">"vertical"</span>></span>


    <span class="hljs-tag" style="color: navy;"><<span class="hljs-title" style="margin-top: 0px !important;">ImageView
</span>        <span class="hljs-attribute" style="color: teal;">android:id</span>=<span class="hljs-value" style="color: rgb(221, 17, 68);">"@+id/imavPic"</span>
        <span class="hljs-attribute" style="color: teal;">android:layout_width</span>=<span class="hljs-value" style="color: rgb(221, 17, 68);">"match_parent"</span>
        <span class="hljs-attribute" style="color: teal;">android:layout_height</span>=<span class="hljs-value" style="color: rgb(221, 17, 68);">"wrap_content"</span>
        <span class="hljs-attribute" style="color: teal;">android:scaleType</span>=<span class="hljs-value" style="color: rgb(221, 17, 68);">"centerCrop"</span> /></span>

    <span class="hljs-tag" style="color: navy;"><<span class="hljs-title" style="margin-top: 0px !important;">TextView
</span>        <span class="hljs-attribute" style="color: teal;">android:id</span>=<span class="hljs-value" style="color: rgb(221, 17, 68);">"@+id/tvUrl"</span>
        <span class="hljs-attribute" style="color: teal;">android:layout_width</span>=<span class="hljs-value" style="color: rgb(221, 17, 68);">"match_parent"</span>
        <span class="hljs-attribute" style="color: teal;">android:layout_height</span>=<span class="hljs-value" style="color: rgb(221, 17, 68);">"wrap_content"</span> /></span>

<span class="hljs-tag" style="color: navy;"></<span class="hljs-title" style="margin-top: 0px !important;">LinearLayout</span>></span>
</code>
同样可以修改为横向和行数,看效果即可。
效果图1

效果图2

效果图3

后记
RecylerView作为新出现的组件。还有很多的问题和用法期待大家的发现。
已知问题
StaggeredGridLayoutManager时图片会自动跳转- 没有可以直接使用的
onItemClickListener - 没有直接使用的
headView和footerView


 2139
2139

 被折叠的 条评论
为什么被折叠?
被折叠的 条评论
为什么被折叠?
 到【灌水乐园】发言


