


视频参考:
【我要做开源】华为大佬亲授,Vue DevUI开源指南06:开源组件库中的CLI脚手架建设,再也不用担心重复工作和代码风格混乱了!_哔哩哔哩_bilibili
参考文档:
【我要做开源】Vue DevUI开源指南06:手把手带你开发一个脚手架 - 掘金
我的gitee:
https://gitee.com/shaoxiaohao/component-library-construction
6.这节课是给创建每个组件搭建组件cli脚手架
1.桌面新建一个文档 devui-cli
2.yarn init -y
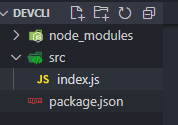
3.devui-cli/src/index.js
#!/usr/bin/env node
import { Command } from 'commander'
import { onCreate } from './commands/create'

// 创建命令对象
const program = new Command()

// 注册命令、参数、回调
program
  // 注册 create 命令
  .command('create')
  // 添加命令描述
  .description('创建一个组件模板或配置文件')
  // 添加命令参数 -t | --type <type> ,<type> 表示该参数必填,[type] 表示选填
  .option('-t --type <type>', `创建类型,可选值:component, lib-entry`)
  // 注册命令回调
  .action(onCreate)

// 执行命令行参数解析
program.parse()
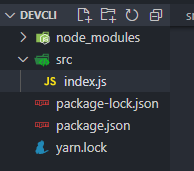
4.安装库
yarn add -D commander inquirer fs-extra kolorist
5.安装esbuild 库
npm i -D esbuild
6执行命令
npx esbuild -h

7.src/commands/create.js
import inquirer from 'inquirer'
import { red } from 'kolorist'

// create type 支持项
const CREATE_TYPES = ['component', 'lib-entry']
// 文档分类
const DOCS_CATEGORIES = ['通用', '导航', '反馈', '数据录入', '数据展示', '布局']

export async function onCreate(cmd = {}) {
  let { type } = cmd

  // 如果没有在命令参数里带入 type 那么就询问一次
  if (!type) {
    const result = await inquirer.prompt([
      {
        // 用于获取后的属性名
        name: 'type',
        // 交互方式为列表单选
        type: 'list',
        // 提示信息
        message: '(必填)请选择创建类型:',
        // 选项列表
        choices: CREATE_TYPES,
        // 默认值,这里是索引下标
        default: 0
      }
    ])
    // 赋值 type
    type = result.type
  }

  // 如果获取的类型不在我们支持范围内,那么输出错误提示并重新选择
  if (CREATE_TYPES.every((t) => type !== t)) {
    console.log(
      red(`当前类型仅支持:${CREATE_TYPES.join(', ')},收到不在支持范围内的 "${type}",请重新选择!`)
    )
    return onCreate()
  }

  try {
    switch (type) {
      case 'component':
        // 如果是组件,我们还需要收集一些信息
        const info = await inquirer.prompt([
          {
            name: 'name',
            type: 'input',
            message: '(必填)请输入组件 name ,将用作目录及文件名:',
            validate: (value) => {
              if (value.trim() === '') {
                return '组件 name 是必填项!'
              }
              return true
            }
          },
          {
            name: 'title',
            type: 'input',
            message: '(必填)请输入组件中文名称,将用作文档列表显示:',
            validate: (value) => {
              if (value.trim() === '') {
                return '组件名称是必填项!'
              }
              return true
            }
          },
          {
            name: 'category',
            type: 'list',
            message: '(必填)请选择组件分类,将用作文档列表分类:',
            choices: DOCS_CATEGORIES,
            default: 0
          }
        ])

        createComponent(info)
        break
      case 'lib-entry':
        createLibEntry()
        break
      default:
        break
    }
  } catch (e) {
    console.log(red('✖') + e.toString())
    process.exit(1)
  }
}

function createComponent(info) {
  // 输出收集到的组件信息
  console.log(info)
}

function createLibEntry() {
  console.log('create lib-entry file.')
}
8.package.json 修改为以下代码
 {
  "name": "devui-cli",
  "version": "1.0.0",
  "description": "",
  "main": "index.js",
  "scripts": {
    "dev": "esbuild --bundle ./src/index.js --format=cjs --platform=node --outdir=./lib --watch",
    "build": "esbuild --bundle ./src/index.js --format=cjs --platform=node --outdir=./lib",
    "cli": "node ./lib/index.js create"
  },
  "keywords": [],
  "author": "",
  "license": "ISC",
  "devDependencies": {
    "commander": "^8.3.0",
    "esbuild": "^0.14.5",
    "fs-extra": "^10.0.0",
    "inquirer": "^8.2.0",
    "kolorist": "^1.5.0"
  }
}
8.执行 yarn dev 然后再开一个脚本
9.输入以下命令
yarn cli


 455
455


 被折叠的 条评论
为什么被折叠?
被折叠的 条评论
为什么被折叠?
 到【灌水乐园】发言


