


springboot打war包指定配置环境
参考网址:
springboot项目打包方式
https://editor.csdn.net/md/?articleId=109153530
说明:
最近项目是一个springboot项目,但是是打war包部署到服务器里面的,遇到的问题就是war包程序不好命令行单独启动指定配置文件,所以需要在打包时候指定配置文件,然后放到服务器里面运行
测试前准备
准备一个springboot测试项目,引入web依赖写一个 controller 测试方法
package com.shaoming.controller;

import org.slf4j.Logger;
import org.slf4j.LoggerFactory;
import org.springframework.beans.factory.annotation.Value;
import org.springframework.web.bind.annotation.RequestMapping;
import org.springframework.web.bind.annotation.RequestMethod;
import org.springframework.web.bind.annotation.RestController;

import javax.servlet.http.HttpServletRequest;
/**
 * @ClassName: HelloController
 * @Author: 邵明
 * @Date: 2021/9/6 00:27
 * @Description:
 */
@RestController//表示这是springmvc的controller层,并且这个类的所有方法都是以json格式返回给前端
@RequestMapping("/springboot")//设置这个controlle的前缀url
public class HelloController {
    private static final Logger log = LoggerFactory.getLogger(HelloController.class);
    @Value("${server.port}")
    private String port;
    @Value("${project.message}")
    private String message;
    @Value("${spring.application.name}")
    private String projectName;
    @RequestMapping(value = "/hello",method = RequestMethod.GET)
    public String hello(HttpServletRequest request){
        String name = request.getParameter("name");
        log.info("项目端口号为: {}",port);
        log.info("项目名称为: {}",projectName);
        return "springboot整合测试,项目端口号为:"+port+",  项目名称为: "+projectName+
                "配置环境"+message;
    }
}
对应的springboot配置文件
application.yml
server:
  port: 8080
spring:
  application:
    name: springboot-war
  profiles:
    active: @activatedProperties@
project:
  message: default环境%
application-dev.yml
server:
  port: 8080
spring:
  application:
    name: springboot-war
  profiles:
    active: @activatedProperties@
project:
  message: dev环境%
application-test.yml
server:
  port: 8080
spring:
  application:
    name: springboot-war
  profiles:
    active: @activatedProperties@
project:
  message: test环境%
项目pom.xml配置
打包之前在pom.xml里面指定打包方式为war包
说明:
1.pom.xml最下面配置profiles标签,这是个模板
2.正常一个项目需要配置多个环境,开发(dev),测试(test),pre(预生产),pro(生产)
 <!--  配置环境  -->
    <profiles>
        <profile>
            <!-- 开发 -->
            <id>dev</id>
            <activation>
                <activeByDefault>true</activeByDefault>
            </activation>
            <properties>
                <activatedProperties>dev</activatedProperties>
            </properties>
        </profile>
        <profile>
            <!-- 测试 -->
            <id>test</id>
            <properties>
                <activatedProperties>test</activatedProperties>
            </properties>
        </profile>
        <profile>
            <!-- 准生产 -->
            <id>pre</id>
            <properties>
                <activatedProperties>pre</activatedProperties>
            </properties>
        </profile>
        <profile>
            <!-- 生产 -->
            <id>prod</id>
            <properties>
                <activatedProperties>prod</activatedProperties>
            </properties>
        </profile>
    </profiles>
打包命令
mvn clean install -DskipTests -Pdev
-DskipTests 表示测试环境
-P 指定配置环境
运行war包
前提服务器环境上要安装jdk和tomcat
省略。。。
war包复制到tomcat的webapps目录下
[root@VM-0-15-centos webapps]# pwd
/usr/local/tomcat8.5/webapps
[root@VM-0-15-centos webapps]# ls
boot-war boot-war.war docs examples host-manager layuimini manager ROOT
[root@VM-0-15-centos webapps]#
启动项目
sh /usr/local/tomcat8.5/bin/startup.sh
访问项目测试
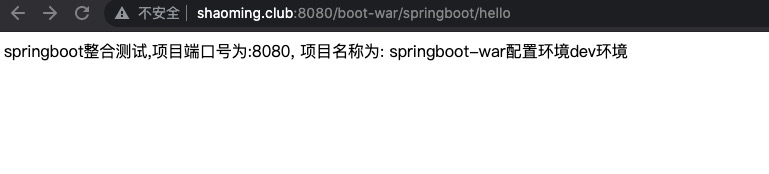
打包指定就是dev环境
测试成功
项目地址
项目已经提交至gitee
网址:https://gitee.com/shao_ming314/springboot-war-package-profile.git


 1160
1160


 被折叠的 条评论
为什么被折叠?
被折叠的 条评论
为什么被折叠?
 到【灌水乐园】发言


