


SpringBoot 整合 Swagger 只需要两个步骤: 引入 Swagger 依赖、创建 Swagger 配置类。
相关代码比较简单,不作为本文重点,放置于文末仅供参考。
本文主要讨论配置完成之后,访问遇到 404 的问题:
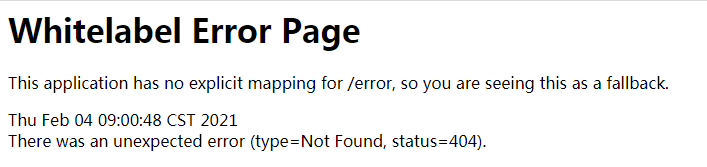
遇到如上报错,主要还分两种情况:
-
使用 swagger 3.0 以下 版本
如遇 404 错误,可能是因为当前环境拦截了 Swagger 默认的静态资源,只需在配置类文件中实现
WebMvcConfigurer接口并重写addResourceHandlers方法即可。相关代码可参考【附录1 : 整合 swagger 2.9 相关代码】
配置完成后 访问: http://localhost:8080/swagger-ui.html

-
使用 swagger 3.0 版本(目前最新版)
如遇 404 错误,可能有两种原因 :
1、依赖引入问题 ;
swagger 3.0版本已经移除了@EnableSwagger2注解。详情参考Swagger的更新文档https://github.com/springfox/springfox并且,官方推荐使用
starter依赖引入,参考【附录2 : 整合 swagger 3.0 相关代码】
2、访问路径问题(需要注意:Swagger 3.0 的默认路径与之前略有不同)
swagger 3.0 的默认路径是
http://localhost:8080/swagger-ui/index.html
其中index.html可以省略不写:
http://localhost:8080/swagger-ui/
而 Swagger 2.9 的默认路径是
http://localhost:8080/swagger-ui.html
附录1 : 整合 swagger 2.9 相关代码
-
pom.xml 配置文件
<!-- Swagger 依赖 --> <dependency> <groupId>io.springfox</groupId> <artifactId>springfox-swagger2</artifactId> <version>2.9.2</version> </dependency> <!-- Swagger UI 依赖 --> <dependency> <groupId>io.springfox</groupId> <artifactId>springfox-swagger-ui</artifactId> <version>2.9.2</version> </dependency> -
Swagger 配置类
@Configuration // 让 Spring 来加载该类配置 @EnableSwagger2 // 启用 Swagger2.createRestApi 函数创建 Docket 的 Bean public class Swagger2Config implements WebMvcConfigurer { /** * 创建 API 应用 * apiInfo 增加 API 相关信息 * 通过 select() 函数返回一个 ApiSelectorBuilder 实例,用来控制哪些接口暴露给 Swagger 来展现 * 本例采用指定扫描的包路径来定义指定要建立 API 的目录 */ @Bean public Docket createRestApi(){ return new Docket(DocumentationType.SWAGGER_2) .apiInfo(apiInfo()) // 用来展示该 API 的基本信息 .select() // 返回一个 ApiSelectorBuilder 实例,用来控制哪些接口暴露给 Swagger 来展现 .apis(RequestHandlerSelectors.basePackage("com.example.swagger.controller")) // 配置包扫描路径(根据自己项目调整,通常配置为控制器路径) .paths(PathSelectors.any()) // .build(); } /** * 创建 API 的基本信息(这些基本信息会展现在文档页面中) * 访问地址:http://xxx/swagger-ui.html */ private ApiInfo apiInfo(){ return new ApiInfoBuilder() .title("RESTful APIs") .description("RESTful APIs") .termsOfServiceUrl("http://localhost:8080/") .contact(new Contact("ambrose", "swagger.example", "123@456.com")) .version("1.0") .build(); } } -
接口文档示例(需要 swagger 自动生成文档的接口,与上面配置类中
com.example.swagger.controller路径对应)@RestController public class HelloWorldController { @ApiOperation(value = "hello", notes = "notes") @RequestMapping("/hello") public String hello() throws Exception{ return "Hello World, Spring Boot"; } } -
如遇 404 错误。可以单独添加一个配置文件(如下,记得
@Configuration注解。推荐),也可以直接对 swagger 的配置文件实现WebMvcConfigurer接口并重写该方法。@Configuration public class WebConfig implements WebMvcConfigurer { @Override public void addResourceHandlers(ResourceHandlerRegistry registry) { registry.addResourceHandler("swagger-ui.html") .addResourceLocations("classpath:/META-INF/resources/"); registry.addResourceHandler("/webjars/**") .addResourceLocations("classpath:/META-INF/resources/webjars/"); } }
附录2 : 整合 swagger 3.0 相关代码
- pom.xml 配置文件。(使用 2.9 中的配置有可能会引起 404)
<!-- Swagger 依赖 --> <dependency> <groupId>io.springfox</groupId> <artifactId>springfox-boot-starter</artifactId> <version>3.0.0</version> </dependency> - Swagger 配置类
@Configuration // 让 Spring 来加载该类配置 public class Swagger2Config implements WebMvcConfigurer { /** * 创建 API 应用 * apiInfo 增加 API 相关信息 * 通过 select() 函数返回一个 ApiSelectorBuilder 实例,用来控制哪些接口暴露给 Swagger 来展现 * 本例采用指定扫描的包路径来定义指定要建立 API 的目录 */ @Bean public Docket createRestApi(){ return new Docket(DocumentationType.SWAGGER_2) .apiInfo(apiInfo()) // 用来展示该 API 的基本信息 .select() // 返回一个 ApiSelectorBuilder 实例,用来控制哪些接口暴露给 Swagger 来展现 .apis(RequestHandlerSelectors.basePackage("com.example.swagger.controller")) // 配置包扫描路径(根据自己项目调整,通常配置为控制器路径) .paths(PathSelectors.any()) // .build(); } /** * 创建 API 的基本信息(这些基本信息会展现在文档页面中) * 访问地址:http://xxx/swagger-ui.html */ private ApiInfo apiInfo(){ return new ApiInfoBuilder() .title("RESTful APIs") .description("RESTful APIs") .termsOfServiceUrl("http://localhost:8080/") .contact(new Contact("ambrose", "swagger.example", "123@456.com")) .version("1.0") .build(); } } - 接口文档示例(需要 swagger 自动生成文档的接口,与上面配置类中
com.example.swagger.controller路径对应)@RestController public class HelloWorldController { @ApiOperation(value = "hello", notes = "notes") @RequestMapping("/hello") public String hello() throws Exception{ return "Hello World, Spring Boot"; } }


 260
260


 被折叠的 条评论
为什么被折叠?
被折叠的 条评论
为什么被折叠?
 到【灌水乐园】发言


