


opencv的强大之处,从这里开始,越来越能和信号处理接轨了,赞一个。
代码:
#include <opencv2/core/core.hpp>
#include <opencv2/imgproc/imgproc.hpp>
#include <opencv2/highgui/highgui.hpp>
#include <iostream>
using namespace std;
using namespace cv;
// "/mnt/hgfs/code_for_Linux/code_opencv/test1/pic/"
int main()
{
Mat srcImage = imread("/mnt/hgfs/code_for_Linux/code_opencv/test1/pic/3.jpg", 0);
if (!srcImage.data) {
return -1;
}
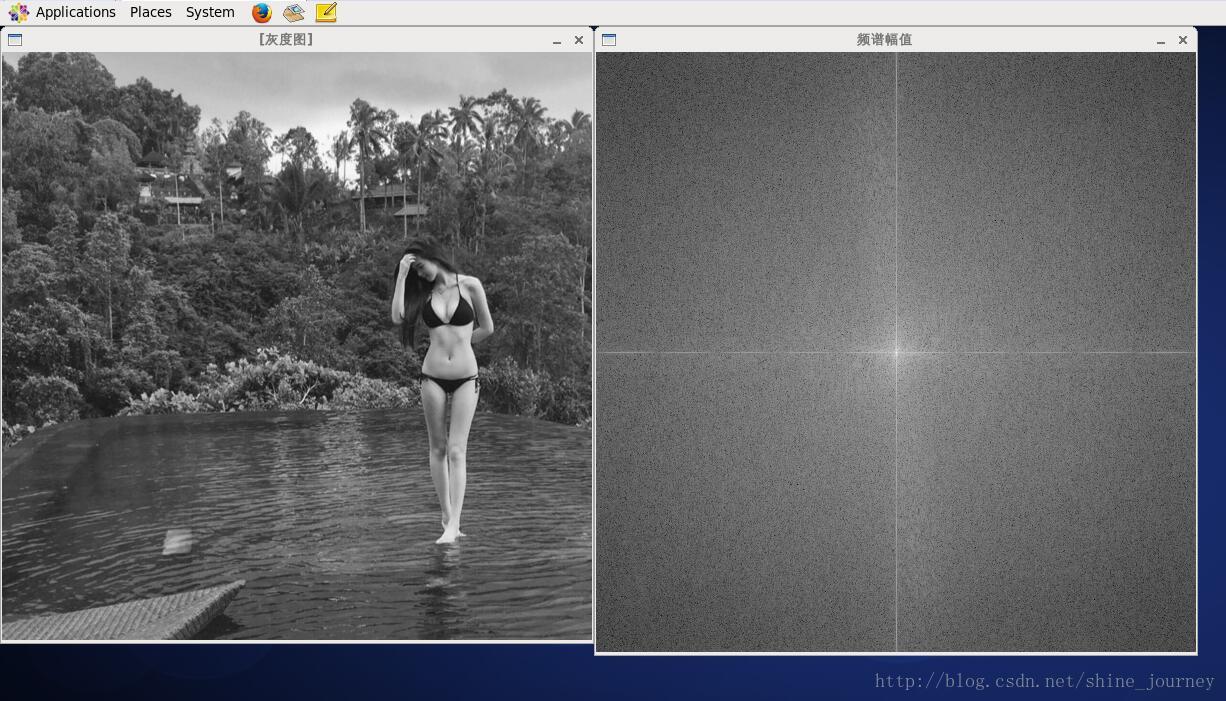
imshow("[灰度图]", srcImage);
int m = getOptimalDFTSize(srcImage.rows);
int n = getOptimalDFTSize(srcImage.cols);
Mat padded;
copyMakeBorder(srcImage, padded, 0, m - srcImage.rows, 0, n - srcImage.cols,
BORDER_CONSTANT, Scalar::all(0));
Mat planes[] = {Mat_<float>(padded), Mat::zeros(padded.size(), CV_32F)};
Mat complexI;
merge(planes, 2, complexI);
dft(complexI, complexI);
split(complexI, planes);
magnitude(planes[0], planes[1], planes[0]);
Mat magnitudeImage = planes[0];
magnitudeImage += Scalar::all(1);
log(magnitudeImage, magnitudeImage);
magnitudeImage = magnitudeImage(Rect(0,
0,
magnitudeImage.cols & - 2,
magnitudeImage.rows & - 2));
int cx = magnitudeImage.cols/2;
int cy = magnitudeImage.rows/2;
Mat q0(magnitudeImage, Rect(0, 0, cx, cy));
Mat q1(magnitudeImage, Rect(cx, 0, cx, cy));
Mat q2(magnitudeImage, Rect(0, cy, cx, cy));
Mat q3(magnitudeImage, Rect(cx, cy, cx, cy));
Mat tmp;
q0.copyTo(tmp);
q3.copyTo(q0);
tmp.copyTo(q3);
q1.copyTo(tmp);
q2.copyTo(q1);
tmp.copyTo(q2);
normalize(magnitudeImage, magnitudeImage, 0, 1, NORM_MINMAX);
imshow("频谱幅值", magnitudeImage);
waitKey(0);
return 0;
}
效果如下:
------


 5421
5421

 被折叠的 条评论
为什么被折叠?
被折叠的 条评论
为什么被折叠?
 到【灌水乐园】发言


