


LinearLayout布局
Android:gravity 是控制控件上的文字显示的位置。Android:layout_gravity 是控制控件显示的位置。
可选值:
这两个属性可选的值有:top、bottom、left、right、center_vertical、fill_vertical、center_horizontal、fill_horizontal、center、fill、clip_vertical。
而且这些属性是可以多选的,用“|”分开。
默认这个的值是:Gravity.LEFT
      注意!!!!


      当 android:orientation="vertical"  时, 只有水平方向的设置才起作用,垂直方向的设置不起作用。即:left,right,center_horizontal 是生效的。


      当 android:orientation="horizontal" 时, 只有垂直方向的设置才起作用,水平方向的设置不起作用。即:top,bottom,center_vertical 是生效的。
Demo代码:
<LinearLayout xmlns:android="http://schemas.android.com/apk/res/android"
android:layout_width="fill_parent"
android:layout_height="fill_parent"
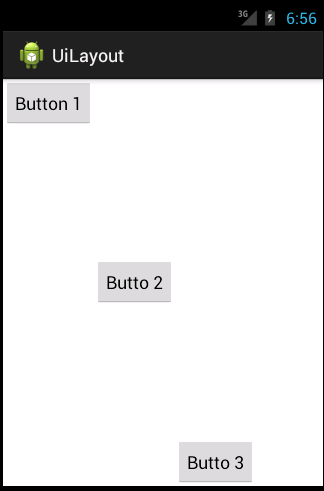
android:orientation="horizontal">
<Button
android:layout_width="wrap_content"
android:layout_height="wrap_content"
android:text="Button 1"
android:layout_gravity="top" />
<Button
android:layout_width="wrap_content"
android:layout_height="wrap_content"
android:text="Butto 2"
android:layout_gravity="center_vertical" />
<Button
android:layout_width="wrap_content"
android:layout_height="wrap_content"
android:text="Butto 3"
android:layout_gravity="bottom" />
</LinearLayout>
运行后效果:
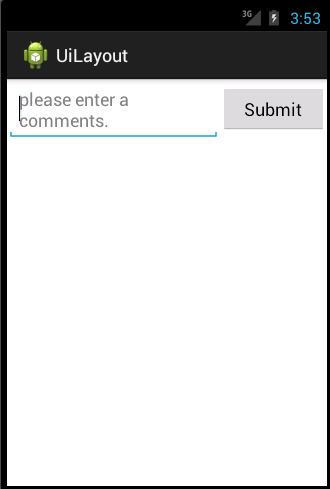
LinearLayout中还有一个非常重要的属性,android:layout_weight这个属性可以根据比例来指定控件的大小,在屏幕适配上起了非常大的作用,其实这个参数就是占据比例,计算方式是当前控件weigth/所有控件的weigth总和,也就是说weigth写的越大站的地方越大,下面是演示weight的代码:
      <LinearLayout xmlns:android="http://schemas.android.com/apk/res/android"


          android:layout_width="fill_parent"


          android:layout_height="fill_parent"


          android:orientation="horizontal">


          <EditText


              android:layout_width="0dp"


              android:layout_height="wrap_content"


              android:layout_weight="2"


              android:hint="please enter a comments."


           />


          <Button


              android:layout_width="0dp"


              android:layout_height="wrap_content"


              android:layout_weight="1"


              android:text="Submit" />


      </LinearLayout>
运行后的效果:


 1386
1386

 被折叠的 条评论
为什么被折叠?
被折叠的 条评论
为什么被折叠?
 到【灌水乐园】发言


