


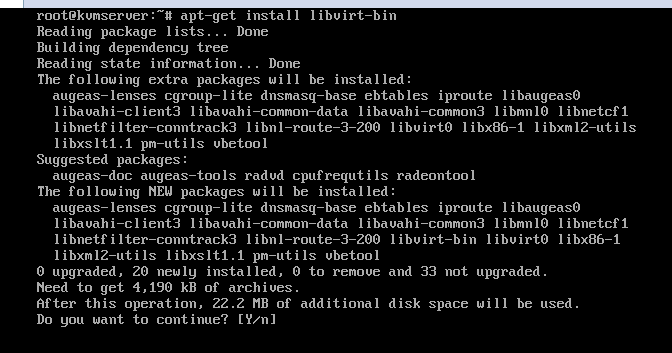
在server和client端都安装libvirt-bin
修改服务端的/etc/libvirt/libvirtd.conf配置文件,去掉listen_tls=0和listen_tcp=1前面的#号
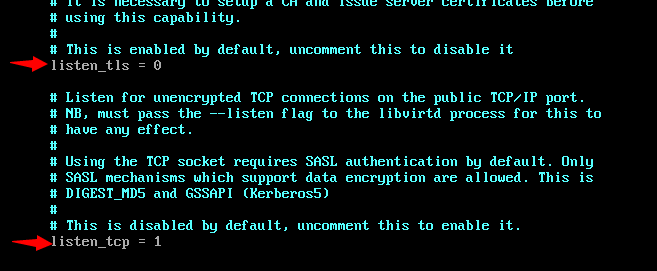
在tcp验证的地方添加auth_tcp = “none”

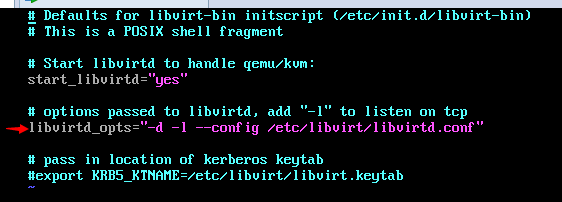
修改/etc/default/libvirtd-bin(因为默认的/etc/init.d/libvirtd-bin默认启动的就是这个)
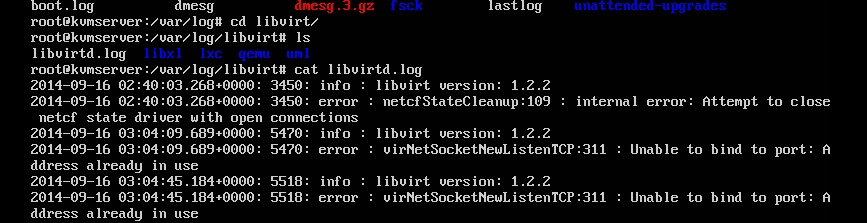
使用/etc/init.d/libvirt-bin stop停止服务,然后使用/etc/init.d/libvirt-bin start,如果启动有什么错误,记得看下/var/log/libvirt/libvirtd.log日志,看守护进程是否启动的话使用netstat –nlp就好了,n标示不需要解析域名,l标示显示listen状态的端口其他不显示,p标示显示端口对应的进程名,看到有16509端口标示正常(跟你的配置文件有关)

在客户端使用下面命令远程连接
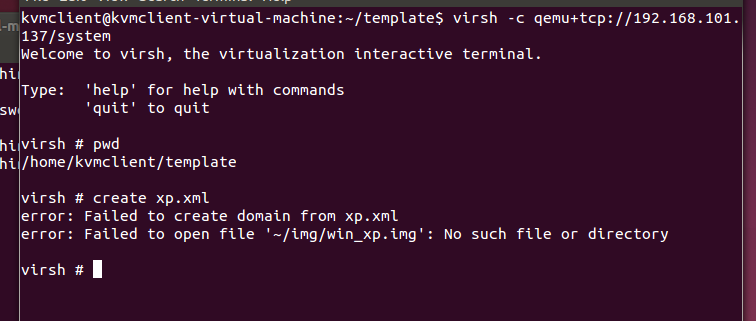
Virsh –c qemu+tcp//192.168.101.137/system
使用virsh domxml-from-native命令将我们前面创建虚拟机用的qemu-kvm命令转换成可以被libvirt使用的domain xml文件。创建一个文件并将我们的qemu-kvm命令输入其中如下内容

然后使用virsh domxml-from-native qemu-argv命令导出xml文件并保存,删掉xml文件中的UUID和MAC地址,并且修改qemu-system-x86_64为/usr/bin/qemu-system-x86_64(实际路径),修改~/img/win_xp.img为/home/kvmserver/img/win_xp.img

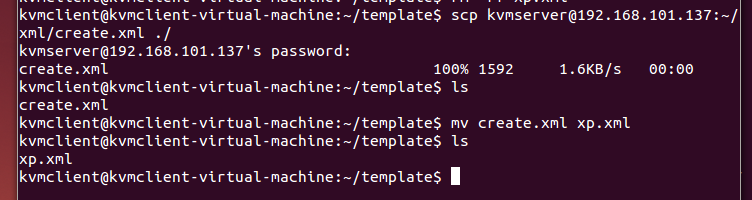
然后将文件移动到新的目录

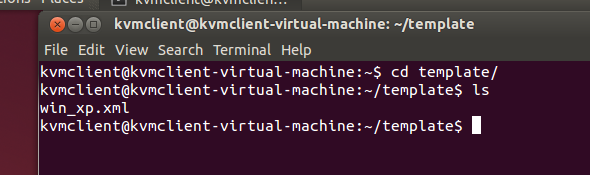
将xml文件移动到客户端
再使用virsh命令创建虚拟机前需要在服务器的对应目录下创建一个磁盘镜像文件

第一次执行命令发现创建失败

虚拟机的CPU虚拟化要开启

再次执行命令发现还是创建失败,提示tap1设备不存在,tun权限不够,直接修改xml的配置,修改网络配置为桥接,不再自己创建网卡后再指定,使用virsh会自动创建一个新的网卡,注意权限配置
<interface type=’bridge’>
	<source bridge=’virbr0’>
</interface><domain type='qemu'>
<name>win_xp</name>
<uuid>2300fadc-5533-4a9a-b4bb-efd6c47fccfe</uuid>
<memory unit='KiB'>524288</memory>
<currentMemory unit='KiB'>524288</currentMemory>
<vcpu placement='static'>1</vcpu>
<os>
<type arch='x86_64' machine='pc'>hvm</type>
<boot dev='cdrom'/>
</os>
<features>
<acpi/>
</features>
<clock offset='utc'/>
<on_poweroff>destroy</on_poweroff>
<on_reboot>restart</on_reboot>
<on_crash>destroy</on_crash>
<devices>
<emulator>/usr/bin/qemu-system-x86_64</emulator>
<disk type='file' device='disk'>
<driver name='qemu' type='raw'/>
<source file='/home/kvmserver/img/win_xp.img'/>
<target dev='hda' bus='ide'/>
<address type='drive' controller='0' bus='0' target='0' unit='0'/>
</disk>
<disk type='block' device='cdrom'>
<driver name='qemu' type='raw'/>
<source dev='/dev/cdrom'/>
<target dev='hdc' bus='ide'/>
<readonly/>
<address type='drive' controller='0' bus='1' target='0' unit='0'/>
</disk>
<controller type='ide' index='0'/>
<controller type='usb' index='0'/>
<controller type='pci' index='0' model='pci-root'/>
<interface type='bridge'>
<source bridge='virbr0'/>
</interface>
<input type='tablet' bus='usb'/>
<input type='mouse' bus='ps2'/>
<input type='keyboard' bus='ps2'/>
<graphics type='vnc' port='5901' autoport='no' listen=''>
<listen type='address' address='0.0.0.0'/>
</graphics>
<video>
<model type='cirrus' vram='9216' heads='1'/>
</video>
<memballoon model='virtio'/>
</devices>
</domain>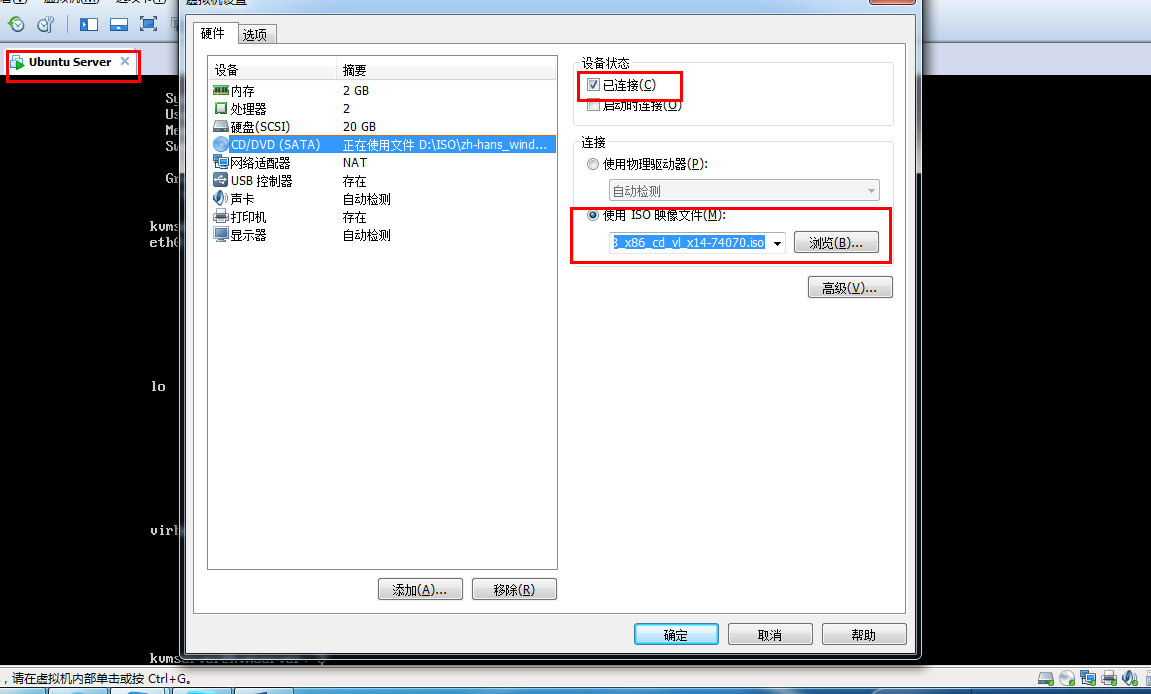
将xml创建文件从server传回client
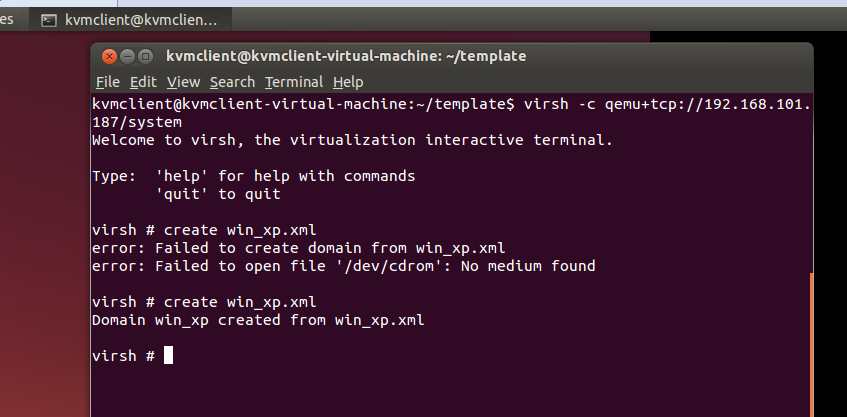
在template目录下启动virsh(中间报错是因为我忘记server的光驱选择的ISO文件但是没连接)
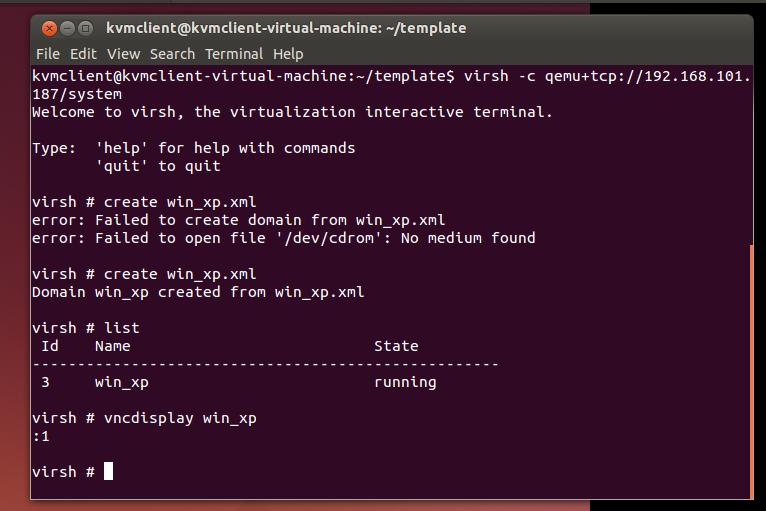
打开vnc
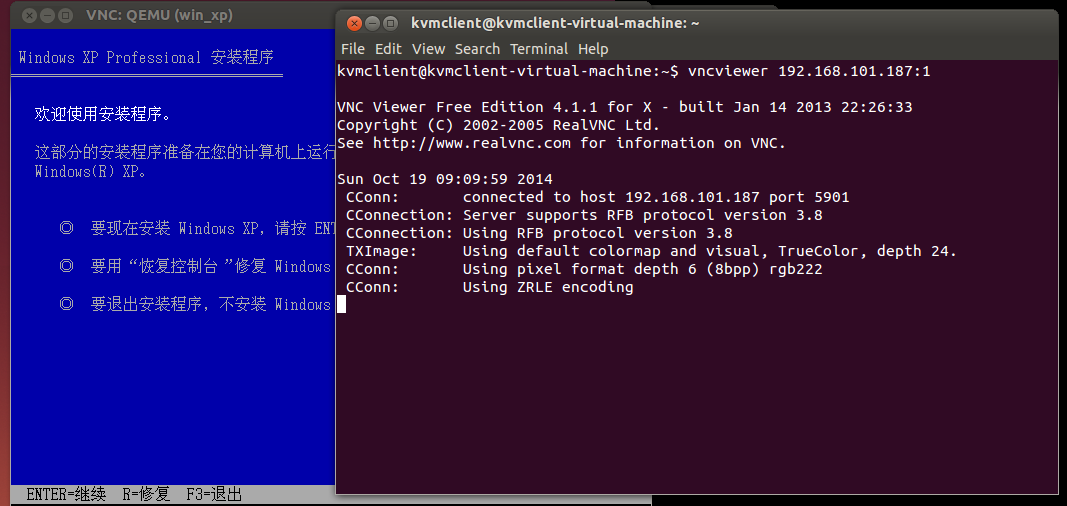
使用vnc远程连接
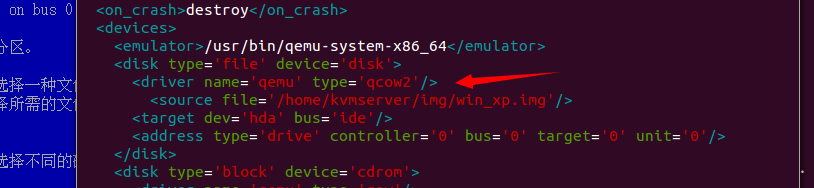
结果发现明明创建的是10G的磁盘,但是现在空间居然只有1MB
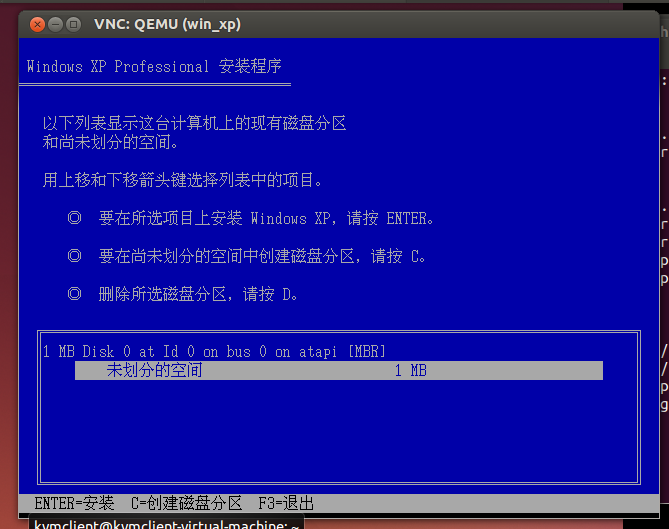
仔细检查xml文件,发现我们的磁盘的驱动格式为raw,应该改为qcow2
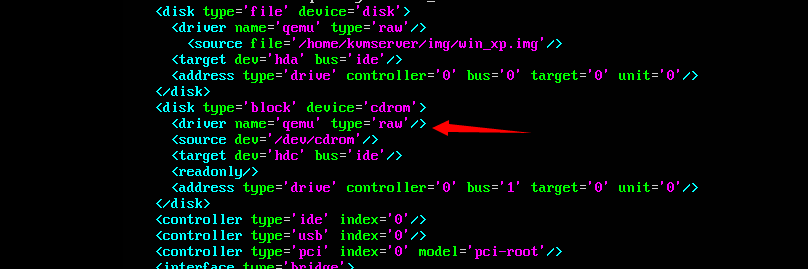
改为
安装完成后启动脚本如下,保存为start_xp.xml
<domain type='qemu'>
  <name>win_xp</name>
  <uuid>2300fadc-5533-4a9a-b4bb-efd6c47fccfe</uuid>
  <memory unit='KiB'>524288</memory>
  <currentMemory unit='KiB'>524288</currentMemory>
  <vcpu placement='static'>1</vcpu>
  <os>
    <type arch='x86_64' machine='pc'>hvm</type>
    <boot dev='hd'/>
  </os>
  <features>
    <acpi/>
  </features>
  <clock offset='utc'/>
  <on_poweroff>destroy</on_poweroff>
  <on_reboot>restart</on_reboot>
  <on_crash>destroy</on_crash>
  <devices>
    <emulator>/usr/bin/qemu-system-x86_64</emulator>
    <disk type='file' device='disk'>
      <driver name='qemu' type='raw'/>
      <source file='/home/kvmserver/img/win_xp.img'/>
      <target dev='hda' bus='ide'/>
      <address type='drive' controller='0' bus='0' target='0' unit='0'/>
    </disk>
    <controller type='ide' index='0'/>
    <controller type='usb' index='0'/>
    <controller type='pci' index='0' model='pci-root'/>
    <interface type='bridge'>
      <source bridge='virbr0'/>
    </interface>
    <input type='tablet' bus='usb'/>
    <input type='mouse' bus='ps2'/>
    <input type='keyboard' bus='ps2'/>
    <graphics type='vnc' port='5901' autoport='no' listen=''>
      <listen type='address' address='0.0.0.0'/>
    </graphics>
    <video>
      <model type='cirrus' vram='9216' heads='1'/>
    </video>
    <memballoon model='virtio'/>
  </devices>
</domain>
参考资料
http://www.chenyudong.com/http://libvirt.org/


 2545
2545

 被折叠的 条评论
为什么被折叠?
被折叠的 条评论
为什么被折叠?
 到【灌水乐园】发言


