


服务器动态资源请求
浏览器请求动态页面过程

WSGI
WSGI(Python Web Server Gateway Interface ),在不修改服务器和架构代码的前提下确保可以在多个架构下运行web服务器。
WSGI允许开发者将选择web框架和web服务器分开。可以混合匹配web服务器和web框架,选择一个适合的配对。
web服务器必须具备WSGI接口,所有的现代Python Web框架都已具备WSGI接口,它让你不对代码作修改就能使服务器和特点的web框架协同工作。
WSGI由web服务器支持,而web框架允许你选择适合自己的配对,但它同样对于服务器和框架开发者提供便利使他们可以专注于自己偏爱的领域和专长而不至于相互牵制。其他语言也有类似接口:java有Servlet API,Ruby 有 Rack。
定义WSGI接口
WSGI接口定义非常简单,它只要求Web开发者实现一个函数,就可以响应HTTP请求。
def application(environ, start_response):
    start_response('200 OK', [('Content-Type', 'text/html')])
    return 'Hello World!'
上面的application()函数就是符合WSGI标准的一个HTTP处理函数,它接收两个参数:
- environ:一个包含所有HTTP请求信息的dict对象;
- start_response:一个发送HTTP响应的函数。
整个application()函数本身没有涉及到任何解析HTTP的部分,也就是说,把底层web服务器解析部分和应用程序逻辑部分进行了分离。application()函数必须由WSGI服务器来调用。
web服务器-----WSGI协议---->web框架 传递的字典
{
    'HTTP_ACCEPT_LANGUAGE': 'zh-cn',
    'wsgi.file_wrapper': <built-infunctionuwsgi_sendfile>,
    'HTTP_UPGRADE_INSECURE_REQUESTS': '1',
    'uwsgi.version': b'2.0.15',
    'REMOTE_ADDR': '172.16.7.1',
    'wsgi.errors': <_io.TextIOWrappername=2mode='w'encoding='UTF-8'>,
    'wsgi.version': (1,0),
    'REMOTE_PORT': '40432',
    'REQUEST_URI': '/',
    'SERVER_PORT': '8000',
    'wsgi.multithread': False,
    'HTTP_ACCEPT': 'text/html,application/xhtml+xml,application/xml;q=0.9,*/*;q=0.8',
    'HTTP_HOST': '172.16.7.152: 8000',
    'wsgi.run_once': False,
    'wsgi.input': <uwsgi._Inputobjectat0x7f7faecdc9c0>,
    'SERVER_PROTOCOL': 'HTTP/1.1',
    'REQUEST_METHOD': 'GET',
    'HTTP_ACCEPT_ENCODING': 'gzip,deflate',
    'HTTP_CONNECTION': 'keep-alive',
    'uwsgi.node': b'ubuntu',
    'HTTP_DNT': '1',
    'UWSGI_ROUTER': 'http',
    'SCRIPT_NAME': '',
    'wsgi.multiprocess': False,
    'QUERY_STRING': '',
    'PATH_INFO': '/index.html',
    'wsgi.url_scheme': 'http',
    'HTTP_USER_AGENT': 'Mozilla/5.0(Macintosh;IntelMacOSX10_12_5)AppleWebKit/603.2.4(KHTML,likeGecko)Version/10.1.1Safari/603.2.4',
    'SERVER_NAME': 'ubuntu'
}
应用程序示例
import time
def application(environ, start_response):
    status = '200 OK'
    response_headers = [('Content-Type', 'text/html')]
    start_response(status, response_headers)
    return str(environ) + '==Hello world from a simple WSGI application!--->%s\n' % time.ctime()
Web动态服务器-基本实现
├── web_server.py
├── web
│   └── my_web.py
└── html
    └── index.html
    .....
web/my_web.py
import time
def application(environ, start_response):
    status = '200 OK'
    response_headers = [('Content-Type', 'text/html')]
    start_response(status, response_headers)
    return str(environ) + '==Hello world from a simple WSGI application!--->%s\n' % time.ctime()
web_server.py
import select
import time
import socket
import sysimport re
import multiprocessing

class WSGIServer(object):
    """定义一个WSGI服务器的类"""

    def __init__(self, port, documents_root, app):

        # 1. 创建套接字
        self.server_socket = socket.socket(socket.AF_INET, socket.SOCK_STREAM)
        # 2. 绑定本地信息
        self.server_socket.setsockopt(socket.SOL_SOCKET, socket.SO_REUSEADDR, 1)
        self.server_socket.bind(("", port))
        # 3. 变为监听套接字
        self.server_socket.listen(128)

        # 设定资源文件的路径
        self.documents_root = documents_root

        # 设定web框架可以调用的函数(对象)
        self.app = app

    def run_forever(self):
        """运行服务器"""

        # 等待对方链接
        while True:
            new_socket, new_addr = self.server_socket.accept()
            # 创建一个新的进程来完成这个客户端的请求任务
            new_socket.settimeout(3)  # 3s
            new_process = multiprocessing.Process(target=self.deal_with_request, args=(new_socket,))
            new_process.start()
            new_socket.close()

    def deal_with_request(self, client_socket):
        """以长链接的方式,为这个浏览器服务器"""

        while True:
            try:
                request = client_socket.recv(1024).decode("utf-8")
            except Exception as ret:
                print("========>", ret)
                client_socket.close()
                return

            # 判断浏览器是否关闭
            if not request:
                client_socket.close()
                return

            request_lines = request.splitlines()
            for i, line in enumerate(request_lines):
                print(i, line)

            # 提取请求的文件(index.html)
            # GET /a/b/c/d/e/index.html HTTP/1.1
            ret = re.match(r"([^/]*)([^ ]+)", request_lines[0])
            if ret:
                print("正则提取数据:", ret.group(1))
                print("正则提取数据:", ret.group(2))
                file_name = ret.group(2)
                if file_name == "/":
                    file_name = "/index.html"

            # 如果不是以py结尾的文件,认为是普通的文件
            if not file_name.endswith(".py"):

                # 读取文件数据
                try:
                    f = open(self.documents_root+file_name, "rb")
                except:
                    response_body = "file not found, 请输入正确的url"

                    response_header = "HTTP/1.1 404 not found\r\n"
                    response_header += "Content-Type: text/html; charset=utf-8\r\n"
                    response_header += "Content-Length: %d\r\n" % (len(response_body))
                    response_header += "\r\n"

                    response = response_header + response_body

                    # 将header返回给浏览器
                    client_socket.send(response.encode('utf-8'))

                else:
                    content = f.read()
                    f.close()

                    response_body = content

                    response_header = "HTTP/1.1 200 OK\r\n"
                    response_header += "Content-Length: %d\r\n" % (len(response_body))
                    response_header += "\r\n"

                    # 将header返回给浏览器
                    client_socket.send(response_header.encode('utf-8') + response_body)

            # 以.py结尾的文件,就认为是浏览需要动态的页面
            else:
                # 准备一个字典,里面存放需要传递给web框架的数据
                env = {}
                # 存web返回的数据
                response_body = self.app(env, self.set_response_headers)

                # 合并header和body
                response_header = "HTTP/1.1 {status}\r\n".format(status=self.headers[0])
                response_header += "Content-Type: text/html; charset=utf-8\r\n"
                response_header += "Content-Length: %d\r\n" % len(response_body)
                for temp_head in self.headers[1]:
                    response_header += "{0}:{1}\r\n".format(*temp_head)

                response = response_header + "\r\n"
                response += response_body

                client_socket.send(response.encode('utf-8'))

    def set_response_headers(self, status, headers):
        """这个方法,会在 web框架中被默认调用"""
        response_header_default = [
            ("Data", time.ctime()),
            ("Server", "ItCast-python mini web server")
        ]

        # 将状态码/响应头信息存储起来
        # [字符串, [xxxxx, xxx2]]
        self.headers = [status, response_header_default + headers]

# 设置静态资源访问的路径
g_static_document_root = "./html"  # 设置动态资源访问的路径
g_dynamic_document_root = "./web"
def main():
    """控制web服务器整体"""
    # python3 xxxx.py 7890
    if len(sys.argv) == 3:
        # 获取web服务器的port
        port = sys.argv[1]
        if port.isdigit():
            port = int(port)
        # 获取web服务器需要动态资源时,访问的web框架名字
        web_frame_module_app_name = sys.argv[2]
    else:
        print("运行方式如: python3 xxx.py 7890 my_web_frame_name:application")
        return

    print("http服务器使用的port:%s" % port)

    # 将动态路径即存放py文件的路径,添加到path中,这样python就能够找到这个路径了
    sys.path.append(g_dynamic_document_root)

    ret = re.match(r"([^:]*):(.*)", web_frame_module_app_name)
    if ret:
        # 获取模块名
        web_frame_module_name = ret.group(1)
        # 获取可以调用web框架的应用名称
        app_name = ret.group(2)

    # 导入web框架的主模块
    web_frame_module = __import__(web_frame_module_name)
    # 获取那个可以直接调用的函数(对象)
    app = getattr(web_frame_module, app_name)

    # print(app)  # for test

    # 启动http服务器
    http_server = WSGIServer(port, g_static_document_root, app)
    # 运行http服务器
    http_server.run_forever()

if __name__ == "__main__":
    main()
运行
打开终端,输入以下命令开始服务器
python3 web_server.py my_web:application
打开浏览器

mini web框架-1-文件结构
├── dynamic ---存放py模块
│   └── my_web.py
├── templates ---存放模板文件
│   ├── center.html
│   ├── index.html
│   ├── location.html
│   └── update.html
├── static ---存放静态的资源文件
│   ├── css
│   │   ├── bootstrap.min.css
│   │   ├── main.css
│   │   └── swiper.min.css
│   └── js
│       ├── a.js
│       ├── bootstrap.min.js
│       ├── jquery-1.12.4.js
│       ├── jquery-1.12.4.min.js
│       ├── jquery.animate-colors.js
│       ├── jquery.animate-colors-min.js
│       ├── jquery.cookie.js
│       ├── jquery-ui.min.js
│       ├── server.js
│       ├── swiper.jquery.min.js
│       ├── swiper.min.js
│       └── zepto.min.js
└── web_server.py ---mini web服务器
my_web.py
import time
def application(environ, start_response):
    status = '200 OK'
    response_headers = [('Content-Type', 'text/html')]
    start_response(status, response_headers)
    return str(environ) + '==Hello world from a simple WSGI application!--->%s\n' % time.ctime()
web_server.py
import select
import time
import socket
import sys
import re
import multiprocessing

class WSGIServer(object):
    """定义一个WSGI服务器的类"""

    def __init__(self, port, documents_root, app):

        # 1. 创建套接字
        self.server_socket = socket.socket(socket.AF_INET, socket.SOCK_STREAM)
        # 2. 绑定本地信息
        self.server_socket.setsockopt(socket.SOL_SOCKET, socket.SO_REUSEADDR, 1)
        self.server_socket.bind(("", port))
        # 3. 变为监听套接字
        self.server_socket.listen(128)

        # 设定资源文件的路径
        self.documents_root = documents_root

        # 设定web框架可以调用的函数(对象)
        self.app = app

    def run_forever(self):
        """运行服务器"""

        # 等待对方链接
        while True:
            new_socket, new_addr = self.server_socket.accept()
            # 创建一个新的进程来完成这个客户端的请求任务
            new_socket.settimeout(3)  # 3s
            new_process = multiprocessing.Process(target=self.deal_with_request, args=(new_socket,))
            new_process.start()
            new_socket.close()

    def deal_with_request(self, client_socket):
        """以长链接的方式,为这个浏览器服务器"""

        while True:
            try:
                request = client_socket.recv(1024).decode("utf-8")
            except Exception as ret:
                print("========>", ret)
                client_socket.close()
                return

            # 判断浏览器是否关闭
            if not request:
                client_socket.close()
                return

            request_lines = request.splitlines()
            for i, line in enumerate(request_lines):
                print(i, line)

            # 提取请求的文件(index.html)
            # GET /a/b/c/d/e/index.html HTTP/1.1
            ret = re.match(r"([^/]*)([^ ]+)", request_lines[0])
            if ret:
                print("正则提取数据:", ret.group(1))
                print("正则提取数据:", ret.group(2))
                file_name = ret.group(2)
                if file_name == "/":
                    file_name = "/index.html"

            # 如果不是以py结尾的文件,认为是普通的文件
            if not file_name.endswith(".py"):

                # 读取文件数据
                try:
                    f = open(self.documents_root+file_name, "rb")
                except:
                    response_body = "file not found, 请输入正确的url"

                    response_header = "HTTP/1.1 404 not found\r\n"
                    response_header += "Content-Type: text/html; charset=utf-8\r\n"
                    response_header += "Content-Length: %d\r\n" % (len(response_body))
                    response_header += "\r\n"

                    response = response_header + response_body

                    # 将header返回给浏览器
                    client_socket.send(response.encode('utf-8'))

                else:
                    content = f.read()
                    f.close()

                    response_body = content

                    response_header = "HTTP/1.1 200 OK\r\n"
                    response_header += "Content-Length: %d\r\n" % (len(response_body))
                    response_header += "\r\n"

                    # 将header返回给浏览器
                    client_socket.send(response_header.encode('utf-8') + response_body)

            # 以.py结尾的文件,就认为是浏览需要动态的页面
            else:
                # 准备一个字典,里面存放需要传递给web框架的数据
                env = dict()
                # 存web返回的数据
                response_body = self.app(env, self.set_response_headers)

                # 合并header和body
                response_header = "HTTP/1.1 {status}\r\n".format(status=self.headers[0])
                response_header += "Content-Type: text/html; charset=utf-8\r\n"
                response_header += "Content-Length: %d\r\n" % len(response_body)
                for temp_head in self.headers[1]:
                    response_header += "{0}:{1}\r\n".format(*temp_head)

                response = response_header + "\r\n"
                response += response_body

                client_socket.send(response.encode('utf-8'))


    def set_response_headers(self, status, headers):
        """这个方法,会在 web框架中被默认调用"""
        response_header_default = [
            ("Data", time.time()),
            ("Server", "ItCast-python mini web server")
        ]

        # 将状态码/响应头信息存储起来
        # [字符串, [xxxxx, xxx2]]
        self.headers = [status, response_header_default + headers]

# 设置静态资源访问的路径
g_static_document_root = "./static"# 设置动态资源访问的路径
g_dynamic_document_root = "./dynamic"
def main():
    """控制web服务器整体"""
    # python3 xxxx.py 7890
    if len(sys.argv) == 3:
        # 获取web服务器的port
        port = sys.argv[1]
        if port.isdigit():
            port = int(port)
        # 获取web服务器需要动态资源时,访问的web框架名字
        web_frame_module_app_name = sys.argv[2]
    else:
        print("运行方式如: python3 xxx.py 7890 my_web_frame_name:application")
        return

    print("http服务器使用的port:%s" % port)

    # 将动态路径即存放py文件的路径,添加到path中,这样python就能够找到这个路径了
    sys.path.append(g_dynamic_document_root)

    ret = re.match(r"([^:]*):(.*)", web_frame_module_app_name)
    if ret:
        # 获取模块名
        web_frame_module_name = ret.group(1)
        # 获取可以调用web框架的应用名称
        app_name = ret.group(2)

    # 导入web框架的主模块
    web_frame_module = __import__(web_frame_module_name)
    # 获取那个可以直接调用的函数(对象)
    app = getattr(web_frame_module, app_name)

    # print(app)  # for test

    # 启动http服务器
    http_server = WSGIServer(port, g_static_document_root, app)
    # 运行http服务器
    http_server.run_forever()

if __name__ == "__main__":
    main()
mini web框架-2-显示页面
dynamic/my_web.py (更新)
import time
import os

template_root = "./templates"

def index(file_name):
    """返回index.py需要的页面内容"""
    # return "hahha" + os.getcwd()  # for test 路径问题
    try:
        file_name = file_name.replace(".py", ".html")
        f = open(template_root + file_name)
    except Exception as ret:
        return "%s" % ret
    else:
        content = f.read()
        f.close()
        return content

def center(file_name):
    """返回center.py需要的页面内容"""
    # return "hahha" + os.getcwd()  # for test 路径问题
    try:
        file_name = file_name.replace(".py", ".html")
        f = open(template_root + file_name)
    except Exception as ret:
        return "%s" % ret
    else:
        content = f.read()
        f.close()
        return content
def application(environ, start_response):
    status = '200 OK'
    response_headers = [('Content-Type', 'text/html')]
    start_response(status, response_headers)

    file_name = environ['PATH_INFO']
    if file_name == "/index.py":
        return index(file_name)
    elif file_name == "/center.py":
        return center(file_name)
    else:
        return str(environ) + '==Hello world from a simple WSGI application!--->%s\n' % time.ctime()
web_server.py (更新)
import select
import time
import socket
import sys
import re
import multiprocessing

class WSGIServer(object):
    """定义一个WSGI服务器的类"""

    def __init__(self, port, documents_root, app):

        # 1. 创建套接字
        self.server_socket = socket.socket(socket.AF_INET, socket.SOCK_STREAM)
        # 2. 绑定本地信息
        self.server_socket.setsockopt(socket.SOL_SOCKET, socket.SO_REUSEADDR, 1)
        self.server_socket.bind(("", port))
        # 3. 变为监听套接字
        self.server_socket.listen(128)

        # 设定资源文件的路径
        self.documents_root = documents_root

        # 设定web框架可以调用的函数(对象)
        self.app = app

    def run_forever(self):
        """运行服务器"""

        # 等待对方链接
        while True:
            new_socket, new_addr = self.server_socket.accept()
            # 创建一个新的进程来完成这个客户端的请求任务
            new_socket.settimeout(3)  # 3s
            new_process = multiprocessing.Process(target=self.deal_with_request, args=(new_socket,))
            new_process.start()
            new_socket.close()

    def deal_with_request(self, client_socket):
        """以长链接的方式,为这个浏览器服务器"""

        while True:
            try:
                request = client_socket.recv(1024).decode("utf-8")
            except Exception as ret:
                print("========>", ret)
                client_socket.close()
                return

            # 判断浏览器是否关闭
            if not request:
                client_socket.close()
                return

            request_lines = request.splitlines()
            for i, line in enumerate(request_lines):
                print(i, line)

            # 提取请求的文件(index.html)
            # GET /a/b/c/d/e/index.html HTTP/1.1
            ret = re.match(r"([^/]*)([^ ]+)", request_lines[0])
            if ret:
                print("正则提取数据:", ret.group(1))
                print("正则提取数据:", ret.group(2))
                file_name = ret.group(2)
                if file_name == "/":
                    file_name = "/index.html"

            # 如果不是以py结尾的文件,认为是普通的文件
            if not file_name.endswith(".py"):

                # 读取文件数据
                try:
                    print(self.documents_root+file_name)
                    f = open(self.documents_root+file_name, "rb")
                except:
                    response_body = "file not found, 请输入正确的url"

                    response_header = "HTTP/1.1 404 not found\r\n"
                    response_header += "Content-Type: text/html; charset=utf-8\r\n"
                    response_header += "Content-Length: %d\r\n" % (len(response_body))
                    response_header += "\r\n"

                    response = response_header + response_body

                    # 将header返回给浏览器
                    client_socket.send(response.encode('utf-8'))

                else:
                    content = f.read()
                    f.close()

                    response_body = content

                    response_header = "HTTP/1.1 200 OK\r\n"
                    response_header += "Content-Length: %d\r\n" % (len(response_body))
                    response_header += "\r\n"

                    # 将header返回给浏览器
                    client_socket.send(response_header.encode('utf-8') + response_body)

            # 以.py结尾的文件,就认为是浏览需要动态的页面
            else:
                # 准备一个字典,里面存放需要传递给web框架的数据
                env = dict()
                # ----------更新---------
                env['PATH_INFO'] = file_name  # 例如 index.py

                # 存web返回的数据
                response_body = self.app(env, self.set_response_headers)

                # 合并header和body
                response_header = "HTTP/1.1 {status}\r\n".format(status=self.headers[0])
                response_header += "Content-Type: text/html; charset=utf-8\r\n"
                response_header += "Content-Length: %d\r\n" % len(response_body.encode("utf-8"))
                for temp_head in self.headers[1]:
                    response_header += "{0}:{1}\r\n".format(*temp_head)

                response = response_header + "\r\n"
                response += response_body

                client_socket.send(response.encode('utf-8'))


    def set_response_headers(self, status, headers):
        """这个方法,会在 web框架中被默认调用"""
        response_header_default = [
            ("Data", time.time()),
            ("Server", "ItCast-python mini web server")
        ]

        # 将状态码/响应头信息存储起来
        # [字符串, [xxxxx, xxx2]]
        self.headers = [status, response_header_default + headers]

# 设置静态资源访问的路径
g_static_document_root = "./static"# 设置动态资源访问的路径
g_dynamic_document_root = "./dynamic"
def main():
    """控制web服务器整体"""
    # python3 xxxx.py 7890
    if len(sys.argv) == 3:
        # 获取web服务器的port
        port = sys.argv[1]
        if port.isdigit():
            port = int(port)
        # 获取web服务器需要动态资源时,访问的web框架名字
        web_frame_module_app_name = sys.argv[2]
    else:
        print("运行方式如: python3 xxx.py 7890 my_web_frame_name:app")
        return

    print("http服务器使用的port:%s" % port)

    # 将动态路径即存放py文件的路径,添加到path中,这样python就能够找到这个路径了
    sys.path.append(g_dynamic_document_root)

    ret = re.match(r"([^:]*):(.*)", web_frame_module_app_name)
    if ret:
        # 获取模块名
        web_frame_module_name = ret.group(1)
        # 获取可以调用web框架的应用名称
        app_name = ret.group(2)

    # 导入web框架的主模块
    web_frame_module = __import__(web_frame_module_name)
    # 获取那个可以直接调用的函数(对象)
    app = getattr(web_frame_module, app_name)

    # print(app)  # for test

    # 启动http服务器
    http_server = WSGIServer(port, g_static_document_root, app)
    # 运行http服务器
    http_server.run_forever()

if __name__ == "__main__":
    main()
浏览器打开看效果

mini web框架-3-替换模板
dynamic/my_web.py
import time
import os
import re

template_root = "./templates"

def index(file_name):
    """返回index.py需要的页面内容"""
    # return "hahha" + os.getcwd()  # for test 路径问题
    try:
        file_name = file_name.replace(".py", ".html")
        f = open(template_root + file_name)
    except Exception as ret:
        return "%s" % ret
    else:
        content = f.read()
        f.close()

        # --------更新-------
        data_from_mysql = "数据还没有敬请期待...."
        content = re.sub(r"\{%content%\}", data_from_mysql, content)

        return content

def center(file_name):
    """返回center.py需要的页面内容"""
    # return "hahha" + os.getcwd()  # for test 路径问题
    try:
        file_name = file_name.replace(".py", ".html")
        f = open(template_root + file_name)
    except Exception as ret:
        return "%s" % ret
    else:
        content = f.read()
        f.close()

        # --------更新-------
        data_from_mysql = "暂时没有数据,,,,~~~~(>_<)~~~~ "
        content = re.sub(r"\{%content%\}", data_from_mysql, content)

        return content
def application(environ, start_response):
    status = '200 OK'
    response_headers = [('Content-Type', 'text/html')]
    start_response(status, response_headers)

    file_name = environ['PATH_INFO']
    if file_name == "/index.py":
        return index(file_name)
    elif file_name == "/center.py":
        return center(file_name)
    else:
        return str(environ) + '==Hello world from a simple WSGI application!--->%s\n' % time.ctime()

闭包
在函数内部再定义一个函数,并且这个函数用到了外边函数的变量,那么将这个函数以及用到的一些变量称之为闭包
def test(num):
	def test_in(num_in):
		print("in test_in 函数, num_in is %d" % num_in)
		return num+num_in
	return test_in

# 给test函数赋值,这个10就是给参数num
ret = test(10)
print(ret)
# 注意这里的100其实给参数num_in
print(ret(100))

通过实例对象方式实现
class Test(object):
	def __init__(self,num):
		self.num = num

	def __call__(self,num_in):
		print('num_in = %d' % num_in)
		print('res = %d' % (self.num+num_in))

test = Test(10)
test(100)

- 函数:能够完成一般的功能,传递的是这个函数的引用,只有功能
- 闭包:能够完成较复杂的功能,传递的是闭包中的函数以及数据,因此是功能+数据(可以说是阉割版的实例对象)
- 实例对象:能够完成最复杂的功能,因为实例对象继承了从父类到object中的各种各样的方法和属性,所以传递的是很多功能+很多数据(可以理解为增强版闭包)
定义一条直线y =ax+b
def line_conf(a,b):
	def line(x):
		return a*x + b
	return line

line1 = line_conf(1,1)
line2 = line_conf(4,5)
print(line1(5))  # 1*5+1 = 6
print(line2(5))  # 4*5+5 = 25
这个例子中,函数line与变量a,b构成闭包。在创建闭包的时候,我们通过line_conf的参数a,b说明了这两个变量的取值,这样,我们就确定了函数的最终形式(y = x + 1和y = 4x + 5)。我们只需要变换参数a,b,就可以获得不同的直线表达函数。由此,我们可以看到,闭包也具有提高代码可复用性的作用。
如果没有闭包,我们需要每次创建直线函数的时候同时说明a,b,x。这样,我们就需要更多的参数传递,也减少了代码的可移植性。
def 外层函数的名称(参数):
    def 内层函数的名称():
         pass
     return  内层函数的引用
注意:
由于闭包引用了外部函数的局部变量,则外部函数的局部变量没有及时释放,消耗内存
修改外部函数中的变量
- python3的方法
def counter(start=0): def incr(): nonlocal start start += 1 return start return incr c1 = counter(5) print(c1()) # 6 print(c1()) # 7 c2 = counter(50) print(c2()) # 51 print(c2()) # 52 - python2的方法
def counter(start=0):
    count=[start]
    def incr():
        count[0] += 1
        return count[0]
    return incr

c1 = closeure.counter(5)
print(c1())  # 6
print(c1())  # 7
c2 = closeure.counter(100)
print(c2())  # 101
print(c2())  # 102
装饰器
在不违反开放封闭的原则下,对被装饰的函数进行功能扩充
所谓装饰器就是在闭包的基础上传递了一个函数,然后覆盖原来函数的执行入口,以后调用这个函数的时候,就可以额外实现一些功能了。装饰器的存在主要是为了不修改原函数的代码,也不修改其他调用这个函数的代码,就能实现功能的拓展。
封闭:已实现的功能代码块
开放:对扩展开发
先来看一个装饰器例子
def set_func(func):
    def call_func():
        print("这是权限验证1")
        print("这是权限验证2")
        func()
    return call_func

@set_func
def test1():
    print("-------test1--------")

test1()

再看如下代码:
def set_func(func):
    def call_func():
        print("这是权限验证1")
        print("这是权限验证2")
        func()
    return call_func

def test1():
	print('----test1----')

test1 = set_func(test1)
test1()

以上代码的执行结果与前面相同,这说明了装饰器@set_func等价于执行了test1 = set_fuct(test1)
装饰器(decorator)功能
- 引入日志
- 函数执行时间统计
- 执行函数前预备处理
- 执行函数后清理功能
- 权限校验等场景
- 缓存
对无参数无返回值的函数进行装饰
def set_func(func):
	def call_func():
		print('这是权限验证...')
		func()
	return call_func

@set_func
def test():
	print('----test----')

test()

对有参数无返回值的函数进行装饰
def set_func(func):
	def call_func(a,b):
		print('---权限验证----')
		func(a,b)
	return call_func

@set_func
def test(a,b):
	print('a+b=%d' % (a+b))

test(4,5)

当原函数需要传参时,装饰器(即闭包)的内函数以及内函数中调用原函数的部分都需要加上相同数量的参数。
同一个装饰器对不同函数进行装饰
def set_func(func):
	def call_func(a):
		print('正在执行代码.....')
		func(a)
	return call_func

@set_func
def test1(num):
	print('in test1 num = %d' % num)

@set_func
def test2(num):
	print('in test2 num = %d' % num)

test1(100)
test2(200)
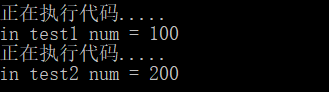
可以看出通过添加装饰器实现了不修改test和test2函数本身而增加功能的效果,并且执行时所调用的函数名字依然不变。
装饰器在还未调用前就已经开始装饰
def set_func(func):
	print('正在进行装饰....')
	def call_func():
		print('正在执行代码.....')
		func()
	return call_func

@set_func
def test():
	print('test.....')

多个装饰器对同一函数进行装饰,应该先装饰里层的,再装饰外层的。
def set_func1(func):
	print('装饰器1.....')
	def call_func1():
		func()
	return call_func1

def set_func2(func):
	print('装饰器2.....')
	def call_func2():
		func()
	return call_func2

@set_func1
@set_func2
def test():
	print('test......')

对带有不定长参数的函数进行装饰
def set_func(func):
    print("---开始装饰----")
    def call_func(*args, **kwargs):
        print("执行代码...")
        func(*args, **kwargs)
    return call_func

@set_func
def test1(num, *args, **kwargs):
    print("-------test1--------%d " % num)
    print("-------test1-------- ", args)
    print("-------test1-------- ", kwargs)


test1(100)
test1(100, 200)
test1(100, 200, 300, mm=100)

对带有返回值的函数进行装饰
def set_func(func):
    print("---开始装饰----")
    def call_func(num):
        print("执行代码....")
        return func(num)
    return call_func

@set_func
def test1(num):
    print("in test1 num = %d " % num)
    return "ok"


ret = test1(100)
print(ret)
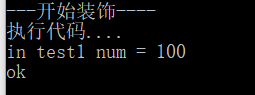
当原函数有返回值时,装饰器(即闭包)的内函数也需要有返回值,且调用原函数的部分需要将原函数的返回值用一个变量进行接收。
为了使装饰器具有通用性,即能够装饰有参、无参、有返回值和无返回值的函数,直接在定义装饰器的时候就将不定长参数和返回值都写上,因为不定长参数包括了零个或零个以上的参数,而无返回值时相当于返回了None。
类装饰器
装饰器函数其实是这样一个接口约束,它必须接受一个callable对象作为参数,然后返回一个callable对象。在Python中一般callable对象都是函数,但也有例外。只要某个对象重写了 __call__() 方法,那么这个对象就是callable的。
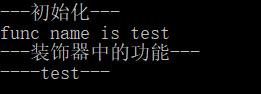
class Test(object):
    def __init__(self, func):
        print("---初始化---")
        print("func name is %s" % func.__name__)
        self.__func = func
    def __call__(self):
        print("---装饰器中的功能---")
        self.__func()

@Test
def test():
    print("----test---")

test()
说明:
- 当用Test来装作装饰器对test函数进行装饰的时候 首先会创建Test的实例对象,并且会把test这个函数名当做参数传递到__init__方法中 即在__init__方法中的属性__func指向了test指向的函数
- test指向了用Test创建出来的实例对象
- 当在使用test()进行调用时,就相当于这个对象(),因此会调用这个对象的__call__方法
- 为了能够在__call__方法中调用原来test指向的函数体,所以在__init__方法中就需要一个实例属性来保存这个函数体的引用 所以才有了self._func = func这句代码,从而在调用_call__方法中能够调用到test之前的函数体
装饰器带有参数
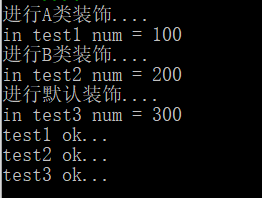
def options(op):
	def set_func(func):
		def call_func(num):
			if op == 1:
				print('进行A类装饰....')
			elif op == 2:
				print('进行B类装饰....')
			else:
				print('进行默认装饰....')
			return func(num)
		return call_func
	return set_func

@options(1)
def test1(num):
	print('in test1 num = %d' % num)
	return 'test1 ok...'
@options(2)
def test2(num):
	print('in test2 num = %d' % num)
	return 'test2 ok...'
@options(3)
def test3(num):
	print('in test3 num = %d' % num)
	return 'test3 ok...'

ret1 = test1(100)
ret2 = test2(200)
ret3 = test3(300)
print(ret1)
print(ret2)
print(ret3)
- 带有参数的装饰器可以理解为首先执行options(op)这个函数,执行结果有个返回值,返回里面闭包的引用
- @符号后面跟上闭包的引用,@options,就相当于对下面的函数用闭包进行装饰,回到了我们熟悉的装饰器
- 利用带参数的装饰器能够实现对不同函数实现不同的装饰效果。
mini web框架-4-路由
路由是指路由器从一个接口上收到数据包,根据数据包的目的地址进行定向并转发到另一个接口的过程。路由通常与桥接来对比,在粗心的人看来,它们似乎完成的是同样的事。它们的主要区别在于桥接发生在OSI参考模型的第二层(数据链路层),而路由发生在第三层(网络层)。这一区别使二者在传递信息的过程中使用不同的信息,从而以不同的方式来完成其任务。
dynamic/my_web.py
import time
import os
import re

template_root = "./templates"
# ----------更新----------# 用来存放url路由映射# url_route = {#   "/index.py": index_func,#   "/center.py": center_func# }
g_url_route = dict()
# ----------更新----------
def route(url):
    def func1(func):
        # 添加键值对,key是需要访问的url,value是当这个url需要访问的时候,需要调用的函数引用
        g_url_route[url] = func
        def func2(file_name):
            return func(file_name)
        return func2
    return func1

@route("/index.py")  # ----------更新----------
def index(file_name):
    """返回index.py需要的页面内容"""
    # return "hahha" + os.getcwd()  # for test 路径问题
    try:
        file_name = file_name.replace(".py", ".html")
        f = open(template_root + file_name)
    except Exception as ret:
        return "%s" % ret
    else:
        content = f.read()
        f.close()

        data_from_mysql = "暂时没有数据"
        content = re.sub(r"\{%content%\}", data_from_mysql, content)

        return content

@route("/center.py")
# ----------更新----------
def center(file_name):
    """返回center.py需要的页面内容"""
    # return "hahha" + os.getcwd()  # for test 路径问题
    try:
        file_name = file_name.replace(".py", ".html")
        f = open(template_root + file_name)
    except Exception as ret:
        return "%s" % ret
    else:
        content = f.read()
        f.close()

        data_from_mysql = "暂时没有数据,,,,~~~~(>_<)~~~~ "
        content = re.sub(r"\{%content%\}", data_from_mysql, content)

        return content

def application(environ, start_response):
    status = '200 OK'
    response_headers = [('Content-Type', 'text/html')]
    start_response(status, response_headers)

    file_name = environ['PATH_INFO']
    # ----------更新----------
    try:
        return g_url_route[file_name](file_name)
    except Exception as ret:
        return "%s" % ret
伪静态、静态和动态的区别
静态URL
静态URL类似 域名/news/2012-5-18/110.html 我们一般称为真静态URL,每个网页有真实的物理路径,也就是真实存在服务器里的。
静态网站对SEO(搜索引擎优化,SEO(Search Engine Optimization):汉译为搜索引擎优化。是一种方式:利用搜索引擎的规则提高网站在有关搜索引擎内的自然排名。目的是让其在行业内占据领先地位,获得品牌收益。很大程度上是网站经营者的一种商业行为,将自己或自己公司的排名前移。)的影响:静态URL对SEO肯定有加分的影响,因为打开速度快,这个是本质。
优点是:
网站打开速度快,因为它不用进行运算;另外网址结构比较友好,利于记忆。
缺点是:
最大的缺点是如果是中大型网站,则产生的页面特别多,不好管理。
动态URL
动态URL类似 域名/NewsMore.asp?id=5 或者 域名/DaiKuan.php?id=17,带有?号的URL,我们一般称为动态网址,每个URL只是一个逻辑地址,并不是真实物理存在服务器硬盘里的。
动态URL对SEO的影响:目前百度SE已经能够很好的理解动态URL,所以对SEO没有什么减分的影响(特别复杂的URL结构除外)。所以你无论选择动态还是静态其实都无所谓,看你选择的程序和需求了。
优点是:
适合中大型网站,修改页面很方便,因为是逻辑地址,所以占用硬盘空间要比纯静态网站小。
缺点是:
因为要进行运算,所以打开速度稍慢,不过这个可有忽略不计,目前有服务器缓存技术可以解决速度问题。最大的缺点是URL结构稍稍复杂,不利于记忆。
伪静态URL
伪静态URL类似 域名/course/74.html 这个URL和真静态URL类似。他是通过伪静态规则把动态URL伪装成静态网址。也是逻辑地址,不存在物理地址。
对SEO的影响:和动态URL一样,对SEO没有什么减分影响。
优点是:
URL比较友好,利于记忆。非常适合大中型网站,是个折中方案。
缺点是:
设置麻烦,服务器要支持重写规则。另外进行了伪静态网站访问速度并没有变快,因为实质上它会额外的进行运算解释,反正增加了服务器负担,速度反而变慢,不过现在的服务器都很强大,这种影响也可以忽略不计。还有可能会造成动态URL和静态URL都被搜索引擎收录,不过可以用robots禁止掉动态地址。
mini-web框架-实现伪静态url
运行方式如下:
python3 web_server.py 7890 my_web:application
web_server.py(部分更新)
import select
import time
import socket
import sys
import re
import multiprocessing


class WSGIServer(object):
    """定义一个WSGI服务器的类"""

    def __init__(self, port, documents_root, app):

        # 1. 创建套接字
        self.server_socket = socket.socket(socket.AF_INET, socket.SOCK_STREAM)
        # 2. 绑定本地信息
        self.server_socket.setsockopt(socket.SOL_SOCKET, socket.SO_REUSEADDR, 1)
        self.server_socket.bind(("", port))
        # 3. 变为监听套接字
        self.server_socket.listen(128)

        # 设定资源文件的路径
        self.documents_root = documents_root

        # 设定web框架可以调用的函数(对象)
        self.app = app

    def run_forever(self):
        """运行服务器"""

        # 等待对方链接
        while True:
            new_socket, new_addr = self.server_socket.accept()
            # 创建一个新的进程来完成这个客户端的请求任务
            new_socket.settimeout(3)  # 3s
            new_process = multiprocessing.Process(target=self.deal_with_request, args=(new_socket,))
            new_process.start()
            new_socket.close()

    def deal_with_request(self, client_socket):
        """以长链接的方式,为这个浏览器服务器"""

        while True:
            try:
                request = client_socket.recv(1024).decode("utf-8")
            except Exception as ret:
                print("========>", ret)
                client_socket.close()
                return

            # 判断浏览器是否关闭
            if not request:
                client_socket.close()
                return

            request_lines = request.splitlines()
            for i, line in enumerate(request_lines):
                print(i, line)

            # 提取请求的文件(index.html)
            # GET /a/b/c/d/e/index.html HTTP/1.1
            ret = re.match(r"([^/]*)([^ ]+)", request_lines[0])
            if ret:
                print("正则提取数据:", ret.group(1))
                print("正则提取数据:", ret.group(2))
                file_name = ret.group(2)
                if file_name == "/":
                    file_name = "/index.html"

            # 如果不是以.html结尾的文件,都认为是普通的文件
            # 如果是.html结尾的请求,那么就让web框架进行处理
            if not file_name.endswith(".html"):  # --------- 进行了更新-------

                # 读取文件数据
                try:
                    print(self.documents_root+file_name)
                    f = open(self.documents_root+file_name, "rb")
                except:
                    response_body = "file not found, 请输入正确的url"

                    response_header = "HTTP/1.1 404 not found\r\n"
                    response_header += "Content-Type: text/html; charset=utf-8\r\n"
                    response_header += "Content-Length: %d\r\n" % (len(response_body))
                    response_header += "\r\n"

                    response = response_header + response_body

                    # 将header返回给浏览器
                    client_socket.send(response.encode('utf-8'))

                else:
                    content = f.read()
                    f.close()

                    response_body = content

                    response_header = "HTTP/1.1 200 OK\r\n"
                    response_header += "Content-Length: %d\r\n" % (len(response_body))
                    response_header += "\r\n"

                    # 将header返回给浏览器
                    client_socket.send(response_header.encode('utf-8') + response_body)

            # 以.py结尾的文件,就认为是浏览需要动态的页面
            else:
                # 准备一个字典,里面存放需要传递给web框架的数据
                env = dict()
                env['PATH_INFO'] = file_name  # 例如 index.py

                # 存web返回的数据
                response_body = self.app(env, self.set_response_headers)

                # 合并header和body
                response_header = "HTTP/1.1 {status}\r\n".format(status=self.headers[0])
                response_header += "Content-Type: text/html; charset=utf-8\r\n"
                response_header += "Content-Length: %d\r\n" % len(response_body.encode("utf-8"))
                for temp_head in self.headers[1]:
                    response_header += "{0}:{1}\r\n".format(*temp_head)

                response = response_header + "\r\n"

                response += response_body

                client_socket.send(response.encode('utf-8'))


    def set_response_headers(self, status, headers):
        """这个方法,会在 web框架中被默认调用"""
        response_header_default = [
            ("Data", time.time()),
            ("Server", "ItCast-python mini web server")
        ]

        # 将状态码/相应头信息存储起来
        # [字符串, [xxxxx, xxx2]]
        self.headers = [status, response_header_default + headers]


# 设置静态资源访问的路径
g_static_document_root = "./static"
# 设置动态资源访问的路径
g_dynamic_document_root = "./dynamic"

def main():
    """控制web服务器整体"""
    # python3 xxxx.py 7890
    if len(sys.argv) == 3:
        # 获取web服务器的port
        port = sys.argv[1]
        if port.isdigit():
            port = int(port)
        # 获取web服务器需要动态资源时,访问的web框架名字
        web_frame_module_app_name = sys.argv[2]
    else:
        print("运行方式如: python3 xxx.py 7890 my_web_frame_name:application")
        return

    print("http服务器使用的port:%s" % port)

    # 将动态路径即存放py文件的路径,添加到path中,这样python就能够找到这个路径了
    sys.path.append(g_dynamic_document_root)

    ret = re.match(r"([^:]*):(.*)", web_frame_module_app_name)
    if ret:
        # 获取模块名
        web_frame_module_name = ret.group(1)
        # 获取可以调用web框架的应用名称
        app_name = ret.group(2)

    # 导入web框架的主模块
    web_frame_module = __import__(web_frame_module_name)
    # 获取那个可以直接调用的函数(对象)
    app = getattr(web_frame_module, app_name)

    # print(app)  # for test

    # 启动http服务器
    http_server = WSGIServer(port, g_static_document_root, app)
    # 运行http服务器
    http_server.run_forever()


if __name__ == "__main__":
    main()
my_web.py(部分修改)
import time
import os
import re

template_root = "./templates"

# 用来存放url路由映射
# url_route = {
#   "/index.py":index_func,
#   "/center.py":center_func
# }
g_url_route = dict()


def route(url):
    def func1(func):
        # 添加键值对,key是需要访问的url,value是当这个url需要访问的时候,需要调用的函数引用
        g_url_route[url]=func
        def func2(file_name):
            return func(file_name)
        return func2
    return func1


@route("/index.html")  # ------- 修改------
def index(file_name):
    """返回index.html需要的页面内容"""
    # return "hahha" + os.getcwd()  # for test 路径问题
    try:
        file_name = file_name.replace(".py", ".html")
        f = open(template_root + file_name)
    except Exception as ret:
        return "%s" % ret
    else:
        content = f.read()
        f.close()

        data_from_mysql = "暂时没有数据,请等待学习mysql吧,学习完mysql之后,这里就可以放入mysql查询到的数据了"
        content = re.sub(r"\{%content%\}", data_from_mysql, content)

        return content


@route("/center.html")  # ------- 修改------
def center(file_name):
    """返回center.html需要的页面内容"""
    # return "hahha" + os.getcwd()  # for test 路径问题
    try:
        file_name = file_name.replace(".py", ".html")
        f = open(template_root + file_name)
    except Exception as ret:
        return "%s" % ret
    else:
        content = f.read()
        f.close()

        data_from_mysql = "暂时没有数据,,,,~~~~(>_<)~~~~ "
        content = re.sub(r"\{%content%\}", data_from_mysql, content)

        return content


def application(environ, start_response):
    status = '200 OK'
    response_headers = [('Content-Type', 'text/html')]
    start_response(status, response_headers)

    file_name = environ['PATH_INFO']
    try:
        return g_url_route[file_name](file_name)
    except Exception as ret:
        return "%s" % ret
    else:
        return str(environ) + '-----404--->%s\n'
mini-web框架-从mysql中查询数据
my_web.py(更新)
import pymysql
import time
import os
import re

template_root = "./templates"

# 用来存放url路由映射
# url_route = {
#   "/index.py":index_func,
#   "/center.py":center_func
# }
g_url_route = dict()


def route(url):
    def func1(func):
        # 添加键值对,key是需要访问的url,value是当这个url需要访问的时候,需要调用的函数引用
        g_url_route[url]=func
        def func2(file_name):
            return func(file_name)
        return func2
    return func1


@route("/index.html")
def index(file_name):
    """返回index.html需要的页面内容"""
    # return "hahha" + os.getcwd()  # for test 路径问题
    try:
        file_name = file_name.replace(".py", ".html")
        f = open(template_root + file_name)
    except Exception as ret:
        return "%s" % ret
    else:
        content = f.read()
        f.close()

        # --------添加---------
        # data_from_mysql = "暂时没有数据,请等待学习mysql吧,学习完mysql之后,这里就可以放入mysql查询到的数据了"
        db = pymysql.connect(host='localhost',port=3306,user='root',password='mysql',database='stock_db',charset='utf8')
        cursor = db.cursor()
        sql = """select * from info;"""
        cursor.execute(sql)
        data_from_mysql = cursor.fetchall()
        cursor.close()
        db.close()

        content = re.sub(r"\{%content%\}", str(data_from_mysql), content)

        return content


@route("/center.html")
def center(file_name):
    """返回center.html需要的页面内容"""
    # return "hahha" + os.getcwd()  # for test 路径问题
    try:
        file_name = file_name.replace(".py", ".html")
        f = open(template_root + file_name)
    except Exception as ret:
        return "%s" % ret
    else:
        content = f.read()
        f.close()

        data_from_mysql = "暂时没有数据,,,,~~~~(>_<)~~~~ "
        content = re.sub(r"\{%content%\}", data_from_mysql, content)

        return content


def application(environ, start_response):
    status = '200 OK'
    response_headers = [('Content-Type', 'text/html')]
    start_response(status, response_headers)

    file_name = environ['PATH_INFO']
    try:
        return g_url_route[file_name](file_name)
    except Exception as ret:
        return "%s" % ret
    else:
        return str(environ) + '-----404--->%s\n'
mini-web框架-组装数据为html格式
my_web.py(更新)
import pymysql
import time
import os
import re

template_root = "./templates"

# 用来存放url路由映射
# url_route = {
#   "/index.py":index_func,
#   "/center.py":center_func
# }
g_url_route = dict()


def route(url):
    def func1(func):
        # 添加键值对,key是需要访问的url,value是当这个url需要访问的时候,需要调用的函数引用
        g_url_route[url]=func
        def func2(file_name):
            return func(file_name)
        return func2
    return func1

@route("/index.html")
def index(file_name):
    """返回index.html需要的页面内容"""
    # return "hahha" + os.getcwd()  # for test 路径问题
    try:
        file_name = file_name.replace(".py", ".html")
        f = open(template_root + file_name)
    except Exception as ret:
        return "%s" % ret
    else:
        content = f.read()
        f.close()

        # data_from_mysql = "暂时没有数据,请等待学习mysql吧,学习完mysql之后,这里就可以放入mysql查询到的数据了"
        db = pymysql.connect(host='localhost',port=3306,user='root',password='mysql',database='stock_db',charset='utf8')
        cursor = db.cursor()
        sql = """select * from info;"""
        cursor.execute(sql)
        data_from_mysql = cursor.fetchall()
        cursor.close()
        db.close()

        html_template = """
            <tr>
                <td>%d</td>
                <td>%s</td>
                <td>%s</td>
                <td>%s</td>
                <td>%s</td>
                <td>%s</td>
                <td>%s</td>
                <td>%s</td>
                <td>
                    <input type="button" value="添加" id="toAdd" name="toAdd" systemidvaule="%s">
                </td>
                </tr>"""

        html = ""

        for info in data_from_mysql:
            html += html_template % (info[0], info[1], info[2], info[3], info[4], info[5], info[6], info[7], info[1])


        content = re.sub(r"\{%content%\}", html, content)

        return content


@route("/center.html")
def center(file_name):
    """返回center.html需要的页面内容"""
    # return "hahha" + os.getcwd()  # for test 路径问题
    try:
        file_name = file_name.replace(".py", ".html")
        f = open(template_root + file_name)
    except Exception as ret:
        return "%s" % ret
    else:
        content = f.read()
        f.close()

        # data_from_mysql = "暂时没有数据,,,,~~~~(>_<)~~~~ "
        db = pymysql.connect(host='localhost',port=3306,user='root',password='mysql',database='stock_db',charset='utf8')
        cursor = db.cursor()
        sql = """select i.code,i.short,i.chg,i.turnover,i.price,i.highs,j.note_info from info as i inner join focus as j on i.id=j.info_id;"""
        cursor.execute(sql)
        data_from_mysql = cursor.fetchall()
        cursor.close()
        db.close()

        html_template = """
            <tr>
                <td>%s</td>
                <td>%s</td>
                <td>%s</td>
                <td>%s</td>
                <td>%s</td>
                <td>%s</td>
                <td>%s</td>
                <td>
                    <a type="button" class="btn btn-default btn-xs" href="/update/%s.html"> <span class="glyphicon glyphicon-star" aria-hidden="true"></span> 修改 </a>
                </td>
                <td>
                    <input type="button" value="删除" id="toDel" name="toDel" systemidvaule="%s">
                </td>
            </tr>
            """

        html = ""

        for info in data_from_mysql:
            html += html_template % (info[0], info[1], info[2], info[3], info[4], info[5], info[6], info[0], info[0])

        content = re.sub(r"\{%content%\}", html, content)

        return content


def application(environ, start_response):
    status = '200 OK'
    response_headers = [('Content-Type', 'text/html')]
    start_response(status, response_headers)

    file_name = environ['PATH_INFO']
    try:
        return g_url_route[file_name](file_name)
    except Exception as ret:
        return "%s" % ret
    else:
        return str(environ) + '-----404--->%s\n'
mini-web框架-路由支持正则
import pymysql
import time
import os
import re

template_root = "./templates"

# 用来存放url路由映射
# url_route = {
#   "/index.py":index_func,
#   "/center.py":center_func
# }
g_url_route = dict()


def route(url):
    def func1(func):
        # 添加键值对,key是需要访问的url,value是当这个url需要访问的时候,需要调用的函数引用
        g_url_route[url]=func
        def func2(file_name):
            return func(file_name)
        return func2
    return func1

@route(r"/index.html")
def index(file_name, url=None):
    """返回index.html需要的页面内容"""
    # return "hahha" + os.getcwd()  # for test 路径问题
    try:
        file_name = file_name.replace(".py", ".html")
        f = open(template_root + file_name)
    except Exception as ret:
        return "%s" % ret
    else:
        content = f.read()
        f.close()

        # data_from_mysql = "暂时没有数据,请等待学习mysql吧,学习完mysql之后,这里就可以放入mysql查询到的数据了"
        db = pymysql.connect(host='localhost',port=3306,user='root',password='mysql',database='stock_db',charset='utf8')
        cursor = db.cursor()
        sql = """select * from info;"""
        cursor.execute(sql)
        data_from_mysql = cursor.fetchall()
        cursor.close()
        db.close()

        html_template = """
            <tr>
                <td>%d</td>
                <td>%s</td>
                <td>%s</td>
                <td>%s</td>
                <td>%s</td>
                <td>%s</td>
                <td>%s</td>
                <td>%s</td>
                <td>
                    <input type="button" value="添加" id="toAdd" name="toAdd" systemidvaule="%s">
                </td>
                </tr>"""

        html = ""

        for info in data_from_mysql:
            html += html_template % (info[0], info[1], info[2], info[3], info[4], info[5], info[6], info[7], info[1])


        content = re.sub(r"\{%content%\}", html, content)

        return content


@route(r"/center.html")
def center(file_name, url=None):
    """返回center.html需要的页面内容"""
    # return "hahha" + os.getcwd()  # for test 路径问题
    try:
        file_name = file_name.replace(".py", ".html")
        f = open(template_root + file_name)
    except Exception as ret:
        return "%s" % ret
    else:
        content = f.read()
        f.close()

        # data_from_mysql = "暂时没有数据,,,,~~~~(>_<)~~~~ "
        db = pymysql.connect(host='localhost',port=3306,user='root',password='mysql',database='stock_db',charset='utf8')
        cursor = db.cursor()
        sql = """select i.code,i.short,i.chg,i.turnover,i.price,i.highs,j.note_info from info as i inner join focus as j on i.id=j.info_id;"""
        cursor.execute(sql)
        data_from_mysql = cursor.fetchall()
        cursor.close()
        db.close()

        html_template = """
            <tr>
                <td>%s</td>
                <td>%s</td>
                <td>%s</td>
                <td>%s</td>
                <td>%s</td>
                <td>%s</td>
                <td>%s</td>
                <td>
                    <a type="button" class="btn btn-default btn-xs" href="/update/%s.html"> <span class="glyphicon glyphicon-star" aria-hidden="true"></span> 修改 </a>
                </td>
                <td>
                    <input type="button" value="删除" id="toDel" name="toDel" systemidvaule="%s">
                </td>
            </tr>
            """

        html = ""

        for info in data_from_mysql:
            html += html_template % (info[0], info[1], info[2], info[3], info[4], info[5], info[6], info[0], info[0])

        content = re.sub(r"\{%content%\}", html, content)

        return content


# ------- 添加 -------
@route(r"/update/(\d*)\.html")
def update(file_name, url):
    """显示 更新页面的内容"""
    try:
        template_file_name = template_root + "/update.html"
        f = open(template_file_name)
    except Exception as ret:
        return "%s,,,没有找到%s" % (ret, template_file_name)
    else:
        content = f.read()
        f.close()

        ret = re.match(url, file_name)
        if ret:
            stock_code = ret.group(1)

        # 将提取到的股票编码返回到浏览器中,以检查是否能够正确的提取url的数据
        return stock_code


def app(environ, start_response):
    status = '200 OK'
    response_headers = [('Content-Type', 'text/html')]
    start_response(status, response_headers)

    file_name = environ['PATH_INFO']
    try:
        for url, call_func in g_url_route.items():
            print(url)
            ret = re.match(url, file_name)
            if ret:
                return call_func(file_name, url)
                break
        else:
            return "没有访问的页面--->%s" % file_name

    except Exception as ret:
        return "%s" % ret

    else:
        return str(environ) + '-----404--->%s\n'
mini-web框架-url编码
python3对url编解码
import urllib.parse
# Python3 url编码
print(urllib.parse.quote("天安门"))
# Python3 url解码
print(urllib.parse.unquote("%E5%A4%A9%E5%AE%89%E9%97%A8"))
logging日志模块
日志级别
日志一共分成5个等级,从低到高分别是:
- DEBUG:详细的信息,通常只出现在诊断问题上
- INFO:确认一切按预期运行
- WARNING:一个迹象表明,一些意想不到的事情发生了,或表明一些问题在不久的将来(例如。磁盘空间低”)。这个软件还能按预期工作。
- ERROR:更严重的问题,软件没能执行一些功能
- CRITICAL:一个严重的错误,这表明程序本身可能无法继续运行
这5个等级,也分别对应5种打日志的方法: debug 、info 、warning 、error 、critical。默认的是WARNING,当在WARNING或之上时才被跟踪。
日志输出
有两种方式记录跟踪,一种输出控制台,另一种是记录到文件中,如日志文件
将日志输出到控制台
import logging

logging.basicConfig(level=logging.WARNING,
                    format='%(asctime)s - %(filename)s[line:%(lineno)d] - %(levelname)s: %(message)s')
# 开始使用log功能
logging.info('这是 loggging info message')
logging.debug('这是 loggging debug message')
logging.warning('这是 loggging a warning message')
logging.error('这是 an loggging error message')
logging.critical('这是 loggging critical message')

通过logging.basicConfig函数对日志的输出格式及方式做相关配置,上面代码设置日志的输出等级是WARNING级别,意思是WARNING级别以上的日志才会输出。另外还制定了日志输出的格式。
注意,只要用过一次log功能再次设置格式时将失效,实际开发中格式肯定不会经常变化,所以刚开始时需要设定好格式
将日志输出到文件
只需要在logging.basicConfig函数中设置好输出文件的文件名和写文件的模式。
import logging

logging.basicConfig(level=logging.WARNING,
                    filename='./log.txt',
                    filemode='w',
                    format='%(asctime)s - %(filename)s[line:%(lineno)d] - %(levelname)s: %(message)s')  # use logging
logging.info('这是 loggging info message')
logging.debug('这是 loggging debug message')
logging.warning('这是 loggging a warning message')
logging.error('这是 an loggging error message')
logging.critical('这是 loggging critical message')
既要把日志输出到控制台, 还要写入日志文件
import logging
# 第一步,创建一个logger
logger = logging.getLogger()
logger.setLevel(logging.INFO)  # Log等级总开关
# 第二步,创建一个handler,用于写入日志文件
logfile = './log.txt'
fh = logging.FileHandler(logfile, mode='a')  # open的打开模式这里可以进行参考
fh.setLevel(logging.DEBUG)  # 输出到file的log等级的开关
# 第三步,再创建一个handler,用于输出到控制台
ch = logging.StreamHandler()
ch.setLevel(logging.WARNING)   # 输出到console的log等级的开关
# 第四步,定义handler的输出格式
formatter = logging.Formatter("%(asctime)s - %(filename)s[line:%(lineno)d] - %(levelname)s: %(message)s")
fh.setFormatter(formatter)
ch.setFormatter(formatter)
# 第五步,将logger添加到handler里面
logger.addHandler(fh)
logger.addHandler(ch)
# 日志
logger.debug('这是 logger debug message')
logger.info('这是 logger info message')
logger.warning('这是 logger warning message')
logger.error('这是 logger error message')
logger.critical('这是 logger critical message')
日志格式说明
logging.basicConfig函数中,可以指定日志的输出格式format,这个参数可以输出很多有用的信息,如下:
- %(levelno)s: 打印日志级别的数值
- %(levelname)s: 打印日志级别名称
- %(pathname)s: 打印当前执行程序的路径,其实就是sys.argv[0]
- %(filename)s: 打印当前执行程序名
- %(funcName)s: 打印日志的当前函数
- %(lineno)d: 打印日志的当前行号
- %(asctime)s: 打印日志的时间
- %(thread)d: 打印线程ID
- %(threadName)s: 打印线程名称
- %(process)d: 打印进程ID
- %(message)s: 打印日志信息
常用格式如下:
format='%(asctime)s - %(filename)s[line:%(lineno)d] - %(levelname)s: %(message)s'
元类
类就是一组用来描述如何生成一个对象的代码段,类同样也是一种对象。只要使用关键字class,Python解释器在执行的时候就会创建一个对象。
动态地创建类
类也是对象,可以在运行时动态的创建它们,就像其他任何对象一样。首先,可以在函数中创建类,使用class关键字即可
def choose_class(name):
	if name == 'foo':
		class Foo(object):
        	pass
    return Foo     # 返回的是类,不是类的实例

MyClass = choose_class('foo')
# 函数返回的是类,不是类的实例
print(MyClass)  #  <class '__main__.choose_class.<locals>.Foo'>
使用type创建类
type可以接受一个类的描述作为参数,然后返回一个类
type(类名, 由父类名称组成的元组(针对继承的情况,可以为空),包含属性的字典(名称和值))
Test2 = type("Test2", (), {}) # 定了一个Test2类
Test2() # <__main__.Test2 at 0x225fe68bfd0>
使用type创建带有属性的类
type 接受一个字典来为类定义属性
Foo = type('Foo', (), {'bar': True})
可以翻译为:
class Foo(object):
	bar = True
注意:
type的第2个参数,元组中是父类的名字,而不是字符串
添加的属性是类属性,并不是实例属性
使用type创建带有方法的类
Foo = type('Foo', (), {'bar': True})

def echo_bar(self):  # 定义了一个普通的函数
	print(self.bar)

FooChild = type('FooChild', (Foo,), {'echo_bar': echo_bar})  # 让FooChild类中的echo_bar属性,指向了上面定义的函数

my_foo = FooChild()
my_foo.echo_bar()  # True
添加静态方法和类方法
class A(object):
    num = 100
def print_b(self):
    print(self.num)
@staticmethod
def print_static():
    print("----haha-----")
@classmethod
def print_class(cls):
    print(cls.num)

B = type("B", (A,), {"print_b": print_b, "print_static": print_static, "print_class": print_class})
b = B()
b.print_b()
b.print_static()
b.print_class()
# 结果
# 100
# ----haha-----
# 100
元类就是类的类
函数type实际上是一个元类。type就是Python在背后用来创建所有类的元类。
str是用来创建字符串对象的类,而int是用来创建整数对象的类。type就是创建类对象的类。可以通过检查__class__属性来看到这一点。Python中所有的东西,注意,这里指所有的东西——都是对象。这包括整数、字符串、函数以及类。它们全部都是对象,而且它们都是从一个类创建而来,这个类就是type。
深入理解元类
元类转自
class关键字在帮我们创建类时,必然帮我们调用了元类Foo=type(…),那调用type时传入的参数是什么呢?必然是类的关键组成部分,一个类有三大组成部分,分别是
1、类名class_name=‘Foo’
2、基类们class_bases=(object,) #继承新式类的父类object
3、类的名称空间class_dic,类的名称空间是执行类体代码而得到的
调用type时会依次传入以上三个参数
综上,class关键字帮我们创建一个类应该细分为以下四个过程
拿到类名:class_name=‘Foo’
拿到类的基类们:class_bases=(object,)
执行类体代码,拿到类的名称空间:class_dic={…}
调用元类得到类Foo = type(class_name,class_bases,class_dic)
元类实现ORM


 438
438


 被折叠的 条评论
为什么被折叠?
被折叠的 条评论
为什么被折叠?
 到【灌水乐园】发言


