


版权申明:My_Self总结,2021-07-14
第一步:建立一个C#的WinForm工程
不会者,请白度,很基础的东西,此步骤省略## 标题 _
第二步: Halcon18与VS2015平台下 C#编程环境搭建
1.请将halcon安装目录下的D:\Program Files\MVTec\HALCON-18.11-Progress\bin\dotnet35目录下的 halcondotnet.dll 拷贝到C#项目工程Debug目录下.
2.请将halcon安装目录下的D:\Program Files\MVTec\HALCON-18.11-Progress\bin\x64-win64目录下的 halcond.dll 拷贝到C#项目工程Debug目录下.(若编译时找不到halcon.dll,将将halcon安装目录下的D:\Program Files\MVTec\HALCON-18.11-Progress\bin\x64-win64目录下的 halcond.dll 拷贝到C#项目工程X64的Debug目录下)。
3.在工程目录下的引用选择右键,打开添加引用对话框.引用halcondotnet.dll
4.在c#界面下的工具箱(视图——工具箱)的 常规 右键,打开选择项添加项目目录下的Debughalcondotnet.dll.
第三步:编写代码测试搭建的环境是否正确
(1)第一个测试例子:
1.引用命名空间
using HalconDotNet;
- Form1.cs
using System;
using System.Collections.Generic;
using System.ComponentModel;
using System.Data;
using System.Drawing;
using System.Linq;
using System.Text;
using System.Windows.Forms;
using HalconDotNet;

namespace Demo
{
    public partial class Form1 : Form
    {
        public Form1()
        {
            InitializeComponent();

            this.Print_label.Text = "我的第一个hello world程序";
        }
    }
}
- Form1.Designer.cs
namespace Demo
{
    partial class Form1
    {
        /// <summary>
        /// 必需的设计器变量。
        /// </summary>
        private System.ComponentModel.IContainer components = null;

        /// <summary>
        /// 清理所有正在使用的资源。
        /// </summary>
        /// <param name="disposing">如果应释放托管资源,为 true;否则为 false。</param>
        protected override void Dispose(bool disposing)
        {
            if (disposing && (components != null))
            {
                components.Dispose();
            }
            base.Dispose(disposing);
        }

        #region Windows 窗体设计器生成的代码

        /// <summary>
        /// 设计器支持所需的方法 - 不要
        /// 使用代码编辑器修改此方法的内容。
        /// </summary>
        private void InitializeComponent()
        {
            this.Print_label = new System.Windows.Forms.Label();
            this.hWindowControl1 = new HalconDotNet.HWindowControl();
            this.SuspendLayout();
            //
            // Print_label
            //
            this.Print_label.AutoSize = true;
            this.Print_label.Location = new System.Drawing.Point(253, 175);
            this.Print_label.Name = "Print_label";
            this.Print_label.Size = new System.Drawing.Size(0, 12);
            this.Print_label.TabIndex = 0;
            //
            // hWindowControl1
            //
            this.hWindowControl1.BackColor = System.Drawing.Color.Black;
            this.hWindowControl1.BorderColor = System.Drawing.Color.Black;
            this.hWindowControl1.ImagePart = new System.Drawing.Rectangle(0, 0, 640, 480);
            this.hWindowControl1.Location = new System.Drawing.Point(296, 28);
            this.hWindowControl1.Name = "hWindowControl1";
            this.hWindowControl1.Size = new System.Drawing.Size(8, 8);
            this.hWindowControl1.TabIndex = 1;
            this.hWindowControl1.WindowSize = new System.Drawing.Size(8, 8);
            //
            // Form1
            //
            this.AutoScaleDimensions = new System.Drawing.SizeF(6F, 12F);
            this.AutoScaleMode = System.Windows.Forms.AutoScaleMode.Font;
            this.ClientSize = new System.Drawing.Size(750, 462);
            this.Controls.Add(this.hWindowControl1);
            this.Controls.Add(this.Print_label);
            this.Name = "Form1";
            this.Text = "Form1";
            this.ResumeLayout(false);
            this.PerformLayout();

        }

        #endregion

        private System.Windows.Forms.Label Print_label;
        private HalconDotNet.HWindowControl hWindowControl1;
    }
}
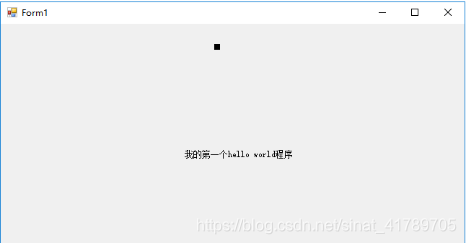
3.Form1 窗体输出
(2)第一个测试例子:
1.引用命名空间
using HalconDotNet;
2.Form1.cs
using System;
using System.Collections.Generic;
using System.ComponentModel;
using System.Data;
using System.Drawing;
using System.Linq;
using System.Text;
using System.Threading.Tasks;
using System.Windows.Forms;
using HalconDotNet;

namespace config_test
{
    public partial class config_test : Form
    {
        private HTuple MainUI_Camera_WindowID;
        public HObject RawImage = new HObject();
        public config_test()
        {
            InitializeComponent();
            OpenWindow();
            LoadImage();
    }
        //以下是两个函数的实现.
    public void OpenWindow()
        {
            long m_lWindowRow = 0, m_lWindowColumn = 0;
            HTuple Farther_windowHandle = this.pictureBox1.Handle;

            HOperatorSet.SetWindowAttr("background_color", "blue");

            HOperatorSet.OpenWindow(m_lWindowRow, m_lWindowColumn, (HTuple)this.pictureBox1.Width, (HTuple)this.pictureBox1.Height, Farther_windowHandle, "visible", "", out MainUI_Camera_WindowID);
        }

     public void LoadImage()
        {
            HOperatorSet.ReadImage(out RawImage, "H://MySelf_DailyPractice//config_test//config_test//bin//Debug//label.png");

            HTuple width = null, height = null;

            HOperatorSet.GetImageSize(RawImage, out width, out height);

            HOperatorSet.SetColor(MainUI_Camera_WindowID, "yellow");

            HOperatorSet.SetPart(MainUI_Camera_WindowID, 0, 0, height, width);

            HOperatorSet.DispObj(RawImage, MainUI_Camera_WindowID);

            HOperatorSet.SetTposition(MainUI_Camera_WindowID, width / 2, height / 2);

            HOperatorSet.WriteString(MainUI_Camera_WindowID, "HelloWorld");
        }
    }
}
5.效果如下(具体代码实现可以看源代码)


 3679
3679


 被折叠的 条评论
为什么被折叠?
被折叠的 条评论
为什么被折叠?
 到【灌水乐园】发言


