


本文主要介绍Haproxy负载均衡的安装配置以及结合keepalived保证高可用,概要如下:
-安装haproxy
-配置haporxy
-单台haproxy负载均衡配置
-安装keepalived
-配置keepalived
-haproxy主从配置
-haproxy主从切换测试
-haproxy配置文件详解
安装haproxy
-
环境说明:
-
软件下载目录:/opt/soft
安装目录:/opt/haproxy
日志目录:/data/logs/haproxy/haproxy.log
所属用户:haproxy.haproxy
获取haproxy
Haproxy 官网下载地址:http://www.haproxy.org/
- 1
- 2
- 1
- 2
编译haproxy
编译时指定内核版本target=linux26,你可以# uname –r查看一下本地的系统内核版本。PREFIX=/opt/haproxy是指定haproxy安装路径。
- 1
- 2
- 3
- 4
- 1
- 2
- 3
- 4
修改配置文件
Haproxy安装完后默认是没有配置文件的,需要手动vi haproxy.cfg编译一个,或者从源码包目录examples/haproxy.cfg拷贝过来。
- 1
- 2
- 1
- 2
修改配置文件:
- 1
- 1
| 修改前 | 修改后 |
|---|---|
| chroot /usr/share/haproxy | chroot /usr/share/haproxy |
| uid 99 | uid haproxy |
| gid 99 | gid haproxy |
| redispatch | redispatch |
| contimeout 5000 | timeout connect 5000 |
| clitimeout 50000 | timeout client 50000 |
| srvtimeout 50000 | timeout server 50000 |
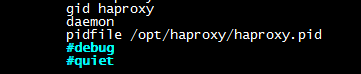
在daemon下面增加一行:
pidfile /opt/haproxy/haproxy.pid
如图:
可以将文件中的几个listen段删除,并在timeout server 下面增加这一段:
- 1
- 2
- 3
- 4
- 5
- 6
- 7
- 8
- 9
- 10
- 11
- 12
- 13
- 14
- 15
- 16
- 17
- 18
- 1
- 2
- 3
- 4
- 5
- 6
- 7
- 8
- 9
- 10
- 11
- 12
- 13
- 14
- 15
- 16
- 17
- 18
如果不删除的话,则需要将文件71行左右的
srvtimeout 20000 改为 timeout server 20000,
将最后一行(79行左右)
errorfile 503 /etc/haproxy/errors/503.http
改为
errorfile 503 /opt/haproxy/errorfiles/503.http,
并将解压后的源码包目录下的/opt/soft/haproxy-1.5.9/examples/errorfiles拷贝到/opt/haproxy下,即
- 1
- 2
- 1
- 2
最后配置文件如下:
- 1
- 2
- 3
- 4
- 5
- 6
- 7
- 8
- 9
- 10
- 11
- 12
- 13
- 14
- 15
- 16
- 17
- 18
- 19
- 20
- 21
- 22
- 23
- 24
- 25
- 26
- 27
- 28
- 29
- 30
- 31
- 32
- 33
- 34
- 35
- 36
- 37
- 38
- 39
- 40
- 41
- 42
- 43
- 44
- 45
- 46
- 47
- 48
- 49
- 50
- 51
- 52
- 53
- 54
- 55
- 56
- 57
- 58
- 59
- 60
- 61
- 62
- 63
- 64
- 65
- 66
- 67
- 68
- 69
- 70
- 71
- 72
启动haproxy服务
创建服务启动环境
- 1
- 2
- 3
- 4
- 1
- 2
- 3
- 4
为haproxy加上日志支持,
即将配置文件中的log 127.0.0.1 local0添加具体日志路径。
- 1
- 1
增加如下两行
local0.* /data/logs/haproxy/haproxy.log
local1.* /data/logs/haproxy/haproxy.log
然后修改rsyslog参数,使它支持外来日志。
- 1
- 1
SYSLOGD_OPTIONS=”-r -m 0”
重启rsyslog服务。
- 1
- 1
编写haproxy启动脚本:
- 1
- 1
- 1
- 2
- 3
- 4
- 5
- 6
- 7
- 8
- 9
- 10
- 11
- 12
- 13
- 14
- 15
- 16
- 17
- 18
- 19
- 20
- 21
- 22
- 23
- 24
- 25
- 26
- 27
- 28
- 29
- 30
- 31
- 32
- 33
- 34
- 35
- 36
- 37
- 38
- 39
- 40
- 41
- 42
- 43
- 44
- 45
- 46
- 47
- 48
- 49
- 50
- 51
- 52
- 53
- 54
- 1
- 2
- 3
- 4
- 5
- 6
- 7
- 8
- 9
- 10
- 11
- 12
- 13
- 14
- 15
- 16
- 17
- 18
- 19
- 20
- 21
- 22
- 23
- 24
- 25
- 26
- 27
- 28
- 29
- 30
- 31
- 32
- 33
- 34
- 35
- 36
- 37
- 38
- 39
- 40
- 41
- 42
- 43
- 44
- 45
- 46
- 47
- 48
- 49
- 50
- 51
- 52
- 53
- 54
将服务加到开机启动
- 1
- 2
- 3
- 4
- 1
- 2
- 3
- 4
启动服务
- 1
- 1
如下则表示启动成功。

常见启动错误
无法chroot的问题
[root@localhost soft]# /etc/init.d/haproxy start
[ALERT] 349/142919 (45886) : [/opt/haproxy/sbin/haproxy.main()] Cannot chroot(/usr/share/haproxy).
解决方案:将配置文件里的chroot /usr/share/haproxy一行注释掉就好。
FD值,可打开的最大文件数限制值的问题
[root@localhost ~]# /etc/init.d/haproxy start
[WARNING] 338/142149 (60372) : [/opt/haproxy/sbin/haproxy.main()] Cannot raise FD limit to 8222.
[WARNING] 338/142149 (60372) : [/opt/haproxy/sbin/haproxy.main()] FD limit (1024) too low for maxconn=4096/maxsock=8222. Please raise ‘ulimit-n’ to 8222 or more to avoid any trouble.
解决方案:系统里的能打开的文件描述符太小,程序里的比较大,只要将系统里的FD重新调大就好。
- 1
- 1
重启就好了
查看系统FD值可以用 ulimit -a
[root@localhost ~]# ulimit -a
core file size (blocks, -c) 0
data seg size (kbytes, -d) unlimited
scheduling priority (-e) 0
file size (blocks, -f) unlimited
pending signals (-i) 7771
max locked memory (kbytes, -l) 64
max memory size (kbytes, -m) unlimited
open files (-n) 1024
pipe size (512 bytes, -p) 8
POSIX message queues (bytes, -q) 819200
real-time priority (-r) 0
stack size (kbytes, -s) 10240
cpu time (seconds, -t) unlimited
max user processes (-u) 7771
virtual memory (kbytes, -v) unlimited
file locks (-x) unlimited
照网上一些博客说的,有以下方法修改FD值:
1.在/etc/rc.local 中增加一行 ulimit -SHn 65535
2.在/etc/profile 中增加一行 ulimit -SHn 65535
3.在/etc/security/limits.conf最后增加如下两行记录
* soft nofile 65535
* hard nofile 65535
修改完后重新登录就可以看到了。
Contimeout参数不支持的问题
[root@localhost haproxy]# /etc/init.d/haproxy start
[WARNING] 338/150533 (60528) : parsing [/opt/haproxy/haproxy.cfg:27] : the ‘contimeout’ directive is now deprecated in favor of ‘timeout connect’, and will not be supported in future versions.
[WARNING] 338/150533 (60528) : parsing [/opt/haproxy/haproxy.cfg:28] : the ‘clitimeout’ directive is now deprecated in favor of ‘timeout client’, and will not be supported in future versions.
[WARNING] 338/150533 (60528) : parsing [/opt/haproxy/haproxy.cfg:29] : the ‘srvtimeout’ directive is now deprecated in favor of ‘timeout server’, and will not be supported in future versions.
解决方案:这说明contimeout这样的参数类型太老了,新版本已经不支持该类型,请使用 timeout connect这样的参数类型来使用。类似clitimeout、srvtimeout都是这样设置。
contimeout 5000
clitimeout 50000
srvtimeout 50000
—>改为
timeout connect 5000
timeout client 50000
timeout server 50000
修改后如图:
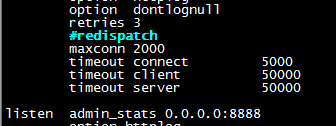
再重启服务就好了。
71行的srvtimeout 2000也是这样改。
Starting haproxy: [WARNING] 349/142919 (45886) : parsing [/opt/haproxy/haproxy.cfg:72] : the ‘srvtimeout’ directive is now deprecated in favor of ‘timeout server’, and will not be supported in future versions.
解决方案:将71行的srvtimeout 20000 改为 timeout server 20000
类似的redispatch也是这样,只要将redispatch注释就好。
[root@localhost ~]# /etc/init.d/haproxy start
[WARNING] 339/041102 (40040) : parsing [/opt/haproxy/haproxy.cfg:22]: keyword ‘redispatch’ is deprecated in favor of ‘option redispatch’, and will not be supported by future versions.
解决方案:将配置文件中的redispatch 注释掉就好了。
Socket无法绑定的问题
[root@localhost ~]# /etc/init.d/haproxy restart
Haproxy stoped…
[ALERT] 338/151423 (60563) : Starting proxy webserver1: cannot bind socket [0.0.0.0:80]
解决方案:无法绑定socket,这是因为本地开启了web服务绑定了80端口,或者其他应用程序占用了该socket。
而且80端口<1024,只能由root用户绑定。haproxy普通用户无法绑定。
只要将端口号改为其他大于1024的就好。
修改/opt/haproxy/haproxy.cfg里面的socket,将端口改为了8090,如下图

再重启服务就好了。
Pid文件无法创建的问题
[root@localhost haproxy]# /etc/init.d/haproxy start
[ALERT] 236/112258 (5538) : [haproxy.main()] Cannot create pidfile /opt/haproxy/haproxy.pid
解决方案:
1、查看目录是否存在,不存在则mkdir创建
2、查看文件所在位置权限,没有则chown -R haproxy.haproxy /opt/haproxy
Uid/user无效的问题
[root@localhost ~]# /etc/init.d/haproxy restart
Haproxy stoped…
[WARNING] 338/142429 (60406) : [/opt/haproxy/sbin/haproxy.main()] Failed to drop supplementary groups. Using ‘gid’/’group’ without ‘uid’/’user’ is generally useless.
解决方案:这是对haproxy.cfg里面指定的用户识别有问题。只要将uid与gid指定为我们想要的用户即可。

—-》改为如下图
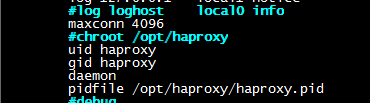
再重启就好了。
打开文件错误的问题
[root@localhost ~]# /etc/init.d/haproxy start
[ALERT] 339/082035 (40193) : parsing [/opt/haproxy/haproxy.cfg:87] : error opening file for custom error message <503>.
[ALERT] 339/082035 (40193) : Error(s) found in configuration file : /opt/haproxy/haproxy.cfg
[ALERT] 339/082035 (40193) : Fatal errors found in configuration.
解决方案:打开文件错误,这是因为/etc/haproxy/errors/503.http文件不存在的问题。源码包目录下的examples/errorfiles文件里面有该文件,只要将它拷贝过来就好。
- 1
- 1
修改配置文件里的路径
- 1
- 1

改为

再重启服务就好了。
单台haproxy负载均衡
-
环境说明:
-
haproxy主机:192.168.253.132 8090
web server1:192.168.253.129 80
web server2:192.168.253.130 80
web server3:192.168.253.131 80
修改配置文件haproxy.cfg
- 1
- 1
增加如下listen字段:
- 1
- 2
- 3
- 4
- 5
- 6
- 7
- 8
- 9
- 10
- 11
- 12
- 13
- 14
- 15
- 16
- 17
- 18
- 1
- 2
- 3
- 4
- 5
- 6
- 7
- 8
- 9
- 10
- 11
- 12
- 13
- 14
- 15
- 16
- 17
- 18
重新启动haproxy服务
- 1
- 1
查看监控界面
在浏览器中输入如上配置的监控地址,http://192.168.253.132:8888/stats就可以看见图形监控界面。如下:
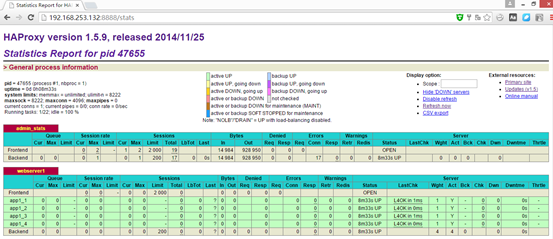
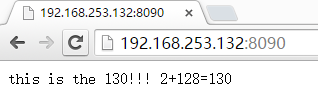
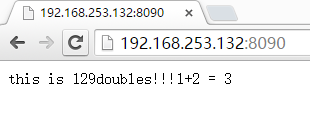
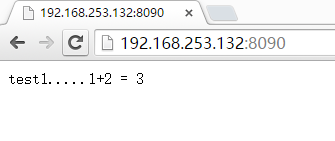
查看轮询效果
在地址栏里输入http://192.168.253.132:8090就可以看到web界面了,它是将访问平均分配到每台主机的,默认每台主机轮询一次过

安装keepalived
获取keepalived
- 1
- 2
- 1
- 2
编译keepalived
- 1
- 2
- 3
- 4
- 1
- 2
- 3
- 4
添加进系统服务
- 1
- 2
- 3
- 4
- 5
- 6
- 1
- 2
- 3
- 4
- 5
- 6
haproxy主从高可用
-
环境说明:
-
VIP: 192.168.253.222
master: 192.168.253.132 8090
backup: 192.168.253.131 8090
web server1:192.168.253.129 80
web server2:192.168.253.130 80
web server3:192.168.253.131 80
参考链接:http://www.cnblogs.com/kgdxpr/p/3325788.html
配置master
修改keepalived.conf
- 1
- 1
配置如下:
- 1
- 2
- 3
- 4
- 5
- 6
- 7
- 8
- 9
- 10
- 11
- 12
- 13
- 14
- 15
- 16
- 17
- 18
- 19
- 20
- 21
- 22
- 23
- 24
- 25
- 26
- 27
- 28
- 29
- 30
- 31
- 32
- 33
- 34
- 35
- 1
- 2
- 3
- 4
- 5
- 6
- 7
- 8
- 9
- 10
- 11
- 12
- 13
- 14
- 15
- 16
- 17
- 18
- 19
- 20
- 21
- 22
- 23
- 24
- 25
- 26
- 27
- 28
- 29
- 30
- 31
- 32
- 33
- 34
- 35
编写haproxy服务状态检测脚本
为了防止haproxy服务挂了,但是keepalived却还正常,没有切换到slave上,所以我们编写这个脚本来检测haproxy服务的状态,haproxy服务挂掉后,该脚本会自动重启haproxy服务,不成功,则关闭keepalived服务,自动切换到backup。
- 1
- 1
- 1
- 2
- 3
- 4
- 5
- 6
- 7
- 8
- 1
- 2
- 3
- 4
- 5
- 6
- 7
- 8
启动服务
- 1
- 2
- 1
- 2
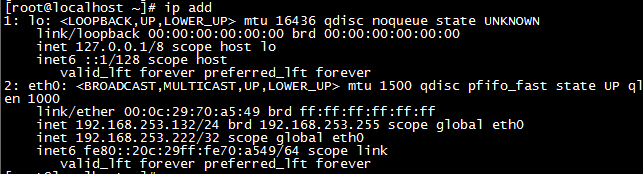
查看VIP如下
配置backup
所有步骤都和master一样,相当于master的一个镜像。
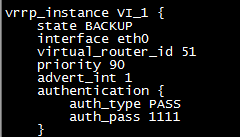
修改keepalived.conf
- 1
- 1
修改如下两行
State MASTER 改为 state BACKUP
Priority 100 改为 priority 90
修改后如下图
启动服务
- 1
- 2
- 1
- 2
高可用测试
停止master的keepalived服务
- 1
- 2
- 3
- 4
- 5
- 6
- 7
- 1
- 2
- 3
- 4
- 5
- 6
- 7
发现master的vip已经释放了。
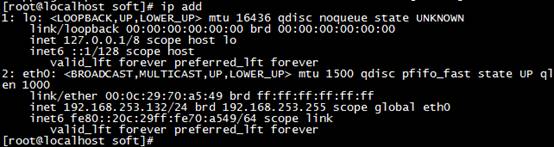
再查看backup上的日志
- 1
- 2
- 3
- 4
- 5
- 6
- 1
- 2
- 3
- 4
- 5
- 6
发现backup已经绑定了VIP
再将master上的keepalived服务启动。
- 1
- 2
- 3
- 4
- 5
- 6
- 7
- 8
- 9
- 10
- 11
- 12
- 13
- 14
- 15
- 1
- 2
- 3
- 4
- 5
- 6
- 7
- 8
- 9
- 10
- 11
- 12
- 13
- 14
- 15
发现master又重新绑定了vip
查看backup日志:
- 1
- 2
- 3
- 4
- 5
- 6
- 7
- 8
- 1
- 2
- 3
- 4
- 5
- 6
- 7
- 8
发现backup又重新释放了vip
haproxy配置文件详解
参考链接:http://www.linuxidc.com/Linux/2012-07/65350.htm
http://www.iyunv.com/thread-18514-1-1.html
http://www.douban.com/note/275230796/
####################全局配置信息########################
#######参数是进程级的,通常和操作系统(OS)相关#########
global
log 127.0.0.1 local0 #日志输出配置,所有日志都记录在本机,通过local0输出
#log 127.0.0.1 local1 notice
#log loghost local0 info
ulimit-n 82000 #设置每个进程的可用的最大文件描述符
maxconn 4096 #最大连接数
chroot /var/haproxy #chroot运行的路径
uid 99 #所属运行的用户uid
gid 99 #所属运行的用户组
daemon #以后台形式运行haproxy
nbproc 1 #进程数量(可以设置多个进程提高性能)
pidfile /var/run/haproxy.pid #haproxy的pid存放路径,启动进程的用户必须有权限访问此文件
debug #调试模式,输出启动信息到标准输出
#quiet #安静模式,启动时无输出
#####################默认的全局设置######################
##这些参数可以被利用配置到frontend,backend,listen组件##
defaults
log global
mode http #所处理的类别 (#7层 http;4层tcp )
option httplog #日志类别,采用httplog
maxconn 20480 #最大连接数
option httplog #日志类别http日志格式
option httpclose #每次请求完毕后主动关闭http通道
option dontlognull #不记录健康检查的日志信息
option forwardfor #如果后端服务器需要获得客户端真实ip需要配置的参数,可以从Http Header中获得客户端ip
option redispatch #serverId对应的服务器挂掉后,强制定向到其他健康的服务器
option abortonclose #当服务器负载很高的时候,自动结束掉当前队列处理比较久的连接
stats refresh 30 #统计页面刷新间隔
retries 3 #3次连接失败就认为服务不可用,也可以通过后面设置
balance roundrobin #默认的负载均衡的方式,轮询方式
#balance source #默认的负载均衡的方式,类似nginx的ip_hash
#balance leastconn #默认的负载均衡的方式,最小连接
contimeout 5000 #连接超时
clitimeout 50000 #客户端超时
srvtimeout 50000 #服务器超时
timeout check 2000 #心跳检测超时
####################监控页面的设置#######################
listen admin_status #Frontend和Backend的组合体,监控组的名称,按需自定义名称
bind 0.0.0.0:65532 #监听端口
mode http #http的7层模式
log 127.0.0.1 local3 err #错误日志记录
stats refresh 5s #每隔5秒自动刷新监控页面
stats uri /admin?stats #监控页面的url
stats realm itnihao\ itnihao #监控页面的提示信息
stats auth admin:admin #监控页面的用户和密码admin,可以设置多个用户名
stats auth admin1:admin1 #监控页面的用户和密码admin1
stats hide-version #隐藏统计页面上的HAproxy版本信息
stats admin if TRUE #手工启用/禁用,后端服务器(haproxy-1.4.9以后版本)
errorfile 403 /etc/haproxy/errorfiles/403.http
errorfile 500 /etc/haproxy/errorfiles/500.http
errorfile 502 /etc/haproxy/errorfiles/502.http
errorfile 503 /etc/haproxy/errorfiles/503.http
errorfile 504 /etc/haproxy/errorfiles/504.http
#################HAProxy的日志记录内容设置###################
capture request header Host len 40
capture request header Content-Length len 10
capture request header Referer len 200
capture response header Server len 40
capture response header Content-Length len 10
capture response header Cache-Control len 8
#######################网站监测listen配置#####################
###########此用法主要是监控haproxy后端服务器的监控状态############
listen site_status
bind 0.0.0.0:1081 #监听端口
mode http #http的7层模式
log 127.0.0.1 local3 err #[err warning info debug]
monitor-uri /site_status #网站健康检测URL,用来检测HAProxy管理的网站是否可以用,正常返回200,不正常返回503
acl site_dead nbsrv(server_web) lt 2 #定义网站down时的策略当挂在负载均衡上的指定backend的中有效机器数小于1台时返回true
acl site_dead nbsrv(server_blog) lt 2
acl site_dead nbsrv(server_bbs) lt 2
monitor fail if site_dead #当满足策略的时候返回503,网上文档说的是500,实际测试为503
monitor-net 192.168.16.2/32 #来自192.168.16.2的日志信息不会被记录和转发
monitor-net 192.168.16.3/32
########frontend配置############
#####注意,frontend配置里面可以定义多个acl进行匹配操作########
frontend http_80_in
bind 0.0.0.0:80 #监听端口,即haproxy提供web服务的端口,和lvs的vip端口类似
mode http #http的7层模式
log global #应用全局的日志配置
option httplog #启用http的log
option httpclose #每次请求完毕后主动关闭http通道,HA-Proxy不支持keep-alive模式
option forwardfor #如果后端服务器需要获得客户端的真实IP需要配置次参数,将可以从Http Header中获得客户端IP
########acl策略配置#############
acl itnihao_web hdr_reg(host) -i ^(www.itnihao.cn|ww1.itnihao.cn)$
#如果请求的域名满足正则表达式中的2个域名返回true -i是忽略大小写
acl itnihao_blog hdr_dom(host) -i blog.itnihao.cn
#如果请求的域名满足www.itnihao.cn返回true -i是忽略大小写
#acl itnihao hdr(host) -i itnihao.cn
#如果请求的域名满足itnihao.cn返回true -i是忽略大小写
#acl file_req url_sub -i killall=
#在请求url中包含killall=,则此控制策略返回true,否则为false
#acl dir_req url_dir -i allow
#在请求url中存在allow作为部分地址路径,则此控制策略返回true,否则返回false
#acl missing_cl hdr_cnt(Content-length) eq 0
#当请求的header中Content-length等于0时返回true
########acl策略匹配相应#############
#block if missing_cl
#当请求中header中Content-length等于0阻止请求返回403
#block if !file_req || dir_req
#block表示阻止请求,返回403错误,当前表示如果不满足策略file_req,或者满足策略dir_req,则阻止请求
use_backend server_web if itnihao_web
#当满足itnihao_web的策略时使用server_web的backend
use_backend server_blog if itnihao_blog
#当满足itnihao_blog的策略时使用server_blog的backend
#redirect prefix http://blog.itniaho.cn code 301 if itnihao
#当访问itnihao.cn的时候,用http的301挑转到http://192.168.16.3
default_backend server_bbs
#以上都不满足的时候使用默认server_bbs的backend
##########backend的设置##############
#下面我将设置三组服务器 server_web,server_blog,server_bbs
###########################backend server_web#############################
backend server_web
mode http #http的7层模式
balance roundrobin #负载均衡的方式,roundrobin平均方式
cookie SERVERID #允许插入serverid到cookie中,serverid后面可以定义
option httpchk GET /index.html #心跳检测的文件
server web1 192.168.16.2:80 cookie web1 check inter 1500 rise 3 fall 3 weight 1
#服务器定义,cookie 1表示serverid为web1,check inter 1500是检测心跳频率rise 3是3次正确认为服务器可用,
#fall 3是3次失败认为服务器不可用,weight代表权重
server web2 192.168.16.3:80 cookie web2 check inter 1500 rise 3 fall 3 weight 2
#服务器定义,cookie 1表示serverid为web2,check inter 1500是检测心跳频率rise 3是3次正确认为服务器可用,
#fall 3是3次失败认为服务器不可用,weight代表权重
###################################backend server_blog###############################################
backend server_blog
mode http #http的7层模式
balance roundrobin #负载均衡的方式,roundrobin平均方式
cookie SERVERID #允许插入serverid到cookie中,serverid后面可以定义
option httpchk GET /index.html #心跳检测的文件
server blog1 192.168.16.2:80 cookie blog1 check inter 1500 rise 3 fall 3 weight 1
#服务器定义,cookie 1表示serverid为web1,check inter 1500是检测心跳频率rise 3是3次正确认为服务器可用,fall 3是3次失败认为服务器不可用,weight代表权重
server blog2 192.168.16.3:80 cookie blog2 check inter 1500 rise 3 fall 3 weight 2
#服务器定义,cookie 1表示serverid为web2,check inter 1500是检测心跳频率rise 3是3次正确认为服务器可用,fall 3是3次失败认为服务器不可用,weight代表权重
###################################backend server_bbs###############################################
backend server_bbs
mode http #http的7层模式
balance roundrobin #负载均衡的方式,roundrobin平均方式
cookie SERVERID #允许插入serverid到cookie中,serverid后面可以定义
option httpchk GET /index.html #心跳检测的文件
server bbs1 192.168.16.2:80 cookie bbs1 check inter 1500 rise 3 fall 3 weight 1
#服务器定义,cookie 1表示serverid为web1,check inter 1500是检测心跳频率rise 3是3次正确认为服务器可用,fall 3是3次失败认为服务器不可用,weight代表权重
server bbs2 192.168.16.3:80 cookie bbs2 check inter 1500 rise 3 fall 3 weight 2
#服务器定义,cookie 1表示serverid为web2,check inter 1500是检测心跳频率rise 3是3次正确认为服务器可用,fall 3是3次失败认为服务器不可用,weight代表权重


 385
385

 被折叠的 条评论
为什么被折叠?
被折叠的 条评论
为什么被折叠?
 到【灌水乐园】发言


