


前言
基于Python3.5+
1.第一阶段基础(必须)
|
|
|
|
| — | — | — |
| Python3 环境搭建 | Python3 基础语法 | Python3 基本数据类型 |
| Python3 数据类型转换 | Python3 解释器 | Python3 注释 |
| Python3 运算符 | Python3 数字(Number) | Python3 字符串 |
| Python3 列表 | Python3 元组 | Python3 字典 |
| Python3 集合 | Python3 条件控制 | Python3 循环语句 |
| Python3 推导式 | Python3 迭代器与生成器 | Python3 函数 |
| Python3 lambda | Python3 模块 | Python3 输入和输出 |
| Python3 错误和异常 | Python3 面向对象 |
|
2.第二阶段基础
Python3 pip (必须)
pip 是 Python 包管理工具,该工具提供了对 Python 包的查找、下载、安装、卸载的功>能。
|
|
|
|
| — | — | — |
| Python3 正则表达式 | Python3 enum(枚举) | Python3 MySQL(PyMySQL) (必须) |
| Python3 requests 模块 | Python3 函数式注解 | Python3 多线程 (必须) |
| Python3 XML 解析 | Python3 JSON (必须) | Python pyecharts模块 |
关于 pyecharts模块
ECharts 是由百度开发的一款强大的开源数据可视化库,而 Pyecharts 则是 ECharts 的 Python 封装,使得在 Python 中使用 ECharts 变得更加方便。
3.Web开发基础
推荐使用 Djiango Rest Framework框架进行web-api开发 1.Django Rest Framework(DRF)框架搭建步骤 2.django-rest-framework官网
4.推荐了解的库,根据你的需要来
内置库:
通用库:
-
time— 时间访问和转换
-
datetime— 基本日期和时间类型
-
calendar— 常规日历相关功能
-
collections— 容器数据类型
-
bisect— 数组二分算法
-
array— 高效的数值数组
-
weakref— 弱引用
-
types— 动态类型创建和内置类型的名称
-
copy— 浅拷贝和深拷贝操作
-
pprint— 数据漂亮的打印机
结构化标记处理工具:
-
html— 超文本标记语言支持
-
html.parser— 简单的 HTML 和 XHTML 解析器
-
html.entities— HTML 通用实体的定义
-
XML 处理模块
-
xml.etree.ElementTree — ElementTreeXML API
-
xml.dom— 文档对象模型 API
-
xml.dom.minidom— 最小的 DOM 实现
-
xml.dom.pulldom— 支持构建部分 DOM 树
-
xml.sax— 支持 SAX2 解析器
-
xml.sax.handler— SAX 处理程序的基类
-
xml.sax.saxutils— SAX 实用程序
-
xml.sax.xmlreader— XML 解析器的接口
-
xml.parsers.expat — 使用 Expat进行快速 XML 解析
数据压缩和归档:
-
gzip— 支持gzip文件
-
zipfile— 处理 ZIP 存档
-
tarfile— 读取和写入 tar 归档文件
加密服务:
-
hashlib— 安全哈希和消息摘要
-
hmac— 用于消息身份验证的密钥哈希
-
secrets— 生成用于管理密钥的安全随机数
并发执行:
-
threading— 基于线程的并行性
-
multiprocessing— 基于进程的并行性
-
multiprocessing.shared_memory— 提供共享内存,以便跨进程直接访问
-
并发包
-
concurrent.futures— 启动并行任务
-
queue— 同步的队列类
网络和进程间通信:
-
asynchronous— 异步 I/O
-
socket— 低级网络接口
-
ssl— 套接字对象的 TLS/SSL 包装器
-
select— 等待 I/O 完成
-
选择器— 高级 I/O 多路复用
第三方库:
进度条
1.tqdm
安装 pip install tqdm
#!/usr/bin/python3
# -*- coding: utf-8 -*-
from tqdm import tqdm
import time

def tqdm_process_do(items):
    pbar = tqdm(items)
    for char in pbar:
        time.sleep(0.25)
        #pbar.set_description("当前进度")
        #pbar.update(21)

if __name__ == "__main__":
    tqdm_process_do(range(100))
2.rich.progress
安装 pip install rich
#!/usr/bin/python3
# -*- coding: utf-8 -*-
import time
from rich.progress import track, Progress
# 基础用法
def rich_progress_base_do(items):
    for i in track(items, description="Processing..."):
        time.sleep(0.1)  # Simulate work being done

# 高级用法  以下演示的是三个任务:下载 (Processing)加工 烹饪
def rich_advice_progress_do():
    with Progress() as progress:
        task1 = progress.add_task("[red]Downloading...", total=100)
        task2 = progress.add_task("[green]Processing...", total=100)
        ## 如果想隐藏任务 可以设置visible为False
        task3 = progress.add_task("[cyan]Cooking...", total=100, visible=False)

        while not progress.finished:
            progress.update(task1, advance=5)
            progress.update(task2, advance=4)
            progress.update(task3, advance=3)
            time.sleep(0.1)

def do_work(task):
    print("回调处理此任务-----------")

# 迅时进度  这个不会在控制台展示
def rich_progress_transient_do():
    with Progress(transient=True) as progress:
        task = progress.add_task("Working", total=100)
        do_work(task)

# 打印/日志
# progress.console
def rich_progress_console_do(items,processTiltle="当前进度",rowJobDesc="当前处理项:"):
    with Progress() as progress:
        task = progress.add_task(processTiltle, total=len(items))
        for job in items:
            progress.console.print(f"{rowJobDesc} #{job}")
            run_job(job)
            progress.advance(task)

def run_job(job):
    pass


if __name__ == "__main__":
    print("-----------基础用法-------------")
    rich_progress_base_do(range(50))
    print("-----------高级用法-------------")
    rich_advice_progress_do()
    print("-----------迅时用法-------------")
    rich_progress_transient_do()
    print("-----------打印/日志用法-------------")
    rich_progress_console_do(range(50))

#如果不确定的进度
#当您添加任务时,它会自动启动,
#1.先调用 add_task() 设置=》 start=False  total=None
#2.当你有步骤数时,你可以调用 start_task()
#3.然后像往常一样 update()
from time import sleep
from urllib.request import urlopen

from rich.progress import wrap_file

response = urlopen("https://www.textualize.io")
size = int(response.headers["Content-Length"])

with wrap_file(response, size) as file:
    for line in file:
        print(line.decode("utf-8"), end="")
        sleep(0.1)
import os.path
import sys
from concurrent.futures import ThreadPoolExecutor
import signal
from functools import partial
from threading import Event
from typing import Iterable
from urllib.request import urlopen

from rich.progress import (
    BarColumn,
    DownloadColumn,
    Progress,
    TaskID,
    TextColumn,
    TimeRemainingColumn,
    TransferSpeedColumn,
)

progress = Progress(
    TextColumn("[bold blue]{task.fields[filename]}", justify="right"),
    BarColumn(bar_width=None),
    "[progress.percentage]{task.percentage:>3.1f}%",
    "•",
    DownloadColumn(),
    "•",
    TransferSpeedColumn(),
    "•",
    TimeRemainingColumn(),
)


done_event = Event()


def handle_sigint(signum, frame):
    done_event.set()


signal.signal(signal.SIGINT, handle_sigint)


def copy_url(task_id: TaskID, url: str, path: str) -> None:
    """Copy data from a url to a local file."""
    progress.console.log(f"Requesting {url}")
    response = urlopen(url)
    # This will break if the response doesn't contain content length
    progress.update(task_id, total=int(response.info()["Content-length"]))
    with open(path, "wb") as dest_file:
        progress.start_task(task_id)
        for data in iter(partial(response.read, 32768), b""):
            dest_file.write(data)
            progress.update(task_id, advance=len(data))
            if done_event.is_set():
                return
    progress.console.log(f"Downloaded {path}")


def download(urls: Iterable[str], dest_dir: str):
    """Download multiple files to the given directory."""

    with progress:
        with ThreadPoolExecutor(max_workers=4) as pool:
            for url in urls:
                filename = url.split("/")[-1]
                dest_path = os.path.join(dest_dir, filename)
                task_id = progress.add_task("download", filename=filename, start=False)
                pool.submit(copy_url, task_id, url, dest_path)


if __name__ == "__main__":
    # Try with https://releases.ubuntu.com/20.04/ubuntu-20.04.3-desktop-amd64.iso
    if sys.argv[1:]:
        download(sys.argv[1:], "./")
    else:
        print("Usage:\n\tpython downloader.py URL1 URL2 URL3 (etc)")
3.alive-progress
安装 pip install alive-progress
#!/usr/bin/python3
# -*- coding: utf-8 -*-
# 导入 alive-progress 库
from alive_progress import alive_bar
import time

def alive_process_do(items):
    with alive_bar(len(items), force_tty=True) as bar:
        for item in items:
            # process item
            bar()  # 推进进度条
            time.sleep(0.1)


if __name__ == "__main__":
     alive_process_do(range(100))
需要注意的是 alive-progress 并不像 tqdm 等进度条库一样会自动更新,只有我们程序调用了 bar 才会让进度条 +1.
Q&A 解决Pycharm不显示进度条
处理excel:
1.openpyxl的
用于读取和写入 Excel 2010 文件的推荐包(即:xlsx/xlsm/xltx/xltm ) 官方文档: https://openpyxl.readthedocs.io/en/stable/
from openpyxl import load_workbook, Workbook
from day01.calTime import CalTime

# 50万数据-(50w行-10列) 大概需要90s
#如果是10万+数据需要写入 可以使用xlsxwriter来代替
# 如果是.xls可以使用 xlread来进行读取

##'get_index', 'get_sheet_by_name', 'get_sheet_names','worksheets','sheetnames'
##, 'remove', 'remove_sheet', 'save', , 'style_names', 'template'
# , 'read_only' 'write_only'
wb = load_workbook(filename='data/infile-3k.xlsx', read_only=True)
sheetnames = wb.get_sheet_names()  # wb.sheetnames
worksheet1 = wb.get_sheet_by_name("Sheet1")  # wb["Sheet1"]
sheets_count = len(sheetnames)  # sheets_count =len(wb.worksheets)
index1 = wb.get_index(worksheet1)

for sn in sheetnames:
    ws = wb.get_sheet_by_name(sn)
    for row in ws.rows:
        for cell in row:
            print(cell.value)

# for ws in wb.worksheets:
#     print(ws.title)
#     for row in ws.rows:
#         for cell in row:
#             print(cell.value)

# 与普通工作簿不同,只读工作簿将使用延迟加载。
#必须使用该方法显式关闭工作簿
wb.close()
2.xlsxwriter
用于写入数据、格式化信息,特别是 Excel 2010 格式(即:.xlsx)图表的替代包 只能写,大量数据时推荐使用
图表:
1.pyecharts
pyecharts 是一个基于 ECharts 的 Python 数据可视化库,它允许用户使用 Python 语言生成各种类型的交互式图表和数据可视化。(ECharts 是由百度开发的一款强大的开源数据可视化库) pyecharts 特点与功能:
简单易用: Pyecharts 提供了直观而友好的 API,使得用户能够快速上手,轻松生成各种图表。
丰富的图表类型: 支持多种常见的图表类型,包括线图、柱状图、散点图、饼图、地图等,满足不同场景的需求。
支持主流数据格式: 能够处理常见的数据格式,如列表、字典、Pandas DataFrame 等。
交互性: 生成的图表可以具有交互性,用户可以通过鼠标悬停、缩放等方式与图表进行互动。
丰富的配置选项: 提供了丰富的配置选项,允许用户自定义图表的样式、布局等属性。
支持主题: 提供多种主题,用户可以根据需要选择合适的主题,使图表更符合应用的整体风格。
数据处理:
1.pandas
#!/usr/bin/python3
# -*- coding: utf-8 -*-
import pandas as pd
import pprint
#读取和写入 支持格式 .csv .xls .html .hdf5 .json .GBQ .Sql /Parquet
from day01.calTime import CalTime

#查看 pandas DataFrame 的前 8 行。
#ld = df.head(8)
#print(ld)

#查看 pandas DataFrame 的最后 8 行。
#ld = df.tail(8)
#print(ld)

# int64  float64 object
##将数据转化成 excel
#df.to_excel("titanic.xlsx", sheet_name="passengers", index=False,header=True)

#查看DataFrame
#print(df.info())

#Series 中的数据是有序的。
#可以将 Series 视为带有索引的一维数组。 可以是list/tuple/dict
#索引可以是唯一的,但不是必须的。 如果是list tuple 则索引个数需要与数据个数一致 dict则没那么多要求
#数据可以是标量、列表、NumPy 数组等。

#

##我想存储泰坦尼克号的乘客数据。对于许多乘客,我知道姓名(字符)、年龄(整数)和性别(男性/女性)数据。

df = pd.DataFrame(
    {
        "Name": [
            "Braund, Mr. Owen Harris",
            "Allen, Mr. William Henry",
            "Bonnell, Miss. Elizabeth",
        ],
        "Age": [22, 35, 58],
        "Sex": ["male", "male", "female"],
    }
)

#df.to_excel("ttnkh.xlsx")
#我只想看age部分
## way-1
# age_part =df["Age"]

## way-2 (重新加载series 列名为Age)
# age_part = pd.Series([22, 35, 58], name="Age")
# pprint.pprint(age_part)

#我想知道乘客的最大年龄
#print(df["Age"].max())
#print(pd.Series([22, 35, 58], name="Age").max())

#我对数据表的数值数据的一些基本统计感兴趣
## 平均值(mean) 总数(count) 最小(min) /大(max)值 各个年龄度占比
#print(df.describe())

# df = pd.read_excel('data/infile-500k.xlsx')
## for col in df.columns:
##     series = df[col]
# df.to_csv("data/500k-data.csv")
calTime = CalTime()
titanic = pd.read_csv("data/500k-data.csv")
datas = titanic.head(1)

for ind,row in datas.iterrows():
    print(ind,row)

calTime.print_and_write()
#方法和属性 方便第一次检查。head tail info dtypes
点击下方安全链接前往获取
CSDN大礼包:《Python入门&进阶学习资源包》免费分享
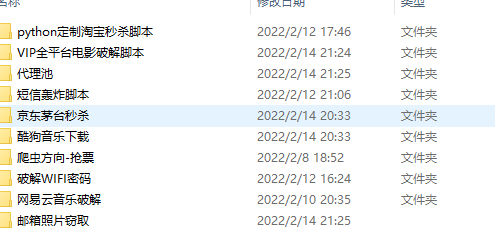
👉Python实战案例👈
光学理论是没用的,要学会跟着一起敲,要动手实操,才能将自己的所学运用到实际当中去,这时候可以搞点实战案例来学习。
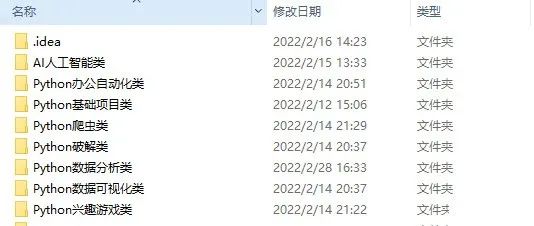
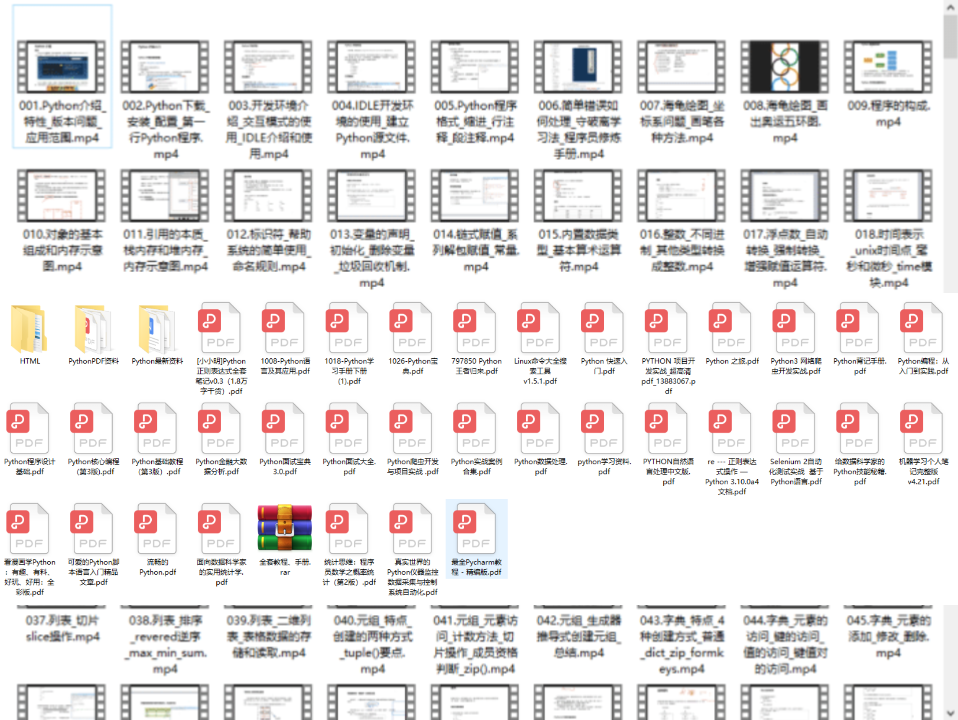
👉Python书籍和视频合集👈
观看零基础学习视频,看视频学习是最快捷也是最有效果的方式,跟着视频中老师的思路,从基础到深入,还是很容易入门的。
👉Python副业创收路线👈
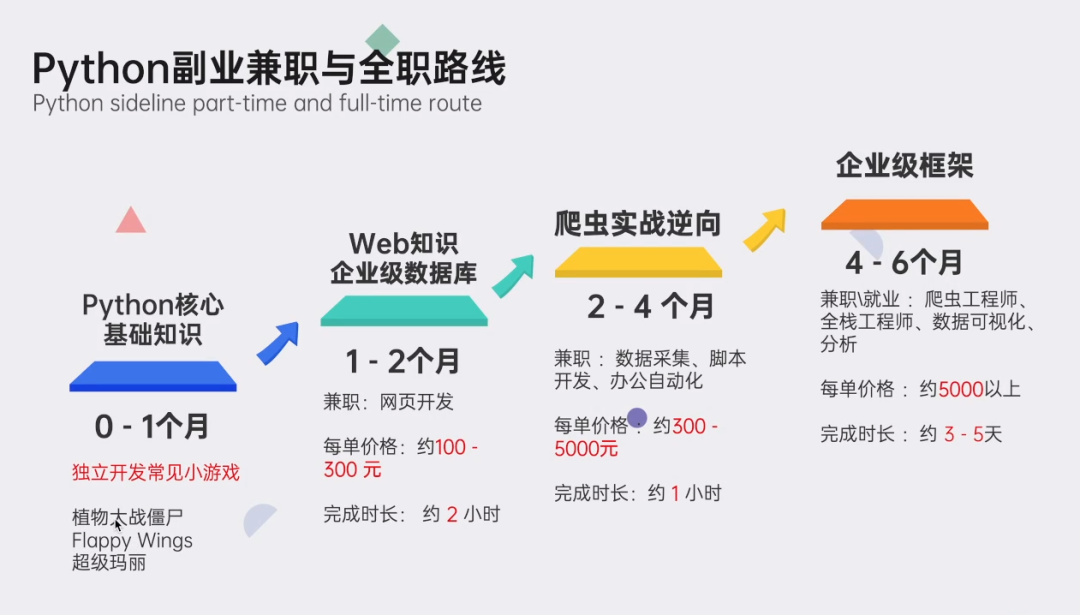
这些资料都是非常不错的,朋友们如果有需要《Python学习路线&学习资料》,点击下方安全链接前往获取
CSDN大礼包:《Python入门&进阶学习资源包》免费分享
本文转自网络,如有侵权,请联系删除。


 239
239


 被折叠的 条评论
为什么被折叠?
被折叠的 条评论
为什么被折叠?
 到【灌水乐园】发言


