


 本文介绍了神经网络中的常用激活函数,如ReLU、Sigmoid、Tanh和Softplus,并展示了如何在PyTorch的torch.nn.functional模块中使用它们。作者强调了选择合适的激活函数对防止梯度问题的重要性,特别是深度网络中超过两层时的考虑。
前言
激活函数作用就是将原来线性的变成非线性,让神经网络变的更加强大。本文会介绍神经网络中的常用激活函数,以及其在pytorch里面的接口。
一、常用激活函数
待更新
二、pytorch接口
1.接口位置(torch.nn.functional)
要学会看官方文档,给出该接口的官方文档pytorch各种激活官方文档
该接口torch.nn.functional里面收集了pytorch里面封装的各种函数,有Non-linear activation functions等等,需要用到时要学会利用官方文档是必要的。
但需注意的是损失函数接口不是发function这个模块里,而是直接在torch.nn这个模块下,同样附上官方文档链接官方文档(LOSS FUNCTION)
# 常用导入该接口的命名规则
import torch.nn.functional as F
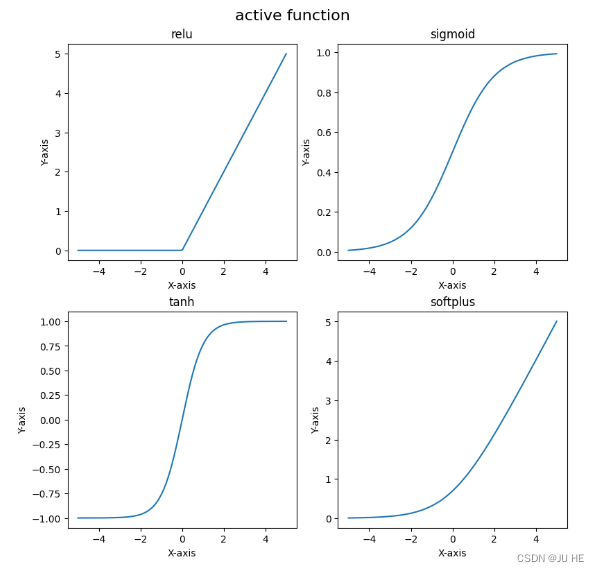
2、具体激活函数演示
# fake data
input = torch.linspace(-5,5,200)
# 输入的是一个tensor数组,在神经网络中就是前一层的所有输入。
relu = np.array(F.relu(input))
sigmoid = np.array(F.sigmoid(input))
tanh = np.array(F.tanh(input))
softplus = np.array(F.softplus(input))
input = np.array(input)

# 使用子图对象的方式
fig, ax = plt.subplots(2,2,constrained_layout=True, figsize=(8,8))
ax[0,0].plot(input, relu)
# 添加标题和标签
ax[0,0].set_title('relu')
ax[0,0].set_xlabel('X-axis')
ax[0,0].set_ylabel('Y-axis')

ax[0,1].plot(input, sigmoid)
# 添加标题和标签
ax[0,1].set_title('sigmoid')
ax[0,1].set_xlabel('X-axis')
ax[0,1].set_ylabel('Y-axis')

ax[1,0].plot(input, tanh)
# 添加标题和标签
ax[1,0].set_title('tanh')
ax[1,0].set_xlabel('X-axis')
ax[1,0].set_ylabel('Y-axis')

ax[1,1].plot(input, softplus)
# 添加标题和标签
ax[1,1].set_title('softplus')
ax[1,1].set_xlabel('X-axis')
ax[1,1].set_ylabel('Y-axis')
# 在整个大图上设置标题
fig.suptitle('active function', fontsize=16)
# 显示图形
plt.show()
输出:
总结
关于回归、分类问题是不同类型的激活函数,具体问题具体选择。另外对于前馈神经网络隐藏层一两层激活函数选择应该是任意一个都大概率能达到满意的非线性效果,但是如果超过了2层更多层,就需要思考一下用那个激活函数了,如果选的不好,极大可能导致梯度爆炸或者梯度消失这些头疼的问题在反向传播过程中。


 被折叠的 条评论
为什么被折叠?
被折叠的 条评论
为什么被折叠?
 到【灌水乐园】发言


