


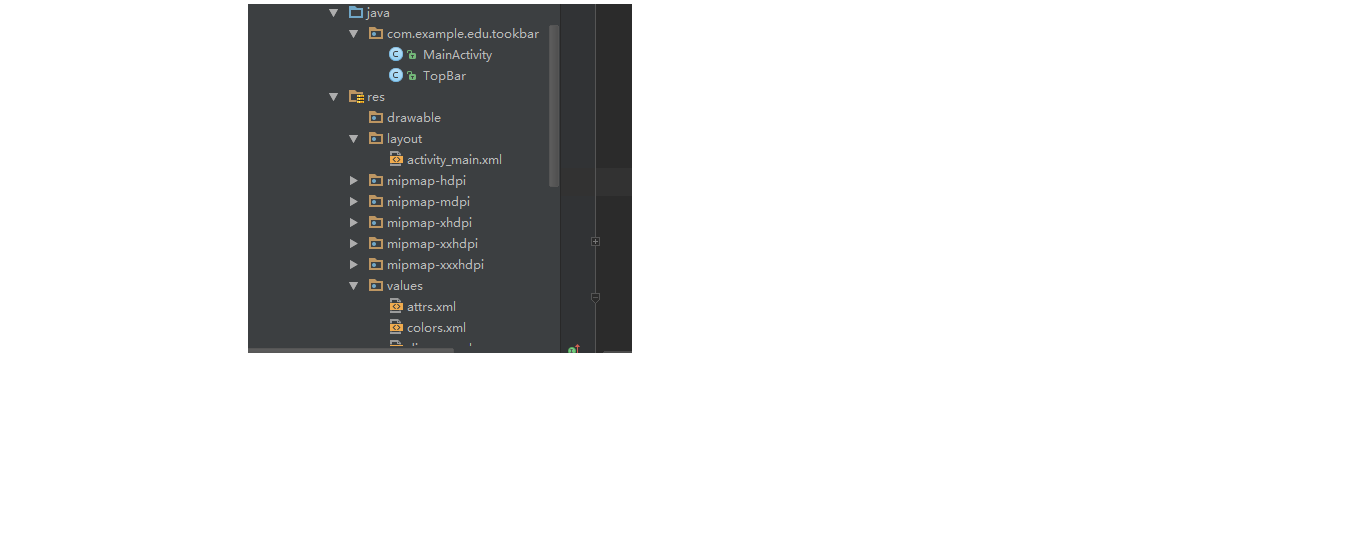
先在res->values->下创建attrs文件,
<?xml version="1.0" encoding="utf-8"?>
<resources>
    <declare-styleable name="TookBar">
        <attr name="leftText" format="string" />
        <attr name="leftTextColor" format="color" />
        <attr name="leftBackground" format="reference|color" />
        <attr name="rightText" format="string" />
        <attr name="rightTextColor" format="color" />
        <attr name="rightBackground" format="reference|color" />
        <attr name="titleSize" format="dimension" />
        <attr name="titleColor" format="color" />
        <attr name="titleText" format="string" />
    </declare-styleable>
</resources>
创建TobBar.java
import android.content.Context;
import android.content.res.TypedArray;
import android.graphics.drawable.Drawable;
import android.util.AttributeSet;
import android.view.Gravity;
import android.view.View;
import android.view.ViewGroup;
import android.widget.Button;
import android.widget.RelativeLayout;
import android.widget.TextView;


/**
 * Created by Administrator on 2016/5/27.
 */
public class TopBar extends RelativeLayout {
    private Button leftButton, rightButton;
    private TextView lvTitle;

    private Drawable leftBackground;
    private int leftTextColor;
    private String leftText;

    private Drawable rightBackground;
    private int rightTextColor;
    private String rightText;

    private int titleColor;
    private String titleText;
    private float titleSize;

    private LayoutParams leftParam, rightParam, titleParam;
    private TopBarClickLinstener linstener;

    public interface TopBarClickLinstener {
        void left();

        void right();
    }

    public void setTopBatClickLinstener(TopBarClickLinstener linstener) {
        this.linstener = linstener;
    }

    public TopBar(Context context, AttributeSet attrs) {
        super(context, attrs);
        TypedArray ta = context.obtainStyledAttributes(attrs, R.styleable.TookBar);

        leftText = ta.getString(R.styleable.TookBar_leftText);
        leftBackground = ta.getDrawable(R.styleable.TookBar_leftBackground);
        leftTextColor = ta.getColor(R.styleable.TookBar_leftTextColor, 0);

        rightText = ta.getString(R.styleable.TookBar_rightText);
        rightBackground = ta.getDrawable(R.styleable.TookBar_rightBackground);
        rightTextColor = ta.getColor(R.styleable.TookBar_rightTextColor, 0);

        titleColor = ta.getColor(R.styleable.TookBar_titleColor, 0);
        titleText = ta.getString(R.styleable.TookBar_titleText);
        titleSize = ta.getDimension(R.styleable.TookBar_titleSize, 0);

        ta.recycle();//回收

        leftButton = new Button(context);
        rightButton = new Button(context);
        lvTitle = new TextView(context);

        leftButton.setText(leftText);
        leftButton.setTextColor(leftTextColor);
        leftButton.setBackground(leftBackground);

        rightButton.setText(rightText);
        rightButton.setTextColor(rightTextColor);
        rightButton.setBackground(rightBackground);

        lvTitle.setText(titleText);
        lvTitle.setTextColor(titleColor);
        lvTitle.setTextSize(titleSize);
        lvTitle.setGravity(Gravity.CENTER);
        setBackgroundColor(0xff0000);

        leftParam = new LayoutParams(ViewGroup.LayoutParams.WRAP_CONTENT, ViewGroup.LayoutParams.WRAP_CONTENT);
        leftParam.addRule(RelativeLayout.ALIGN_PARENT_LEFT, TRUE);
        addView(leftButton, leftParam);

        rightParam = new LayoutParams(ViewGroup.LayoutParams.WRAP_CONTENT, ViewGroup.LayoutParams.WRAP_CONTENT);
        rightParam.addRule(RelativeLayout.ALIGN_PARENT_RIGHT, TRUE);
        addView(rightButton, rightParam);

        titleParam = new LayoutParams(ViewGroup.LayoutParams.WRAP_CONTENT, ViewGroup.LayoutParams.WRAP_CONTENT);
        titleParam.addRule(RelativeLayout.CENTER_IN_PARENT, TRUE);
        addView(lvTitle, titleParam);

        leftButton.setOnClickListener(new OnClickListener() {
            @Override
            public void onClick(View v) {
                linstener.left();
            }
        });

        rightButton.setOnClickListener(new OnClickListener() {
            @Override
            public void onClick(View v) {
                linstener.right();
            }
        });
    }
}
在activity_main.xml 写自己自定义的view 这句
xmlns:custom=”http://schemas.android.com/apk/res-auto” 在androidstudio这样写,在eclipse写完整的路径
<?xml version="1.0" encoding="utf-8"?>
<RelativeLayout xmlns:android="http://schemas.android.com/apk/res/android"
xmlns:custom="http://schemas.android.com/apk/res-auto"
xmlns:tools="http://schemas.android.com/tools"
android:layout_width="match_parent"
android:layout_height="match_parent"
android:paddingBottom="@dimen/activity_vertical_margin"
android:paddingLeft="@dimen/activity_horizontal_margin"
android:paddingRight="@dimen/activity_horizontal_margin"
android:paddingTop="@dimen/activity_vertical_margin"
tools:context="com.example.edu.tookbar.MainActivity">
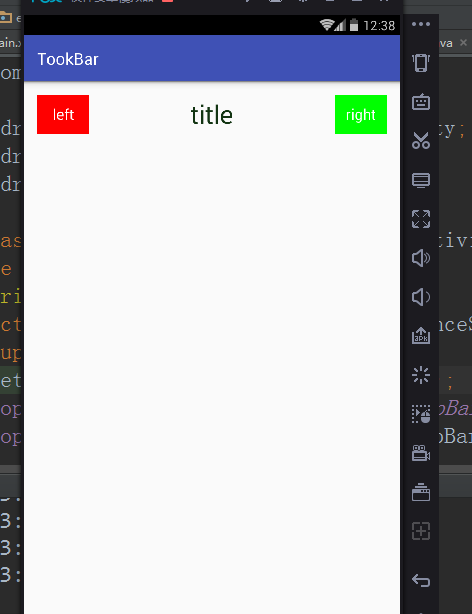
<com.example.edu.tookbar.TopBar
android:id="@+id/topBar"
android:layout_width="match_parent"
android:layout_height="wrap_content"
custom:leftText="left"
custom:leftBackground="#ff0000"
custom:leftTextColor="#ffffff"
custom:rightText="right"
custom:rightBackground="#00ff00"
custom:rightTextColor="#ffffff"
custom:titleText="title"
custom:titleSize="20sp"
custom:titleColor="#123412"
></com.example.edu.tookbar.TopBar>
</RelativeLayout>
接下来就是测试下自己写的view
import android.support.v7.app.AppCompatActivity;
import android.os.Bundle;
import android.widget.Toast;

public class MainActivity extends AppCompatActivity {
   private TopBar topBar;
    @Override
    protected void onCreate(Bundle savedInstanceState) {
        super.onCreate(savedInstanceState);
        setContentView(R.layout.activity_main);
        topBar= (TopBar) findViewById(R.id.topBar);
        topBar.setTopBatClickLinstener(new TopBar.TopBarClickLinstener() {
            @Override
            public void left() {
                Toast.makeText(MainActivity.this,"left click",Toast.LENGTH_SHORT).show();
            }

            @Override
            public void right() {
                Toast.makeText(MainActivity.this,"right click",Toast.LENGTH_SHORT).show();
            }
        });
    }
}


 1590
1590

 被折叠的 条评论
为什么被折叠?
被折叠的 条评论
为什么被折叠?
 到【灌水乐园】发言


