


目的
- 理清springmvc 基本配置
- 实现基本的web功能
- 可以fork后快速开发web静态页面应用
// 为什么静态页面应用还要用spring?
// 为了使用freemarker实现页面拆分啊摔!
读者的准备
- 如果有读者的话,可以先clone这个下来研究
- https://git.oschina.net/sqq/springmvc-hello-world.git
具体步骤(工具为:IDEA)
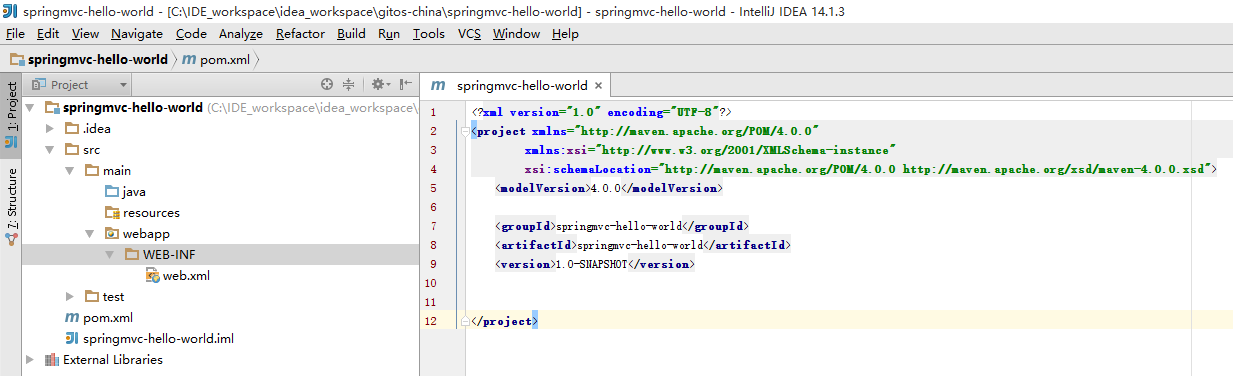
新建maven工程,添加web项目。不详述了,建完后目录结构如下。
pom.xml 中添加spring等的maven依赖包
<dependencies>
        <!--spring 依赖包-->
        <dependency>
            <groupId>org.springframework</groupId>
            <artifactId>spring-web</artifactId>
            <version>4.1.6.RELEASE</version>
        </dependency>
        <dependency>
            <groupId>org.springframework</groupId>
            <artifactId>spring-webmvc</artifactId>
            <version>4.1.6.RELEASE</version>
        </dependency>
        <dependency>
            <groupId>org.springframework</groupId>
            <artifactId>spring-context</artifactId>
            <version>4.1.6.RELEASE</version>
        </dependency>
        <dependency>
            <groupId>org.springframework</groupId>
            <artifactId>spring-context-support</artifactId>
            <version>4.1.6.RELEASE</version>
        </dependency>
        <!--freemark依赖包-->
        <dependency>
            <groupId>org.freemarker</groupId>
            <artifactId>freemarker</artifactId>
            <version>2.3.22</version>
        </dependency>
        <!--java servlet依赖包-->
        <dependency>
            <groupId>javax.servlet</groupId>
            <artifactId>javax.servlet-api</artifactId>
            <version>3.0.1</version>
            <scope>provided</scope>
        </dependency>
    </dependencies>
在resources中添加 freemarker配置文件freemarker.properties,后会在spring配置文件中引用
tag_syntax=auto_detect
template_update_delay=2
default_encoding=UTF-8
output_encoding=UTF-8
locale=zh_CN
date_format=yyyy-MM-dd
time_format=HH\:mm\:ss
datetime_format=yyyy-MM-dd HH\:mm\:ss
# 自动导入freemarker模板
# auto_import=/template/spring.ftl as s, /template/conditions.html as cd
number_format=\#
创建控制器包com.demo.web.controller和类IndexController.java,然后再spring文件中配置
package com.demo.web.controller;
import org.springframework.stereotype.Controller;
import org.springframework.web.bind.annotation.RequestMapping;
import java.util.Map;
@Controller
public class IndexController {
    @RequestMapping("/index")
    public String index(Map<String, Object> model) {
        model.put("name", "小荟");
        return "index/index.html";
    }
}
同时创建样例html文件作为视图 index.html;webapp下创建静态资源文件夹static和空样式表base.css
<!DOCTYPE html>
<html>
<head lang="en">
  <meta charset="UTF-8">
  <title></title>
    <link rel="stylesheet" type="text/css" href="/static/base.css">
</head>
<body>
你好啊~ ${name}
</body>
</html>
在resourse中添加spring配置文件spring-config.xml,会在web.xml中加载.
<?xml version="1.0" encoding="UTF-8"?>
<beans xmlns="http://www.springframework.org/schema/beans"
       xmlns:context="http://www.springframework.org/schema/context"
       xmlns:xsi="http://www.w3.org/2001/XMLSchema-instance"
       xmlns:mvc="http://www.springframework.org/schema/mvc"
       xsi:schemaLocation="http://www.springframework.org/schema/beans
     http://www.springframework.org/schema/beans/spring-beans.xsd
     http://www.springframework.org/schema/context
     http://www.springframework.org/schema/context/spring-context.xsd
     http://www.springframework.org/schema/mvc
     http://www.springframework.org/schema/mvc/spring-mvc.xsd">
    <!--开启注解-->
    <mvc:annotation-driven/>
    <!--配置spring扫描根目录,扫到即转成Bean-->
    <context:component-scan base-package="com.demo.web.controller" use-default-filters="false">
        <!--扫描过滤条件,这里只扫描注解为 @Ctronller的类-->
        <context:include-filter type="annotation" expression="org.springframework.stereotype.Controller"/>
    </context:component-scan>

    <!--设置freeMarker配置文件路径-->
    <bean id="freemarkerConfiguration" class="org.springframework.beans.factory.config.PropertiesFactoryBean">
        <property name="location" value="classpath:freemarker.properties"/>
    </bean>
    <!--freemarker 模板字符转义-->
    <bean id="fmXmlEscape" class="freemarker.template.utility.XmlEscape"/>
    <!--配置freeMarker -->
    <bean id="freemarkerConfig" class="org.springframework.web.servlet.view.freemarker.FreeMarkerConfigurer">
        <!--设置配置参数-->
        <property name="freemarkerSettings" ref="freemarkerConfiguration"/>
        <!--设置模板路径,spring将从这个目录下寻找freemarker页面-->
        <property name="templateLoaderPath" value="/WEB-INF/"/>
        <!--freemarker 参数 可自定义freemarker方法-->
        <property name="freemarkerVariables">
            <map>
                <entry key="xml-escape" value-ref="fmXmlEscape"/>
            </map>
        </property>
    </bean>
    <!--配置视图解析器-->
    <bean id="viewResolver" class="org.springframework.web.servlet.view.freemarker.FreeMarkerViewResolver">
        <!--视图解析类-->
        <property name="viewClass" value="org.springframework.web.servlet.view.freemarker.FreeMarkerView"/>
        <!--视图名-->
        <property name="viewNames" value="*.html"/>
        <property name="contentType" value="text/html;charset=utf-8"/>
        <property name="cache" value="true"/>
        <property name="prefix" value=""/>
        <property name="suffix" value=""/>
        <property name="order" value="0"/>
        <!--将request请求内容绑定到freemarker内置变量request上-->
        <property name="requestContextAttribute" value="request"/>
    </bean>
    <!-- 配置基于Session的处理,将提交上来的locale参数进行处理 -->
    <bean id="localeResolver" class="org.springframework.web.servlet.i18n.SessionLocaleResolver"/>

    <!--静态资源配置,web.xml中配置spring会拦截一切请求,这里设置会对/static路径下资源请求放行-->
    <mvc:resources mapping="/static/**" location="/static/*"/>
</beans>
配置web.xml 启动spring
<?xml version="1.0" encoding="UTF-8"?>
<web-app xmlns="http://java.sun.com/xml/ns/javaee"
         xmlns:xsi="http://www.w3.org/2001/XMLSchema-instance"
         xsi:schemaLocation="http://java.sun.com/xml/ns/javaee
          http://java.sun.com/xml/ns/javaee/web-app_3_0.xsd"
         version="3.0">
    <!-- Spring启动监听 -->
    <context-param>
        <param-name>contextConfigLocation</param-name>
        <param-value>classpath:spring-config.xml</param-value>
    </context-param>

    <listener>
        <listener-class>org.springframework.web.context.ContextLoaderListener</listener-class>
    </listener>

    <!-- 编码统一最好放最上面,最先加载,防止乱码 -->
    <filter>
        <filter-name>Set Character Encoding</filter-name>
        <filter-class>org.springframework.web.filter.CharacterEncodingFilter</filter-class>
        <init-param>
            <param-name>encoding</param-name>
            <param-value>UTF-8</param-value>
        </init-param>
        <init-param>
            <param-name>forceEncoding</param-name>
            <param-value>true</param-value>
        </init-param>
    </filter>
    <filter-mapping>
        <filter-name>Set Character Encoding</filter-name>
        <url-pattern>/*</url-pattern>
    </filter-mapping>


    <servlet>
        <servlet-name>mvc-dispatcher</servlet-name>
        <servlet-class>org.springframework.web.servlet.DispatcherServlet</servlet-class>
        <init-param>
            <param-name>contextConfigLocation</param-name>
            <param-value>classpath:spring-config.xml</param-value>
        </init-param>
        <load-on-startup>1</load-on-startup>
    </servlet>

    <servlet-mapping>
        <servlet-name>mvc-dispatcher</servlet-name>
        <url-pattern>/</url-pattern>
    </servlet-mapping>

</web-app>
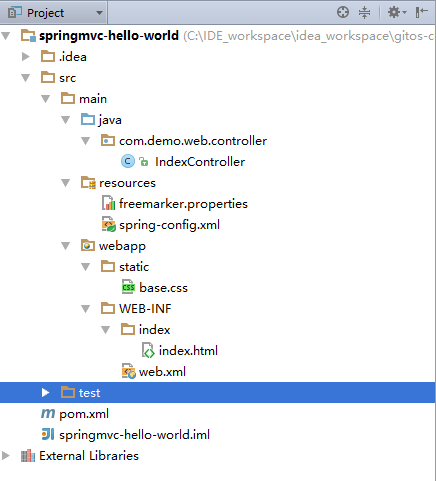
万事具备此时,目录结构如图
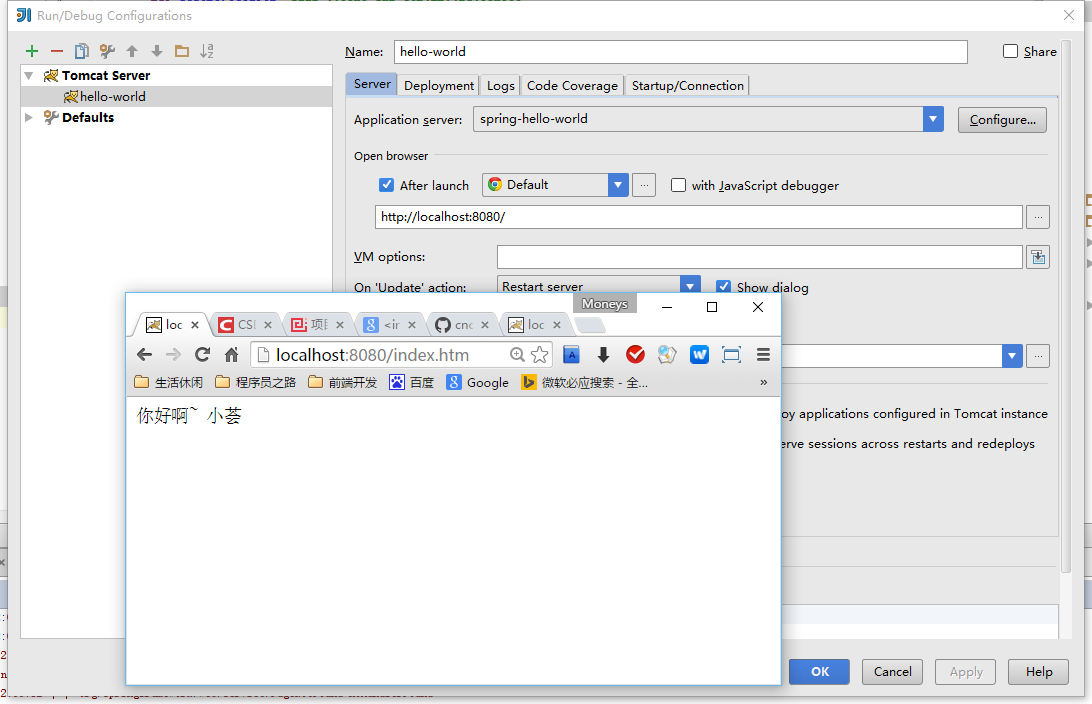
添加tomcat,运行 访问路径http://localhost:8080/index.htm
结论
- spring配置中 要注意context:include-filter 和context:exclude-filter的区别
web.xml配置中 要配置 下面这个,否则spring默认会去WEB-INF/下去找application-context.xml
<!-- Spring启动监听 -->
 <context-param>
 <param-name>contextConfigLocation</param-name>
 <param-value>classpath:spring-config.xml</param-value>
 </context-param>
IDEA智能提示强大,不过在web配置启动时有点小坑。


 754
754


 被折叠的 条评论
为什么被折叠?
被折叠的 条评论
为什么被折叠?
 到【灌水乐园】发言


