


1.操作环境
| 序号 | 软件 | 版本 | 备注 |
|---|---|---|---|
| 1 | Windows | 1.版本:Windows 10 专业版2.版本号:21H23.操作系统内部版本:19044.1889 | |
| 2 | Docker Desktop | 4.24.2 (124339) | |
| 3 | WSL | Ubuntu 22.04 LTS | |
| 4 | Python | 3.10 | |
| 5 | CUDA | 12.1 | |
| 6 | Dify | 0.6.6 |
Xorbits inference 是一个强大且通用的分布式推理框架,旨在为大型语言模型、语音识别模型和多模态模型提供服务,甚至可以在笔记本电脑上使用。它支持多种与 GGML 兼容的模型,如 ChatGLM、Baichuan、Whisper、Vicuna、Orca 等。Dify 支持以本地部署的方式接入 Xinference 部署的大型语言模型推理和 Embedding 能力。
2.本地安装 Xinfernece
安装 Xinference 用于推理的基础依赖,以及支持用 ggml推理 和 PyTorch推理的依赖。
pip install "xinference"
pip install "xinference[ggml]"
pip install "xinference[pytorch]"
pip install "xinference[all]"
执行脚本报错:
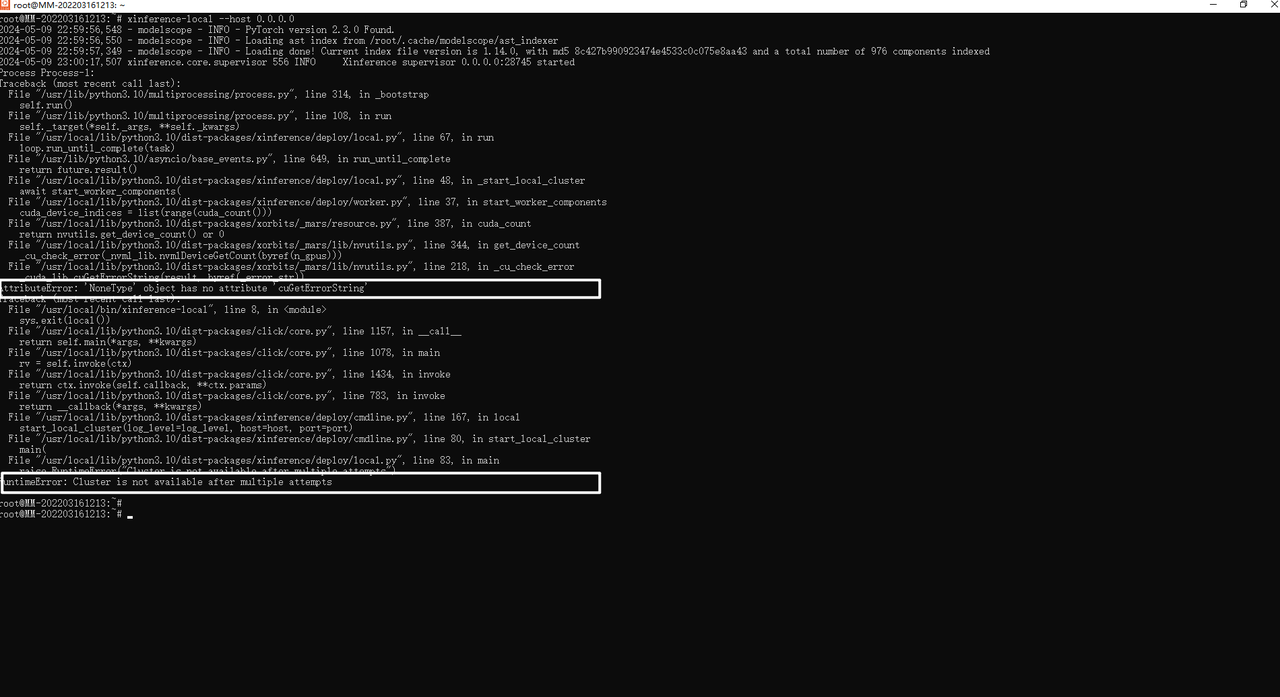
注解:暂时没有解决,可能是版本问题。
3.Docker安装Xinfernece
(1)启动容器
Nvidia GPU 用户可以使用Xinference Docker 镜像 启动 Xinference 服务器。在执行安装命令之前,确保系统中已经安装了 Docker 和 CUDA。你可以使用如下方式在容器内启动 Xinference,同时将 9997 端口映射到宿主机的 9998 端口,并且指定日志级别为 DEBUG,也可以指定需要的环境变量。
docker run -e XINFERENCE_MODEL_SRC=modelscope -p 9998:9997 --gpus all xprobe/xinference:v<your_version> xinference-local -H 0.0.0.0 --log-level debug
需要修改<your_version>为实际使用版本,也可以为latest:
docker run -e XINFERENCE_MODEL_SRC=modelscope -p 9998:9997 --gpus all xprobe/xinference:latest xinference-local -H 0.0.0.0 --log-level debug
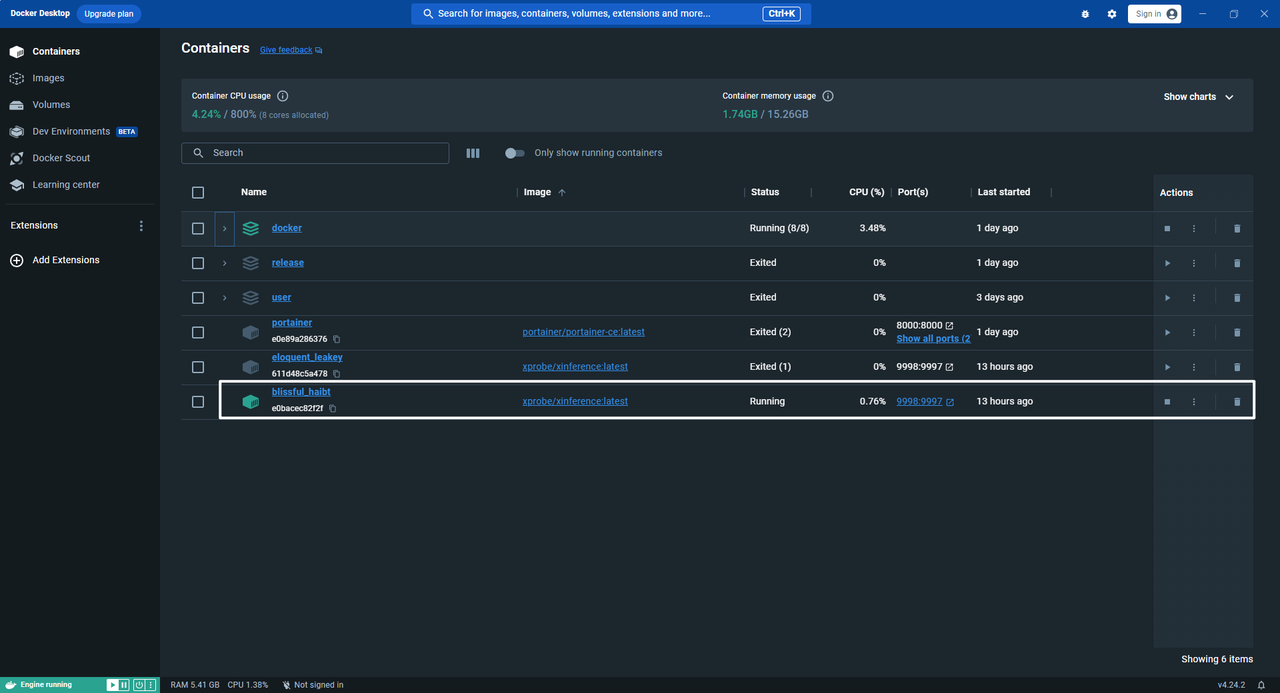
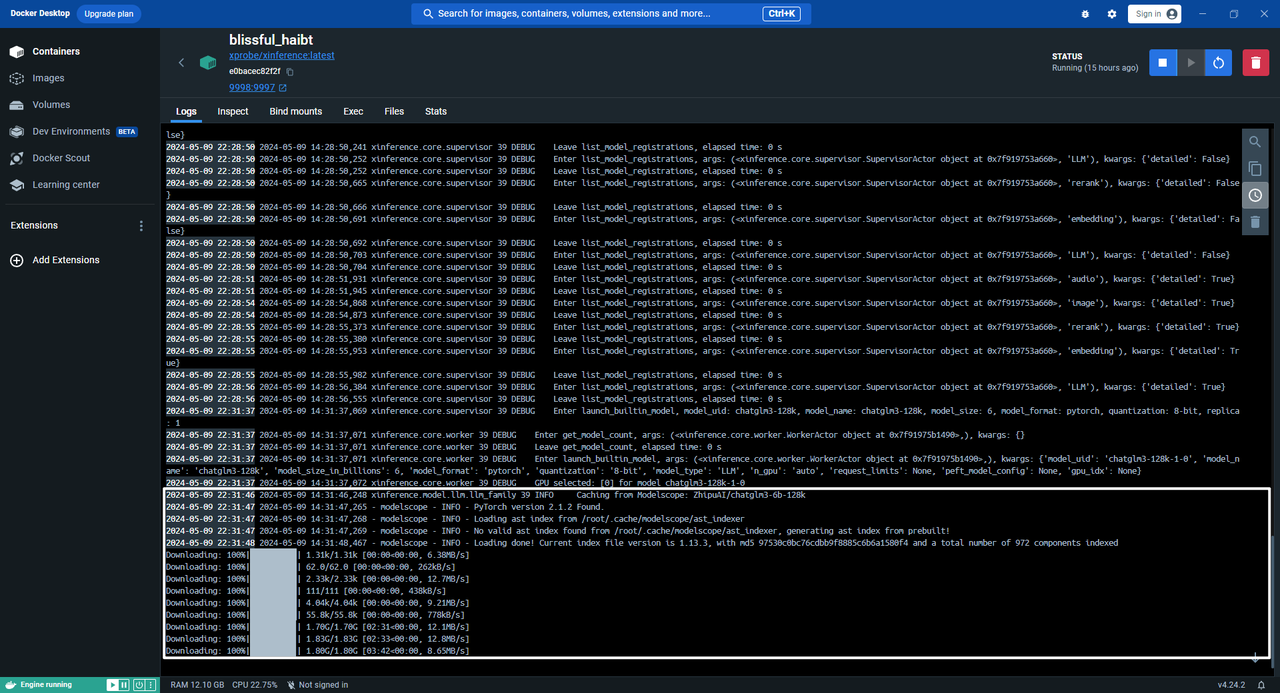
执行成功容器显示:
(2)打开Xinference界面
通过链接http://localhost:9998/ui/#/login打开界面,如下所示:
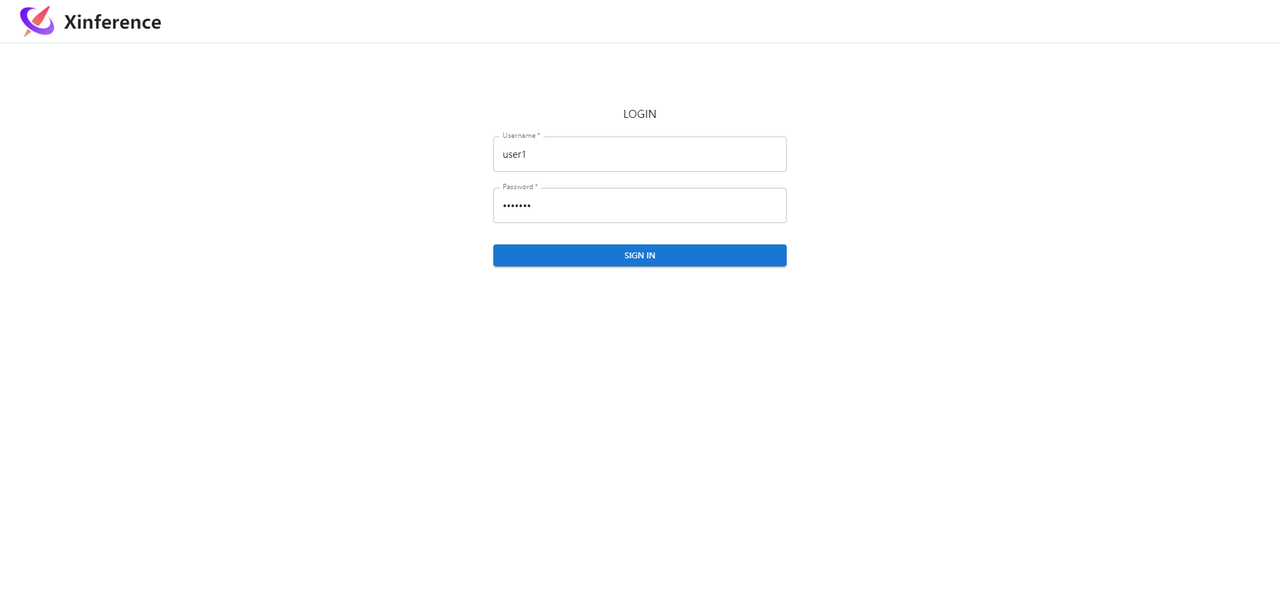
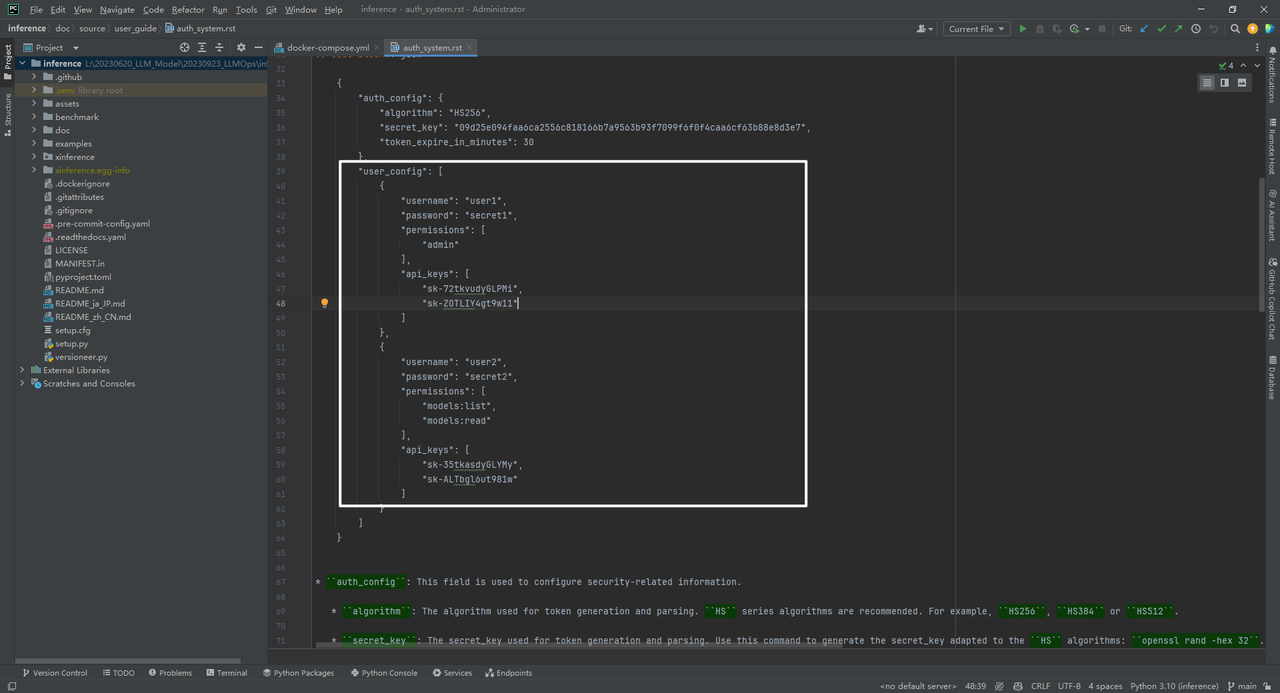
登录账号和密码,如下所示:
(3)Web端启动部署
xinference提供了两种部署模型的方式:Web端启动,命令端启动。接下来使用Web端启动:

部署模型过程中输出日志,如下所示:
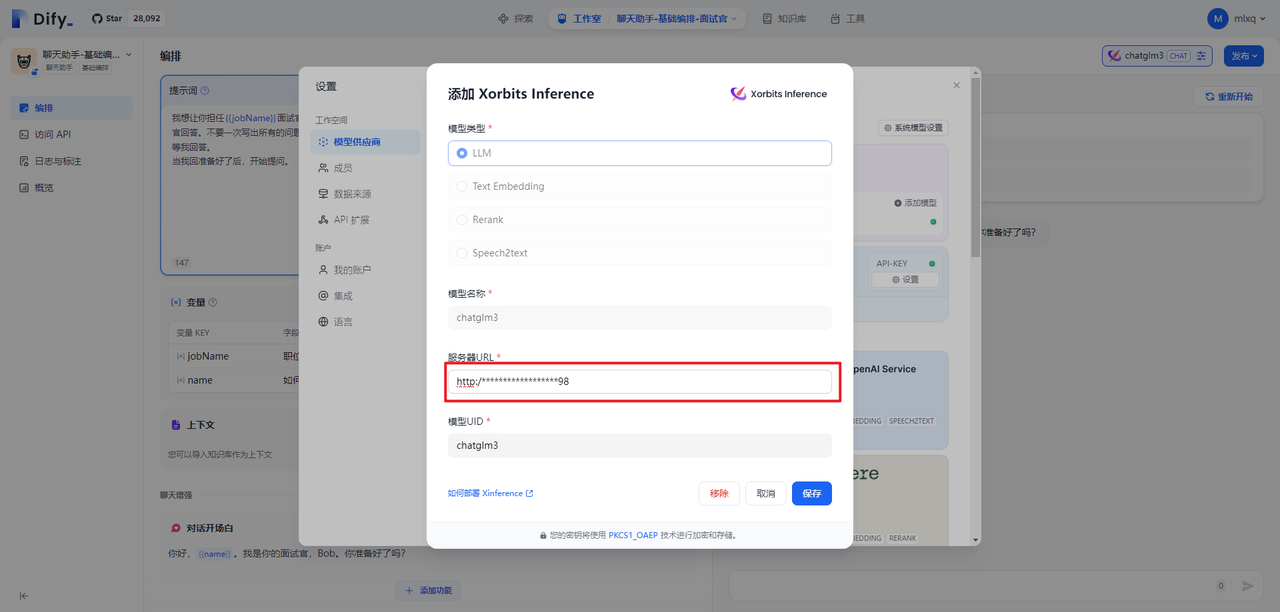
ChatGLM3服务启动后,可以在Dify中进行模型供应商注册。需要说明的是服务器URL中的IP地址,可通过ifconfig命令,在Ubuntu中查看。因为无论配置127.0.0.1,还是0.0.0.0均不通。
(4)命令端启动
下面是分别启动chat / embedding / rerank 三种模型的cmd命令。启动完了,会返回对应模型的UID:
# 部署chatglm3
xinference launch --model-name chatglm3 --size-in-billions 6 --model-format pytorch --quantization 8-bit
# 部署 bge-large-zh embedding
xinference launch --model-name bge-large-zh --model-type embedding
# 部署 bge-reranker-large rerank
xinference launch --model-name bge-reranker-large --model-type rerank
测试模型是否已经部署到本地,以rerank模型为例可以执行下面这个脚本:
from xinference.client import Client

# url 可以是local的端口 也可以是外接的端口
url = "http://172.19.0.1:6006"
print(url)

client = Client(url)
model_uid = client.launch_model(model_name="bge-reranker-base", model_type="rerank")
model = client.get_model(model_uid)

query = "A man is eating pasta."
corpus = [
    "A man is eating food.",
    "A man is eating a piece of bread.",
    "The girl is carrying a baby.",
    "A man is riding a horse.",
    "A woman is playing violin."
]
print(model.rerank(corpus, query))
4.分布式部署
分布式场景下,需要在一台服务器上部署一个 Xinference supervisor,并在其余服务器上分别部署一个 Xinference worker。 具体步骤如下:
(1)启动 supervisor执行命令
xinference-supervisor -H "${supervisor_host}",替换 ${supervisor_host} 为 supervisor 所在服务器的实际主机名或 IP 地址。
(2)启动 workers其余服务器执行命令
xinference-worker -e "http://${supervisor_host}:9997"
Xinference 启动后,将会打印服务的 endpoint。这个 endpoint 用于通过命令行工具或编程接口进行模型的管理:
-
本地部署下,endpoint 默认为
http://localhost:9997 -
集群部署下,endpoint 默认为
http://${supervisor_host}:9997。其中${supervisor_host}为 supervisor 所在服务器的主机名或 IP 地址。
5.常用命令
(1)启动指定模型
xinference launch --model-name "llama-2-chat" --model-format ggmlv3 --size-in-billions 7 --quantization q4_0 --endpoint "http://127.0.0.1:9091"
启动 Falcon-40B-Instruct 模型:
xinference launch --model-name "falcon-instruct" \
   --model-format pytorch \
   -size-in-billions 40 \
   --endpoint "http://127.0.0.1:9997"
启动 Llama 2-Chat-70B 模型:
xinference launch --model-name "llama-2-chat" \
  --model-format ggmlv3 \
  --size-in-billions 70 \
  --endpoint "http://127.0.0.1:9997"
(2)列举指定机器上运行的模型
xinference list --endpoint "http://127.0.0.1:9091"
(3)结束模型
xinference terminate --model-uid ${model_uid}
6.模型注册
(1)注册模型
编写模型的配置文件。PyTorch 类型可以加载本地模型,ggmlv3 类型只能加载 HuggingFace 上的模型。
{
  "version": 1,
  "context_length": 2048,
  "model_name": "custom-llama-2",
  "model_lang": [
    "en"
  ],
  "model_ability": [
    "generate"
  ],
  "model_family": "llama-2",
  "model_specs": [
    {
      "model_format": "pytorch",
      "model_size_in_billions": 7,
      "quantizations": [
        "4-bit",
        "8-bit",
        "none"
      ],
      "model_id": "meta-llama/Llama-2-7b",
      "model_uri": "file:///path/to/llama-2-7b"
    },
    {
      "model_format": "ggmlv3",
      "model_size_in_billions": 7,
      "quantizations": [
        "q4_0",
        "q8_0"
      ],
      "model_id": "TheBloke/Llama-2-7B-GGML",
      "model_file_name_template": "llama-2-7b.ggmlv3.{quantization}.bin"
      "model_uri": "file:///path/to/ggml-file"
    }
  ],
}
-
model_id:HuggingFace 上模型的 ID
-
model_uri:表示可从中加载模型的 URI 的字符串,例如"file:///path/to/llama-2-7b"。如果模型 URI 不存在,推理将尝试使用模型 ID 从 HuggingFace 下载模型。
-
model_file_name_template:ggml 模型需要。用于基于量化定义模型文件名的字符串模板。
(2)注册模型到服务中
xinference register --model-type LLM --file model.json --persist
也可通过Python代码方式进行注册:
import json
from xinference.client import Client

with open('model.json') as fd:
    model = fd.read()

# replace with real xinference endpoint
endpoint = 'http://localhost:9997'
client = Client(endpoint)
client.register_model(model_type="<model_type>", model=model, persist=False)
(3)列举内置和自定义模型
xinference registrations --model-type LLM --endpoint "http://127.0.0.1:9091"
Type    Name              Language      Ability                Is-built-in
------  ----------------  ------------  ---------------------  -------------
LLM     baichuan          ['en', 'zh']  ['embed', 'generate']  True
LLM     baichuan-chat     ['en', 'zh']  ['embed', 'chat']      True
LLM     wizardlm-v1.0     ['en']        ['embed', 'chat']      True
LLM     vicuna-v1.3       ['en']        ['embed', 'chat']      True
LLM     orca              ['en']        ['embed', 'chat']      True
LLM     chatglm           ['en', 'zh']  ['embed', 'chat']      True
LLM     chatglm2          ['en', 'zh']  ['embed', 'chat']      True
LLM     chatglm2-32k      ['en', 'zh']  ['embed', 'chat']      True
LLM     llama-2-chat      ['en']        ['embed', 'chat']      True
LLM     llama-2           ['en']        ['embed', 'generate']  True
LLM     opt               ['en']        ['embed', 'generate']  True
LLM     falcon            ['en']        ['embed', 'generate']  True
LLM     falcon-instruct   ['en']        ['embed', 'chat']      True
LLM     starcoderplus     ['en']        ['embed', 'generate']  True
LLM     starchat-beta     ['en']        ['embed', 'chat']      True
LLM     qwen-chat         ['en', 'zh']  ['embed', 'chat']      True
LLM     starcoder         ['en']        ['generate']           True
LLM     gpt-2             ['en']        ['generate']           True
LLM     internlm          ['en', 'zh']  ['embed', 'generate']  True
LLM     internlm-chat     ['en', 'zh']  ['embed', 'chat']      True
LLM     internlm-chat-8k  ['en', 'zh']  ['embed', 'chat']      True
LLM     vicuna-v1.5       ['en']        ['embed', 'chat']      True
LLM     vicuna-v1.5-16k   ['en']        ['embed', 'chat']      True
LLM     wizardmath-v1.0   ['en']        ['embed', 'chat']      True
也可以通过Python代码方式进行列举:
registrations = client.list_model_registrations(model_type="<model_type>")
(4)启动自定义模型
xinference launch --model-name custom-llama-2 --model-format pytorch
会根据参数生成本地模型目录名。如模型名 custom-chinese-alpaca-2 生成目录:custom-chinese-alpaca-2-ggmlv3-7b。
也可通过Python代码方式启动模型:
uid = client.launch_model(model_name='custom-llama-2', model_format='pytorch')
(5)同自定义模型交互
xinference generate --model-uid ${UID}
也可通过Python代码实现:
model = client.get_model(model_uid=uid)
model.generate('What is the largest animal in the world?')
结果输出如下所示:
{
   "id":"cmpl-a4a9d9fc-7703-4a44-82af-fce9e3c0e52a",
   "object":"text_completion",
   "created":1692024624,
   "model":"43e1f69a-3ab0-11ee-8f69-fa163e74fa2d",
   "choices":[
      {
         "text":"\nWhat does an octopus look like?\nHow many human hours has an octopus been watching you for?",
         "index":0,
         "logprobs":"None",
         "finish_reason":"stop"
      }
   ],
   "usage":{
      "prompt_tokens":10,
      "completion_tokens":23,
      "total_tokens":33
   }
}
(6)取消注册模型
xinference unregister --model-type LLM --model-name custom-llama-2
会删除/root/.xinference/model/llm/目录下的自定义模型配置 json 文件。
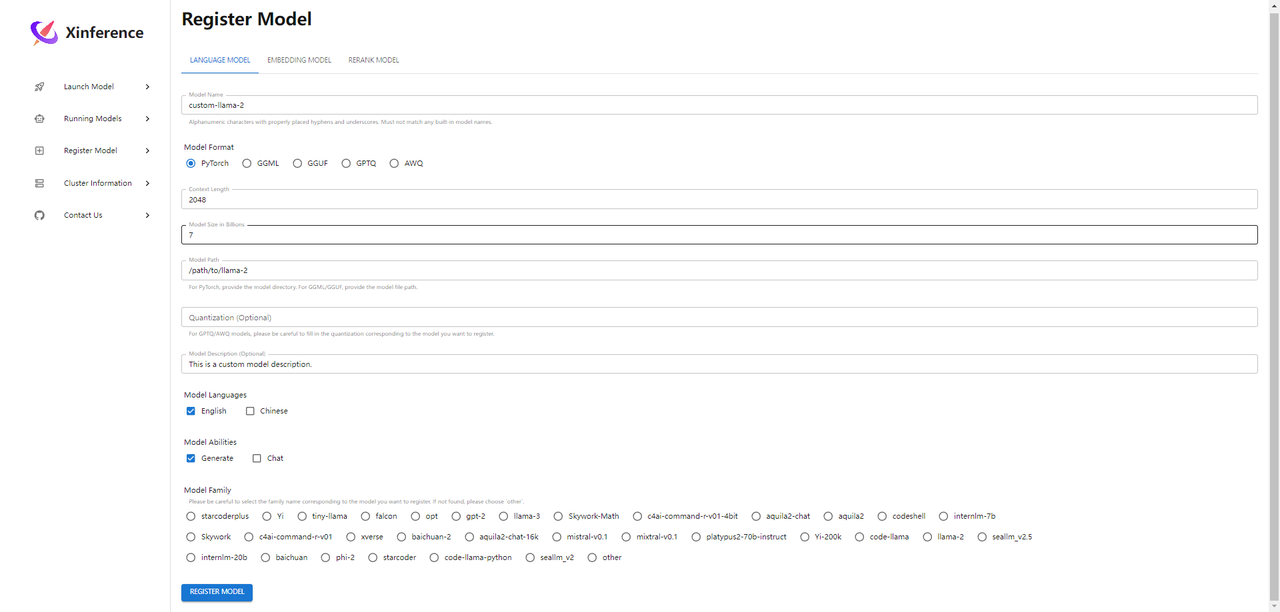
(7)通过Web注册模型
参考文献
[1] 教你快速上手Xinference分布式推理框架:https://cloud.tencent.com/developer/article/2328362
[2] 自定义模型:https://inference.readthedocs.io/en/latest/models/custom.html
[3] LangChain - Xorbits Inference:https://python.langchain.com/v0.1/docs/integrations/llms/xinference/
[4] LlamaIndex - Xorbits Inference:https://docs.llamaindex.ai/en/stable/examples/llm/xinference_local_deployment/
[5] Xinference 对于不同模型支持不同的推理引擎:https://inference.readthedocs.io/zh-cn/latest/user_guide/backends.html
[6] 接入 Xinference 部署的本地模型:https://docs.dify.ai/v/zh-hans/guides/model-configuration/xinference


 6986
6986

 被折叠的 条评论
为什么被折叠?
被折叠的 条评论
为什么被折叠?
 到【灌水乐园】发言


