


这周好艰难,项目经理提了一个包含在线打印,word下载及数据渲染的需求,这个可我难坏了,文件一直是我的噩梦(os:我好想写CRUD啊)。唉,本想着去看看技术经理写没写这个demo,结果发现,他们竟然没有做这个功能,这我真的是匪夷所思,都做了3,4个月了,竟然没有写打印,和模板文档数据渲染的功能(这个项目是一个很大的管理后台,老系统jsp翻新做boot),唉,要做第一个吃蘑菇的人了吗,不到要踩多少坑。
- HTML实现打印功能
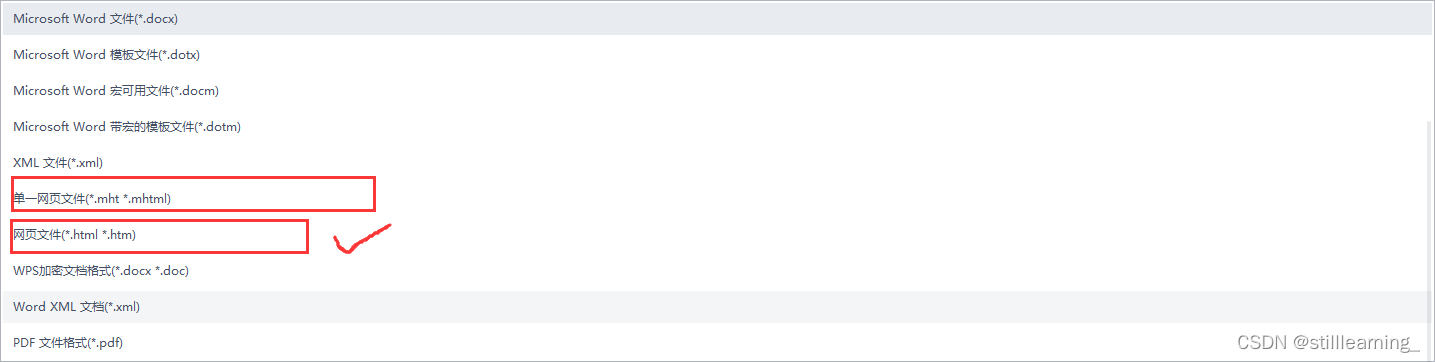
- 首先下载了word看了一下,要素很多,问了下其他同事,他们都是在前端打印的(好像也只能在前端),这就简单了,我先下载了一个word,然后转成了html(注意:一定要是html网页文件,而不是上面那个单一网页文件:单一网页文件的内容太臃肿看着非常乱不好修改)。转换完成后复制到VUE项目中,数据渲染了一下页面就做好了。
- 然后调用了一下工具类,前端的在线打印就完成了。(os:说着简单也耗费了我好久,找了很多转换方法,其实写样式也能搞定但是我不怎末会(福昕))
- 首先下载了word看了一下,要素很多,问了下其他同事,他们都是在前端打印的(好像也只能在前端),这就简单了,我先下载了一个word,然后转成了html(注意:一定要是html网页文件,而不是上面那个单一网页文件:单一网页文件的内容太臃肿看着非常乱不好修改)。转换完成后复制到VUE项目中,数据渲染了一下页面就做好了。
(前端不是专业的。代码原作者——李鼎元)这个Print类有三个元素
- iframe内联框架这个里面放的就是我面页面上要打印的html节点(VUE项目中的REF即可)
- printStyle用来设置打印要调整的样式
- option好像也是用来设置样式,不过应该设置的是打印纸上的样式
主要看print方法,第一行为js原生方法,在文档的body中添加了一个iframe子元素;第二行是将这个创建的元素取了出来;第三行设置打印样式(这个打印样式的写法好像word转html-时样式的写法:styleEl.setAttribute('media', 'print'););第四行是设置html的header部分;第五行是设置html的body部分;第六行为js原生操作打印的方法打印html页面(window.print());第七行清除了iframe内的html代码,第八行又删除了这个iframe元素。
/* eslint-disable @typescript-eslint/no-explicit-any */
export default class Print {
  iframe: HTMLIFrameElement;
  printStyle!: HTMLStyleElement;
  globalOption;

  constructor(option = { margin: 10 }) {
    this.iframe = document.createElement('iframe');
    this.iframe.style.display = 'none';
    this.globalOption = option;
  }

  /**
   *  打印区域内容
   * @param {*} el HTMLElement
   * @example
      vue组件中使用 this.$print(this.$refs.test.$el);
   */
  print(el: HTMLElement, option = this.globalOption) {
    document.body.appendChild(this.iframe);
    const printWindow = window.frames[window.frames.length - 1];
    this.setPrintStyle(option);
    this.appendHead(printWindow);
    this.appendBody(el, printWindow);
    printWindow.print();
    this.clear(printWindow);
    document.body.removeChild(this.iframe);
  }

  setPrintStyle(style: Record<string, any> = {}) {
    let { margin } = style;
    if (!Array.isArray(margin)) {
      margin = [margin, margin, margin, margin];
    } else if (margin.length === 1) {
      margin = [margin[0], margin[0], margin[0], margin[0]];
    } else if (margin.length === 2) {
      margin = [margin[0], margin[1], margin[0], margin[1]];
    }
    const styleEl = document.createElement('style');
    styleEl.setAttribute('type', 'text/css');
    styleEl.setAttribute('media', 'print');
    styleEl.innerHTML = `
    @page{size: auto;}
    html{margin: ${margin[0]}mm ${margin[1]}mm ${margin[2]}mm ${margin[3]}mm;}
    body{
      -webkit-print-color-adjust:exact;
      -moz-print-color-adjust:exact;
      -ms-print-color-adjust:exact;
      print-color-adjust:exact;
      margin: 0;
    }
    `;
    this.printStyle = styleEl;
  }

  appendHead(printWindow: Window) {
    document.head.cloneNode(true).childNodes.forEach((node) => {
      if (['STYLE', 'link'].includes(node.nodeName)) {
        printWindow.document.head.appendChild(node);
      }
    });
    printWindow.document.head.appendChild(this.printStyle);
  }

  appendBody(el: HTMLElement, printWindow: Window) {
    const copyEl = el.cloneNode(true);
    printWindow.document.body.appendChild(copyEl);
  }

  clear(printWindow: Window) {
    printWindow.document.head.innerHTML = '';
    printWindow.document.body.innerHTML = '';
  }
}
总结:打印功能的实现主要是使用window.print()方法,这个方法打印document文档内的html元素。至于为什么要创建个iframe再进行打印我是这莫理解的,也简单实践过,就是window.print(),会打印页面中的所有东西包括在常规系统中的菜单栏等,这并不能满足我们的使用需求,我们只想打印文档中的元素。html网页其实也就是一种文档,和word,excel没什么区别,都由内容(数据)和样式(展示的样式)组成。
疑问:后端能否直接实现在线打印?(在网上看了一些文章,好像不行,可用的方法就是再java后台‘画’一个页面出来[awt包],如果有其他方法,还请各位大神多多指教我)
- Word模板渲染数据并下载
word模板渲染数据这个我也找了好久的框架,aspose-words要付费就算了给老板省钱,后来找到了apacha下的poi-tl还挺好用的
先添加下依赖
<dependency>
            <groupId>com.deepoove</groupId>
            <artifactId>poi-tl</artifactId>
            <version>1.10.5</version>
            <exclusions>
                <exclusion>
                    <artifactId>poi-ooxml-schemas</artifactId>
                    <groupId>org.apache.poi</groupId>
                </exclusion>
                <exclusion>
                    <groupId>org.apache.poi</groupId>
                    <artifactId>poi-ooxml</artifactId>
                </exclusion>
            </exclusions>
</dependency>然后看了看poi的官方文档Poi-tl Documentation (deepoove.com),文档比较容易看懂,里面写的也比较清楚,常规的取值比较简单{{}}双大括号就可以取值,表格的话要先在表格行上面把集合的key写好,然后再在行上使用[]方括号取出集合中每个元素的属性值。(其他的有时间在研究,目前只用到这俩个),渲染表格一定要使用LoopRowTableRenderPolicy绑定好你表格集合的key。
@Override
    public void downloadContractWord(@RequestBody Map<String, Object> printMap, HttpServletResponse httpServletResponse) {
        System.out.println(printMap);
        //List<ContractDTO> contractWords = contractService.findDetailByContractCodesWithFilePath(contractCodes);
        //TODO XWPFTemplate  aliOssFileStorage.getFile()
        LoopRowTableRenderPolicy policy = new LoopRowTableRenderPolicy();
        Configure config = Configure.builder()
                .bind("brand_list", policy).build();
        XWPFTemplate xwpfTemplate = XWPFTemplate.compile(new File("C:\\Users\\17674\\Downloads\\模板.docx"), config)
                .render(printMap);
        httpServletResponse.setContentType("application/octet-stream");
        httpServletResponse.setHeader("Content-disposition", "attachment;filename=\"" + "out_template.docx" + "\"");

        try {
            OutputStream out = httpServletResponse.getOutputStream();
            BufferedOutputStream bos = new BufferedOutputStream(out);
            xwpfTemplate.write(bos);
            bos.flush();
            out.flush();
            PoitlIOUtils.closeQuietlyMulti(xwpfTemplate, bos, out);
        } catch (Exception e) {
            log.warn("文件下载失败:{}", e.getMessage());
        }
}代码在这里,我是从前端传过来的值,因为我这个渲染其实就是和上面哪个打印出的文档是一个东西,而且我们的表设计的比较不好,查询真的好费劲,项目组内的也大部分都在前端使用linq处理出数据,所以我就在前端把数据处理好,然后在后端用map接了一下比较方便也方便后面抽取其他打印 。(linq和其他的前端缓存等等有时间再写一个文章总结下)文件还没存储到线上,就是个简单的demo吧,实现了项目经理的需求。debug跑了几遍发现该去的属性都取到了就没问题了,然后返回了2进制流给前端。
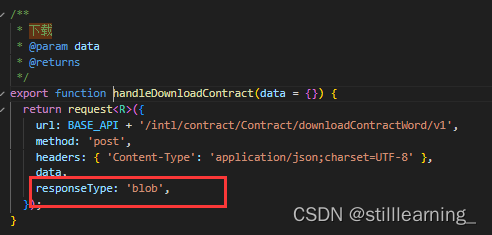
前端一定要使用blob接啊,否则乱码会伴随你左右!!,
printList.value.forEach((item) => {
    ContractApi.handleDownloadContract(item).then((res) => {
      console.log(res);
      const blob = new Blob([res.data]);
      const downloadElement = document.createElement('a');
      const href = window.URL.createObjectURL(blob); // 创建下载的链接
      downloadElement.href = href;
      downloadElement.download = '合.docx'; // 下载后文件名
      document.body.appendChild(downloadElement);
      downloadElement.click(); // 点击下载
      document.body.removeChild(downloadElement); // 下载完成移除元素
      window.URL.revokeObjectURL(href); // 释放blob对象
    });
  });
前端代码也贴一下,防止我以后找不到了,这个和上面打打印比较像,js原生代码创建a链接和点击后下载然后删除。(Blob主要就是接收2进制流的)
- 文件上传(下周写完再回来补充!!!! TODO)
心得:其实无论什么语言,什么代码,都是在不同的地方取数据,在不同的地方输出数据,只是在调用不同方法罢了,以后提升的方向应该就是不同业务需求下的架构能力,不同业务需求下的‘好’代码的编写能力。


 1269
1269

 被折叠的 条评论
为什么被折叠?
被折叠的 条评论
为什么被折叠?
 到【灌水乐园】发言


